
Search results for "Rewards" in Home Design Ideas
 Artisan Kitchen & Bath GC License #107583
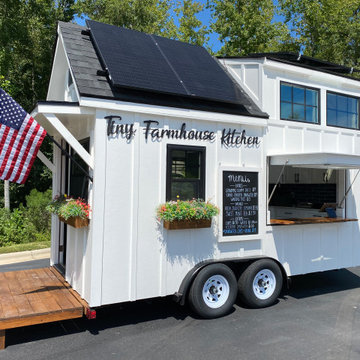
The Tiny Farmhouse Kitchen is by far one of the most complex, rewarding, and unforgettable projects we’ve ever completed. Designed to be fully mobile and 100% solar-powered, this one-of-a-kind kitchen on wheels pushed our creativity, craftsmanship, and problem-solving skills to new heights. Every time we transported it through town, it turned heads—people would literally stop in their tracks just to get a closer look.
Building a fully functional commercial kitchen in such a small footprint required precision in every detail. We carefully selected each piece of equipment to minimize electrical draw, including a commercial refrigerator and four recessed induction food warmers—all powered entirely by solar energy. Onboard water storage, filtration, and gray water management were meticulously engineered to maximize both functionality and space.
The Tiny Farmhouse Kitchen features:
• Custom handcrafted cabinetry
• Granite countertops
• Vaulted ceilings with dimmable LED lighting
• A full POS system with a built-in Wi-Fi hotspot
• A gas-shock lift service window with a live-edge oak flip-down counter, finished with crystal-clear epoxy for a stunning, natural look
Every inch of this mobile kitchen was designed for both beauty and efficiency, blending farmhouse charm with modern utility. It’s a project we are immensely proud of—and one that perfectly captures the spirit of what we do at Artisan Kitchen & Bath: bringing bold ideas to life with craftsmanship, innovation, and heart.
 Neil Kelly Company
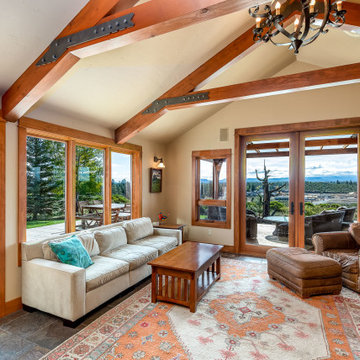
Adding on to this modern mountain home was complex and rewarding. The nature-loving Bend homeowners wanted to create an outdoor space to better enjoy their spectacular river view. They also wanted to Provide direct access to a covered outdoor space, create a sense of connection between the interior and exterior, add gear storage for outdoor activities, and provide additional bedroom and office space. The Neil Kelly team led by Paul Haigh created a covered deck extending off the living room, re-worked exterior walls, added large 8’ tall French doors for easy access and natural light, extended garage with 3rd bay, and added a bedroom addition above the garage that fits seamlessly into the existing structure.
 Reico Kitchen & Bath
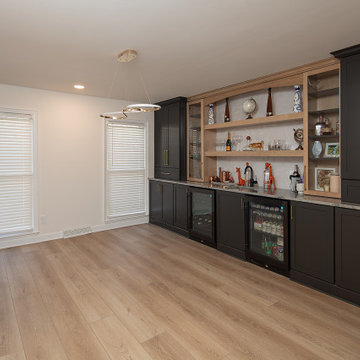
Lauren Hunt from Reico Kitchen and Bath in Charlotte, NC, worked with The Atta Group to design a transitional-inspired kitchen and bar using Masterpiece cabinetry. The kitchen features Masterpiece cabinets in the Martel Evercore doorstyle in a Frost finish on the perimeter.
The kitchen island and bar area both features the same doorstyle with a combination of two different finishes, Riverbed and Shortbread. The countertops are Calacatta Macchia Vecchia Sapien Stone Porcelain.
The client shared their experience, saying, “I love the range hood and the slatted island decor. Riverbed is a beautiful color in both sun and shade. Lauren’s advice to get samples and lay them out in different lighting was invaluable. She went above and beyond, even coming out in the parking lot on a hot summer day to help us. We truly couldn’t have done this without her. Lauren was always patient and supportive as we made decisions, and she never pressured us. Any future projects we have, we’ll 100% reach out to Lauren. She even welcomed our newborn to the showroom!”
Lauren shared, “The clients came with a clear aesthetic vision and plenty of inspiration photos, but they gave me the freedom to recommend and create a space that worked for their growing family while still looking great. We added design details like two-toned dining room cabinets, dark accent shelves in glass towers, an arched valance to match the doorways, and a custom hood that pulls from the island finishes. My favorite element is the slatted accent on the island, which the installers executed perfectly.
This renovation was a big project, starting with a blank slate, which can be overwhelming with so many options. But it was incredibly rewarding to work with these clients who had such a creative vision. We really worked together to create a space that met their needs while showcasing their style. It was a team effort, and I hope that comes through in the final design.”
Photos courtesy of Six Cents Media.
Find the right local pro for your project
 Century Stair Company
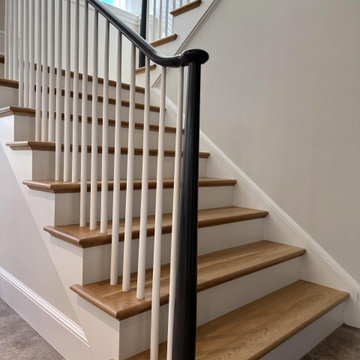
A staircase lives two lives. One as an architectural feature, and another as a functional piece of the home. This transitional design handles both with ease. Natural white oak treads flow from the hardwood floors below, making the staircase feel fundamental to the home rather than inserted into it. White painted risers and pin balusters keep the composition light and open, letting natural light move freely through the space.
The glossy black handrail and newels add an edge to the design, creating definition against the white paint and warm oak elements. Tying it together, the over-the-post balustrade creates a flowing line that draws the eye up. A staircase that doesn't demand attention, but rewards those who pause to notice it.
1976-2026 © Century Stair Company
 butter+velvet DESIGN · HOME
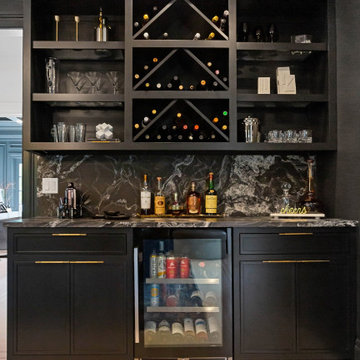
A family friendly contemporary whole house update for a client's family of 5 and their dog.
The overall vision was to create a home the family wants to "vacation" in.
The rooms featured are family room, dining room, pool lounge, playroom, eating area, guest room, powder room, offices, primary bedroom, childrens' bedrooms, as well as, accessories and art work throughout the home.
The home was purchased in need of contemporary updates throughout every room in order to bring the personality of the family into the home. From refinishing the wood flooring and stair railings and custom built ins to runners, area rugs, lighting, window treatments, furniture and accessories, each detail was intentional, resulting in a cohesive flow and highly personalized spaces. Each decision focused on family friendly and entertaining spaces.
The most rewarding part of this house is the family would rather spend time at home than almost anywhere else. They love "living" in their home because of the joy each detail brings them when they are there.
We are currently completely renovating the primary bathroom and walk in closet. We cannot wait to share the finished space.
 The Remodeler
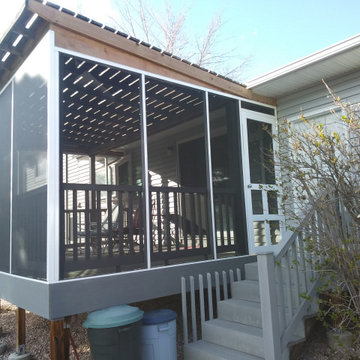
AFTER PHOTO.
One of our past clients enjoyed spending time outdoors on her deck, but her 2 cats let her know that they wanted to join her (meow, meow) and partake of the sunshine too. She reached out to us and we crafted an outdoor space - catio - for her and her two feline friends. It was a fun project. So rewarding to see how the finished product is greatly impacting our client and her kitties for the better. They all love it!
 KSI Kitchen & Bath
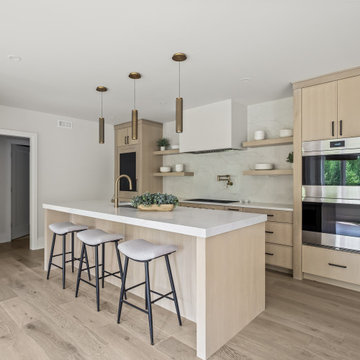
When our clients approached us about remodeling their home, their goal was clear: transform a traditionally styled interior into a clean-lined, contemporary space that truly reflected who they are today. The home originally featured dark wood floors, heavy moldings, and glazed cabinetry—hallmarks of a more traditional design. Our mission was to reimagine it entirely with modern sensibility, warmth, and purpose.
One of the most rewarding aspects of this project was creating harmony throughout the home—from the kitchen to the family room, dining area, office, and even a new basement kitchen. We selected cabinetry finishes and styles that tied the spaces together while allowing each room to maintain its own personality.
 Treefrog Design
Amy Birrer
I have been working as a kitchen and bath designer in the Pacific Northwest for 13 years. I love engaging with new clients, ascertaining their needs through various interviews and meetings and then collaborating as we build their finished concept together. The variety of design styles, room layouts and function changes so much between one person and the next that no two finished products are remotely the same. This fluidity allows for endless possibilities for exploration in my field. It keeps the job interesting and has always given me a particular sense of reward and accomplishment as we near completion. The greatest personal recompense in this chosen profession is being able to walk with a client through this process and come out the other side with that client feeling elated with the end result.
 Cantoni Irvine
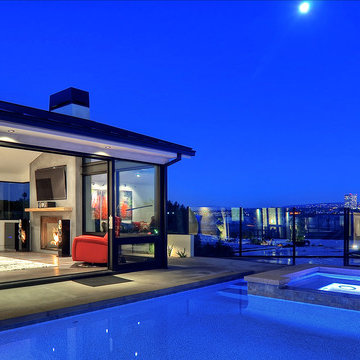
When Irvine designer, Richard Bustos’ client decided to remodel his Orange County 4,900 square foot home into a contemporary space, he immediately thought of Cantoni. His main concern though was based on the assumption that our luxurious modern furnishings came with an equally luxurious price tag. It was only after a visit to our Irvine store, where the client and Richard connected that the client realized our extensive collection of furniture and accessories was well within his reach.
“Richard was very thorough and straight forward as far as pricing,” says the client. "I became very intrigued that he was able to offer high quality products that I was looking for within my budget.”
The next phases of the project involved looking over floor plans and discussing the client’s vision as far as design. The goal was to create a comfortable, yet stylish and modern layout for the client, his wife, and their three kids. In addition to creating a cozy and contemporary space, the client wanted his home to exude a tranquil atmosphere. Drawing most of his inspiration from Houzz, (the leading online platform for home remodeling and design) the client incorporated a Zen-like ambiance through the distressed greyish brown flooring, organic bamboo wall art, and with Richard’s help, earthy wall coverings, found in both the master bedroom and bathroom.
Over the span of approximately two years, Richard helped his client accomplish his vision by selecting pieces of modern furniture that possessed the right colors, earthy tones, and textures so as to complement the home’s pre-existing features.
The first room the duo tackled was the great room, and later continued furnishing the kitchen and master bedroom. Living up to its billing, the great room not only opened up to a breathtaking view of the Newport coast, it also was one great space. Richard decided that the best option to maximize the space would be to break the room into two separate yet distinct areas for living and dining.
While exploring our online collections, the client discovered the Jasper Shag rug in a bold and vibrant green. The grassy green rug paired with the sleek Italian made Montecarlo glass dining table added just the right amount of color and texture to compliment the natural beauty of the bamboo sculpture. The client happily adds, “I’m always receiving complements on the green rug!”
Once the duo had completed the dining area, they worked on furnishing the living area, and later added pieces like the classic Renoir bed to the master bedroom and Crescent Console to the kitchen, which adds both balance and sophistication. The living room, also known as the family room was the central area where Richard’s client and his family would spend quality time. As a fellow family man, Richard understood that that meant creating an inviting space with comfortable and durable pieces of furniture that still possessed a modern flare. The client loved the look and design of the Mercer sectional. With Cantoni’s ability to customize furniture, Richard was able to special order the sectional in a fabric that was both durable and aesthetically pleasing.
Selecting the color scheme for the living room was also greatly influenced by the client’s pre-existing artwork as well as unique distressed floors. Richard recommended adding dark pieces of furniture as seen in the Mercer sectional along with the Viera area rug. He explains, “The darker colors and contrast of the rug’s material worked really well with the distressed wood floor.” Furthermore, the comfortable American Leather Recliner, which was customized in red leather not only maximized the space, but also tied in the client’s picturesque artwork beautifully. The client adds gratefully, “Richard was extremely helpful with color; He was great at seeing if I was taking it too far or not enough.”
It is apparent that Richard and his client made a great team. With the client’s passion for great design and Richard’s design expertise, together they transformed the home into a modern sanctuary. Working with this particular client was a very rewarding experience for Richard. He adds, “My client and his family were so easy and fun to work with. Their enthusiasm, focus, and involvement are what helped me bring their ideas to life. I think we created a unique environment that their entire family can enjoy for many years to come.”
https://www.cantoni.com/project/a-contemporary-sanctuary
 MARGARITA BRAVO
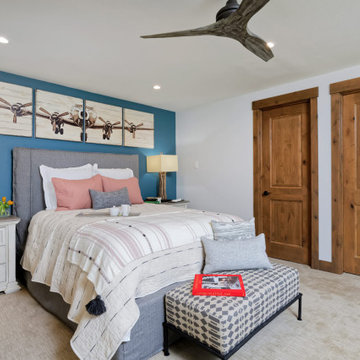
The first thing you notice about this property is the stunning views of the mountains, and our clients wanted to showcase this. We selected pieces that complement and highlight the scenery. Our clients were in love with their brown leather couches, so we knew we wanted to keep them from the beginning. This was the focal point for the selections in the living room, and we were able to create a cohesive, rustic, mountain-chic space. The home office was another critical part of the project as both clients work from home. We repurposed a handmade table that was made by the client’s family and used it as a double-sided desk. We painted the fireplace in a gorgeous green accent to make it pop.
Finding the balance between statement pieces and statement views made this project a unique and incredibly rewarding experience.
Project designed by Montecito interior designer Margarita Bravo. She serves Montecito as well as surrounding areas such as Hope Ranch, Summerland, Santa Barbara, Isla Vista, Mission Canyon, Carpinteria, Goleta, Ojai, Los Olivos, and Solvang.
---
For more about MARGARITA BRAVO, click here: https://www.margaritabravo.com/
To learn more about this project, click here: https://www.margaritabravo.com/portfolio/mountain-chic-modern-rustic-home-denver/
 BRY design
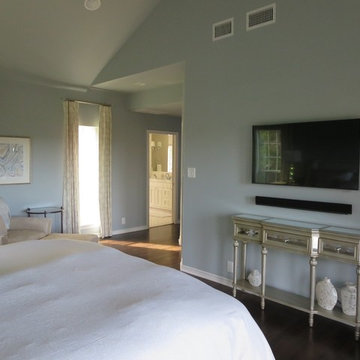
This was a big complicated layout of a house with really good bones....We originally were going to update the master bathroom and quickly there after ended up completely gutting the entire house and adding more square footage too. The client took a chance and was greatly rewarded. Their home has such a beautiful flow now.
 ONE Design
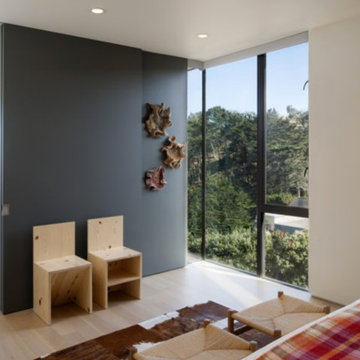
Completed in 2014, ONE Design worked closely with GB Architecture and Design to compliment this expressive example of balance and elegance. Refinished redwood siding salvaged from Hangar One at Moffett Field fused with the glass shaft that slices through the south facing façade — offer a unique interpretation of materialistic fusion.
With a cantilevered steel and concrete stairs and floating catwalk bridging the double height entryway, the naked and unapologetic structure welcomes the viewer to this spectacular residence. The challenging topography required a customized structural design to allow the expression to reveal itself and rewarded the result with sweeping vistas. Featured as part of the AIA San Francisco Living Home tours in 2014, this property is a testament to architectural vision and collaboration.
 Reico Kitchen & Bath
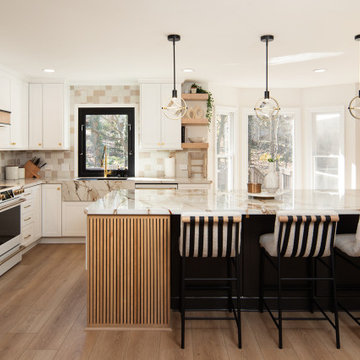
Lauren Hunt from Reico Kitchen and Bath in Charlotte, NC, worked with The Atta Group to design a transitional-inspired kitchen and bar using Masterpiece cabinetry. The kitchen features Masterpiece cabinets in the Martel Evercore doorstyle in a Frost finish on the perimeter.
The kitchen island and bar area both features the same doorstyle with a combination of two different finishes, Riverbed and Shortbread. The countertops are Calacatta Macchia Vecchia Sapien Stone Porcelain.
The client shared their experience, saying, “I love the range hood and the slatted island decor. Riverbed is a beautiful color in both sun and shade. Lauren’s advice to get samples and lay them out in different lighting was invaluable. She went above and beyond, even coming out in the parking lot on a hot summer day to help us. We truly couldn’t have done this without her. Lauren was always patient and supportive as we made decisions, and she never pressured us. Any future projects we have, we’ll 100% reach out to Lauren. She even welcomed our newborn to the showroom!”
Lauren shared, “The clients came with a clear aesthetic vision and plenty of inspiration photos, but they gave me the freedom to recommend and create a space that worked for their growing family while still looking great. We added design details like two-toned dining room cabinets, dark accent shelves in glass towers, an arched valance to match the doorways, and a custom hood that pulls from the island finishes. My favorite element is the slatted accent on the island, which the installers executed perfectly.
This renovation was a big project, starting with a blank slate, which can be overwhelming with so many options. But it was incredibly rewarding to work with these clients who had such a creative vision. We really worked together to create a space that met their needs while showcasing their style. It was a team effort, and I hope that comes through in the final design.”
Photos courtesy of Six Cents Media.
 Renovisions
This North Shore of Boston client wanted to make a change; she decided to purchase a seaside antique home and was up for the challenge to re-design and remodel. Her plan involved re-locating her mother from Florida to the newly added wing of the house when the remodel was in full swing.
We believed that what was standing between our client and the kitchen of her dreams was a well thought out, creative design and a wall or two…
Once outdated and worn, this 1830 antique kitchen was closed off from the family room and dining spaces. The newly re-configured kitchen with re-claimed wide-plank wood floors and restorations to wood cladding on the ceiling, beam and open corner shelving really warmed up the room and welcomes friends, neighbors and relatives. Wood bead board paneling around the island cabinetry along with mixed metals, tie in nicely with the stunning soapstone countertops with distinctive copper-colored veining, creating a beautiful vintage appeal.
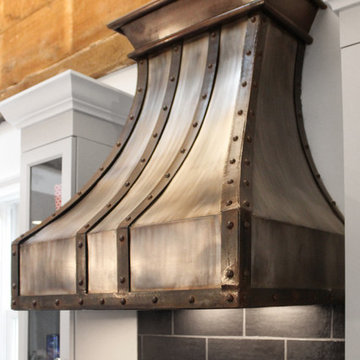
Styled to look like an old-fashioned stove, this steel range boasts modern conveniences such as dual-fuel (gas burners and electric oven) and a convection oven crowned by a custom steel hood adorned with rivets and metal trims.
To enrich the vintage feel, a white farm-style fire clay apron sink was installed that also evokes a classic and time- honored feel.
Although the process was daunting as it presented several challenges, it was a rewarding experience when the project was completed. Our client and her mother were absolutely thrilled with the final results.
“Thank you to Cathy and Ed very much for all your assistance with my kitchen planning! I’m fortunate to have had your input and expertise! It was great seeing you and spending time together and my mom really liked you both. I would welcome you to stop by and say hello when you’re headed to Portsmouth or the north shore. All the best!”
-Jill P.
 birdRock Project Studio Inc.
Ever heard some say “It has good bones?” Well, no one had ever said that about this house; it needed a major overhaul - “A TOTAL GUT.”
It’s saving grace was:
1. It’s enthusiastic new homeowners.
2. The expansive and gorgeous views of Okanagan Lake.
We were asked to assist our clients with big-picture-planning for their newest investment property.
Upon initial walk through of the home, it was immediately evident there were many previous ‘bandaid-type’ updates that it had gone through over the years.
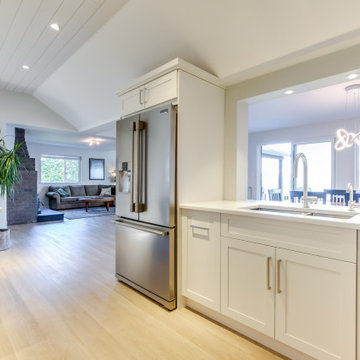
This house was in prime need of an overhaul inside and out:
- multiple dropped Ceilings with layers of Plumbing add ons
- wall to wall Carpet
-a tired Bathtub directly inside the Master Bedroom
- a “dreaded” Corner Kitchen Sink
-multiple add ons involving three confusing front entry doors
Discovering what was previously done and the quandary of why these things were done is always so interesting to discover and can be very overwhelming for clients.
A big part of what we love most about Design is helping to propose new ideas to revitalize and improve all that has come before. It is one of the most challenging and rewarding parts of our work.
Our Renovation Strategy began in Layout Design for optimizing Interior & Exterior flow, moving into Concept & Style Planning, Millwork and Finish Selections.
We then created an ordered implementation sequence which would allow the homeowners to live on one floor while the other was being renovated Later they would move to the finished floor and renovate the remaining areas.
Once complete, the home quickly sold and we look forwards to assisting these happy investors on their next endeavour.
 Ralene Simmons Interiors
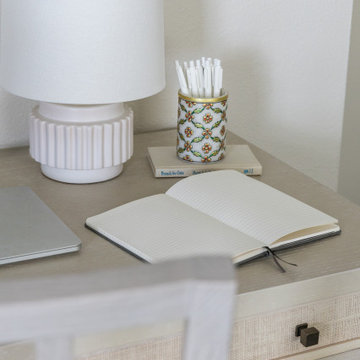
Creating this calm and comfortable retirement retreat for a couple who are ready for their next chapter was so rewarding. We optimized the primary bedroom space with beautiful bedding, ample storage, and a sweet work zone.

 Industrial Projects
Creating a comfortable outdoor living space is a priority for many homeowners and DIY enthusiasts. With rising summer temperatures, installing a shade tarp in your backyard offers an affordable and effective solution for sun protection. We’ve developed this detailed, step-by-step guide to help you confidently install a shade tarp that not only shields you from the sun but also adds aesthetic appeal to your outdoor area.
Benefits of Installing a Backyard Shade Tarp
Before diving into the installation process, let’s explore the key benefits of having a backyard shade tarp:
Provides UV Protection: Keeps your family and guests safe from harmful sun exposure.
Reduces Outdoor Temperatures: Creates a cooler, more enjoyable outdoor space.
Protects Outdoor Furniture: Extends the life of patio furniture by reducing sun damage.
Enhances Outdoor Aesthetics: Adds a modern, stylish look to your yard.
Budget-Friendly: More affordable compared to permanent structures like pergolas.
Materials and Tools You’ll Need
To begin your DIY backyard shade project, gather the following materials and tools:
Materials:
Shade tarp (UV-resistant and breathable)
Sturdy posts or existing structures (trees, fences, walls)
Mounting hardware (eye bolts, D-rings, turnbuckles, snap hooks)
Nylon or polyester rope, or stainless-steel wire
Concrete (if installing new posts)
Tools:
Power drill
Measuring tape
Level
Ladder
Wrench or adjustable spanner
Post hole digger (if installing new posts)
Step 1: Plan Your Shade Tarp Layout
The first step in installing your backyard shade tarp is careful planning. Take time to assess your outdoor area and answer these key questions:
Where is the sun’s path throughout the day?
What size and shape of tarp best suits your space?
Will you anchor the tarp to existing structures or install new posts?
What height do you want the tarp to sit at for maximum shade and airflow?
Pro Tip: Use string or garden hoses to visualize the tarp layout on the ground before making permanent decisions.
Step 2: Measure and Mark Anchor Points
Once you’ve determined the tarp’s location and orientation:
Measure the tarp dimensions.
Mark the exact points where each corner of the tarp will be anchored.
Ensure that the anchor points are at least 5–10% longer than the tarp size to allow for tensioning and slight adjustments.
Consider slope angles for water runoff. Aim for at least a 20-degree angle to prevent water pooling on the tarp.
Step 3: Install Support Posts (If Necessary)
If your backyard lacks existing anchor points like trees or fences, you’ll need to install sturdy support posts:
Dig post holes at least 24 inches deep and 8-12 inches wide for stability.
Set posts in concrete, making sure they remain plumb and level.
Allow the concrete to cure for at least 24–48 hours before applying tension from the tarp.
We recommend using pressure-treated wood, galvanized steel poles, or aluminum posts for longevity and strength.
Step 4: Install Mounting Hardware
With your anchor points ready, it’s time to install the necessary hardware:
Attach eye bolts or pad eyes securely into walls, posts, or other fixed structures.
For added flexibility and adjustability, install turnbuckles or tensioners to fine-tune the tarp’s tightness.
Connect snap hooks, D-rings, or carabiners to make assembly and disassembly easier.
Make sure all hardware is rated for outdoor use to prevent rust and corrosion.
Step 5: Attach and Tension the Shade Tarp
Now it’s time for the most satisfying part—mounting the shade tarp:
Begin by attaching one corner of the tarp to an anchor point.
Gradually attach the remaining corners, moving diagonally for even tension.
Adjust each connection point using your turnbuckles, ropes, or cables.
Pull the tarp tight enough to avoid sagging, but not so tight that it risks tearing.
Check that the tarp maintains the desired slope for rainwater runoff and adjust tension as needed.
Step 6: Final Adjustments and Safety Check
Before enjoying your new shaded area:
Inspect all anchor points and hardware for stability.
Test the tarp’s tension and make adjustments for even distribution.
Ensure that no sharp edges or loose connections remain that could damage the tarp or pose a safety hazard.
Confirm that the tarp is secure in windy conditions by giving it a gentle tug.
If you live in an area with frequent high winds, consider removing the tarp during storms to prevent damage.
Step 7: Enjoy Your Shaded Backyard Oasis
Once installed, your backyard shade tarp provides a comfortable and protective space for outdoor gatherings, relaxation, or family activities. You can decorate underneath with outdoor furniture, string lights, or potted plants to create a personalized outdoor retreat.
Maintenance Tips for Long-Lasting Shade Tarp Performance
To extend the life of your shade tarp, follow these maintenance guidelines:
Regularly check for wear and tear, especially around anchor points and seams.
Clean the tarp periodically with mild soap and water to prevent mildew buildup.
Store the tarp indoors during harsh weather seasons if it's not designed for year-round use.
Tighten hardware as needed to maintain proper tension and avoid sagging.
By following these simple care steps, your shade tarp will continue to deliver years of sun protection and outdoor comfort.
Conclusion: Upgrade Your Outdoor Space with a DIY Shade Tarp
Installing a shade tarp in your backyard is a cost-effective and rewarding DIY project. With careful planning, quality materials, and proper installation techniques, you’ll enjoy cool, shaded outdoor living all season long. This step-by-step guide ensures your project goes smoothly from start to finish.
 Steve Norr
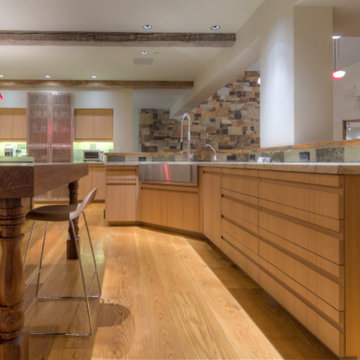
Thanks to the Jaffa Group for inviting us to do the Cabinetry in this amazing house, and Thanks to Tommy Chambers Interiors for sharing these photos . It has been a pleasure working with everyone involved with this project. I have a very rewarding job!
 Christopher Jones Photography
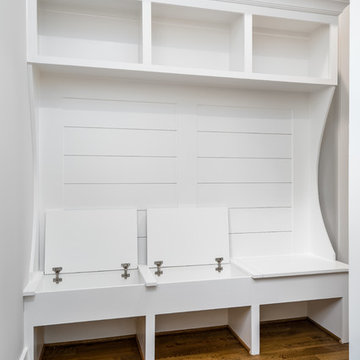
Photo: Christopher Jones Photography / Builder: Reward Builders
Inspiration for a transitional entryway remodel
Inspiration for a transitional entryway remodel
 Spire Integrated Systems Inc.
Hidden Technology at It’s Best
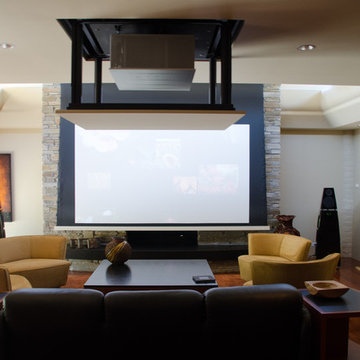
As you walk into this modern living space, you are greeted by the amble sunlight from the skylights and large window that extends from the ground to the ceiling. A pleasing space to enjoy a book next to the fireplace but it much more than that. With a press of a button, shades lower covering every window, blocking all sunlight. A screen descend from above the fireplace and a projector lowers from the ceiling. The Meridian speakers that were artfully accenting the room begin to play. This modern living space seamlessly is transitioned to a high performing theater room.
Spire Integrated Systems Inc. specializes in the design and installation of award-winning theater systems that meet the lifestyle, decor and budget of the homeowner. In the comforts of your own home enjoy the dynamics of a full-screen viewing arena, complete with spectacular surround sound system, custom acoustical treatments, ambiance lighting, simple automated touch panel control and luxurious theater seating. Whether watching the latest high-definition cinematic astonishment, hearing every note of a composition, or partaking in a larger-than-life game experience, a home theater will enhance your home.
When you are ready to enjoy the convenience and rewards of a home theater system, contact Spire Integrated Systems. Spire’s expertise in conscious design, ever-changing technology and priority service, will make you a captive audience. Please schedule a private tour of our showroom in Troy, MI to learn how we can take your home to a new level.
49