
Search results for "Schedule" in Home Design Ideas
 Kathleen Jennison
An Arts & Crafts Bungalow is one of my favorite styles of homes. We have quite a few of them in our Stockton Mid-Town area. And when C&L called us to help them remodel their 1923 American Bungalow, I was beyond thrilled.
As per usual, when we get a new inquiry, we quickly Google the project location while we are talking to you on the phone. My excitement escalated when I saw the Google Earth Image of the sweet Sage Green bungalow in Mid-Town Stockton. "Yes, we would be interested in working with you," I said trying to keep my cool.
But what made it even better was meeting C&L and touring their home, because they are the nicest young couple, eager to make their home period perfect. Unfortunately, it had been slightly molested by some bad house-flippers, and we needed to bring the bathroom back to it "roots."
We knew we had to banish the hideous brown tile and cheap vanity quickly. But C&L complained about the condensation problems and the constant fight with mold. This immediately told me that improper remodeling had occurred and we needed to remedy that right away.
The Before: Frustrations with a Botched Remodel
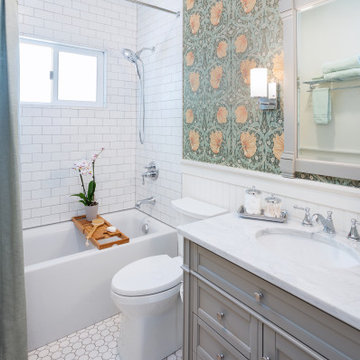
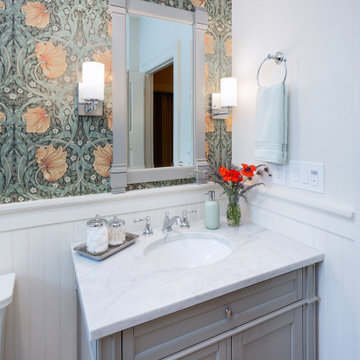
The bathroom needed to be brought back to period appropriate design with all the functionality of a modern bathroom. We thought of things like marble countertop, white mosaic floor tiles, white subway tile, board and batten molding, and of course a fabulous wallpaper.
This small (and only) bathroom on a tight budget required a little bit of design sleuthing to figure out how we could get the proper look and feel. Our goal was to determine where to splurge and where to economize and how to complete the remodel as quickly as possible because C&L would have to move out while construction was going on.
The Process: Hard Work to Remedy Design and Function
During our initial design study, (which included 2 hours in the owners’ home), we noticed framed images of William Morris Arts and Crafts textile patterns and knew this would be our design inspiration. We presented C&L with three options and they quickly selected the Pimpernel Design Concept.
We had originally selected the Black and Olive colors with a black vanity, mirror, and black and white floor tile. C&L liked it but weren’t quite sure about the black, We went back to the drawing board and decided the William & Co Pimpernel Wallpaper in Bayleaf and Manilla color with a softer gray painted vanity and mirror and white floor tile was more to their liking.
After the Design Concept was approved, we went to work securing the building permit, procuring all the elements, and scheduling our trusted tradesmen to perform the work.
We did uncover some shoddy work by the flippers such as live electrical wires hidden behind the wall, plumbing venting cut-off and buried in the walls (hence the constant dampness), the tub barely balancing on two fence boards across the floor joist, and no insulation on the exterior wall.
All of the previous blunders were fixed and the bathroom put back to its previous glory. We could feel the house thanking us for making it pretty again.
The After Reveal: Cohesive Design Decisions
We selected a simple white subway tile for the tub/shower. This is always classic and in keeping with the style of the house.
We selected a pre-fab vanity and mirror, but they look rich with the quartz countertop. There is much more storage in this small vanity than you would think.
The Transformation: A Period Perfect Refresh
We began the remodel just as the pandemic reared and stay-in-place orders went into effect. As C&L were already moved out and living with relatives, we got the go-ahead from city officials to get the work done (after all, how can you shelter in place without a bathroom?).
All our tradesmen were scheduled to work so that only one crew was on the job site at a time. We stayed on the original schedule with only a one week delay.
The end result is the sweetest little bathroom I've ever seen (and I can't wait to start work on C&L's kitchen next).
Thank you for joining me in this project transformation. I hope this inspired you to think about being creative with your design projects, determining what works best in keeping with the architecture of your space, and carefully assessing how you can have the best life in your home.

 Nathan Taylor for Obelisk Home
Photos by Jeremy Mason McGraw
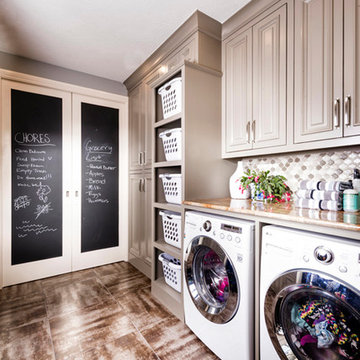
Example of a large transitional galley porcelain tile dedicated laundry room design with gray cabinets, granite countertops, gray walls, a side-by-side washer/dryer and raised-panel cabinets
Example of a large transitional galley porcelain tile dedicated laundry room design with gray cabinets, granite countertops, gray walls, a side-by-side washer/dryer and raised-panel cabinets
Find the right local pro for your project

 The Stonehill Company
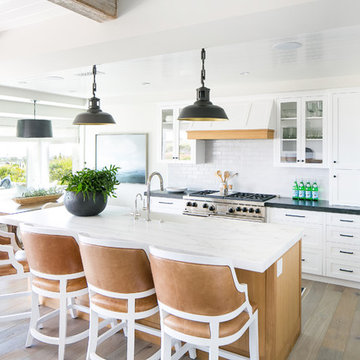
Eat-in kitchen - coastal galley dark wood floor and brown floor eat-in kitchen idea in Orange County with a farmhouse sink, shaker cabinets, white cabinets, white backsplash, subway tile backsplash, stainless steel appliances, an island and black countertops



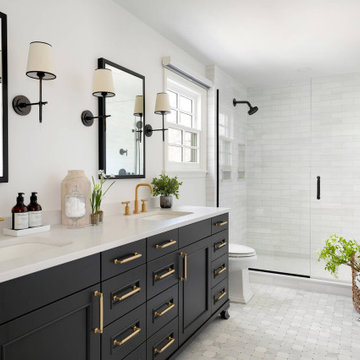

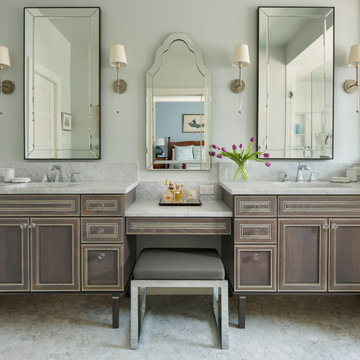
 LifeHouse Construction
These owners know craftsmanship and appreciate high-quality details. The owner hand crafted some of the furniture pieces included in this remodel, including the master bed frame. To update the home and do justice to the owner’s own furniture pieces, we installed a sky light in the upstairs bedroom hallway to bathe the space in light and added new doors with brass hardware. The master bathroom was transformed into an oasis and the kitchen underwent a remodel to make it more functional with modern appliances.
Photos by Kimberly Gavin Photography
 INSPIRED KITCHEN DESIGN
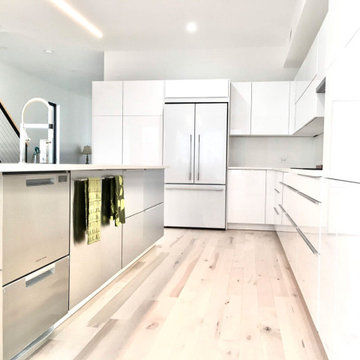
Busy with a new home, working full-time and raising a young child, Elaine knew her large, white kitchen required a team effort.
Luckily, she researched examples of all-white kitchen designs as inspiration.
“I knew what I wanted my kitchen to look like, but I needed more customization and ideas for the space that would appeal to my aesthetics as well as our busy lifestyle,” she says.
Therefore, she recruited IKD’s design team.
“I wanted someone who had lots of experience designing IKEA kitchens. IKD fit the bill after seeing the results of their work online from past customers. They had the experience and knowledge to manage all the finer details of the IKEA kitchen options. IKD helped me focus on the big picture by helping my stay organized and keep my sanity!”
She adds that initially she was tempted to do the install herself, but knew she didn’t have time.
“Although I’m handy, I worried that it would take me twice as long because I would have to figure out how to install it first. I ultimately went with IKEA’s installers. IKEA’s installers were extremely professional and did an excellent job,” she says.
This was a good choice as the installation for her IKEA kitchen – particularly with its minimalist kitchen theme – faced a few unique obstacles.
“It was tricky trying to coordinate everything; from ordering the new appliances, scheduling the kitchen installers and [coordinating with] my general contractor who did the electrical and plumbing. It was rather time consuming and nerve-wracking,” she says.
She adds that the installers were able to customize all cabinets and pieces to fit around the appliances for a seamless look.
“They made the installation seem easy but it was definitely not,” she says.
 Peltier Interiors
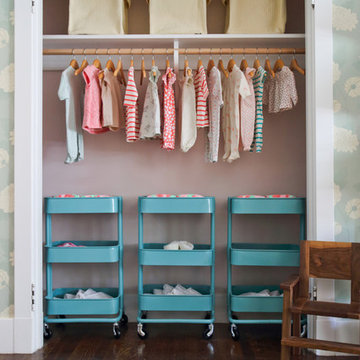
From the playful colors and patterns in the bathroom to the lightly romantic feel in the nursery, this space is a breath of fresh air.
Photographed by Bethany Nauert

 Kathleen Jennison
An Arts & Crafts Bungalow is one of my favorite styles of homes. We have quite a few of them in our Stockton Mid-Town area. And when C&L called us to help them remodel their 1923 American Bungalow, I was beyond thrilled.
As per usual, when we get a new inquiry, we quickly Google the project location while we are talking to you on the phone. My excitement escalated when I saw the Google Earth Image of the sweet Sage Green bungalow in Mid-Town Stockton. "Yes, we would be interested in working with you," I said trying to keep my cool.
But what made it even better was meeting C&L and touring their home, because they are the nicest young couple, eager to make their home period perfect. Unfortunately, it had been slightly molested by some bad house-flippers, and we needed to bring the bathroom back to it "roots."
We knew we had to banish the hideous brown tile and cheap vanity quickly. But C&L complained about the condensation problems and the constant fight with mold. This immediately told me that improper remodeling had occurred and we needed to remedy that right away.
The Before: Frustrations with a Botched Remodel
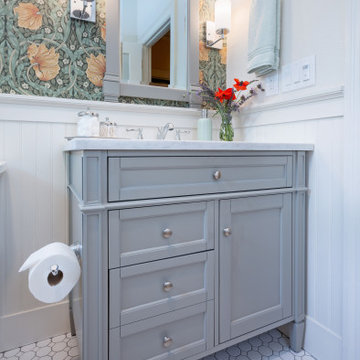
The bathroom needed to be brought back to period appropriate design with all the functionality of a modern bathroom. We thought of things like marble countertop, white mosaic floor tiles, white subway tile, board and batten molding, and of course a fabulous wallpaper.
This small (and only) bathroom on a tight budget required a little bit of design sleuthing to figure out how we could get the proper look and feel. Our goal was to determine where to splurge and where to economize and how to complete the remodel as quickly as possible because C&L would have to move out while construction was going on.
The Process: Hard Work to Remedy Design and Function
During our initial design study, (which included 2 hours in the owners’ home), we noticed framed images of William Morris Arts and Crafts textile patterns and knew this would be our design inspiration. We presented C&L with three options and they quickly selected the Pimpernel Design Concept.
We had originally selected the Black and Olive colors with a black vanity, mirror, and black and white floor tile. C&L liked it but weren’t quite sure about the black, We went back to the drawing board and decided the William & Co Pimpernel Wallpaper in Bayleaf and Manilla color with a softer gray painted vanity and mirror and white floor tile was more to their liking.
After the Design Concept was approved, we went to work securing the building permit, procuring all the elements, and scheduling our trusted tradesmen to perform the work.
We did uncover some shoddy work by the flippers such as live electrical wires hidden behind the wall, plumbing venting cut-off and buried in the walls (hence the constant dampness), the tub barely balancing on two fence boards across the floor joist, and no insulation on the exterior wall.
All of the previous blunders were fixed and the bathroom put back to its previous glory. We could feel the house thanking us for making it pretty again.
The After Reveal: Cohesive Design Decisions
We selected a simple white subway tile for the tub/shower. This is always classic and in keeping with the style of the house.
We selected a pre-fab vanity and mirror, but they look rich with the quartz countertop. There is much more storage in this small vanity than you would think.
The Transformation: A Period Perfect Refresh
We began the remodel just as the pandemic reared and stay-in-place orders went into effect. As C&L were already moved out and living with relatives, we got the go-ahead from city officials to get the work done (after all, how can you shelter in place without a bathroom?).
All our tradesmen were scheduled to work so that only one crew was on the job site at a time. We stayed on the original schedule with only a one week delay.
The end result is the sweetest little bathroom I've ever seen (and I can't wait to start work on C&L's kitchen next).
Thank you for joining me in this project transformation. I hope this inspired you to think about being creative with your design projects, determining what works best in keeping with the architecture of your space, and carefully assessing how you can have the best life in your home.
 Kathleen Jennison
An Arts & Crafts Bungalow is one of my favorite styles of homes. We have quite a few of them in our Stockton Mid-Town area. And when C&L called us to help them remodel their 1923 American Bungalow, I was beyond thrilled.
As per usual, when we get a new inquiry, we quickly Google the project location while we are talking to you on the phone. My excitement escalated when I saw the Google Earth Image of the sweet Sage Green bungalow in Mid-Town Stockton. "Yes, we would be interested in working with you," I said trying to keep my cool.
But what made it even better was meeting C&L and touring their home, because they are the nicest young couple, eager to make their home period perfect. Unfortunately, it had been slightly molested by some bad house-flippers, and we needed to bring the bathroom back to it "roots."
We knew we had to banish the hideous brown tile and cheap vanity quickly. But C&L complained about the condensation problems and the constant fight with mold. This immediately told me that improper remodeling had occurred and we needed to remedy that right away.
The Before: Frustrations with a Botched Remodel
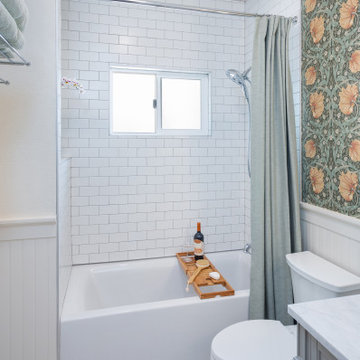
The bathroom needed to be brought back to period appropriate design with all the functionality of a modern bathroom. We thought of things like marble countertop, white mosaic floor tiles, white subway tile, board and batten molding, and of course a fabulous wallpaper.
This small (and only) bathroom on a tight budget required a little bit of design sleuthing to figure out how we could get the proper look and feel. Our goal was to determine where to splurge and where to economize and how to complete the remodel as quickly as possible because C&L would have to move out while construction was going on.
The Process: Hard Work to Remedy Design and Function
During our initial design study, (which included 2 hours in the owners’ home), we noticed framed images of William Morris Arts and Crafts textile patterns and knew this would be our design inspiration. We presented C&L with three options and they quickly selected the Pimpernel Design Concept.
We had originally selected the Black and Olive colors with a black vanity, mirror, and black and white floor tile. C&L liked it but weren’t quite sure about the black, We went back to the drawing board and decided the William & Co Pimpernel Wallpaper in Bayleaf and Manilla color with a softer gray painted vanity and mirror and white floor tile was more to their liking.
After the Design Concept was approved, we went to work securing the building permit, procuring all the elements, and scheduling our trusted tradesmen to perform the work.
We did uncover some shoddy work by the flippers such as live electrical wires hidden behind the wall, plumbing venting cut-off and buried in the walls (hence the constant dampness), the tub barely balancing on two fence boards across the floor joist, and no insulation on the exterior wall.
All of the previous blunders were fixed and the bathroom put back to its previous glory. We could feel the house thanking us for making it pretty again.
The After Reveal: Cohesive Design Decisions
We selected a simple white subway tile for the tub/shower. This is always classic and in keeping with the style of the house.
We selected a pre-fab vanity and mirror, but they look rich with the quartz countertop. There is much more storage in this small vanity than you would think.
The Transformation: A Period Perfect Refresh
We began the remodel just as the pandemic reared and stay-in-place orders went into effect. As C&L were already moved out and living with relatives, we got the go-ahead from city officials to get the work done (after all, how can you shelter in place without a bathroom?).
All our tradesmen were scheduled to work so that only one crew was on the job site at a time. We stayed on the original schedule with only a one week delay.
The end result is the sweetest little bathroom I've ever seen (and I can't wait to start work on C&L's kitchen next).
Thank you for joining me in this project transformation. I hope this inspired you to think about being creative with your design projects, determining what works best in keeping with the architecture of your space, and carefully assessing how you can have the best life in your home.
 Kathleen Jennison
An Arts & Crafts Bungalow is one of my favorite styles of homes. We have quite a few of them in our Stockton Mid-Town area. And when C&L called us to help them remodel their 1923 American Bungalow, I was beyond thrilled.
As per usual, when we get a new inquiry, we quickly Google the project location while we are talking to you on the phone. My excitement escalated when I saw the Google Earth Image of the sweet Sage Green bungalow in Mid-Town Stockton. "Yes, we would be interested in working with you," I said trying to keep my cool.
But what made it even better was meeting C&L and touring their home, because they are the nicest young couple, eager to make their home period perfect. Unfortunately, it had been slightly molested by some bad house-flippers, and we needed to bring the bathroom back to it "roots."
We knew we had to banish the hideous brown tile and cheap vanity quickly. But C&L complained about the condensation problems and the constant fight with mold. This immediately told me that improper remodeling had occurred and we needed to remedy that right away.
The Before: Frustrations with a Botched Remodel
The bathroom needed to be brought back to period appropriate design with all the functionality of a modern bathroom. We thought of things like marble countertop, white mosaic floor tiles, white subway tile, board and batten molding, and of course a fabulous wallpaper.
This small (and only) bathroom on a tight budget required a little bit of design sleuthing to figure out how we could get the proper look and feel. Our goal was to determine where to splurge and where to economize and how to complete the remodel as quickly as possible because C&L would have to move out while construction was going on.
The Process: Hard Work to Remedy Design and Function
During our initial design study, (which included 2 hours in the owners’ home), we noticed framed images of William Morris Arts and Crafts textile patterns and knew this would be our design inspiration. We presented C&L with three options and they quickly selected the Pimpernel Design Concept.
We had originally selected the Black and Olive colors with a black vanity, mirror, and black and white floor tile. C&L liked it but weren’t quite sure about the black, We went back to the drawing board and decided the William & Co Pimpernel Wallpaper in Bayleaf and Manilla color with a softer gray painted vanity and mirror and white floor tile was more to their liking.
After the Design Concept was approved, we went to work securing the building permit, procuring all the elements, and scheduling our trusted tradesmen to perform the work.
We did uncover some shoddy work by the flippers such as live electrical wires hidden behind the wall, plumbing venting cut-off and buried in the walls (hence the constant dampness), the tub barely balancing on two fence boards across the floor joist, and no insulation on the exterior wall.
All of the previous blunders were fixed and the bathroom put back to its previous glory. We could feel the house thanking us for making it pretty again.
The After Reveal: Cohesive Design Decisions
We selected a simple white subway tile for the tub/shower. This is always classic and in keeping with the style of the house.
We selected a pre-fab vanity and mirror, but they look rich with the quartz countertop. There is much more storage in this small vanity than you would think.
The Transformation: A Period Perfect Refresh
We began the remodel just as the pandemic reared and stay-in-place orders went into effect. As C&L were already moved out and living with relatives, we got the go-ahead from city officials to get the work done (after all, how can you shelter in place without a bathroom?).
All our tradesmen were scheduled to work so that only one crew was on the job site at a time. We stayed on the original schedule with only a one week delay.
The end result is the sweetest little bathroom I've ever seen (and I can't wait to start work on C&L's kitchen next).
Thank you for joining me in this project transformation. I hope this inspired you to think about being creative with your design projects, determining what works best in keeping with the architecture of your space, and carefully assessing how you can have the best life in your home.
 Mayflower Construction Group
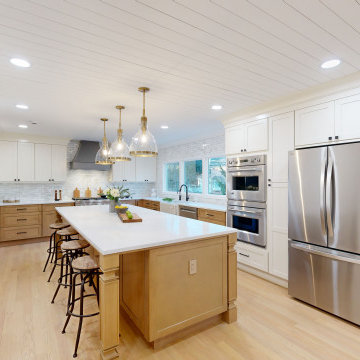
How Planning Leads to Successful Construction
Construction projects, whether small residential jobs or large commercial builds, require more than just skilled labor and high-quality materials. The foundation of a successful project lies in effective planning. Proper planning ensures efficiency, minimizes risks, and keeps the project within budget and on schedule. Here’s how thorough planning leads to successful construction:
1. Clear Project Scope and Objectives
Defining the project scope early on helps prevent scope creep and miscommunication. Establishing clear goals, deliverables, and timelines ensures that everyone involved understands the expectations. This prevents delays and unnecessary changes during construction.
2. Accurate Budgeting and Cost Control
A well-planned project includes a detailed cost estimation. This accounts for labor, materials, permits, and unexpected contingencies. Without proper budgeting, costs can spiral out of control, leading to financial strain and potential project failure.
3. Efficient Resource Management
Proper planning helps allocate resources effectively, including manpower, equipment, and materials. Scheduling workers and ordering materials at the right time avoids delays caused by shortages or logistical issues.
4. Risk Identification and Mitigation
Every construction project comes with risks—weather delays, supply chain issues, safety hazards, or regulatory compliance concerns. Planning ahead allows for risk assessment and the implementation of strategies to mitigate potential problems before they occur.
5. Compliance with Regulations and Permits
Failing to secure the necessary permits or adhere to building codes can halt a project indefinitely. Planning ensures that all legal requirements are met in advance, avoiding costly fines and legal complications.
6. Seamless Communication and Coordination
A structured plan includes clear communication protocols between contractors, architects, engineers, and clients. When everyone is on the same page, mistakes are reduced, and the workflow remains smooth.
7. Improved Project Scheduling
A construction schedule outlines each phase of the project, from site preparation to finishing touches. A well-planned schedule helps keep tasks on track, prevents unnecessary delays, and ensures timely project completion.
8. Higher Quality Workmanship
Planning allows for a structured approach to quality control. By setting benchmarks, conducting inspections, and using the right materials, projects meet industry standards and client expectations.
9. Better Client Satisfaction
When a project is completed on time, within budget, and meets quality expectations, client satisfaction increases. A satisfied client is more likely to recommend your services and return for future projects.
Conclusion
In construction, planning isn’t just a step—it’s the backbone of success. From budgeting and resource management to compliance and scheduling, thorough planning prevents costly errors, improves efficiency, and ensures a high-quality outcome. Whether you're working on a small driveway installation or a large-scale commercial project, investing time in planning will always pay off in the long run.
Do you need expert concrete construction services that prioritize planning and quality? Contact us today!
 Moore Design Works
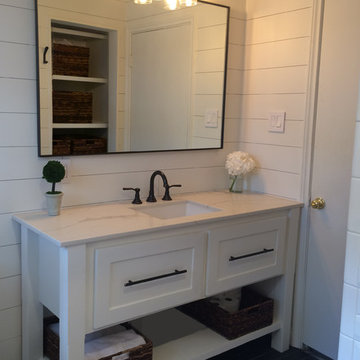
Inspiration for a mid-sized scandinavian 3/4 white tile and subway tile slate floor and black floor alcove bathtub remodel in Houston with furniture-like cabinets, white cabinets, a two-piece toilet, white walls, an undermount sink and marble countertops
 Change Your Bathroom©
The detailed plans for this bathroom can be purchased here: https://www.changeyourbathroom.com/shop/felicitous-flora-bathroom-plans/
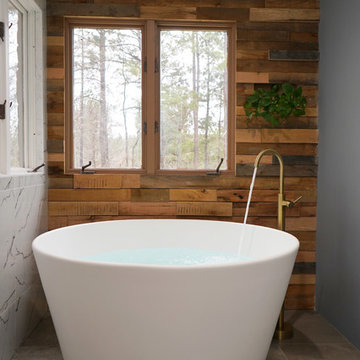
The original layout of this bathroom underutilized the spacious floor plan and had an entryway out into the living room as well as a poorly placed entry between the toilet and the shower into the master suite. The new floor plan offered more privacy for the water closet and cozier area for the round tub. A more spacious shower was created by shrinking the floor plan - by bringing the wall of the former living room entry into the bathroom it created a deeper shower space and the additional depth behind the wall offered deep towel storage. A living plant wall thrives and enjoys the humidity each time the shower is used. An oak wood wall gives a natural ambiance for a relaxing, nature inspired bathroom experience.

5