
Search results for "Separate must do" in Home Design Ideas
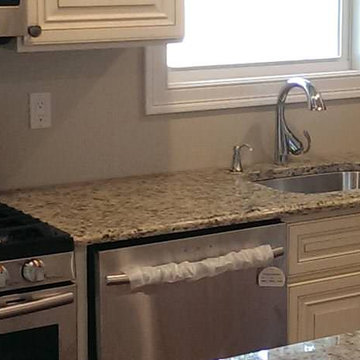
 Cavalier Homes Inc
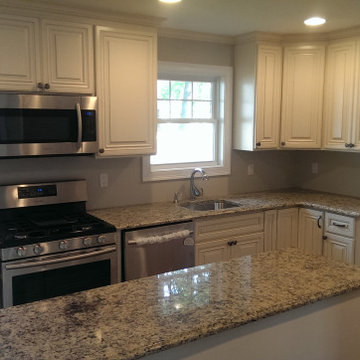
Do you believe that when someone looks at your kitchen, they should exclaim “WOW”? It is quite possible with our kitchen remodeling service. Cavalier Homes Inc. believes that the kitchen is the powerhouse of your family. Therefore, top-quality products combined with our impeccable craftsmanship have resulted in some of the most stunning kitchens in West Islip, Long Island, New York since 1985.
The kitchen of your dreams is well within your budget. If you’ve been envisioning something unique in terms of design, we can bring it to life. Kitchen remodeling is not always as simple as it appears. The upgrades must be finished, depending on the size of your kitchen. All you need is a team of experts to guide you through the entire kitchen remodeling process, from design to completion.
From project planning and design to sourcing materials and installation, Cavalier Homes is equipped to undertake every aspect of your kitchen remodel. We take on all of the responsibilities required to complete the kitchen remodeling work on time. Our home remodeling team is dedicated to making your kitchen as spectacular as you have imagined.
Important factors to consider before remodeling your kitchen:
As previously stated, a kitchen renovation can appear to be a massive undertaking. When you choose Cavalier Homes, you’ll be working with a Long Island home remodeling company that has been in business for nearly 40 years. Not only do we have four decades of design and craftsmanship experience, but we also have a professional team that will guide you through the entire kitchen remodeling process.
Here are some crucial factors to take into account in order to maximize the value of your kitchen remodeling service:
#1 Budget:
This is quite an important factor as every home renovation project starts here. Think about the aspects that are important to you before deciding on the overall remodeling budget. If it’s flooring, you should probably spend more money there and perhaps spend less on appliances and lighting.
#2 Design:
Keeping the existing design of your kitchen definitely keeps your budget low, but it may not be possible to realize what you have envisioned. However, walking through our ideas will yield the best results.
Take some time to consider your workflow when remodeling your kitchen. What would work best for your cooking style? Is it easy to move around your kitchen? What happens if your family grows?
#3 Appliances:
Upgrading their current appliances is one of the main reasons homeowners think about remodeling their kitchens. The adjustments that may be necessary to make room for the new appliances must possibly be taken into consideration. We will assist you in preparing the extra wiring, plumbing, and cabinetry.
#4 Countertops and Cabinets:
For a more elegant appearance, choose countertops made of wood, marble, or granite. Wooden surfaces add character and charm while not costing a lot. Solid wood cabinets and slabs of granite, marble, or quartz are classic choices that will never go out of style.
#5 Lighting and Flooring:
These elements can make a significant difference in your kitchen’s appearance, giving it a stunning and unique look.
In addition to the above, you’ll have to compare the costs and benefits of upgrading to current trends versus classic designs. Kitchen renovations remain one of the most popular home improvement projects among the majority of homeowners. Contact us to discuss the design of your new kitchen and how we can assist you in providing the best kitchen remodeling service possible.
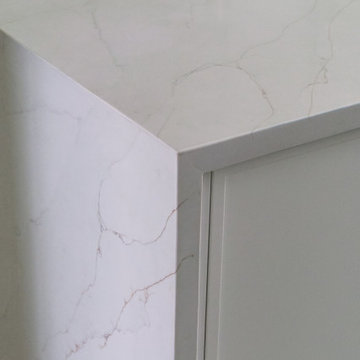
 Drury Design
THE SETUP
Multiple ovens, multiple workspaces, multiple sinks – when you think about it, non-jewish kitchens have been adapting the criteria of kosher kitchens for years.
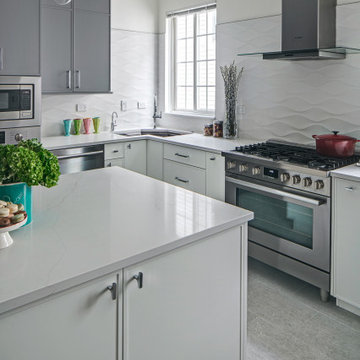
Gladys’ clients in West Rogers Park are Orthodox Jewish. The house they bought already had a kosher kitchen – it just wasn’t done that well. It needed some more things to be duplicated for the dairy side and the meat side. Plus, it was dark and the configuration wasn’t very conducive for a family of eight.
It was time for a remodel.
Design Objectives
Improve kosher kitchen
Add more storage in the island
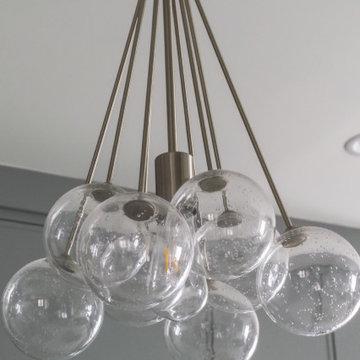
Better lighting
More open, lighter feel
Change the wood floor in the kitchen to tile
THE REMODEL
Design Challenges
- We had originally planned on removing a wing wall by the breakfast area. During demolition, we learned it contained a support beam.
- The kitchen is a substantial size, but having two sinks, dishwashers, and ovens presented a challenge – how do we fit it all in and make it flow with the storage still accessible near the work areas?
Where do you stop the materials for the new space? - -- The right tile, paint, lighting, etc. would be needed to make the remodeled area cohesive with the rest of the main floor.
- An existing column limited cabinet options and thus, storage capacity. Could we conceal it without disrupting the cabinetry flow?
Design Solutions
- We had to keep the wing wall, but decided to continue the tile on the sides of the cabinets and maintain the height of the tile to line up with the rest of the backsplash. This actually presented a very nice and cohesive look, especially since the opposite side has a wing wall to the left of the refrigerator.
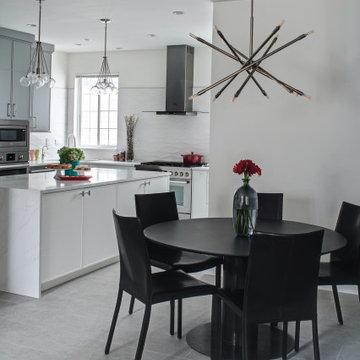
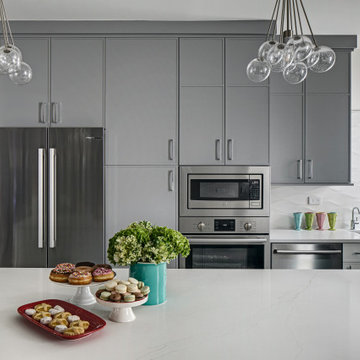
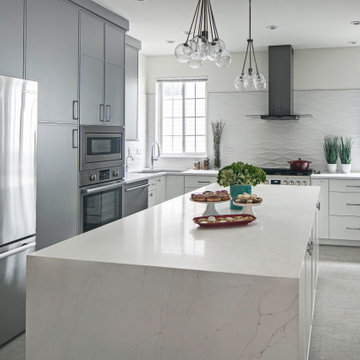
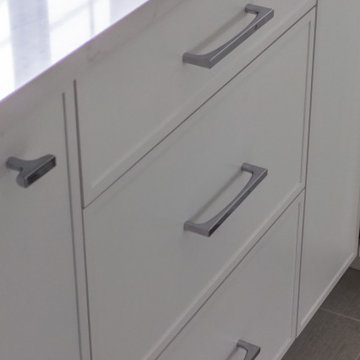
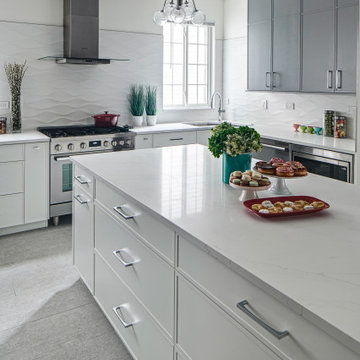
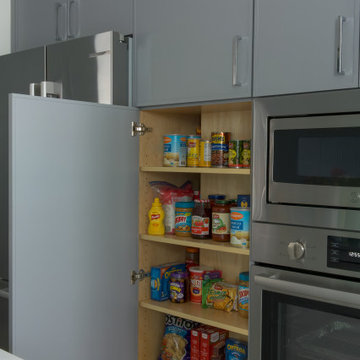
- We used “L-shaped” corner sinks instead of the rectangular ones set on an angle. This gave us more of the legs of the triangles versus the hypotenuse, which allowed for the two dishwashers, and the pullout utensil canisters and spice pullouts while still keeping the 3-drawer cabinets on either side of the range (by the sinks). The old island had the recess for stools which the family never used. By extending the width of the island 6” and utilizing this leg space, we were able to fit 18”-deep cabinets on this side – adding lots of accessible storage. The family can now work simultaneously on the dairy side (the side with the fridge) and the meat side (opposite) without getting in each other’s way. We separated the cooking by using the range oven for the meat and a built-in microwave in the base cabinet. The wall oven with built-in microwave on top is for dairy.
- Corner sinks opened up the middle area for a wider range – we went from a 30” to a 36”. Removing all the wall cabinets (on the range wall) made a big difference. That opened up the entire space while adding some visual impact. (Not pictured: We also made the cabinets directly opposite the range wall tall and removed the countertop, resulting in more room for rollouts and even more storage!) The kitchen now has more storage than it did before.
- We ended up painting the ceiling of the kitchen into the hallway that leads to the foyer. The living and dining rooms were separated by a soffit, so that became a natural boundary. We kept the tile in the kitchen by stopping it short of the hallway and lining it up with the pantry wall. This creates a border between the breakfast area and family room. The rest of the existing wood floors were refinished to refresh and make the hue darker. We also painted a dark accent wall and carried it into the breakfast area to make the rooms look deeper.
- The in-the-way column housed plumbing and couldn’t be moved. We still built cabinets in that spot – we just had to build a chase inside it to conceal the pipes. There was still plenty of room for new storage. We also took the cabinets all the way to the ceiling. The continuous tall cabinets added a functional elegance to the space.
THE RENEWED SPACE
The client’s long-awaited dream of a better kosher kitchen has finally been achieved, beautifully combining enhanced storage solutions with adherence to the family’s orthodox dietary laws. The kitchen’s standout feature, an expanded island, now offers a spacious and efficient workspace. This allows several family members to cook together comfortably, without the inconvenience of bumping into each other, ensuring a harmonious and productive cooking environment.
 Drury Design
THE SETUP
Multiple ovens, multiple workspaces, multiple sinks – when you think about it, non-jewish kitchens have been adapting the criteria of kosher kitchens for years.
Gladys’ clients in West Rogers Park are Orthodox Jewish. The house they bought already had a kosher kitchen – it just wasn’t done that well. It needed some more things to be duplicated for the dairy side and the meat side. Plus, it was dark and the configuration wasn’t very conducive for a family of eight.
It was time for a remodel.
Design Objectives
Improve kosher kitchen
Add more storage in the island
Better lighting
More open, lighter feel
Change the wood floor in the kitchen to tile
THE REMODEL
Design Challenges
- We had originally planned on removing a wing wall by the breakfast area. During demolition, we learned it contained a support beam.
- The kitchen is a substantial size, but having two sinks, dishwashers, and ovens presented a challenge – how do we fit it all in and make it flow with the storage still accessible near the work areas?
Where do you stop the materials for the new space? - -- The right tile, paint, lighting, etc. would be needed to make the remodeled area cohesive with the rest of the main floor.
- An existing column limited cabinet options and thus, storage capacity. Could we conceal it without disrupting the cabinetry flow?
Design Solutions
- We had to keep the wing wall, but decided to continue the tile on the sides of the cabinets and maintain the height of the tile to line up with the rest of the backsplash. This actually presented a very nice and cohesive look, especially since the opposite side has a wing wall to the left of the refrigerator.
- We used “L-shaped” corner sinks instead of the rectangular ones set on an angle. This gave us more of the legs of the triangles versus the hypotenuse, which allowed for the two dishwashers, and the pullout utensil canisters and spice pullouts while still keeping the 3-drawer cabinets on either side of the range (by the sinks). The old island had the recess for stools which the family never used. By extending the width of the island 6” and utilizing this leg space, we were able to fit 18”-deep cabinets on this side – adding lots of accessible storage. The family can now work simultaneously on the dairy side (the side with the fridge) and the meat side (opposite) without getting in each other’s way. We separated the cooking by using the range oven for the meat and a built-in microwave in the base cabinet. The wall oven with built-in microwave on top is for dairy.
- Corner sinks opened up the middle area for a wider range – we went from a 30” to a 36”. Removing all the wall cabinets (on the range wall) made a big difference. That opened up the entire space while adding some visual impact. (Not pictured: We also made the cabinets directly opposite the range wall tall and removed the countertop, resulting in more room for rollouts and even more storage!) The kitchen now has more storage than it did before.
- We ended up painting the ceiling of the kitchen into the hallway that leads to the foyer. The living and dining rooms were separated by a soffit, so that became a natural boundary. We kept the tile in the kitchen by stopping it short of the hallway and lining it up with the pantry wall. This creates a border between the breakfast area and family room. The rest of the existing wood floors were refinished to refresh and make the hue darker. We also painted a dark accent wall and carried it into the breakfast area to make the rooms look deeper.
- The in-the-way column housed plumbing and couldn’t be moved. We still built cabinets in that spot – we just had to build a chase inside it to conceal the pipes. There was still plenty of room for new storage. We also took the cabinets all the way to the ceiling. The continuous tall cabinets added a functional elegance to the space.
THE RENEWED SPACE
The client’s long-awaited dream of a better kosher kitchen has finally been achieved, beautifully combining enhanced storage solutions with adherence to the family’s orthodox dietary laws. The kitchen’s standout feature, an expanded island, now offers a spacious and efficient workspace. This allows several family members to cook together comfortably, without the inconvenience of bumping into each other, ensuring a harmonious and productive cooking environment.
Find the right local pro for your project
 Drury Design
THE SETUP
Multiple ovens, multiple workspaces, multiple sinks – when you think about it, non-jewish kitchens have been adapting the criteria of kosher kitchens for years.
Gladys’ clients in West Rogers Park are Orthodox Jewish. The house they bought already had a kosher kitchen – it just wasn’t done that well. It needed some more things to be duplicated for the dairy side and the meat side. Plus, it was dark and the configuration wasn’t very conducive for a family of eight.
It was time for a remodel.
Design Objectives
Improve kosher kitchen
Add more storage in the island
Better lighting
More open, lighter feel
Change the wood floor in the kitchen to tile
THE REMODEL
Design Challenges
- We had originally planned on removing a wing wall by the breakfast area. During demolition, we learned it contained a support beam.
- The kitchen is a substantial size, but having two sinks, dishwashers, and ovens presented a challenge – how do we fit it all in and make it flow with the storage still accessible near the work areas?
Where do you stop the materials for the new space? - -- The right tile, paint, lighting, etc. would be needed to make the remodeled area cohesive with the rest of the main floor.
- An existing column limited cabinet options and thus, storage capacity. Could we conceal it without disrupting the cabinetry flow?
Design Solutions
- We had to keep the wing wall, but decided to continue the tile on the sides of the cabinets and maintain the height of the tile to line up with the rest of the backsplash. This actually presented a very nice and cohesive look, especially since the opposite side has a wing wall to the left of the refrigerator.
- We used “L-shaped” corner sinks instead of the rectangular ones set on an angle. This gave us more of the legs of the triangles versus the hypotenuse, which allowed for the two dishwashers, and the pullout utensil canisters and spice pullouts while still keeping the 3-drawer cabinets on either side of the range (by the sinks). The old island had the recess for stools which the family never used. By extending the width of the island 6” and utilizing this leg space, we were able to fit 18”-deep cabinets on this side – adding lots of accessible storage. The family can now work simultaneously on the dairy side (the side with the fridge) and the meat side (opposite) without getting in each other’s way. We separated the cooking by using the range oven for the meat and a built-in microwave in the base cabinet. The wall oven with built-in microwave on top is for dairy.
- Corner sinks opened up the middle area for a wider range – we went from a 30” to a 36”. Removing all the wall cabinets (on the range wall) made a big difference. That opened up the entire space while adding some visual impact. (Not pictured: We also made the cabinets directly opposite the range wall tall and removed the countertop, resulting in more room for rollouts and even more storage!) The kitchen now has more storage than it did before.
- We ended up painting the ceiling of the kitchen into the hallway that leads to the foyer. The living and dining rooms were separated by a soffit, so that became a natural boundary. We kept the tile in the kitchen by stopping it short of the hallway and lining it up with the pantry wall. This creates a border between the breakfast area and family room. The rest of the existing wood floors were refinished to refresh and make the hue darker. We also painted a dark accent wall and carried it into the breakfast area to make the rooms look deeper.
- The in-the-way column housed plumbing and couldn’t be moved. We still built cabinets in that spot – we just had to build a chase inside it to conceal the pipes. There was still plenty of room for new storage. We also took the cabinets all the way to the ceiling. The continuous tall cabinets added a functional elegance to the space.
THE RENEWED SPACE
The client’s long-awaited dream of a better kosher kitchen has finally been achieved, beautifully combining enhanced storage solutions with adherence to the family’s orthodox dietary laws. The kitchen’s standout feature, an expanded island, now offers a spacious and efficient workspace. This allows several family members to cook together comfortably, without the inconvenience of bumping into each other, ensuring a harmonious and productive cooking environment.

 StarStyle® Productions, LLC
In My Sister’s Garden-A Wistful Romp through a Drought Resistant Oasis
"Spring is the time of the year, when it is summer in the sun and winter in the shade." - Charles Dickens
One of the great things about growing up on a farm in the boondocks is that your tribe is your family. We five siblings were as thick as thieves as we climbed trees, worked the fields, pulled fences, drove tractors, branded cattle, and planted the spring garden. We played, we quarreled, and we dug in the dirt together. By the time May arrived, we ached to get our hands grubby in the vegetable patch. Waiting for the vegetables to sprout and be harvested taught us patience and responsibility. Of course, Mom’s beautiful flower gardens would already be abloom by this time of year getting us into constant trouble because we were forever picking bouquets not only for her, but, for teachers, 4-H leaders, and Sunday masses.
As we grew into adults, our love of the earth grew as well. Following in the big shoes of my Father, my brother continued the family tradition of being a farmer and has one of the most beautiful vineyards in the county. Our Mother’s love of gardening instructed the gardens of her girls.
Recently I walked with my sister Debbie through her eclectic garden. There is a saying that “you can take the girl out of the country, but you can never take the country out of the girl.” With Deb, she’s never left the land where we were born. She is a country cowgirl through and through. She’s always adorned with her cowboy hat, rodeo belt buckle, and boots! She hunts, fishes, grows her food, and would have relished being a pioneer in the 1870’s.
Debbie and her husband are the ultimate recyclers and re-purposers. With their barnyard of adopted animals-pigs, goats, donkeys, chickens, even Texas long horns at one time, all the weeds and garden cuttings feed the animals and the manure is then recycled back to the garden. They collect rooftop rain runoff in used wine barrels then pipe it to a storage tank to help with summer watering. It’s never enough, but every drop helps. Their garden art includes rusted plows, wooden swings, a plethora of homemade birdhouses, multiple fountains made from found objects, wagon wheels, antlers, the cutest country chicken coop you ever did see, and a sleeping shed outfitted with a bear hide, antique fishing gear, pinecones, and found treasures of every sort. From their patio they watch the wildlife on their hillside property-deer, bobcats, raccoons, turkeys, skunks, and the occasional mountain lion. It’s a playful, restful garden setting, albeit with a watchful eye for the rattlesnakes that enjoy this oasis as well.
What I love about Debbie’s garden is how it reflects her unique personality, her love of the land, and her admiration for the history of the Wild West. As we ambled around the property with her happy dogs in the lead, the songbirds sang, a bevy of butterflies delicately landed on her flowers, and the koi in the pond swam to the surface to greet me. This time together immersed in this sustainable landscape nurtured my soul and brought our childhood memories to vivid life. Although we grow the same plants, shrubs, trees, and succulents in both of our yards, our designs and esthetics are completely different. And that’s the beauty of creating a garden, making it your own special paradise where you can find peace, tranquility, and restoration in tandem with the wild kingdom.
TIPS TO CREATING YOUR OWN UNIQUE PLAYGROUND
⎫ Don’t over-think it! Make lists of everything you enjoy in a garden then do it.
⎫ Be conservation conscious as well as considerate of nature.
⎫ Be creative. Think swathes, angles, circles, and flow. There is nothing more boring than a box.
⎫ The hardscape must include natural materials: rocks, gravel, barn wood, shells, or anything meaningful to you.
⎫ Instead of buying art, repurpose childhood toys, old sinks, even a commode overflowing with flowers can be comical.
⎫ Be playful. When you are going to spend time in the outdoors, you want to enjoy yourself. Allow your personality to shine.
⎫ Add surprises, secret gardens, hedged rooms, anything that will enhance the whimsical and magical element to your garden experience.
⎫ Lead to a focal point or view with meandering paths, walkways, and trails.
⎫ Invite the pollinators; bees, butterflies, and birds by providing housing, nectar flowers, protection, fountains, and ponds.
⎫ Mix it up. For a drought resistant garden, consider an array of beautiful succulents, cactus, lavender, bulbs, iris, daylily, geraniums, and other plants that will add color, texture, form, and structure, yet require little maintenance and minimal water.
⎫ A potager, pots, or area designated for edibles and herbs is a must have. There is nothing better than picking your dinner from your own property.
⎫ Benches, swings, lounge chairs, umbrellas, and places to unwind, watch the clouds, savor sunsets, and marvel at the stars make your garden your home.
`
What’s so fun about our family gardening experience is the sharing that we all do in giving each other clips, snips, cuttings, bulbs, and volunteers. We grow the same specimens and as we stroll and admire our handiwork, we can’t remember who gave what to whom first.
As I said farewell to my sister, she handed me a hand-painted tin filled with blooming echeveria from clippings I had given her a few years before. We shared a laugh.
Little did I know this would be the last walk with my sister. She died just a few days before this article was published. She would have loved to have seen her passion in print. Debbie may you garden in the heavens. The circle of life continues.
Happy Trails to you, Debbie. Until we meet again...
Read more: https://www.lam
orindaweekly.com/archive/issue1006/Digging-Deep-with-Cynthia-Brian.html
Scribd: https://www.scribd.com/doc/313702488/My-Sister-s-Garden-Digging-Deep-With-Cynthia-Brian
Radio Broadcast: http://www.voiceamerica.com/episode/92459/porn-alarm-effective-apologies-in-my-sisters-garden
Press Pass: http://vapresspass.com/2016/05/24/in-my-sisters-garden-a-wistful-romp-through-a-drought-resistant-oasis-by-cynthia-brian/
©2016
Cynthia Brian
The Goddess Gardener
Starstyle® Productions, llc
Cynthia@GoddessGardener.com
www.GoddessGardener.com
925-377-STAR
Tune into Cynthia’s Radio show at www.StarStyleRadio.com
I am available as a speaker, designer, and consultant.
Keywords: Debbie’s garden my sister’s garden, a cowboy western garden, drought resistant plants, cynthia brian, lamorinda weekly, starstyle, goddess gardener.
 Drury Design
THE SETUP
Multiple ovens, multiple workspaces, multiple sinks – when you think about it, non-jewish kitchens have been adapting the criteria of kosher kitchens for years.
Gladys’ clients in West Rogers Park are Orthodox Jewish. The house they bought already had a kosher kitchen – it just wasn’t done that well. It needed some more things to be duplicated for the dairy side and the meat side. Plus, it was dark and the configuration wasn’t very conducive for a family of eight.
It was time for a remodel.
Design Objectives
Improve kosher kitchen
Add more storage in the island
Better lighting
More open, lighter feel
Change the wood floor in the kitchen to tile
THE REMODEL
Design Challenges
- We had originally planned on removing a wing wall by the breakfast area. During demolition, we learned it contained a support beam.
- The kitchen is a substantial size, but having two sinks, dishwashers, and ovens presented a challenge – how do we fit it all in and make it flow with the storage still accessible near the work areas?
Where do you stop the materials for the new space? - -- The right tile, paint, lighting, etc. would be needed to make the remodeled area cohesive with the rest of the main floor.
- An existing column limited cabinet options and thus, storage capacity. Could we conceal it without disrupting the cabinetry flow?
Design Solutions
- We had to keep the wing wall, but decided to continue the tile on the sides of the cabinets and maintain the height of the tile to line up with the rest of the backsplash. This actually presented a very nice and cohesive look, especially since the opposite side has a wing wall to the left of the refrigerator.
- We used “L-shaped” corner sinks instead of the rectangular ones set on an angle. This gave us more of the legs of the triangles versus the hypotenuse, which allowed for the two dishwashers, and the pullout utensil canisters and spice pullouts while still keeping the 3-drawer cabinets on either side of the range (by the sinks). The old island had the recess for stools which the family never used. By extending the width of the island 6” and utilizing this leg space, we were able to fit 18”-deep cabinets on this side – adding lots of accessible storage. The family can now work simultaneously on the dairy side (the side with the fridge) and the meat side (opposite) without getting in each other’s way. We separated the cooking by using the range oven for the meat and a built-in microwave in the base cabinet. The wall oven with built-in microwave on top is for dairy.
- Corner sinks opened up the middle area for a wider range – we went from a 30” to a 36”. Removing all the wall cabinets (on the range wall) made a big difference. That opened up the entire space while adding some visual impact. (Not pictured: We also made the cabinets directly opposite the range wall tall and removed the countertop, resulting in more room for rollouts and even more storage!) The kitchen now has more storage than it did before.
- We ended up painting the ceiling of the kitchen into the hallway that leads to the foyer. The living and dining rooms were separated by a soffit, so that became a natural boundary. We kept the tile in the kitchen by stopping it short of the hallway and lining it up with the pantry wall. This creates a border between the breakfast area and family room. The rest of the existing wood floors were refinished to refresh and make the hue darker. We also painted a dark accent wall and carried it into the breakfast area to make the rooms look deeper.
- The in-the-way column housed plumbing and couldn’t be moved. We still built cabinets in that spot – we just had to build a chase inside it to conceal the pipes. There was still plenty of room for new storage. We also took the cabinets all the way to the ceiling. The continuous tall cabinets added a functional elegance to the space.
THE RENEWED SPACE
The client’s long-awaited dream of a better kosher kitchen has finally been achieved, beautifully combining enhanced storage solutions with adherence to the family’s orthodox dietary laws. The kitchen’s standout feature, an expanded island, now offers a spacious and efficient workspace. This allows several family members to cook together comfortably, without the inconvenience of bumping into each other, ensuring a harmonious and productive cooking environment.
 Cavalier Homes Inc
Kitchen Remodeling
Do you believe that when someone looks at your kitchen, they should exclaim “WOW”? It is quite possible with our kitchen remodeling service. Cavalier Homes Inc. believes that the kitchen is the powerhouse of your family. Therefore, top-quality products combined with our impeccable craftsmanship have resulted in some of the most stunning kitchens in West Islip, Long Island, New York since 1985.
The kitchen of your dreams is well within your budget. If you’ve been envisioning something unique in terms of design, we can bring it to life. Kitchen remodeling is not always as simple as it appears. The upgrades must be finished, depending on the size of your kitchen. All you need is a team of experts to guide you through the entire kitchen remodeling process, from design to completion.
From project planning and design to sourcing materials and installation, Cavalier Homes is equipped to undertake every aspect of your kitchen remodel. We take on all of the responsibilities required to complete the kitchen remodeling work on time. Our home remodeling team is dedicated to making your kitchen as spectacular as you have imagined.
Important factors to consider before remodeling your kitchen:
As previously stated, a kitchen renovation can appear to be a massive undertaking. When you choose Cavalier Homes, you’ll be working with a Long Island home remodeling company that has been in business for nearly 40 years. Not only do we have four decades of design and craftsmanship experience, but we also have a professional team that will guide you through the entire kitchen remodeling process.
Here are some crucial factors to take into account in order to maximize the value of your kitchen remodeling service:
#1 Budget:
This is quite an important factor as every home renovation project starts here. Think about the aspects that are important to you before deciding on the overall remodeling budget. If it’s flooring, you should probably spend more money there and perhaps spend less on appliances and lighting.
#2 Design:
Keeping the existing design of your kitchen definitely keeps your budget low, but it may not be possible to realize what you have envisioned. However, walking through our ideas will yield the best results.
Take some time to consider your workflow when remodeling your kitchen. What would work best for your cooking style? Is it easy to move around your kitchen? What happens if your family grows?
#3 Appliances:
Upgrading their current appliances is one of the main reasons homeowners think about remodeling their kitchens. The adjustments that may be necessary to make room for the new appliances must possibly be taken into consideration. We will assist you in preparing the extra wiring, plumbing, and cabinetry.
#4 Countertops and Cabinets:
For a more elegant appearance, choose countertops made of wood, marble, or granite. Wooden surfaces add character and charm while not costing a lot. Solid wood cabinets and slabs of granite, marble, or quartz are classic choices that will never go out of style.
#5 Lighting and Flooring:
These elements can make a significant difference in your kitchen’s appearance, giving it a stunning and unique look.
In addition to the above, you’ll have to compare the costs and benefits of upgrading to current trends versus classic designs. Kitchen renovations remain one of the most popular home improvement projects among the majority of homeowners. Contact us to discuss the design of your new kitchen and how we can assist you in providing the best kitchen remodeling service possible.
Sponsored
Columbus, OH

Hope Restoration & General Contracting
Columbus Design-Build, Kitchen & Bath Remodeling, Historic Renovations
 Drury Design
THE SETUP
Multiple ovens, multiple workspaces, multiple sinks – when you think about it, non-jewish kitchens have been adapting the criteria of kosher kitchens for years.
Gladys’ clients in West Rogers Park are Orthodox Jewish. The house they bought already had a kosher kitchen – it just wasn’t done that well. It needed some more things to be duplicated for the dairy side and the meat side. Plus, it was dark and the configuration wasn’t very conducive for a family of eight.
It was time for a remodel.
Design Objectives
Improve kosher kitchen
Add more storage in the island
Better lighting
More open, lighter feel
Change the wood floor in the kitchen to tile
THE REMODEL
Design Challenges
- We had originally planned on removing a wing wall by the breakfast area. During demolition, we learned it contained a support beam.
- The kitchen is a substantial size, but having two sinks, dishwashers, and ovens presented a challenge – how do we fit it all in and make it flow with the storage still accessible near the work areas?
Where do you stop the materials for the new space? - -- The right tile, paint, lighting, etc. would be needed to make the remodeled area cohesive with the rest of the main floor.
- An existing column limited cabinet options and thus, storage capacity. Could we conceal it without disrupting the cabinetry flow?
Design Solutions
- We had to keep the wing wall, but decided to continue the tile on the sides of the cabinets and maintain the height of the tile to line up with the rest of the backsplash. This actually presented a very nice and cohesive look, especially since the opposite side has a wing wall to the left of the refrigerator.
- We used “L-shaped” corner sinks instead of the rectangular ones set on an angle. This gave us more of the legs of the triangles versus the hypotenuse, which allowed for the two dishwashers, and the pullout utensil canisters and spice pullouts while still keeping the 3-drawer cabinets on either side of the range (by the sinks). The old island had the recess for stools which the family never used. By extending the width of the island 6” and utilizing this leg space, we were able to fit 18”-deep cabinets on this side – adding lots of accessible storage. The family can now work simultaneously on the dairy side (the side with the fridge) and the meat side (opposite) without getting in each other’s way. We separated the cooking by using the range oven for the meat and a built-in microwave in the base cabinet. The wall oven with built-in microwave on top is for dairy.
- Corner sinks opened up the middle area for a wider range – we went from a 30” to a 36”. Removing all the wall cabinets (on the range wall) made a big difference. That opened up the entire space while adding some visual impact. (Not pictured: We also made the cabinets directly opposite the range wall tall and removed the countertop, resulting in more room for rollouts and even more storage!) The kitchen now has more storage than it did before.
- We ended up painting the ceiling of the kitchen into the hallway that leads to the foyer. The living and dining rooms were separated by a soffit, so that became a natural boundary. We kept the tile in the kitchen by stopping it short of the hallway and lining it up with the pantry wall. This creates a border between the breakfast area and family room. The rest of the existing wood floors were refinished to refresh and make the hue darker. We also painted a dark accent wall and carried it into the breakfast area to make the rooms look deeper.
- The in-the-way column housed plumbing and couldn’t be moved. We still built cabinets in that spot – we just had to build a chase inside it to conceal the pipes. There was still plenty of room for new storage. We also took the cabinets all the way to the ceiling. The continuous tall cabinets added a functional elegance to the space.
THE RENEWED SPACE
The client’s long-awaited dream of a better kosher kitchen has finally been achieved, beautifully combining enhanced storage solutions with adherence to the family’s orthodox dietary laws. The kitchen’s standout feature, an expanded island, now offers a spacious and efficient workspace. This allows several family members to cook together comfortably, without the inconvenience of bumping into each other, ensuring a harmonious and productive cooking environment.
 Drury Design
THE SETUP
Multiple ovens, multiple workspaces, multiple sinks – when you think about it, non-jewish kitchens have been adapting the criteria of kosher kitchens for years.
Gladys’ clients in West Rogers Park are Orthodox Jewish. The house they bought already had a kosher kitchen – it just wasn’t done that well. It needed some more things to be duplicated for the dairy side and the meat side. Plus, it was dark and the configuration wasn’t very conducive for a family of eight.
It was time for a remodel.
Design Objectives
Improve kosher kitchen
Add more storage in the island
Better lighting
More open, lighter feel
Change the wood floor in the kitchen to tile
THE REMODEL
Design Challenges
- We had originally planned on removing a wing wall by the breakfast area. During demolition, we learned it contained a support beam.
- The kitchen is a substantial size, but having two sinks, dishwashers, and ovens presented a challenge – how do we fit it all in and make it flow with the storage still accessible near the work areas?
Where do you stop the materials for the new space? - -- The right tile, paint, lighting, etc. would be needed to make the remodeled area cohesive with the rest of the main floor.
- An existing column limited cabinet options and thus, storage capacity. Could we conceal it without disrupting the cabinetry flow?
Design Solutions
- We had to keep the wing wall, but decided to continue the tile on the sides of the cabinets and maintain the height of the tile to line up with the rest of the backsplash. This actually presented a very nice and cohesive look, especially since the opposite side has a wing wall to the left of the refrigerator.
- We used “L-shaped” corner sinks instead of the rectangular ones set on an angle. This gave us more of the legs of the triangles versus the hypotenuse, which allowed for the two dishwashers, and the pullout utensil canisters and spice pullouts while still keeping the 3-drawer cabinets on either side of the range (by the sinks). The old island had the recess for stools which the family never used. By extending the width of the island 6” and utilizing this leg space, we were able to fit 18”-deep cabinets on this side – adding lots of accessible storage. The family can now work simultaneously on the dairy side (the side with the fridge) and the meat side (opposite) without getting in each other’s way. We separated the cooking by using the range oven for the meat and a built-in microwave in the base cabinet. The wall oven with built-in microwave on top is for dairy.
- Corner sinks opened up the middle area for a wider range – we went from a 30” to a 36”. Removing all the wall cabinets (on the range wall) made a big difference. That opened up the entire space while adding some visual impact. (Not pictured: We also made the cabinets directly opposite the range wall tall and removed the countertop, resulting in more room for rollouts and even more storage!) The kitchen now has more storage than it did before.
- We ended up painting the ceiling of the kitchen into the hallway that leads to the foyer. The living and dining rooms were separated by a soffit, so that became a natural boundary. We kept the tile in the kitchen by stopping it short of the hallway and lining it up with the pantry wall. This creates a border between the breakfast area and family room. The rest of the existing wood floors were refinished to refresh and make the hue darker. We also painted a dark accent wall and carried it into the breakfast area to make the rooms look deeper.
- The in-the-way column housed plumbing and couldn’t be moved. We still built cabinets in that spot – we just had to build a chase inside it to conceal the pipes. There was still plenty of room for new storage. We also took the cabinets all the way to the ceiling. The continuous tall cabinets added a functional elegance to the space.
THE RENEWED SPACE
The client’s long-awaited dream of a better kosher kitchen has finally been achieved, beautifully combining enhanced storage solutions with adherence to the family’s orthodox dietary laws. The kitchen’s standout feature, an expanded island, now offers a spacious and efficient workspace. This allows several family members to cook together comfortably, without the inconvenience of bumping into each other, ensuring a harmonious and productive cooking environment.
 Drury Design
THE SETUP
Multiple ovens, multiple workspaces, multiple sinks – when you think about it, non-jewish kitchens have been adapting the criteria of kosher kitchens for years.
Gladys’ clients in West Rogers Park are Orthodox Jewish. The house they bought already had a kosher kitchen – it just wasn’t done that well. It needed some more things to be duplicated for the dairy side and the meat side. Plus, it was dark and the configuration wasn’t very conducive for a family of eight.
It was time for a remodel.
Design Objectives
Improve kosher kitchen
Add more storage in the island
Better lighting
More open, lighter feel
Change the wood floor in the kitchen to tile
THE REMODEL
Design Challenges
- We had originally planned on removing a wing wall by the breakfast area. During demolition, we learned it contained a support beam.
- The kitchen is a substantial size, but having two sinks, dishwashers, and ovens presented a challenge – how do we fit it all in and make it flow with the storage still accessible near the work areas?
Where do you stop the materials for the new space? - -- The right tile, paint, lighting, etc. would be needed to make the remodeled area cohesive with the rest of the main floor.
- An existing column limited cabinet options and thus, storage capacity. Could we conceal it without disrupting the cabinetry flow?
Design Solutions
- We had to keep the wing wall, but decided to continue the tile on the sides of the cabinets and maintain the height of the tile to line up with the rest of the backsplash. This actually presented a very nice and cohesive look, especially since the opposite side has a wing wall to the left of the refrigerator.
- We used “L-shaped” corner sinks instead of the rectangular ones set on an angle. This gave us more of the legs of the triangles versus the hypotenuse, which allowed for the two dishwashers, and the pullout utensil canisters and spice pullouts while still keeping the 3-drawer cabinets on either side of the range (by the sinks). The old island had the recess for stools which the family never used. By extending the width of the island 6” and utilizing this leg space, we were able to fit 18”-deep cabinets on this side – adding lots of accessible storage. The family can now work simultaneously on the dairy side (the side with the fridge) and the meat side (opposite) without getting in each other’s way. We separated the cooking by using the range oven for the meat and a built-in microwave in the base cabinet. The wall oven with built-in microwave on top is for dairy.
- Corner sinks opened up the middle area for a wider range – we went from a 30” to a 36”. Removing all the wall cabinets (on the range wall) made a big difference. That opened up the entire space while adding some visual impact. (Not pictured: We also made the cabinets directly opposite the range wall tall and removed the countertop, resulting in more room for rollouts and even more storage!) The kitchen now has more storage than it did before.
- We ended up painting the ceiling of the kitchen into the hallway that leads to the foyer. The living and dining rooms were separated by a soffit, so that became a natural boundary. We kept the tile in the kitchen by stopping it short of the hallway and lining it up with the pantry wall. This creates a border between the breakfast area and family room. The rest of the existing wood floors were refinished to refresh and make the hue darker. We also painted a dark accent wall and carried it into the breakfast area to make the rooms look deeper.
- The in-the-way column housed plumbing and couldn’t be moved. We still built cabinets in that spot – we just had to build a chase inside it to conceal the pipes. There was still plenty of room for new storage. We also took the cabinets all the way to the ceiling. The continuous tall cabinets added a functional elegance to the space.
THE RENEWED SPACE
The client’s long-awaited dream of a better kosher kitchen has finally been achieved, beautifully combining enhanced storage solutions with adherence to the family’s orthodox dietary laws. The kitchen’s standout feature, an expanded island, now offers a spacious and efficient workspace. This allows several family members to cook together comfortably, without the inconvenience of bumping into each other, ensuring a harmonious and productive cooking environment.
 Drury Design
THE SETUP
Multiple ovens, multiple workspaces, multiple sinks – when you think about it, non-jewish kitchens have been adapting the criteria of kosher kitchens for years.
Gladys’ clients in West Rogers Park are Orthodox Jewish. The house they bought already had a kosher kitchen – it just wasn’t done that well. It needed some more things to be duplicated for the dairy side and the meat side. Plus, it was dark and the configuration wasn’t very conducive for a family of eight.
It was time for a remodel.
Design Objectives
Improve kosher kitchen
Add more storage in the island
Better lighting
More open, lighter feel
Change the wood floor in the kitchen to tile
THE REMODEL
Design Challenges
- We had originally planned on removing a wing wall by the breakfast area. During demolition, we learned it contained a support beam.
- The kitchen is a substantial size, but having two sinks, dishwashers, and ovens presented a challenge – how do we fit it all in and make it flow with the storage still accessible near the work areas?
Where do you stop the materials for the new space? - -- The right tile, paint, lighting, etc. would be needed to make the remodeled area cohesive with the rest of the main floor.
- An existing column limited cabinet options and thus, storage capacity. Could we conceal it without disrupting the cabinetry flow?
Design Solutions
- We had to keep the wing wall, but decided to continue the tile on the sides of the cabinets and maintain the height of the tile to line up with the rest of the backsplash. This actually presented a very nice and cohesive look, especially since the opposite side has a wing wall to the left of the refrigerator.
- We used “L-shaped” corner sinks instead of the rectangular ones set on an angle. This gave us more of the legs of the triangles versus the hypotenuse, which allowed for the two dishwashers, and the pullout utensil canisters and spice pullouts while still keeping the 3-drawer cabinets on either side of the range (by the sinks). The old island had the recess for stools which the family never used. By extending the width of the island 6” and utilizing this leg space, we were able to fit 18”-deep cabinets on this side – adding lots of accessible storage. The family can now work simultaneously on the dairy side (the side with the fridge) and the meat side (opposite) without getting in each other’s way. We separated the cooking by using the range oven for the meat and a built-in microwave in the base cabinet. The wall oven with built-in microwave on top is for dairy.
- Corner sinks opened up the middle area for a wider range – we went from a 30” to a 36”. Removing all the wall cabinets (on the range wall) made a big difference. That opened up the entire space while adding some visual impact. (Not pictured: We also made the cabinets directly opposite the range wall tall and removed the countertop, resulting in more room for rollouts and even more storage!) The kitchen now has more storage than it did before.
- We ended up painting the ceiling of the kitchen into the hallway that leads to the foyer. The living and dining rooms were separated by a soffit, so that became a natural boundary. We kept the tile in the kitchen by stopping it short of the hallway and lining it up with the pantry wall. This creates a border between the breakfast area and family room. The rest of the existing wood floors were refinished to refresh and make the hue darker. We also painted a dark accent wall and carried it into the breakfast area to make the rooms look deeper.
- The in-the-way column housed plumbing and couldn’t be moved. We still built cabinets in that spot – we just had to build a chase inside it to conceal the pipes. There was still plenty of room for new storage. We also took the cabinets all the way to the ceiling. The continuous tall cabinets added a functional elegance to the space.
THE RENEWED SPACE
The client’s long-awaited dream of a better kosher kitchen has finally been achieved, beautifully combining enhanced storage solutions with adherence to the family’s orthodox dietary laws. The kitchen’s standout feature, an expanded island, now offers a spacious and efficient workspace. This allows several family members to cook together comfortably, without the inconvenience of bumping into each other, ensuring a harmonious and productive cooking environment.
 Drury Design
THE SETUP
Multiple ovens, multiple workspaces, multiple sinks – when you think about it, non-jewish kitchens have been adapting the criteria of kosher kitchens for years.
Gladys’ clients in West Rogers Park are Orthodox Jewish. The house they bought already had a kosher kitchen – it just wasn’t done that well. It needed some more things to be duplicated for the dairy side and the meat side. Plus, it was dark and the configuration wasn’t very conducive for a family of eight.
It was time for a remodel.
Design Objectives
Improve kosher kitchen
Add more storage in the island
Better lighting
More open, lighter feel
Change the wood floor in the kitchen to tile
THE REMODEL
Design Challenges
- We had originally planned on removing a wing wall by the breakfast area. During demolition, we learned it contained a support beam.
- The kitchen is a substantial size, but having two sinks, dishwashers, and ovens presented a challenge – how do we fit it all in and make it flow with the storage still accessible near the work areas?
Where do you stop the materials for the new space? - -- The right tile, paint, lighting, etc. would be needed to make the remodeled area cohesive with the rest of the main floor.
- An existing column limited cabinet options and thus, storage capacity. Could we conceal it without disrupting the cabinetry flow?
Design Solutions
- We had to keep the wing wall, but decided to continue the tile on the sides of the cabinets and maintain the height of the tile to line up with the rest of the backsplash. This actually presented a very nice and cohesive look, especially since the opposite side has a wing wall to the left of the refrigerator.
- We used “L-shaped” corner sinks instead of the rectangular ones set on an angle. This gave us more of the legs of the triangles versus the hypotenuse, which allowed for the two dishwashers, and the pullout utensil canisters and spice pullouts while still keeping the 3-drawer cabinets on either side of the range (by the sinks). The old island had the recess for stools which the family never used. By extending the width of the island 6” and utilizing this leg space, we were able to fit 18”-deep cabinets on this side – adding lots of accessible storage. The family can now work simultaneously on the dairy side (the side with the fridge) and the meat side (opposite) without getting in each other’s way. We separated the cooking by using the range oven for the meat and a built-in microwave in the base cabinet. The wall oven with built-in microwave on top is for dairy.
- Corner sinks opened up the middle area for a wider range – we went from a 30” to a 36”. Removing all the wall cabinets (on the range wall) made a big difference. That opened up the entire space while adding some visual impact. (Not pictured: We also made the cabinets directly opposite the range wall tall and removed the countertop, resulting in more room for rollouts and even more storage!) The kitchen now has more storage than it did before.
- We ended up painting the ceiling of the kitchen into the hallway that leads to the foyer. The living and dining rooms were separated by a soffit, so that became a natural boundary. We kept the tile in the kitchen by stopping it short of the hallway and lining it up with the pantry wall. This creates a border between the breakfast area and family room. The rest of the existing wood floors were refinished to refresh and make the hue darker. We also painted a dark accent wall and carried it into the breakfast area to make the rooms look deeper.
- The in-the-way column housed plumbing and couldn’t be moved. We still built cabinets in that spot – we just had to build a chase inside it to conceal the pipes. There was still plenty of room for new storage. We also took the cabinets all the way to the ceiling. The continuous tall cabinets added a functional elegance to the space.
THE RENEWED SPACE
The client’s long-awaited dream of a better kosher kitchen has finally been achieved, beautifully combining enhanced storage solutions with adherence to the family’s orthodox dietary laws. The kitchen’s standout feature, an expanded island, now offers a spacious and efficient workspace. This allows several family members to cook together comfortably, without the inconvenience of bumping into each other, ensuring a harmonious and productive cooking environment.
 Drury Design
THE SETUP
Multiple ovens, multiple workspaces, multiple sinks – when you think about it, non-jewish kitchens have been adapting the criteria of kosher kitchens for years.
Gladys’ clients in West Rogers Park are Orthodox Jewish. The house they bought already had a kosher kitchen – it just wasn’t done that well. It needed some more things to be duplicated for the dairy side and the meat side. Plus, it was dark and the configuration wasn’t very conducive for a family of eight.
It was time for a remodel.
Design Objectives
Improve kosher kitchen
Add more storage in the island
Better lighting
More open, lighter feel
Change the wood floor in the kitchen to tile
THE REMODEL
Design Challenges
- We had originally planned on removing a wing wall by the breakfast area. During demolition, we learned it contained a support beam.
- The kitchen is a substantial size, but having two sinks, dishwashers, and ovens presented a challenge – how do we fit it all in and make it flow with the storage still accessible near the work areas?
Where do you stop the materials for the new space? - -- The right tile, paint, lighting, etc. would be needed to make the remodeled area cohesive with the rest of the main floor.
- An existing column limited cabinet options and thus, storage capacity. Could we conceal it without disrupting the cabinetry flow?
Design Solutions
- We had to keep the wing wall, but decided to continue the tile on the sides of the cabinets and maintain the height of the tile to line up with the rest of the backsplash. This actually presented a very nice and cohesive look, especially since the opposite side has a wing wall to the left of the refrigerator.
- We used “L-shaped” corner sinks instead of the rectangular ones set on an angle. This gave us more of the legs of the triangles versus the hypotenuse, which allowed for the two dishwashers, and the pullout utensil canisters and spice pullouts while still keeping the 3-drawer cabinets on either side of the range (by the sinks). The old island had the recess for stools which the family never used. By extending the width of the island 6” and utilizing this leg space, we were able to fit 18”-deep cabinets on this side – adding lots of accessible storage. The family can now work simultaneously on the dairy side (the side with the fridge) and the meat side (opposite) without getting in each other’s way. We separated the cooking by using the range oven for the meat and a built-in microwave in the base cabinet. The wall oven with built-in microwave on top is for dairy.
- Corner sinks opened up the middle area for a wider range – we went from a 30” to a 36”. Removing all the wall cabinets (on the range wall) made a big difference. That opened up the entire space while adding some visual impact. (Not pictured: We also made the cabinets directly opposite the range wall tall and removed the countertop, resulting in more room for rollouts and even more storage!) The kitchen now has more storage than it did before.
- We ended up painting the ceiling of the kitchen into the hallway that leads to the foyer. The living and dining rooms were separated by a soffit, so that became a natural boundary. We kept the tile in the kitchen by stopping it short of the hallway and lining it up with the pantry wall. This creates a border between the breakfast area and family room. The rest of the existing wood floors were refinished to refresh and make the hue darker. We also painted a dark accent wall and carried it into the breakfast area to make the rooms look deeper.
- The in-the-way column housed plumbing and couldn’t be moved. We still built cabinets in that spot – we just had to build a chase inside it to conceal the pipes. There was still plenty of room for new storage. We also took the cabinets all the way to the ceiling. The continuous tall cabinets added a functional elegance to the space.
THE RENEWED SPACE
The client’s long-awaited dream of a better kosher kitchen has finally been achieved, beautifully combining enhanced storage solutions with adherence to the family’s orthodox dietary laws. The kitchen’s standout feature, an expanded island, now offers a spacious and efficient workspace. This allows several family members to cook together comfortably, without the inconvenience of bumping into each other, ensuring a harmonious and productive cooking environment.
Sponsored
Sunbury, OH

J.Holderby - Renovations
Franklin County's Leading General Contractors - 2X Best of Houzz!
 StarStyle® Productions, LLC
In My Sister’s Garden-A Wistful Romp through a Drought Resistant Oasis
"Spring is the time of the year, when it is summer in the sun and winter in the shade." - Charles Dickens
One of the great things about growing up on a farm in the boondocks is that your tribe is your family. We five siblings were as thick as thieves as we climbed trees, worked the fields, pulled fences, drove tractors, branded cattle, and planted the spring garden. We played, we quarreled, and we dug in the dirt together. By the time May arrived, we ached to get our hands grubby in the vegetable patch. Waiting for the vegetables to sprout and be harvested taught us patience and responsibility. Of course, Mom’s beautiful flower gardens would already be abloom by this time of year getting us into constant trouble because we were forever picking bouquets not only for her, but, for teachers, 4-H leaders, and Sunday masses.
As we grew into adults, our love of the earth grew as well. Following in the big shoes of my Father, my brother continued the family tradition of being a farmer and has one of the most beautiful vineyards in the county. Our Mother’s love of gardening instructed the gardens of her girls.
Recently I walked with my sister Debbie through her eclectic garden. There is a saying that “you can take the girl out of the country, but you can never take the country out of the girl.” With Deb, she’s never left the land where we were born. She is a country cowgirl through and through. She’s always adorned with her cowboy hat, rodeo belt buckle, and boots! She hunts, fishes, grows her food, and would have relished being a pioneer in the 1870’s.
Debbie and her husband are the ultimate recyclers and re-purposers. With their barnyard of adopted animals-pigs, goats, donkeys, chickens, even Texas long horns at one time, all the weeds and garden cuttings feed the animals and the manure is then recycled back to the garden. They collect rooftop rain runoff in used wine barrels then pipe it to a storage tank to help with summer watering. It’s never enough, but every drop helps. Their garden art includes rusted plows, wooden swings, a plethora of homemade birdhouses, multiple fountains made from found objects, wagon wheels, antlers, the cutest country chicken coop you ever did see, and a sleeping shed outfitted with a bear hide, antique fishing gear, pinecones, and found treasures of every sort. From their patio they watch the wildlife on their hillside property-deer, bobcats, raccoons, turkeys, skunks, and the occasional mountain lion. It’s a playful, restful garden setting, albeit with a watchful eye for the rattlesnakes that enjoy this oasis as well.
What I love about Debbie’s garden is how it reflects her unique personality, her love of the land, and her admiration for the history of the Wild West. As we ambled around the property with her happy dogs in the lead, the songbirds sang, a bevy of butterflies delicately landed on her flowers, and the koi in the pond swam to the surface to greet me. This time together immersed in this sustainable landscape nurtured my soul and brought our childhood memories to vivid life. Although we grow the same plants, shrubs, trees, and succulents in both of our yards, our designs and esthetics are completely different. And that’s the beauty of creating a garden, making it your own special paradise where you can find peace, tranquility, and restoration in tandem with the wild kingdom.
TIPS TO CREATING YOUR OWN UNIQUE PLAYGROUND
⎫ Don’t over-think it! Make lists of everything you enjoy in a garden then do it.
⎫ Be conservation conscious as well as considerate of nature.
⎫ Be creative. Think swathes, angles, circles, and flow. There is nothing more boring than a box.
⎫ The hardscape must include natural materials: rocks, gravel, barn wood, shells, or anything meaningful to you.
⎫ Instead of buying art, repurpose childhood toys, old sinks, even a commode overflowing with flowers can be comical.
⎫ Be playful. When you are going to spend time in the outdoors, you want to enjoy yourself. Allow your personality to shine.
⎫ Add surprises, secret gardens, hedged rooms, anything that will enhance the whimsical and magical element to your garden experience.
⎫ Lead to a focal point or view with meandering paths, walkways, and trails.
⎫ Invite the pollinators; bees, butterflies, and birds by providing housing, nectar flowers, protection, fountains, and ponds.
⎫ Mix it up. For a drought resistant garden, consider an array of beautiful succulents, cactus, lavender, bulbs, iris, daylily, geraniums, and other plants that will add color, texture, form, and structure, yet require little maintenance and minimal water.
⎫ A potager, pots, or area designated for edibles and herbs is a must have. There is nothing better than picking your dinner from your own property.
⎫ Benches, swings, lounge chairs, umbrellas, and places to unwind, watch the clouds, savor sunsets, and marvel at the stars make your garden your home.
`
What’s so fun about our family gardening experience is the sharing that we all do in giving each other clips, snips, cuttings, bulbs, and volunteers. We grow the same specimens and as we stroll and admire our handiwork, we can’t remember who gave what to whom first.
As I said farewell to my sister, she handed me a hand-painted tin filled with blooming echeveria from clippings I had given her a few years before. We shared a laugh.
Little did I know this would be the last walk with my sister. She died just a few days before this article was published. She would have loved to have seen her passion in print. Debbie may you garden in the heavens. The circle of life continues.
Happy Trails to you, Debbie. Until we meet again...
Read more: https://www.lam
orindaweekly.com/archive/issue1006/Digging-Deep-with-Cynthia-Brian.html
Scribd: https://www.scribd.com/doc/313702488/My-Sister-s-Garden-Digging-Deep-With-Cynthia-Brian
Radio Broadcast: http://www.voiceamerica.com/episode/92459/porn-alarm-effective-apologies-in-my-sisters-garden
Press Pass: http://vapresspass.com/2016/05/24/in-my-sisters-garden-a-wistful-romp-through-a-drought-resistant-oasis-by-cynthia-brian/
©2016
Cynthia Brian
The Goddess Gardener
Starstyle® Productions, llc
Cynthia@GoddessGardener.com
www.GoddessGardener.com
925-377-STAR
Tune into Cynthia’s Radio show at www.StarStyleRadio.com
I am available as a speaker, designer, and consultant.
Keywords: Debbie’s garden my sister’s garden, a cowboy western garden, drought resistant plants, cynthia brian, lamorinda weekly, starstyle, goddess gardener.
 Drury Design
THE SETUP
Multiple ovens, multiple workspaces, multiple sinks – when you think about it, non-jewish kitchens have been adapting the criteria of kosher kitchens for years.
Gladys’ clients in West Rogers Park are Orthodox Jewish. The house they bought already had a kosher kitchen – it just wasn’t done that well. It needed some more things to be duplicated for the dairy side and the meat side. Plus, it was dark and the configuration wasn’t very conducive for a family of eight.
It was time for a remodel.
Design Objectives
Improve kosher kitchen
Add more storage in the island
Better lighting
More open, lighter feel
Change the wood floor in the kitchen to tile
THE REMODEL
Design Challenges
- We had originally planned on removing a wing wall by the breakfast area. During demolition, we learned it contained a support beam.
- The kitchen is a substantial size, but having two sinks, dishwashers, and ovens presented a challenge – how do we fit it all in and make it flow with the storage still accessible near the work areas?
Where do you stop the materials for the new space? - -- The right tile, paint, lighting, etc. would be needed to make the remodeled area cohesive with the rest of the main floor.
- An existing column limited cabinet options and thus, storage capacity. Could we conceal it without disrupting the cabinetry flow?
Design Solutions
- We had to keep the wing wall, but decided to continue the tile on the sides of the cabinets and maintain the height of the tile to line up with the rest of the backsplash. This actually presented a very nice and cohesive look, especially since the opposite side has a wing wall to the left of the refrigerator.
- We used “L-shaped” corner sinks instead of the rectangular ones set on an angle. This gave us more of the legs of the triangles versus the hypotenuse, which allowed for the two dishwashers, and the pullout utensil canisters and spice pullouts while still keeping the 3-drawer cabinets on either side of the range (by the sinks). The old island had the recess for stools which the family never used. By extending the width of the island 6” and utilizing this leg space, we were able to fit 18”-deep cabinets on this side – adding lots of accessible storage. The family can now work simultaneously on the dairy side (the side with the fridge) and the meat side (opposite) without getting in each other’s way. We separated the cooking by using the range oven for the meat and a built-in microwave in the base cabinet. The wall oven with built-in microwave on top is for dairy.
- Corner sinks opened up the middle area for a wider range – we went from a 30” to a 36”. Removing all the wall cabinets (on the range wall) made a big difference. That opened up the entire space while adding some visual impact. (Not pictured: We also made the cabinets directly opposite the range wall tall and removed the countertop, resulting in more room for rollouts and even more storage!) The kitchen now has more storage than it did before.
- We ended up painting the ceiling of the kitchen into the hallway that leads to the foyer. The living and dining rooms were separated by a soffit, so that became a natural boundary. We kept the tile in the kitchen by stopping it short of the hallway and lining it up with the pantry wall. This creates a border between the breakfast area and family room. The rest of the existing wood floors were refinished to refresh and make the hue darker. We also painted a dark accent wall and carried it into the breakfast area to make the rooms look deeper.
- The in-the-way column housed plumbing and couldn’t be moved. We still built cabinets in that spot – we just had to build a chase inside it to conceal the pipes. There was still plenty of room for new storage. We also took the cabinets all the way to the ceiling. The continuous tall cabinets added a functional elegance to the space.
THE RENEWED SPACE
The client’s long-awaited dream of a better kosher kitchen has finally been achieved, beautifully combining enhanced storage solutions with adherence to the family’s orthodox dietary laws. The kitchen’s standout feature, an expanded island, now offers a spacious and efficient workspace. This allows several family members to cook together comfortably, without the inconvenience of bumping into each other, ensuring a harmonious and productive cooking environment.
 Drury Design
THE SETUP
Multiple ovens, multiple workspaces, multiple sinks – when you think about it, non-jewish kitchens have been adapting the criteria of kosher kitchens for years.
Gladys’ clients in West Rogers Park are Orthodox Jewish. The house they bought already had a kosher kitchen – it just wasn’t done that well. It needed some more things to be duplicated for the dairy side and the meat side. Plus, it was dark and the configuration wasn’t very conducive for a family of eight.
It was time for a remodel.
Design Objectives
Improve kosher kitchen
Add more storage in the island
Better lighting
More open, lighter feel
Change the wood floor in the kitchen to tile
THE REMODEL
Design Challenges
- We had originally planned on removing a wing wall by the breakfast area. During demolition, we learned it contained a support beam.
- The kitchen is a substantial size, but having two sinks, dishwashers, and ovens presented a challenge – how do we fit it all in and make it flow with the storage still accessible near the work areas?
Where do you stop the materials for the new space? - -- The right tile, paint, lighting, etc. would be needed to make the remodeled area cohesive with the rest of the main floor.
- An existing column limited cabinet options and thus, storage capacity. Could we conceal it without disrupting the cabinetry flow?
Design Solutions
- We had to keep the wing wall, but decided to continue the tile on the sides of the cabinets and maintain the height of the tile to line up with the rest of the backsplash. This actually presented a very nice and cohesive look, especially since the opposite side has a wing wall to the left of the refrigerator.
- We used “L-shaped” corner sinks instead of the rectangular ones set on an angle. This gave us more of the legs of the triangles versus the hypotenuse, which allowed for the two dishwashers, and the pullout utensil canisters and spice pullouts while still keeping the 3-drawer cabinets on either side of the range (by the sinks). The old island had the recess for stools which the family never used. By extending the width of the island 6” and utilizing this leg space, we were able to fit 18”-deep cabinets on this side – adding lots of accessible storage. The family can now work simultaneously on the dairy side (the side with the fridge) and the meat side (opposite) without getting in each other’s way. We separated the cooking by using the range oven for the meat and a built-in microwave in the base cabinet. The wall oven with built-in microwave on top is for dairy.
- Corner sinks opened up the middle area for a wider range – we went from a 30” to a 36”. Removing all the wall cabinets (on the range wall) made a big difference. That opened up the entire space while adding some visual impact. (Not pictured: We also made the cabinets directly opposite the range wall tall and removed the countertop, resulting in more room for rollouts and even more storage!) The kitchen now has more storage than it did before.
- We ended up painting the ceiling of the kitchen into the hallway that leads to the foyer. The living and dining rooms were separated by a soffit, so that became a natural boundary. We kept the tile in the kitchen by stopping it short of the hallway and lining it up with the pantry wall. This creates a border between the breakfast area and family room. The rest of the existing wood floors were refinished to refresh and make the hue darker. We also painted a dark accent wall and carried it into the breakfast area to make the rooms look deeper.
- The in-the-way column housed plumbing and couldn’t be moved. We still built cabinets in that spot – we just had to build a chase inside it to conceal the pipes. There was still plenty of room for new storage. We also took the cabinets all the way to the ceiling. The continuous tall cabinets added a functional elegance to the space.
THE RENEWED SPACE
The client’s long-awaited dream of a better kosher kitchen has finally been achieved, beautifully combining enhanced storage solutions with adherence to the family’s orthodox dietary laws. The kitchen’s standout feature, an expanded island, now offers a spacious and efficient workspace. This allows several family members to cook together comfortably, without the inconvenience of bumping into each other, ensuring a harmonious and productive cooking environment.
 Veritas Products
There are a lot of ways to make our homes look fun and appealing to others.
A wall makeover of the interior of the house can be one of the steps that will create a beautiful and attractive house design.
There is no need to make it a new construction project, so you don't need to spend more money to impress your friends. Redecorating is a job that must be done right the first time, because, lets face it, we really don't want to have to go back and do it again.
If you already have a home built, them maybe when you look around, some parts are incomplete. Look at your current style, maybe it is out date, or you want to apply a new style of the decoration for your rooms.
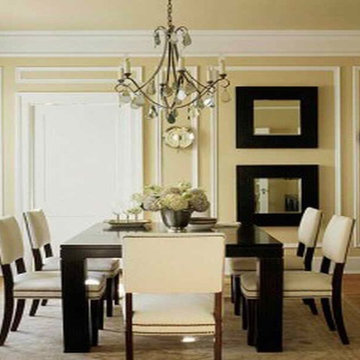
Most existing homes usually have flat smooth walls or bare ceilings. As you know, the ceiling and the wall are both space that must not be wasted, especially in home decorating. You can dress up the walls and the ceilings by adding some Spectis Ceiling Medallions, Squares, Rings or Wall Molding Designs.
The Spectis molding can be placed at the wall, the ceiling, or maybe at the limit of the ceiling and the wall. For the moldings that are located in the wall, it is better to apply molding that is thin and has a neutral color.
It will make the room feel warm and inviting without reducing the color scheme impression of the room. You can put the shape of the wall moldings that have layers in it. Place it randomly, vertical and horizontal as you wish.
On the other hand, you can also make it surround your picture frame or a mirror on the wall. The appropriate wall molding accents will give you a lot of benefits. You can make your decorated wall as the focal point of the room.
This is a cheap decoration because it does not take much to do and its fast and easy to install with Premium adhesive.

 Advance Design Studio, Ltd.
Mike and Michelle of Lake Barrington knew they needed extra space. Their home was becoming too crowded for their family with blossoming teenagers, so a basement renovation offered the perfect solution for more space for the kids and more room to entertain for the adults.
“Our project consisted of expanding our laundry room, putting in a first floor wet bar so we had adult space upstairs, while also renovating our basement for a family-friendly and teen-functional area as well,” Michelle says.
They found Advance Design Studio through a neighbor who gave a glowing recommendation, giving Michelle and Mike the confidence they needed to move forward with a major home renovation. They felt like they knew Advance Design before they even worked together. When they met with the owner Todd Jurs and designer Nicole Ryan, Mike and Michelle knew they were getting a trustworthy, dependable team that could create the project they had been dreaming about for 7 years.
Having virtually no natural light to work with, one of the biggest design challenges was creating a basement that did not feel dark and depressing. The Advance team got to work creating architectural archways and custom detailed dry-stack stone columns artfully designed into the space, adding a dramatic element that made the space feel less like a basement or more like a relaxing family room. Color 3D renderings were created to portray what the space would look like so Mike and Michelle could visualize the space in advance.
Detailed trim and crown moldings grace the built in buffet and wet bar making for an amazingly functional space that lacks nothing in style and visual interest. Cherry wood cabinetry by Dura Supreme is featured in the space with a “Cocoa Brown” finish and includes beautiful mirrored glass doors embellished with unique elliptical mullion details. A built-in microwave, dishwasher and mini fridge add practicality to the ample entertainment mecca. An under mounted sink finishes the space joined with a intricate mosaic tile backsplash and “Ventisca Polished” quartz countertops.
The basement is absolutely perfect for hosting friends and family with expertly designed key areas such as a game space for the kids, a movie area for the family, an ample workout room with luxurious full bath, and even built in wine storage. The family absolutely loves the new basement living space, and has already enjoyed numerous family movie nights and sleep-overs with friends.
While custom cabinets made by Dura Supreme were used to create unique spaces that lived up to Mike and Michelle’s expectations., heated flooring under the 16”x16” “Mongolian Spring” tile was installed giving all tiled areas of the basement a much cozier feel, eliminating that cold hard surface most of us hate in our basements!
The new basement must-have requirement list included a new bath space, which was incorporated adjacent to the work out room. The sleek shower door and cabinets in the new bathroom make guests and family feel like they are in an elegant hotel. The new guest bath features 4”x36” “Silver Screen” honed marble tile in a brick pattern on the shower walls and 2”x2” “Chenille” limestone tile in a hexagon mosaic pattern on the shower floor.
“I came in with very specific requirements for our three project areas,” Michelle says. “There was not one time that I felt like I was asking for something that was not going to turn out how I anticipated.”
Tying in multiple rooms during a renovation if you have can do it makes a lot of sense and saves money in the long run. A fully functional laundry room as well was a must on this family’s wish list. Michelle wanted to add space to the existing cramped and awkward laundry room, and Mike wanted to make sure they could still park a car in the garage. Reconfiguring interior walls required borrowing unused space cleverly from the garage in order to enlarge the laundry room space.
Drawers under the stairs added beautiful hidden storage created almost magically out of dead space. White painted Dura Supreme cabinets bring additional light into the small space; while the 16”x16” cleft slate tile flooring provides excellent contrast and the naturally earthy feel Michelle wanted. Quartz countertops with a 3”x12” “Debut Dew” subway tile backsplash add elegance to the now upliftingly bright laundry room.
The extra space makes doing laundry much more pleasurable and the added storage is a great for all those little things like winter hats and gloves, umbrellas and the like. “The Advance Design project team was phenomenal to work with,” Michelle says. “They came in, shared the plans with us and walked us through the expectations. We always knew what was coming next.”
Converting an existing closet space, the wet bar upstairs was challenging because they wanted a functional area that didn’t look or feel like cabinets just sticking out of a closet. So the Advance team transformed this ordinary closet space into a stunning wet bar that architecturally appears as if it’s always been there. Traditional, elegant hand carved custom molding matching the adjacent fireplace ties the new entertainment bar area in nicely with the existing family room and kitchen area.
Featuring a built in wine refrigerator, Dura Supreme cabinetry in deep cherry wood elegantly displays wine bottles and etched glass mullion doors that fill with soft light in the evening hours. Cambria “Windermere” quartz countertops with a sophisticated hammered copper sink and a glimmering backsplash round out the stunning wet bar. Hosting parties and family functions has become much more enjoyable now that they have a dedicated beverage serving area large enough to include hors devours.
All three projects were designed and constructed together at the same time, making for a cohesive project that was administered smoothly and easily both for the design team and for the family. Disruption to the home was minimal as each phase was completed in each project conclusively, and design and meeting time for the homeowner was efficient and organized making for an enjoyable process.
“Advance Design was great to work with,” Michelle says. “I would highly recommend them to anyone considering a home improvement project. They took the time at the beginning to understand our needs, our budget, and our vision for our home. The field team was great, attentive, on time, cleaned up each day and made the overall experience very positive. We couldn't be happier with the finished product.”
With the help of our talented, award winning design team you can create the basement, laundry room, or any other home renovation that you have been dreaming of. With our “Common Sense Remodeling” approach, the process of renovating you home has never been easier. Contact us today at 847-836-2600 or schedule an appointment to talk with us about that kitchen remodeling project.
Joe Nowak
 Interior and Architecture
In hospitality design, no space carries as much weight or expectation as the hotel lobby. It is the handshake, the welcome note, the first frame of the guest experience. Within seconds of entering, guests form opinions not just about the space, but about the brand, the service, and the story. At its best, the hotel lobby isn’t just a transitional space; it’s a destination. A well-designed lobby invites, orients, calms, and excites, all at once. It acts as a stage where luxury is not merely seen, but sensed. In this article, Ar. Anil Badan, Founder and Principal Architect at Studio B Architects, shares how hotel lobbies go beyond functionality, becoming emotive spaces that leave a lasting impression from the very first step inside.
Designing for Emotion, Not Just Function
Every guest arrives with a subconscious expectation. Whether stepping into a serene resort or an urban boutique hotel, the lobby must immediately align with the tone of their stay. Lighting, for instance, isn’t just about visibility; it’s about setting mood. A warm, ambient glow suggests calm sophistication, while bold, sculptural fixtures can convey modern opulence. Seating arrangements must strike a balance between social energy and quiet retreat. Natural materials, wood, stone, and linen evoke authenticity and calm. These elements work collectively to influence how a guest feels within the first few moments.
Branding Through Architecture
A hotel lobby is also a silent storyteller. Every finish, curve, and fixture communicates something about the brand's identity. For us, design isn’t about imitation, it’s about interpretation. We interpret the soul of the property and translate it into spatial language. For instance, a curved wall might reference local landscapes. A palette of coastal hues might evoke a regional narrative. In doing so, the lobby becomes more than a threshold; it becomes an anchor of place and memory.
Fluidity, Function, and Flow
In luxury hospitality, the lobby is often a hybrid zone, part reception, part lounge, part co-working, part café. Designing for this fluidity means considering flow and flexibility. Wayfinding should be intuitive. Transitions between zones must be seamless, often achieved through changes in flooring, ceiling heights, or lighting zones. Materials must withstand footfall yet retain elegance. Every element must serve both beauty and purpose.
Ultimately, a successful hotel lobby lingers in memory long after check-out. It is not just a space, it is a statement! One that says: you’ve arrived. And in a world where hospitality is no longer just about service, but about feeling seen, understood, and inspired, the lobby is where that promise begins!
 Charlie & Co. Design, Ltd
Design: Charlie & Co. Design | Builder: John Kraemer & Sons | Interiors & Photo Styling: Lucy Interior Design | Susan Gilmore Photography
Example of an ornate freestanding bathtub design in Minneapolis with an undermount sink, flat-panel cabinets, medium tone wood cabinets and beige walls
Example of an ornate freestanding bathtub design in Minneapolis with an undermount sink, flat-panel cabinets, medium tone wood cabinets and beige walls
33