
Search results for "Solving" in Home Design Ideas
 Mottram Architecture
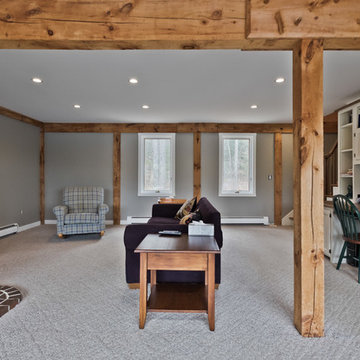
Timber frame homes offer unique challenges during a remodel. What often makes them beautiful and attractive to most homeowners, also makes them challenging for space requirements.
Context: The lovely couple that owned this home were struggling with some interesting floor plan challenges that just didn't work for their family. The loved the beautiful timbers and woodwork of their home, but the dramatically sloping ceilings on the second floor, particularly in the bathroom, just didn't work for this 1 1/2 bath home. Needing to use the skylight to approach the toilet was a less then ideal scenario. Although the bathroom footprint was more then adequate, the sloped ceiling only made half of the space useable. Check out the Before/After post on our blog to see the photos of the house pre-renovation. As much as they loved all the wood features in their home, another challenge they had was light. The wood ceiling made everything inside the house darker, even with a fantastic array of south facing windows, there were spaces in the home that felt dark and small. When they contacted us they wanted to know how could they make their brighter and more inviting, were there solutions to the 2nd floor sloped ceiling issues, and if they were going to do all of this work, how could they make their home more comfortable and efficient. A nagging water leak in the upstairs bathroom spurred them into action and here is how we solved their dilemma.
Conclusion: First, we added a little dormer to the rear of the house so we could get full headroom in nearly all of the upstairs bathroom! Then we decided to extend that dormer one more timber bay over to create a walk in closet with natural light and plenty of space. Since we were contemplating energy efficiency, we resolved a nagging issue that is present in a lot of timber frame construction, air tightness. Commonly found in timber frame construction, fiberglass insulation is installed in the rafter bays and board ceilings are installed over top. Unfortunately, board ceilings are anything but air tight, and fiberglass insulation needs to be in an airtight cavity for maximum effectiveness. So we were able to solve two issues at the same time for this homeowner. We removed the board ceiling and fiberglass insulation, we dense packed the rafter bays with cellulose insulation, and installed sheetrock in place of the boards. The boards were salvaged for re-use by the homeowner, and the space and light quality was dramatically improved. Some may think that losing the board ceiling took something away from the space, but what you'll see in the pictures is that it highly accentuates the heavy timbers and really makes them stand out in a beautiful way. Now with this added airtightness, better insulation, and brighter space, the homeowner hardly runs their wood stove, and it's so quiet in the space, an added bonus from changing the insulation. It became necessary to also add a sheetrock ceiling to the living room to hide the plumbing from the new bathroom layout above. Changing this ceiling gave the homeowner some real quality lighting that was lacking in the living room before. The brighter ceiling and new lighting layout completely transforms the living room into a space you want to hang out, even though the layout didn't change at all. When the homeowner saw the finished spaces she said "I can't believe this is my house, I want to live in this house"
Energy Efficiency: I touched a little on the efficiency above, but like all projects done with Mottram Architecture, we always want to leave you with a little extra. Timber frame construction with board ceilings and fiberglass insulation are notoriously leaky! If you want to know what we think about fiberglass insulation, check our our blog post on Why Fiberglass Insulation Sucks. By installing cellulose insulation and covering it with sheetrock we were able to greatly reduce the heat flowing out of this home. It not only improves cashflow it improves the comfort level in the space. Who wants to sit in their living room and feel a draft? Let us remind you, we are not saying cellulose insulation is an air barrier, we use the sheetrock to help with that, but it does significantly reduce the air flow over fiberglass insulation. And when we reduce the airflow, we reduce the heat flow. And when we reduce the heat flow, we reduce the need to re-heat that drafty air from outside. When it comes to energy efficiency the first and best place to start is air infiltration. We greatly reduced the air infiltration with the new insulation, but we also added a hat and warm boots. What I mean by that is, we improved the insulation in the roof, and we installed insulation in the basement. Maybe it's a silly analogy, but when you think about keeping warm, we always start with the hat and boots! With sustainability in mind, the next project will be to add a deck to the front of this house with rain catchment barrels from the metal roof. They are planning to plant a garden in the spring and the rain catchment system will help to irrigate the new garden.
Builder: East Shore Builders
Photographer: Michael Eric Berube
 Mottram Architecture
Timber frame homes offer unique challenges during a remodel. What often makes them beautiful and attractive to most homeowners, also makes them challenging for space requirements.
Context: The lovely couple that owned this home were struggling with some interesting floor plan challenges that just didn't work for their family. The loved the beautiful timbers and woodwork of their home, but the dramatically sloping ceilings on the second floor, particularly in the bathroom, just didn't work for this 1 1/2 bath home. Needing to use the skylight to approach the toilet was a less then ideal scenario. Although the bathroom footprint was more then adequate, the sloped ceiling only made half of the space useable. Check out the Before/After post on our blog to see the photos of the house pre-renovation. As much as they loved all the wood features in their home, another challenge they had was light. The wood ceiling made everything inside the house darker, even with a fantastic array of south facing windows, there were spaces in the home that felt dark and small. When they contacted us they wanted to know how could they make their brighter and more inviting, were there solutions to the 2nd floor sloped ceiling issues, and if they were going to do all of this work, how could they make their home more comfortable and efficient. A nagging water leak in the upstairs bathroom spurred them into action and here is how we solved their dilemma.
Conclusion: First, we added a little dormer to the rear of the house so we could get full headroom in nearly all of the upstairs bathroom! Then we decided to extend that dormer one more timber bay over to create a walk in closet with natural light and plenty of space. Since we were contemplating energy efficiency, we resolved a nagging issue that is present in a lot of timber frame construction, air tightness. Commonly found in timber frame construction, fiberglass insulation is installed in the rafter bays and board ceilings are installed over top. Unfortunately, board ceilings are anything but air tight, and fiberglass insulation needs to be in an airtight cavity for maximum effectiveness. So we were able to solve two issues at the same time for this homeowner. We removed the board ceiling and fiberglass insulation, we dense packed the rafter bays with cellulose insulation, and installed sheetrock in place of the boards. The boards were salvaged for re-use by the homeowner, and the space and light quality was dramatically improved. Some may think that losing the board ceiling took something away from the space, but what you'll see in the pictures is that it highly accentuates the heavy timbers and really makes them stand out in a beautiful way. Now with this added airtightness, better insulation, and brighter space, the homeowner hardly runs their wood stove, and it's so quiet in the space, an added bonus from changing the insulation. It became necessary to also add a sheetrock ceiling to the living room to hide the plumbing from the new bathroom layout above. Changing this ceiling gave the homeowner some real quality lighting that was lacking in the living room before. The brighter ceiling and new lighting layout completely transforms the living room into a space you want to hang out, even though the layout didn't change at all. When the homeowner saw the finished spaces she said "I can't believe this is my house, I want to live in this house"
Energy Efficiency: I touched a little on the efficiency above, but like all projects done with Mottram Architecture, we always want to leave you with a little extra. Timber frame construction with board ceilings and fiberglass insulation are notoriously leaky! If you want to know what we think about fiberglass insulation, check our our blog post on Why Fiberglass Insulation Sucks. By installing cellulose insulation and covering it with sheetrock we were able to greatly reduce the heat flowing out of this home. It not only improves cashflow it improves the comfort level in the space. Who wants to sit in their living room and feel a draft? Let us remind you, we are not saying cellulose insulation is an air barrier, we use the sheetrock to help with that, but it does significantly reduce the air flow over fiberglass insulation. And when we reduce the airflow, we reduce the heat flow. And when we reduce the heat flow, we reduce the need to re-heat that drafty air from outside. When it comes to energy efficiency the first and best place to start is air infiltration. We greatly reduced the air infiltration with the new insulation, but we also added a hat and warm boots. What I mean by that is, we improved the insulation in the roof, and we installed insulation in the basement. Maybe it's a silly analogy, but when you think about keeping warm, we always start with the hat and boots! With sustainability in mind, the next project will be to add a deck to the front of this house with rain catchment barrels from the metal roof. They are planning to plant a garden in the spring and the rain catchment system will help to irrigate the new garden.
Builder: East Shore Builders
Photographer: Michael Eric Berube
 DiGiacomo Homes & Renovation
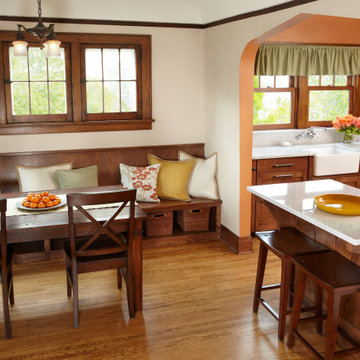
A 1929 urban Bungalow well preserved save for the kitchen. The kitchen had been twice remodeled – most recently in the 1970’s by previous homeowners. Our clients wished to restore the original Craftsman-era charm to their kitchen (which adjoined the dining room and was visible from the front entry). At the same time, our clients were looking to increase the functionality of the kitchen space and create additional seating for frequent dinner guests. Our clients’ tight budget restricted the finish pallet to rather simple options, but that simplicity became the project’s strength.
Custom cabinets (using FSC-certified maple) were designed with simple flat panel doors and fabricated using dove-tail joinery as was typical of Bungalow cabinetry. Red oak, stained to match the home’s original millwork was used to construct the cabinet lowers and a new bench to create continuity with the remainder of the home. Carrara marble, authentic to the 1920s period, was used to aesthetically brighten the space. Cabinet uppers were enameled in a historically appropriate cream hue to compliment the countertop stone. The backsplash tile was selected to pay tribute to the home’s original 1929 wall color – found beneath several layers of wallpaper during demolition. Walls were painted a bold, but historically, accurate, copper color (a perfect compliment the red oak cabinetry and trim). Lighting issues in this north-facing kitchen were addressed using hidden over-cabinet lights, task-specific under-cabinet lighting, sink cans and several period fixtures – hand fashioned by a local artisan specializing in historic reproductions to complete the bungalow look and honor the Arts-n-Crafts practice of using local craftsman. Simple and practical…in budget and in period.
To solve the seating issue, a new bench (with storage below) was custom built to span the 12’ dining room wall – allowing plenty of room for family and guests alike during dinner. The larger kitchen approach provided room for a new serve-through with counter seating where snacks, homework, and spill-over food prep can occur. No new square footage… six new seats!
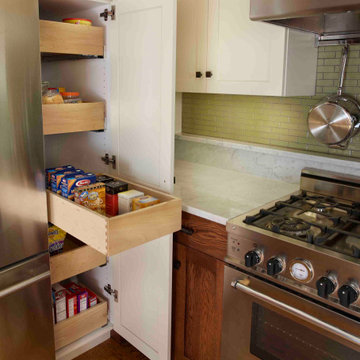
To solve storage needs, the base cabinets in the kitchen were designed 3” deeper than standard 24” box cabinets and a new 28” deep pantry added allowing some of the wasted space at the center of this square kitchen to be used more efficiently. A tall backsplash capped with a 4” ledge provides a place for all of the inevitable items that clutter valuable counter real estate (cooking timers, seasoning jars, etc …) Specialized, task-specific storage - the highlight of Bungalow kitchens - was incorporated throughout: 1) An angled cabinet, built to accommodate an awkward side door location, now holds a trash can, tin-lined recycling bins, and a knife drawer; 2) A difficult deep corner necessitated by the 28” deep fridge gave rise to open cookbook shelves, an appliance cubby and narrow, and a deep pantry with full-extension roll-out trays; 3) An open pot & pan rack, built-in wall spice cabinet, kid-height microwave (a special request from our clients), customized cell-phone/electronics storage, built-in chalk board message center, and new rear entry coat/backpack storage with cork board complete the net storage gain. No new square footage … lots of new, innovative, high-functioning storage.
Find the right local pro for your project
 Fidelity General Contractors Inc.
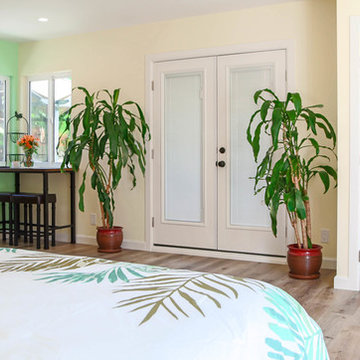
What is an ADU: Accessory Dwelling Units:
An accessory dwelling unit, usually just called an ADU, is a secondary housing unit on a single-family residential lot. The term “accessory dwelling unit” is a institutional-sounding name, but it’s the most commonly-used term across the country to describe this type of housing. While the full name is a mouthful, the shorthand “ADU” is better.
ADUs vary in their physical form quite a bit, as there are detached ADU, attached ADU, second story ADU (above garage or work shop), addition ADU, internal ADU.
IMPORTANT:
There’s simply too few permitted ADUs to make a real difference in the housing stock. But, even if they aren’t going to solve all a city’s problems, they may help homeowners solve some of their problems. The most common motivation for ADU development is rental income potential, followed by the prospect of flexible living space for multigenerational households.
We at FIDELITY GENERAL CONTRACTORS, providing a single point of contact to homeowners interested in this product, from conceptual stage including plans, city legwork, project managing of the construction stage including assistance with material purchase and other coordination, all the way to completion.
(this project showcases a detached ADU, 400 SQ.)
 DiGiacomo Homes & Renovation
A 1929 urban Bungalow well preserved save for the kitchen. The kitchen had been twice remodeled – most recently in the 1970’s by previous homeowners. Our clients wished to restore the original Craftsman-era charm to their kitchen (which adjoined the dining room and was visible from the front entry). At the same time, our clients were looking to increase the functionality of the kitchen space and create additional seating for frequent dinner guests. Our clients’ tight budget restricted the finish pallet to rather simple options, but that simplicity became the project’s strength.
Custom cabinets (using FSC-certified maple) were designed with simple flat panel doors and fabricated using dove-tail joinery as was typical of Bungalow cabinetry. Red oak, stained to match the home’s original millwork was used to construct the cabinet lowers and a new bench to create continuity with the remainder of the home. Carrara marble, authentic to the 1920s period, was used to aesthetically brighten the space. Cabinet uppers were enameled in a historically appropriate cream hue to compliment the countertop stone. The backsplash tile was selected to pay tribute to the home’s original 1929 wall color – found beneath several layers of wallpaper during demolition. Walls were painted a bold, but historically, accurate, copper color (a perfect compliment the red oak cabinetry and trim). Lighting issues in this north-facing kitchen were addressed using hidden over-cabinet lights, task-specific under-cabinet lighting, sink cans and several period fixtures – hand fashioned by a local artisan specializing in historic reproductions to complete the bungalow look and honor the Arts-n-Crafts practice of using local craftsman. Simple and practical…in budget and in period.
To solve the seating issue, a new bench (with storage below) was custom built to span the 12’ dining room wall – allowing plenty of room for family and guests alike during dinner. The larger kitchen approach provided room for a new serve-through with counter seating where snacks, homework, and spill-over food prep can occur. No new square footage… six new seats!
To solve storage needs, the base cabinets in the kitchen were designed 3” deeper than standard 24” box cabinets and a new 28” deep pantry added allowing some of the wasted space at the center of this square kitchen to be used more efficiently. A tall backsplash capped with a 4” ledge provides a place for all of the inevitable items that clutter valuable counter real estate (cooking timers, seasoning jars, etc …) Specialized, task-specific storage - the highlight of Bungalow kitchens - was incorporated throughout: 1) An angled cabinet, built to accommodate an awkward side door location, now holds a trash can, tin-lined recycling bins, and a knife drawer; 2) A difficult deep corner necessitated by the 28” deep fridge gave rise to open cookbook shelves, an appliance cubby and narrow, and a deep pantry with full-extension roll-out trays; 3) An open pot & pan rack, built-in wall spice cabinet, kid-height microwave (a special request from our clients), customized cell-phone/electronics storage, built-in chalk board message center, and new rear entry coat/backpack storage with cork board complete the net storage gain. No new square footage … lots of new, innovative, high-functioning storage.
 Anthony J. Vallée
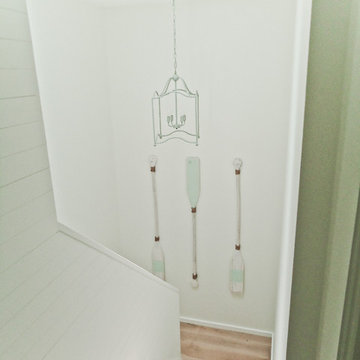
The client was excited to purchase a home in the beautiful resort of Sandestin, but was not pleased with the dark interiors, heavy mouldings, tile floors, dated fixtures and heavy feel of the interior of the home. We solved their problems by completely renovating the interiors. Ceilings were raised, floors were replaced, cabinetry and fixtures were replaced and a problem area in the living room was solved. They now have the open, clean, airy beach home of their dreams and I couldn't be more pleased with how this home turned out for them.
anthony vallee
 Mottram Architecture
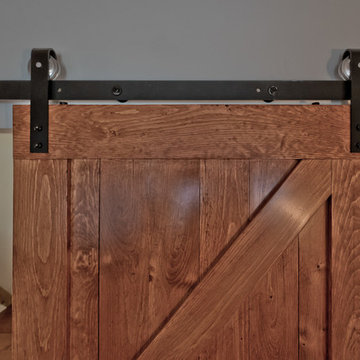
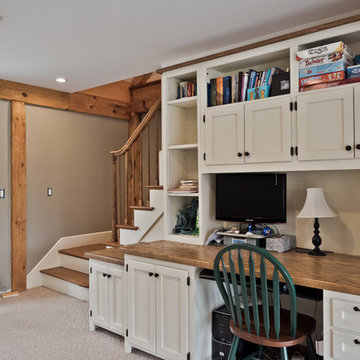
This custom piece of cabinetry was specially designed and built by the homeowner's father!
Timber frame homes offer unique challenges during a remodel. What often makes them beautiful and attractive to most homeowners, also makes them challenging for space requirements.
Context: The lovely couple that owned this home were struggling with some interesting floor plan challenges that just didn't work for their family. The loved the beautiful timbers and woodwork of their home, but the dramatically sloping ceilings on the second floor, particularly in the bathroom, just didn't work for this 1 1/2 bath home. Needing to use the skylight to approach the toilet was a less then ideal scenario. Although the bathroom footprint was more then adequate, the sloped ceiling only made half of the space useable. Check out the Before/After post on our blog to see the photos of the house pre-renovation. As much as they loved all the wood features in their home, another challenge they had was light. The wood ceiling made everything inside the house darker, even with a fantastic array of south facing windows, there were spaces in the home that felt dark and small. When they contacted us they wanted to know how could they make their brighter and more inviting, were there solutions to the 2nd floor sloped ceiling issues, and if they were going to do all of this work, how could they make their home more comfortable and efficient. A nagging water leak in the upstairs bathroom spurred them into action and here is how we solved their dilemma.
Conclusion: First, we added a little dormer to the rear of the house so we could get full headroom in nearly all of the upstairs bathroom! Then we decided to extend that dormer one more timber bay over to create a walk in closet with natural light and plenty of space. Since we were contemplating energy efficiency, we resolved a nagging issue that is present in a lot of timber frame construction, air tightness. Commonly found in timber frame construction, fiberglass insulation is installed in the rafter bays and board ceilings are installed over top. Unfortunately, board ceilings are anything but air tight, and fiberglass insulation needs to be in an airtight cavity for maximum effectiveness. So we were able to solve two issues at the same time for this homeowner. We removed the board ceiling and fiberglass insulation, we dense packed the rafter bays with cellulose insulation, and installed sheetrock in place of the boards. The boards were salvaged for re-use by the homeowner, and the space and light quality was dramatically improved. Some may think that losing the board ceiling took something away from the space, but what you'll see in the pictures is that it highly accentuates the heavy timbers and really makes them stand out in a beautiful way. Now with this added airtightness, better insulation, and brighter space, the homeowner hardly runs their wood stove, and it's so quiet in the space, an added bonus from changing the insulation. It became necessary to also add a sheetrock ceiling to the living room to hide the plumbing from the new bathroom layout above. Changing this ceiling gave the homeowner some real quality lighting that was lacking in the living room before. The brighter ceiling and new lighting layout completely transforms the living room into a space you want to hang out, even though the layout didn't change at all. When the homeowner saw the finished spaces she said "I can't believe this is my house, I want to live in this house"
Energy Efficiency: I touched a little on the efficiency above, but like all projects done with Mottram Architecture, we always want to leave you with a little extra. Timber frame construction with board ceilings and fiberglass insulation are notoriously leaky! If you want to know what we think about fiberglass insulation, check our our blog post on Why Fiberglass Insulation Sucks. By installing cellulose insulation and covering it with sheetrock we were able to greatly reduce the heat flowing out of this home. It not only improves cashflow it improves the comfort level in the space. Who wants to sit in their living room and feel a draft? Let us remind you, we are not saying cellulose insulation is an air barrier, we use the sheetrock to help with that, but it does significantly reduce the air flow over fiberglass insulation. And when we reduce the airflow, we reduce the heat flow. And when we reduce the heat flow, we reduce the need to re-heat that drafty air from outside. When it comes to energy efficiency the first and best place to start is air infiltration. We greatly reduced the air infiltration with the new insulation, but we also added a hat and warm boots. What I mean by that is, we improved the insulation in the roof, and we installed insulation in the basement. Maybe it's a silly analogy, but when you think about keeping warm, we always start with the hat and boots! With sustainability in mind, the next project will be to add a deck to the front of this house with rain catchment barrels from the metal roof. They are planning to plant a garden in the spring and the rain catchment system will help to irrigate the new garden.
Builder: East Shore Builders
Photographer: Michael Eric Berube
Michael Eric Berube, Maine Virtual Home Tours
 Home & Garden Design, Atlanta - Danna Cain, ASLA
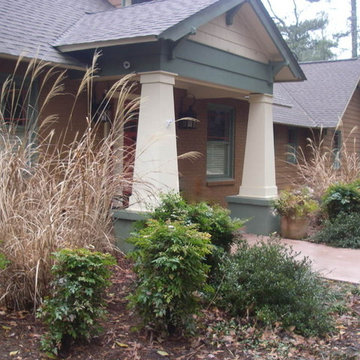
The ornamental grasses at the front door accent the Mission style architecture of this home. The owner enjoys how they dance with the slightest breeze so we don't prune them back until early spring when they are ready to resprout again. All plants here are drought tolerant and very low maintenance. Why plant drought tolerant plants in a landscape that has drainage problems? Well, Atlanta always seems to be too rainy or too dry. We've solved both problems on this site.
Photographer: Danna Cain, Home & Garden Design, Inc.

 Quality By Design Home Renovations
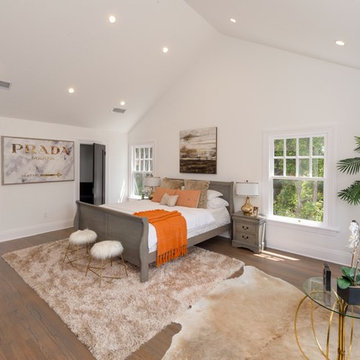
Transitional dark wood floor and brown floor bedroom photo in Los Angeles with white walls
 Bluestem Remodeling
"Brandon Stengel - www.farmkidstudios.com”
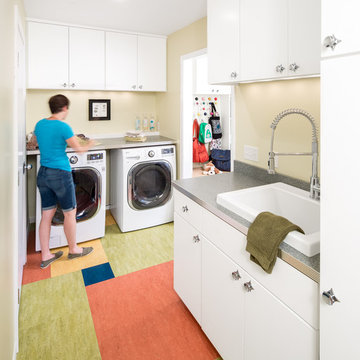
Dedicated laundry room - mid-sized mid-century modern l-shaped multicolored floor dedicated laundry room idea in Minneapolis with a drop-in sink, flat-panel cabinets, white cabinets, beige walls and a side-by-side washer/dryer
Dedicated laundry room - mid-sized mid-century modern l-shaped multicolored floor dedicated laundry room idea in Minneapolis with a drop-in sink, flat-panel cabinets, white cabinets, beige walls and a side-by-side washer/dryer
 Organized Living
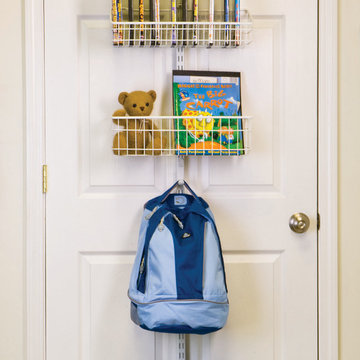
Food, movies, shoes, or a mixture of all three. You can hang anything on the Organized Living Over The Door system. It's a great way to maximize space in any room and gives you easy access to the items you use most often.
 The Brooklyn Studio
This Cobble Hill Brownstone for a family of five is a fun and captivating design, the perfect blend of the wife’s love of English country style and the husband’s preference for modern. The young power couple, her the co-founder of Maisonette and him an investor, have three children and a dog, requiring that all the surfaces, finishes and, materials used throughout the home are both beautiful and durable to make every room a carefree space the whole family can enjoy.
The primary design challenge for this project was creating both distinct places for the family to live their day to day lives and also a whole floor dedicated to formal entertainment. The clients entertain large dinners on a monthly basis as part of their profession. We solved this by adding an extension on the Garden and Parlor levels. This allowed the Garden level to function as the daily family operations center and the Parlor level to be party central. The kitchen on the garden level is large enough to dine in and accommodate a large catering crew.
On the parlor level, we created a large double parlor in the front of the house; this space is dedicated to cocktail hour and after-dinner drinks. The rear of the parlor is a spacious formal dining room that can seat up to 14 guests. The middle "library" space contains a bar and facilitates access to both the front and rear rooms; in this way, it can double as a staging area for the parties.
The remaining three floors are sleeping quarters for the family and frequent out of town guests. Designing a row house for private and public functions programmatically returns the building to a configuration in line with its original design.
This project was published in Architectural Digest.
Photography by Sam Frost

 Unpatterned
First we helped this family make their traditional first floor their own by adding a custom painted entry design, designer wallpaper, fresh paint on the fireplace and bookshelves, and a dining accent wall. We even helped procure furniture, including the custom designed record cabinet and commissioned painting and completed the look with hands-on styling. Less than a year later we were back for a master suite overhaul, including a new floor plan, an expanded master bath, his/hers closets, a fresh look for the hall bath, some bedroom, nursery and office decor and new floors throughout. From space planning problem solving, to project management during construction, and down to styling the details, Unpatterned was involved every step of the way.
FUN FACT The master bathroom used to just have a pedestal sink and no door!
Photography 2nd Floor: Dustin Halleck/1st Floor: Michael Kaskel
 User
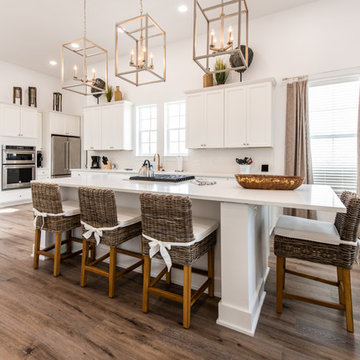
UserExample of a beach style l-shaped dark wood floor and brown floor kitchen design in Austin with an undermount sink, shaker cabinets, white cabinets, white backsplash, stainless steel appliances, an island and white countertops
 Peruri Design Company
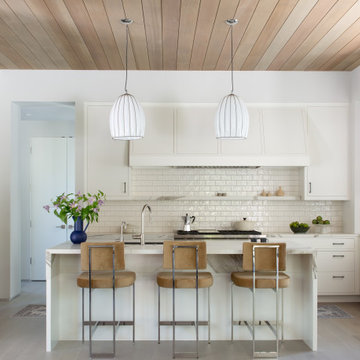
Kitchen - contemporary u-shaped medium tone wood floor, brown floor and wood ceiling kitchen idea in San Francisco with a farmhouse sink, flat-panel cabinets, white cabinets, marble countertops, white backsplash, subway tile backsplash, paneled appliances, an island and multicolored countertops
 Tamara Heather Interior Design, LLC
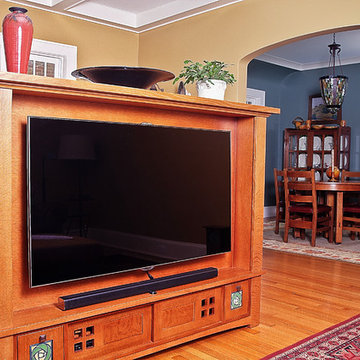
Tamara Heather Interior Design solved the challenge of where to put the televison in this 1920's home, by designing a custom Arts and Crafts style TV/media cabinet that acts as a room divider and defines the entry. Additional updates included a new coffered ceiling, lighting and new paint colors throughout the home.
Stephen Wilfong Photography

 Jay Sifford
James Golden's Federal Twist garden. Photo by Jay Sifford.
Photo of a landscaping in Philadelphia.
Photo of a landscaping in Philadelphia.
33