
Search results for "Strategically" in Home Design Ideas

 TOC design & construction inc.
DESIGNED BY TOC design
CONSTRUCTION BY TOC design & Construction inc.
PHOTOS BY : Tania Scardellato
I was fortunate to have a young family approach me in desperate need to renovate there only 3 piece bathroom. This space was In dire need of a remodel, with old brown wall to wall tiles and a dated bulky yellow brown single sink vanity.
Storage was a must, lighting a necessity, and proper accessibility to the shower bath area.
We had a tight budget to respect, but a full gut of this bathroom was required. And a good thing too, once we started doing the demolition we noticed that mildew and rotting floors and walls had accumulated throughout the years. Doing it right the first time is no joke when dealing with water and electrical issues.
We discarded all reminisce of old and built from scratch, new walls, new plumbing, new electrical ,new insulation and a new window, a new fan that actually exhausted outside ( I say this laughing as you would be amazed at how many fans are installed but don’t exhaust outside, and you the client would never know unless you go inside the attic space.
Once all the hard stuff was done, the rest is just a matter of smart design. If you have a small bathroom here are some tips to guide you.
10 tips for making a small bathroom feel larger
Is your tiny bathroom cramping your functionality and style, leaving you longing for the enormous bathrooms gracing the pages of design magazines? Even if your bathroom is a fraction of the size, all it takes is some design savvy to make the most of the space you have. Consider these 10 smart tips that will help your bathroom look, feel and function like those larger contenders.
1-Get creative with corners
Space is at a premium in small bathrooms, so it's important to maximize every inch. Corners, for example, provide extra space for shelving, storage units and even hooks. Get creative and install unique design solutions that are not only functional, but also eye-catching. If you love the airiness of floating cabinets, add baskets or decorative boxes under for extra storage. If you are installing floating cabinets insure that they are installed securely to studs or plywood at wall.
2- Let solid colors shine
Busy patterns have a shrinking effect and make small bathrooms seem even smaller. Conversely, light natural hues make a space feel more open. If you're itching to get creative with design, experiment with textures but keep overpowering patterns to a minimum. Tone on tone is the best to achieve this.
3 - Maximize your bathtub
A bathtub takes up a significant portion of the room, but modern, compact options with curved basins, can make the tub feel larger when in use, all while conserving space.
4 - Select a smaller faucet
A faucet is jewelry for the bathroom. And just as accessories can overpower an outfit, a big bulky faucet isn't flattering in a small bath. Single-handle designs conserve counter space, while a wall-mount installation frees it up all together and can create quite the wow-factor, if the budget can accommodate the required changes to plumbing behind the wall.
5 - Make vanity storage simple
If you're in a storage war with your small bathroom, you're not alone in the battle. Toiletries and personal supplies without a place to call home only add clutter and chaos. Store smart with a space-saving vanity, the dual sink vanity shown here, looks quite simple, but in reality it has 4 sets of full extension drawers, and the vanity tower adds extra storage without overpowering the use of space.
6 - Show off the shower
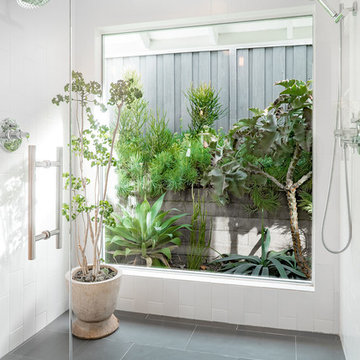
Shower curtains may be pretty, but they interrupt the visual flow of a bathing space and make it feel significantly smaller. In bathrooms with small footprints, opt for a clear glass sliding shower door that doesn't require the clearance of one with a hinged design. Or as shown in this design and for fraction less expensive a half hinged panel installed on a fixed tempered glass panel. If you're embarking on a big remodel, create the illusion of more space by using same tile in the shower that's used throughout; instead of seeing them as two separate zones, the eye will read them as one.
7 - Discover the treasure of hidden storage
Work with a contractor, and you just might find some serious storage potential hidden behind your walls. Whether it's utilizing space between the studs for shallow shelving or a creating a small linen closet by annexing space from an adjacent room, even small additions can make a big difference.
8 - Focal Point
Tile is a beautiful, durable addition to any bathroom. For dainty spaces, consider installing tile at a diagonal to accentuate the focal point or as in this bathroom I used an oversized textured pattern to bring depth to the space at the window wall.
9 - Choose the right lights
Strategically install light to reflect and brighten a small bathroom to make it appear larger. Recessed lighting is an affordable solution for tiny rooms, offering ample light while taking up little space. Wall sconces alongside a mirror also reflect off the walls and make a room feel bright and airy. I always recommend going with LED lighting at 2800 to 3000K.
10 – Accessorize
This is your time to shine in your decorating skills, have fun with your towels, you can change the color scheme daily just by adding pops of color in your accessories, make sure to get items that serve a dual purpose, like baskets, boxes they can always be used as hampers, storing of towels and even a nice display for your guest.
 Mom's Design Build
Spacecrafting
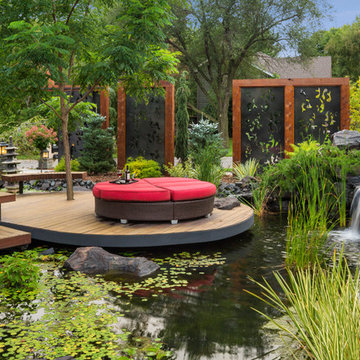
Design ideas for an asian front yard stone water fountain landscape in Minneapolis.
Design ideas for an asian front yard stone water fountain landscape in Minneapolis.
 Astro Design Inc.
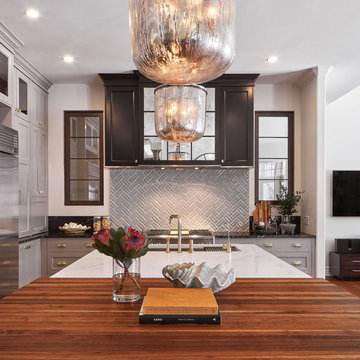
The design concept balances a fine line between modern masculinity and feminine elegance. Mixing metals and materials were key to achieving a timeless aesthetic throughout the room.
Walnut butcher block table supported on a custom Brass leg frame.
Watermark Faucet
Brass Hardware
Downsview Hood
House Brand Cabinetry
Visual Comfort Lights
Monogram Appliances
Sink: Galley Worksattion
Beveled Herringbone Clay tiles
All above is supplied via Astro Design Centre
Design by Astro
Photo by JVL Photography
Ottawa, Ontario Canada
Find the right local pro for your project
 Solda Pools Ltd.
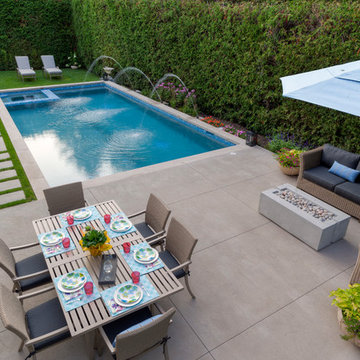
Inspiration for a mid-sized contemporary backyard concrete paver and rectangular lap hot tub remodel in Toronto
 FOUR POINT DESIGN BUILD INC
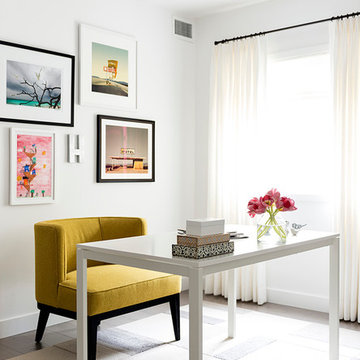
DESIGN BUILD REMODEL | Home Office Transformation | FOUR POINT DESIGN BUILD INC.
This space was once a child's bedroom and now doubles as a professional home photography post production office and a dressing room for graceful ballerinas!
This completely transformed 3,500+ sf family dream home sits atop the gorgeous hills of Calabasas, CA and celebrates the strategic and eclectic merging of contemporary and mid-century modern styles with the earthy touches of a world traveler!
AS SEEN IN Better Homes and Gardens | BEFORE & AFTER | 10 page feature and COVER | Spring 2016
To see more of this fantastic transformation, watch for the launch of our NEW website and blog THE FOUR POINT REPORT, where we celebrate this and other incredible design build journey! Launching September 2016.
Photography by Riley Jamison
#ballet #photography #remodel #LAinteriordesigner #builder #dreamproject #oneinamillion
 Drury Design
THE SETUP
Once these empty nest homeowners decided to stay put, they knew a new kitchen was in order. Passionate about cooking, entertaining, and hosting holiday gatherings, they found their existing kitchen inadequate. The space, with its traditional style and outdated layout, was far from ideal. They longed for an elegant, timeless kitchen that was not only show-stopping but also functional, seamlessly catering to both their daily routines and special occasions with friends and family. Another key factor was its future appeal to potential buyers, as they’re ready to enjoy their new kitchen while also considering downsizing in the future.
Design Objectives:
Create a more streamlined, open space
Eliminate traditional elements
Improve flow for entertaining and everyday use
Omit dated posts and soffits
Include storage for small appliances to keep counters clutter-free
Address mail organization and phone charging concerns
THE REMODEL
Design Challenges:
Compensate for lost storage from omitted wall cabinets
Revise floorplan to feature a single, spacious island
Enhance island seating proximity for a more engaging atmosphere
Address awkward space above existing built-ins
Improve natural light blocked by wall cabinet near the window
Create a highly functional space tailored for entertaining
Design Solutions:
Tall cabinetry and pull-outs maximize storage efficiency
A generous single island promotes seamless flow and ample prep space
Strategic island seating arrangement fosters easy conversation
New built-ins fill arched openings, ensuring a custom, clutter-free look
Replace wall cabinet with lighted open shelves for an airy feel
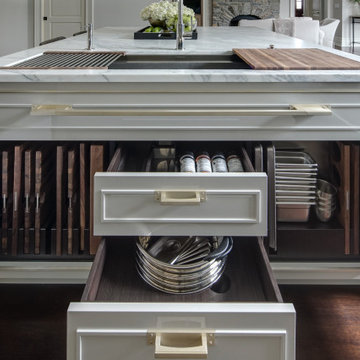
Galley Dresser and Workstation offer impeccable organization and versatility, creating the perfect setup for entertaining with everything easily accessible.
THE RENEWED SPACE
The new kitchen exceeded every expectation, thrilling the clients with its revitalized, expansive design and thoughtful functionality. The transformation brought to life an open space adorned with marble accents, a state-of-the-art steam oven, and the seamless integration of the Galley Dresser, crafting a kitchen not just to be used, but to be cherished. This is more than a culinary space; it’s a new heart of their home, ready to host countless memories and culinary adventures.
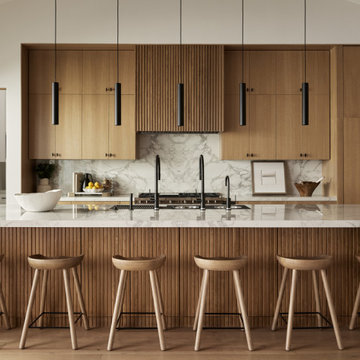
The Galley Sink dresser features many options neatly tucked away into a custom arrangement for ease of access while entertaining.
 Closet Factory
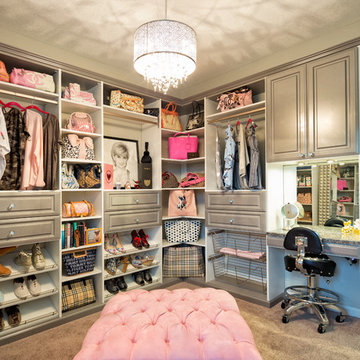
A walk-in closet is a luxurious and practical addition to any home, providing a spacious and organized haven for clothing, shoes, and accessories.
Typically larger than standard closets, these well-designed spaces often feature built-in shelves, drawers, and hanging rods to accommodate a variety of wardrobe items.
Ample lighting, whether natural or strategically placed fixtures, ensures visibility and adds to the overall ambiance. Mirrors and dressing areas may be conveniently integrated, transforming the walk-in closet into a private dressing room.
The design possibilities are endless, allowing individuals to personalize the space according to their preferences, making the walk-in closet a functional storage area and a stylish retreat where one can start and end the day with ease and sophistication.
 Orren Pickell Building Group
**Project Overview**
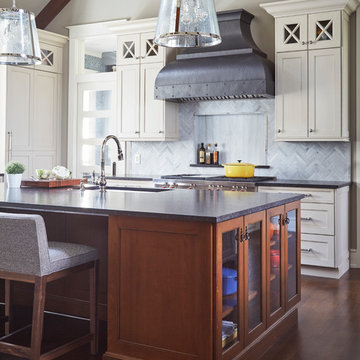
This new construction home built next to a serene lake features a gorgeous, large-scale kitchen that also connects to a bar, home office, breakfast room and great room. The homeowners sought the warmth of traditional styling, updated for today. In addition, they wanted to incorporate unexpected touches that would add personality. Strategic use of furniture details combined with clean lines brings the traditional style forward, making the kitchen feel fresh, new and timeless.
**What Makes This Project Unique?*
Three finishes, including vintage white paint, stained cherry and textured painted gray oak cabinetry, work together beautifully to create a varied, unique space. Above the wall cabinets, glass cabinets with X mullions add interest and decorative storage. Single ovens are tucked in cabinets under a window, and a warming drawer under one perfectly matches the cabinet drawer under the other. Matching furniture-style armoires flank the wall ovens, housing the freezer and a pantry in one and custom designed large scale appliance garage with retractable doors in the other. Other furniture touches can be found on the sink cabinet and range top cabinet that help complete the look. The variety of colors and textures of the stained and painted cabinetry, custom dark finish copper hood, wood ceiling beams, glass cabinets, wood floors and sleek backsplash bring the whole look together.
**Design Challenges*
Even though the space is large, we were challenged by having to work around the two doorways, two windows and many traffic patterns that run through the kitchen. Wall space for large appliances was quickly in short supply. Because we were involved early in the project, we were able to work with the architect to expanded the kitchen footprint in order to make the layout work and get appliance placement just right. We had other architectural elements to work with that we wanted to compliment the kitchen design but also dictated what we could do with the cabinetry. The wall cabinet height was determined based on the beams in the space. The oven wall with furniture armoires was designed around the window with the lake view. The height of the oven cabinets was determined by the window. We were able to use these obstacles and challenges to design creatively and make this kitchen one of a kind.
Photo by MIke Kaskel
 Charlie & Co. Design, Ltd
Spacecrafting Photography
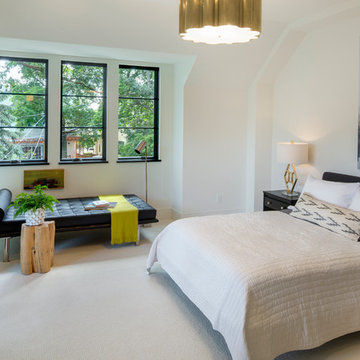
Transitional master carpeted bedroom photo in Minneapolis with white walls
Transitional master carpeted bedroom photo in Minneapolis with white walls
 Wanda Ely Architect Inc.
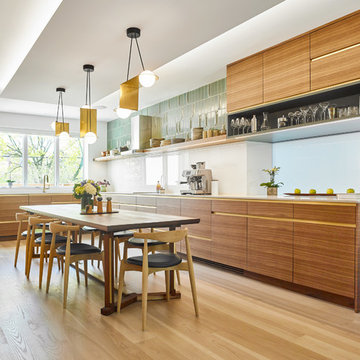
The kitchen is designed for two serious home chefs who often entertain guests for dinner parties. Merging the kitchen and dining room into a singular space was a strategic design decision to both foster their style of ‘chefs table’ entertaining, and also make the most efficient use of valuable floor space - a common consideration in most Toronto homes. The table becomes an island-like surface for additional prep space, and also as the surface upon which the meal is eventually enjoyed.
 Christie's Design Build Remodeling
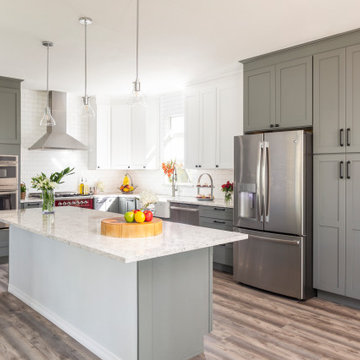
Inspiration for a large modern l-shaped gray floor and light wood floor eat-in kitchen remodel in Denver with a farmhouse sink, shaker cabinets, white backsplash, an island, gray cabinets, quartz countertops, ceramic backsplash, stainless steel appliances and white countertops
 McDonald Remodeling
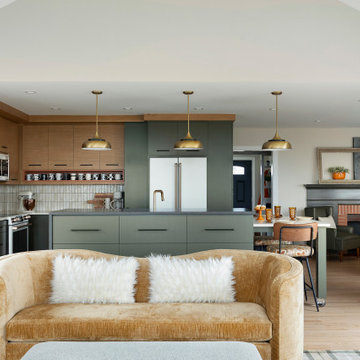
Main floor, kitchen, and dining remodel plus addition replacement by Minneapolis / St. Paul-based McDonald Remodeling. See more examples of our work and learn more at www.mcdonaldremodeling.com
 O’Hara Interiors
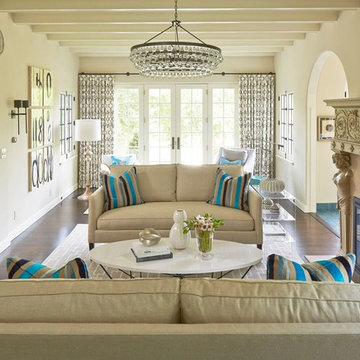
The home’s archways are preserved and the ornate fireplace is showcased through our strategic placement of furnishings that offer a clear view from one end of the home to the other. The original living room ceiling beams were stained dark and stenciled in green paint. To draw attention to the fireplace while preserving the beams, we painted the entire ceiling a light cream tone.
Martha O'Hara Interiors, Interior Design | John Kraemer & Sons, Builder | Troy Thies, Photography | Shannon Gale, Photo Styling
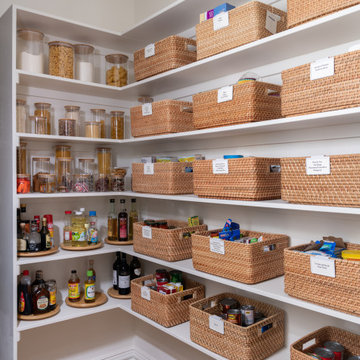
 Nicole Arnold Interiors
This great home in Bent Tree, with stunning golf course views, was a delightful project! Due to unfortunate water damage, we were given the opportunity to redesign a beautiful dining room, kitchen and breakfast area in the coastal style this couple has enjoyed for decades. We were able to embrace all of the things they love: fine materials such as marble, the clean transitional aesthetic and light and bright areas. Our clients’ favorite color, blue, was strategically incorporated throughout the spaces in varying tones to create depth and interest. The kitchen was expanded to ensure functionality and provide oodles of storage. This peaceful and inviting retreat will surely be enjoyed for many years to come.
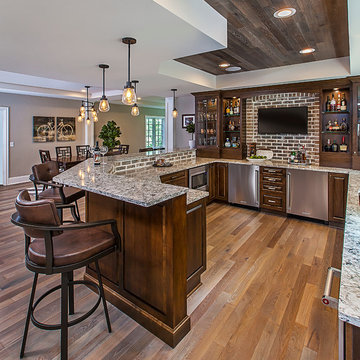
 M.J. Whelan Construction
This Milford French country home’s 2,500 sq. ft. basement transformation is just as extraordinary as it is warm and inviting. The M.J. Whelan design team, along with our clients, left no details out. This luxury basement is a beautiful blend of modern and rustic materials. A unique tray ceiling with a hardwood inset defines the space of the full bar. Brookhaven maple custom cabinets with a dark bistro finish and Cambria quartz countertops were used along with state of the art appliances. A brick backsplash and vintage pendant lights with new LED Edison bulbs add beautiful drama. The entertainment area features a custom built-in entertainment center designed specifically to our client’s wishes. It houses a large flat screen TV, lots of storage, display shelves and speakers hidden by speaker fabric. LED accent lighting was strategically installed to highlight this beautiful space. The entertaining area is open to the billiards room, featuring a another beautiful brick accent wall with a direct vent fireplace. The old ugly steel columns were beautifully disguised with raised panel moldings and were used to create and define the different spaces, even a hallway. The exercise room and game space are open to each other and features glass all around to keep it open to the rest of the lower level. Another brick accent wall was used in the game area with hardwood flooring while the exercise room has rubber flooring. The design also includes a rear foyer coming in from the back yard with cubbies and a custom barn door to separate that entry. A playroom and a dining area were also included in this fabulous luxurious family retreat. Stunning Provenza engineered hardwood in a weathered wire brushed combined with textured Fabrica carpet was used throughout most of the basement floor which is heated hydronically. Tile was used in the entry and the new bathroom. The details are endless! Our client’s selections of beautiful furnishings complete this luxurious finished basement. Photography by Jeff Garland Photography
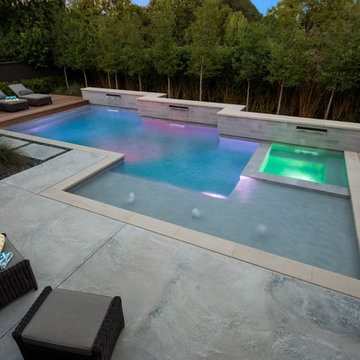
 AquaTerra Outdoors
Mid-sized minimalist backyard concrete and custom-shaped lap hot tub photo in Dallas
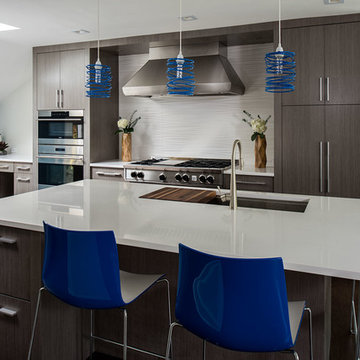
 Amazing Spaces
The prep sink and cooking space are designed to be a social experience and are located close to, and in view of, the family room furniture arrangement. The clean-up area is located in a more private area of the space so that dirty dishes following a party could be stacked out of sight. The refrigerator is centrally located so it can efficiently service both work zones.
Slab wood veneer doors in a textured gloss finish are framed by pilasters forming a cohesive furniture concept throughout the design. White countertops receive waterfall sides in strategic locations and are complimented by white porcelain tile backsplash with a modern wavy texture. Blue pendants, blue counter stools and a blue accent wall satisfy the client’s need for a splash of their favorite color.
The wall between the kitchen and dining area was removed to achieve the open concept that the clients wanted. The existing small kitchen table was replaced by an eating area with stools at the island and a larger, family-friendly dining table. A window was relocated to accommodate a functional cabinet layout.
Ilir Rizaj

 TOC design & construction inc.
DESIGNED BY TOC design
CONSTRUCTION BY TOC design & Construction inc.
PHOTOS BY : Tania Scardellato
I was fortunate to have a young family approach me in desperate need to renovate there only 3 piece bathroom. This space was In dire need of a remodel, with old brown wall to wall tiles and a dated bulky yellow brown single sink vanity.
Storage was a must, lighting a necessity, and proper accessibility to the shower bath area.
We had a tight budget to respect, but a full gut of this bathroom was required. And a good thing too, once we started doing the demolition we noticed that mildew and rotting floors and walls had accumulated throughout the years. Doing it right the first time is no joke when dealing with water and electrical issues.
We discarded all reminisce of old and built from scratch, new walls, new plumbing, new electrical ,new insulation and a new window, a new fan that actually exhausted outside ( I say this laughing as you would be amazed at how many fans are installed but don’t exhaust outside, and you the client would never know unless you go inside the attic space.
Once all the hard stuff was done, the rest is just a matter of smart design. If you have a small bathroom here are some tips to guide you.
10 tips for making a small bathroom feel larger
Is your tiny bathroom cramping your functionality and style, leaving you longing for the enormous bathrooms gracing the pages of design magazines? Even if your bathroom is a fraction of the size, all it takes is some design savvy to make the most of the space you have. Consider these 10 smart tips that will help your bathroom look, feel and function like those larger contenders.
1-Get creative with corners
Space is at a premium in small bathrooms, so it's important to maximize every inch. Corners, for example, provide extra space for shelving, storage units and even hooks. Get creative and install unique design solutions that are not only functional, but also eye-catching. If you love the airiness of floating cabinets, add baskets or decorative boxes under for extra storage. If you are installing floating cabinets insure that they are installed securely to studs or plywood at wall.
2- Let solid colors shine
Busy patterns have a shrinking effect and make small bathrooms seem even smaller. Conversely, light natural hues make a space feel more open. If you're itching to get creative with design, experiment with textures but keep overpowering patterns to a minimum. Tone on tone is the best to achieve this.
3 - Maximize your bathtub
A bathtub takes up a significant portion of the room, but modern, compact options with curved basins, can make the tub feel larger when in use, all while conserving space.
4 - Select a smaller faucet
A faucet is jewelry for the bathroom. And just as accessories can overpower an outfit, a big bulky faucet isn't flattering in a small bath. Single-handle designs conserve counter space, while a wall-mount installation frees it up all together and can create quite the wow-factor, if the budget can accommodate the required changes to plumbing behind the wall.
5 - Make vanity storage simple
If you're in a storage war with your small bathroom, you're not alone in the battle. Toiletries and personal supplies without a place to call home only add clutter and chaos. Store smart with a space-saving vanity, the dual sink vanity shown here, looks quite simple, but in reality it has 4 sets of full extension drawers, and the vanity tower adds extra storage without overpowering the use of space.
6 - Show off the shower
Shower curtains may be pretty, but they interrupt the visual flow of a bathing space and make it feel significantly smaller. In bathrooms with small footprints, opt for a clear glass sliding shower door that doesn't require the clearance of one with a hinged design. Or as shown in this design and for fraction less expensive a half hinged panel installed on a fixed tempered glass panel. If you're embarking on a big remodel, create the illusion of more space by using same tile in the shower that's used throughout; instead of seeing them as two separate zones, the eye will read them as one.
7 - Discover the treasure of hidden storage
Work with a contractor, and you just might find some serious storage potential hidden behind your walls. Whether it's utilizing space between the studs for shallow shelving or a creating a small linen closet by annexing space from an adjacent room, even small additions can make a big difference.
8 - Focal Point
Tile is a beautiful, durable addition to any bathroom. For dainty spaces, consider installing tile at a diagonal to accentuate the focal point or as in this bathroom I used an oversized textured pattern to bring depth to the space at the window wall.
9 - Choose the right lights
Strategically install light to reflect and brighten a small bathroom to make it appear larger. Recessed lighting is an affordable solution for tiny rooms, offering ample light while taking up little space. Wall sconces alongside a mirror also reflect off the walls and make a room feel bright and airy. I always recommend going with LED lighting at 2800 to 3000K.
10 – Accessorize
This is your time to shine in your decorating skills, have fun with your towels, you can change the color scheme daily just by adding pops of color in your accessories, make sure to get items that serve a dual purpose, like baskets, boxes they can always be used as hampers, storing of towels and even a nice display for your guest.
51