
Search results for "Stubborn stains" in Home Design Ideas

 DayHouse Studio
Inspiration for a transitional open concept medium tone wood floor and brown floor living room remodel with white walls, a standard fireplace and a wall-mounted tv


 Amy Storm & Company
Mid-sized transitional built-in desk light wood floor, brown floor and coffered ceiling home office library photo in Chicago with gray walls
Find the right local pro for your project

 Atelier Interior Design
Transitional dining room photo in Denver with white walls and a wall-mounted tv

 Soorikian Architecture
Example of a transitional l-shaped gray floor dedicated laundry room design in Atlanta with a farmhouse sink, recessed-panel cabinets, white cabinets, gray walls and black countertops
 Mayflower Construction Group
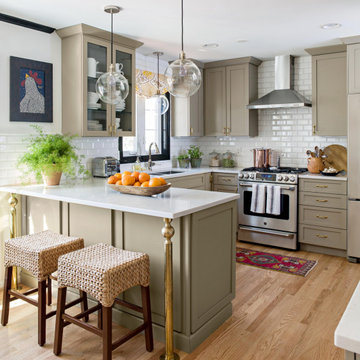
For the better part of 2020, many of us spent more time at home than ever before, and the ways in which we cook, entertain, work and relax in our homes changed significantly. Now, the look and function of kitchens are changing, too.
Industry experts state that hygiene and cleanliness will be a top priority in kitchen designs while flexibility for multiple tasks and users remains important. Here are the five trends that will dominate 2021:
1. Warm colored materials
2. Organic style materials
3. Touchless faucets
4. Specialty Ovens
5. Large Islands
If you want to learn more about these trends and more check out this article that goes into detail about how and why these new kitchen trends are happening! https://www.bhg.com/kitchen/remodeling/2021-kitchen-trends/
 Gables and Pillows
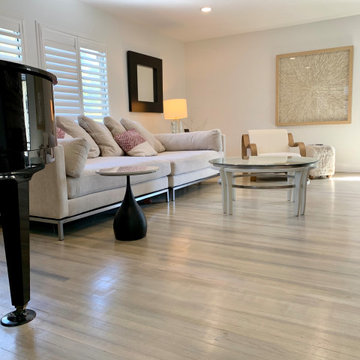
Completed 2" hardwood floor restoration featuring a modern white-wash finish and low-sheen protective topcoat. This project highlights a dramatic transformation of a vintage 2-inch narrow plank hardwood floor. As you can see in the progress photos, the original wood was hidden under decades of wear, heavy pet stains, and stubborn old subfloor adhesive.Many homeowners assume floors in this condition need to be torn out and replaced. Instead, our team completely salvaged the original wood through a meticulous deep-sanding process, specialized stain-remediation techniques, and precision floor leveling.To match the client's bright, modern living room aesthetic, we applied a custom translucent white/gray wash finish that mutes the heavy amber tones while beautifully highlighting the natural grain of the wood. We finished the floor with a premium, high-durability matte protective coat to ensure long-lasting protection against daily traffic.Services Provided: Heavy floor sanding, deep stain removal, adhesive scraping, custom wood staining, and premium matte top-coating.

Sponsored
Sunbury, OH

J.Holderby - Renovations
Franklin County's Leading General Contractors - 2X Best of Houzz!
 Meyer Design
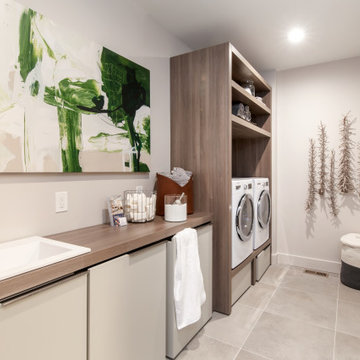
The laundry room is a functional and organized space designed for efficiency. Along one wall, ample storage cabinets and shelves provide plenty of room for detergents, fabric softeners, and cleaning supplies, keeping everything neatly arranged. Adjacent to the storage, a dedicated drying area is equipped with a sturdy clothing rod or a drying rack, perfect for air-drying delicate items. The space also features a utility sink with a sturdy faucet, ideal for hand-washing garments or tackling stubborn stains. The overall layout is bright and welcoming, with practical surfaces and thoughtful details that make laundry tasks easier and more convenient.

 Anderson Homes
Transitional l-shaped light wood floor and brown floor open concept kitchen photo in Seattle with a farmhouse sink, recessed-panel cabinets, white cabinets, quartz countertops, white backsplash, stainless steel appliances, an island and white countertops


 Sara Ray Interior Design
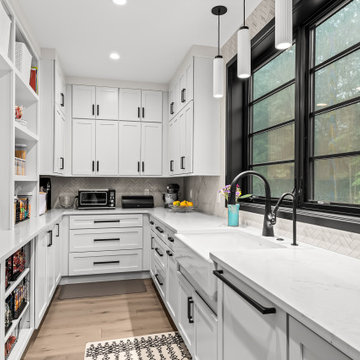
We custom designed the pantry with the client’s needs in mind. It serves as overflow for serving and party pieces, as well as cookbooks and small appliances.
Photo © Alyssa Rosenheck 2016
 Tile Doctor Ltd
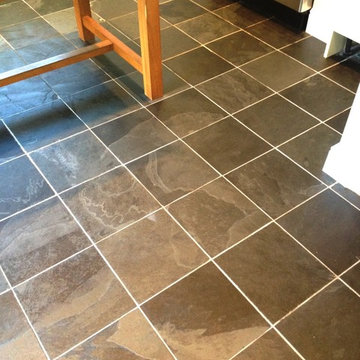
Slate is a popular choice for tiled kitchen floors and when properly maintained looks fantastic, however like all natural stone products without an effective cleaning plan dirt will become ingrained in the stone and will start to lose its appearance.
This was the case with this fantastic Slate tiled kitchen floor in Twickenham which had the potential to look really nice, but hadn’t received the proper maintenance for a long while, leaving it looking very tired. It now needed what was left of its old surface sealer stripped off, followed by a deep cleaning of the tile and grout before having a fresh seal applied.
To begin the restoration, I mixed a 50:50 solution of Tile Doctor Remove and Go and Tile Doctor Pro Clean. This was applied to the floor and allowed to dwell. Remove and Go functions as a stripper that breaks down the old sealer, while Pro Clean is a versatile, high alkaline cleaner that is safe to use on all types of natural stone flooring.
To use it to full effect, I machine scrubbed this solution into the floor to completely remove all dirt, stains, and old sealer. I also ran a stiff brush along the grout lines to remove the particularly stubborn dirt ingrained in the grout. The resulting cleaning slurry was then rinsed with water and extracted using a wet vacuum and the floor checked for stubborn marks which were retreated using the same process.
The floor was left to dry overnight and I came back the next day to apply a new seal. It’s important to leave a tiled floor to dry completely before sealing and at this time of year 24 hours is usually enough. This is necessary to ensures there is no excess moisture in the tile as this has the potential to cloud the sealer and affect its effectiveness.
The customer required a low sheen finish and a floor that was easy to maintain. I opted to use Seal & Go, which provides exactly that. It is a water-based with a high sheen blend of acrylic polymers that offers a both a stain resistant surface seal and a durable low sheen finish, also being water based it doesn’t leave a smell as it dries. Seal and Go is also a breathable sealer that will allow moisture to rise up through the tile and allow the floor to breathe.
As you can see from the pictures, the lustre has been completely restored to the Slate tiles and the sealer will allow for easy maintenance for the customer in the future.
Jonathan Oldham
South Middlesex Tile Doctor

 Regal American Homes
Example of a trendy gray tile and white tile mosaic tile floor and gray floor double shower design in Phoenix with gray walls


 Tile Doctor Ltd
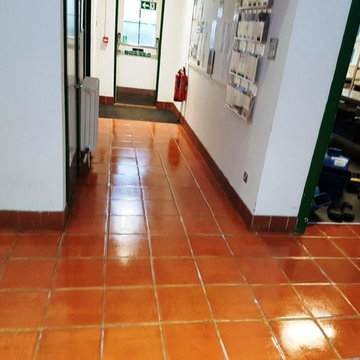
A local cleaning contractor called us in to work on the Terracotta tiled floors at a council building in Amersham. The Terracotta had not been deep cleaned and resealed for about ten years and the sealer had worn off leaving the tile vulnerable to dirt becoming ingrained in the pores of the tile. The grout had also suffered the same fate and had almost gone black in many areas.
This is a common problem with Terracotta which is quite porous and once those pores become ingrained with dirt the tile becomes difficult to clean effectively. The solution is to seal the tile however sealers wear off over time and this was basically the problem.
After discussing the issues we agreed on a plan of action to deep clean the Terracotta tile and grout and then re-seal to protect it. Due to the busy nature of the building we agreed to do the work between Christmas and New Year when we knew the building would be empty.
We started by applying a strong dilution of Tile Doctor Oxy-Gel which is a strong tile cleaning product that being in a gel form ensures it sits on the tile for longer, giving it a longer effective dwell time so it can really eat into and loose the dirt. After approximately twenty minutes the gel was scrubbed into the tile with a black scrubbing pad fitted to a rotary machine. This broke down most of the dirt and removed any remaining sealer. Once the whole floor had been treated in this manner it was rinsed thoroughly with water which was then extracted using a wet vacuum.
With the soiled cleaning solution removed I could see the next step would be to spot clean stubborn staining and clean the grout. For this task I used a strong dilution of Tile Doctor Pro-Clean scrubbing it in by hand using stiff brushes and aided with a hand-held steamer to help treat the stubborn staining. Once done the floor was given a final rinse and then as much moisture as possible removed with the wet vacuum.
We then left the floor to dry off completely and came back a couple of days later to seal the Terracotta tile.
I mentioned earlier that Terracotta is porous; in fact it’s probably the most porous material I deal with, so to fully seal the floor I had to apply eight coats of Tile Doctor Seal and Go which will provide complete and long lasting protection against staining and dirt. Seal and Go also adds an appealing satin sheen to the tile and the new seal will make it much easier to clean in future.
The floor tile and grout now look much healthier and I’m sure the council will be very impressed when they go back to work after the holidays.
Happy New Year…
Andrew Newstead
North Buckinghamshire Tile Doctor


 Tile Doctor Ltd
Limescale deposits are a big problem in many parts of the UK where hard water is common. To remove it you need to use a strong acidic cleaner however what to do if you have limescale deposits on Limestone? As many may already know, Limestone is an expensive, high-quality stone that like a lot of natural stone is acid sensitive and can be damaged with the application of acid-based products.
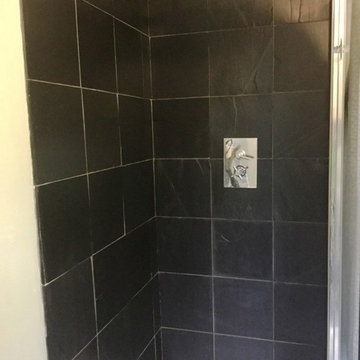
You can use acids on Limestone however if your careful and I demonstrated this recently at a property in this village of Everdon near Daventry in Northamptonshire. My customer had a fantastic black Limestone tiled shower cubicle that had been absolutely ruined by white limescale staining and it had reached the point where the situation simply couldn’t be resolved with standard cleaning products.
As the staining was so severe, I opted to use Tile Doctor Acid Gel to clean the tiles. This is a blend of phosphoric and hydrochloric acids in gel form and is the best product for cleaning vertical services, since water based products just run off and don’t have time to work on the staining.
Working in small areas, I carefully scrubbed the product into the stone and then rinsed it off with plain water. This process was repeated across the whole cubicle, reducing the stains significantly in the process.
Next, I used a handheld polishing machine fitted with 6” diamond encrusted burnishing pads, along with some water for lubrication, to polish and deep clean the stone, removing any stubborn stains remaining on the tiles.
I left the cubicle to dry completely overnight. Upon my return the next day, I proceeded to seal the tiles using two coats of Tile Doctor Colour Grow sealer.
This sealer is impregnating, meaning it fils the pores of stone to protect against ingrained dirt and staining. As well as providing stone protection, Colour Grow also enhances the natural colour in the stone – in this case, the deep black shades in the Limestone.
Having finished the job, I gave the very happy customer some advice on keeping limescale and other staining at bay in future. I explained that proper maintenance can be conducted by simply rinsing the tiles with clean water after each use of the shower, and by using Tile Doctor Aqua-Pro tile aftercare cleaner at least once a week.
Phil Vissian
Northamptonshire Tile Doctor


Sponsored
Fredericksburg, OH

High Point Cabinets
Columbus' Experienced Custom Cabinet Builder | 4x Best of Houzz Winner
 Tile Doctor Ltd
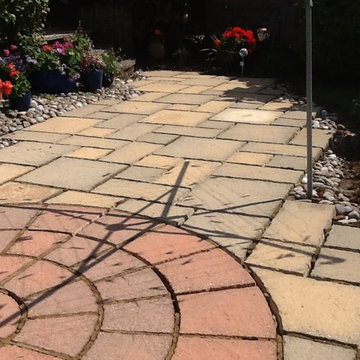
Lichen, moss and other plant-based staining is a common sight on patios exposed to the UK climate. For many property owners, it’s a very difficult task to keep patios looking great in the face of the natural effects of the environment. However always happy to help Tile Doctor is available to provide the professional cleaning and sealing needed on a regular basis.
This Sandstone tiled patio in Rushden was certainly a prime candidate for restoration. Not only was it completely covered in lichen and moss, but it was also cracked in parts and missing grout. The patio would therefore need not only cleaning and sealing, but also re-grouting.
To begin the restoration, I opted to power jet wash the entire area to remove as much of the initial layers of moss. Then, I mixed a strong dilution of Tile Doctor Pro Clean, which is a powerful and reliable alkaline cleaner suitable for use on both internal and external natural stone tiles. This was applied liberally to the patio and scrubbed into the stone to cut through the particularly stubborn stains. The two photos below show the fantastic result.
After completing the cleaning phase, I allowed the patio to dry completely overnight before returning to re-grout the entire area with mortar. To finish off I applied a fresh sealer in the form of Tile Doctor Seal and Go Extra, which an acrylic-based, fully breathable sealer appropriate for outside use.
The below pictures show the final result. As you can see, it was a complete transformation – and my very happy customer will agree! With the right products and methods, it’s possible to bring new life back to weathered patios.
Phil Vissian
Northamptonshire Tile Doctor



2