
Search results for "Timely repairs" in Home Design Ideas
 Stevens Residential Remodeling & Repair, Inc
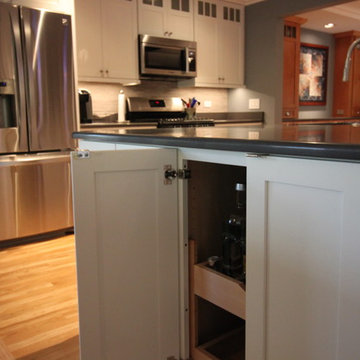
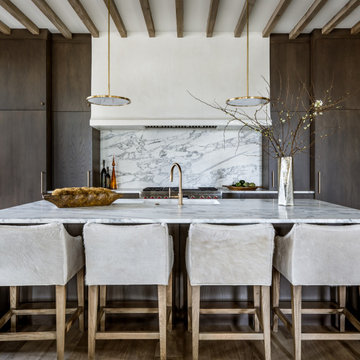
This island contains 90 cubic feet of storage. That is 3 times more than a 24" X 84" pantry cabinet. For ease of entry, two of the islands cabinet were turned to the side. The doors resemble decorative panels on the side of the island but two small tab handles at the top of each door makes them practical.
 JC Brothers General Contractor Siding Repair
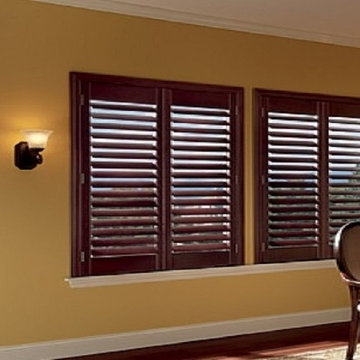
After years in your home, it is finally type to remodel your kitchen Hillside NJ 07205 Kitchen remodeling can be tricky for the unprofessional contractor. At Jc Brothers, we help you with your kitchen renovations.
It has been said that the kitchen is the heart of a home. The kitchen of your Hillside home is where your family comes together to cook, to eat and spend time together. It can be challenging to make sure that your kitchen is equipped to handle being the center of your home
 Unmistakable Flooring
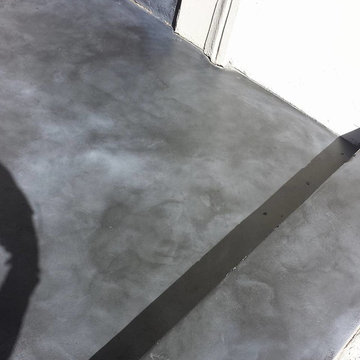
After a few hours of hard work by Your Personal Artist, this patio is looking good as new, and ready for more time under the Florida Sun!!
Inspiration for a mid-sized modern courtyard concrete patio remodel in Miami with a fire pit
Inspiration for a mid-sized modern courtyard concrete patio remodel in Miami with a fire pit
Find the right local pro for your project
 Figueroa Remodeling Drywall Repair & Installation
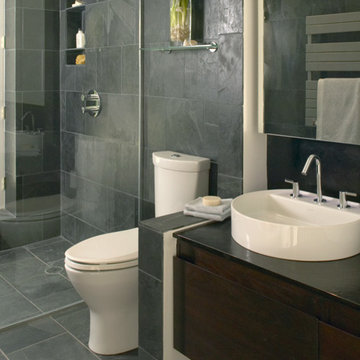
We offer bathroom remodeling South Amboy NJ 08879, with over ten years experience in home painting projects either interior or exterior. And if you are looking a painting contractor please contact us any time and get for free estimate.
 Nilipour Oriental Rugs
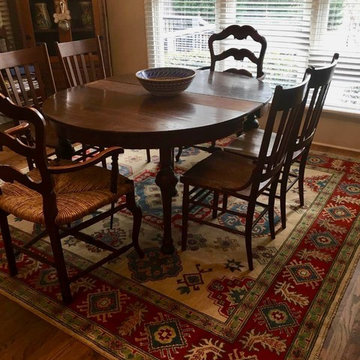
Kazak Oriental Rug warms this kitchen for family meal times!
photo credits to Nilipour Oriental Rugs
Inspiration for a timeless kitchen/dining room combo remodel in Birmingham
Inspiration for a timeless kitchen/dining room combo remodel in Birmingham
 Tile Doctor Ltd
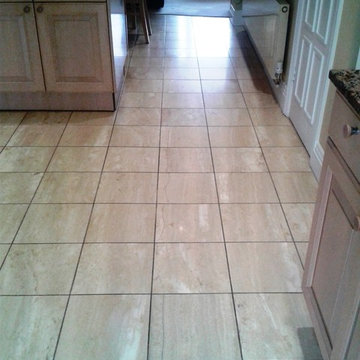
Every now and again, I get a call from a client located on the small peninsula of Sandbanks, Poole. Sandbanks, sometimes referred to as ‘Britain’s Palm Beach’, is known for its fantastic beach and high value property. My client asked me to take a look at a Travertine floor in his kitchen which was, in fact, more highly polished than he had wanted. The polished finish had worn off the travertine tiles where they had been walked on, leaving a dull trackway running down the centre of the kitchen. With its distinct characteristics, travertine is a popular choice for kitchen flooring, although it is also quite often used in bathrooms. In any case Travertine tiles will need regular maintenance to keep them looking their best.
Unfortunately, the kitchen floor must have experienced some sort of settlement or shrinkage as a long crack has appeared, which ran along the same line as the dull trackway. It is not uncommon for Travertine tiles to crack due to wear over time, or even bad fitting in some cases. While the exact cause of the crack was unclear, the homeowner concluded that the floor was certainly in need of restoration.
Repairing a crack in a Travertine tiled floor
Replacing the Travertine tiles was not an option due to a lack of spare tiles, so I opted instead to fill the crack in the floor using Harbro Stone Filler, an epoxy stone filler, matching the colour of the tile as closely as possible. I left this to set, before sanding down the excess filler.
My next action was to use a set of Tile Doctor Diamond burnishing pads to sand out any scratches and restore a more even shine to the floor, as per the client’s request. For polished stone, I recommend using a set of four burnishing pads applied in order: Coarse, Medium, Fine, and Very Fine. I used these one after the other with a little water to lubricate and restore the surface polish to the desired level.
Sealing a Travertine tiled floor
The next day, I returned to seal the floor with a couple of coats of Tile Doctor Colour Grow sealer. Colour Grow is a colour enhancing, impregnating sealer which penetrates deeply into the pores of the stone, thereby preventing dirt from becoming ingrained within. This particular sealer also enhances the natural colours within the Travertine tile, whilst also providing long term durable protection.
Although the crack could not be made to disappear completely, its appearance was much improved. The customer was also very pleased with the long-lasting lower sheen provided, describing it as “the finish I had wanted in the first place when the tiles were fitted”.


 Keller/Eaton Architects
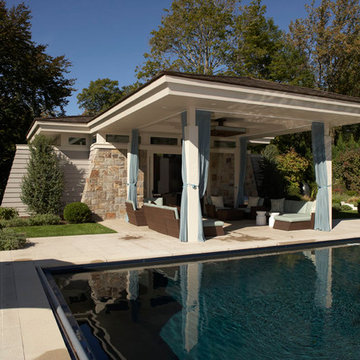
Pool house with outdoor seating area.
Huge elegant backyard rectangular and concrete lap pool house photo in New York
Huge elegant backyard rectangular and concrete lap pool house photo in New York
 TVL Creative Ltd.
This project was such an incredible design opportunity, and instilled inspiration and excitement at every turn! Our amazing clients came to us with the challenge of converting their beloved family home into a welcoming haven for all members of the family. At the time that we met our clients, they were struggling with the difficult personal decision of the fate of the home. Their father/father-in-law had passed away and their mother/mother-in-law had recently been admitted into a nursing facility and was fighting Alzheimer’s. Resistant to loss of the home now that both parents were out of it, our clients purchased the home to keep in in the family. Despite their permanent home currently being in New Jersey, these clients dedicated themselves to keeping and revitalizing the house. We were moved by the story and became immediately passionate about bringing this dream to life.
The home was built by the parents of our clients and was only ever owned by them, making this a truly special space to the family. Our goal was to revitalize the home and to bring new energy into every room without losing the special characteristics that were original to the home when it was built. In this way, we were able to develop a house that maintains its own unique personality while offering a space of welcoming neutrality for all members of the family to enjoy over time.
The renovation touched every part of the home: the exterior, foyer, kitchen, living room, sun room, garage, six bedrooms, three bathrooms, the laundry room, and everything in between. The focus was to develop a style that carried consistently from space to space, but allowed for unique expression in the small details in every room.
Starting at the entry, we renovated the front door and entry point to offer more presence and to bring more of the mid-century vibe to the home’s exterior. We integrated a new modern front door, cedar shingle accents, new exterior paint, and gorgeous contemporary house numbers that really allow the home to stand out. Just inside the entry, we renovated the foyer to create a playful entry point worthy of attention. Cement look tile adorns the foyer floor, and we’ve added new lighting and upgraded the entry coat storage.
Upon entering the home, one will immediately be captivated by the stunning kitchen just off the entry. We transformed this space in just about every way. While the footprint of the home ultimately remained almost identical, the aesthetics were completely turned on their head. We re-worked the kitchen to maximize storage and to create an informal dining area that is great for casual hosting or morning coffee.
We removed the entry to the garage that was once in the informal dining, and created a peninsula in its place that offers a unique division between the kitchen/informal dining and the formal dining and living areas. The simple light warm light gray cabinetry offers a bit of traditional elegance, along with the marble backsplash and quartz countertops. We extended the original wood flooring into the kitchen and stained all floors to match for a warmth that truly resonates through all spaces. We upgraded appliances, added lighting everywhere, and finished the space with some gorgeous mid century furniture pieces.
In the formal dining and living room, we really focused on maintaining the original marble fireplace as a focal point. We cleaned the marble, repaired the mortar, and refinished the original fireplace screen to give a new sleek look in black. We then integrated a new gas insert for modern heating and painted the upper portion in a rich navy blue; an accent that is carried through the home consistently as a nod to our client’s love of the color.
The former entry into the old covered porch is now an elegant glass door leading to a stunning finished sunroom. This room was completely upgraded as well. We wrapped the entire space in cozy white shiplap to keep a casual feel with brightness. We tiled the floor with large format concrete look tile, and painted the old brick fireplace a bright white. We installed a new gas burning unit, and integrated transitional style lighting to bring warmth and elegance into the space. The new black-frame windows are adorned with decorative shades that feature hand-sketched bird prints, and we’ve created a dedicated garden-ware “nook” for our client who loves to work in the yard. The far end of this space is completed with two oversized chaise loungers and overhead lights…the most perfect little reading nook!
Just off the dining room, we created an entirely new space to the home: a mudroom. The clients lacked this space and desperately needed a landing spot upon entering the home from the garage. We uniquely planned existing space in the garage to utilize for this purpose, and were able to create a small but functional entry point without losing the ability to park cars in the garage. This new space features cement-look tile, gorgeous deep brown cabinetry, and plenty of storage for all the small items one might need to store while moving in and out of the home.
The remainder of the upstairs level includes massive renovations to the guest hall bathroom and guest bedroom, upstairs master bed/bath suite, and a third bedroom that we converted into a home office for the client.
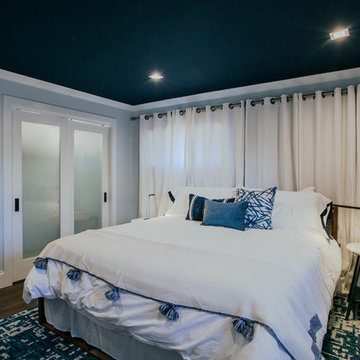
Some of the largest transformations were made in the basement, where unfinished space and lack of light were converted into gloriously lit, cozy, finished spaces. Our first task was to convert the massive basement living room into the new master bedroom for our clients. We removed existing built-ins, created an entirely new walk-in closet, painted the old brick fireplace, installed a new gas unit, added carpet, introduced new lighting, replaced windows, and upgraded every part of the aesthetic appearance. One of the most incredible features of this space is the custom double sliding barn door made by a Denver artisan. This space is truly a retreat for our clients!
We also completely transformed the laundry room, back storage room, basement master bathroom, and two bedrooms.
This home’s massive scope and ever-evolving challenges were thrilling and exciting to work with, and the result is absolutely amazing. At the end of the day, this home offers a look and feel that the clients love. Above all, though, the clients feel the spirit of their family home and have a welcoming environment for all members of the family to enjoy for years to come.

 Allen Construction
Designer: Allen Construction
General Contractor: Allen Construction
Photographer: Jim Bartsch Photography
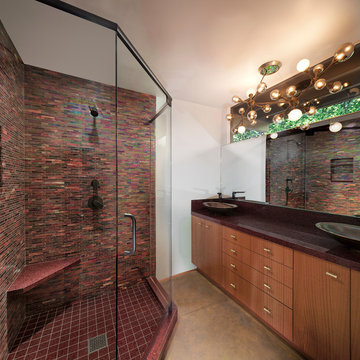
Mid-sized 1960s master red tile and glass tile concrete floor corner shower photo in Los Angeles with flat-panel cabinets, medium tone wood cabinets, a two-piece toilet, white walls and a vessel sink
Mid-sized 1960s master red tile and glass tile concrete floor corner shower photo in Los Angeles with flat-panel cabinets, medium tone wood cabinets, a two-piece toilet, white walls and a vessel sink

 Tile Doctor Ltd
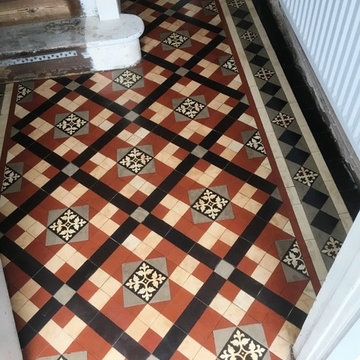
The owner of this house in Chaplefields near Coventry had bought this property as an investment and was keen to improve its appearance. As part of this work he had lifted the vinyl tiles in the hallway and discovered a lovely Edwardian tiled floor. Unfortunately, whoever had laid the Vinyl tiles had decided to use Tar as an adhesive and this had left a black mess all over the floor.
Realising the potential value an original feature such as this could add to the property he was keen to restore the tiles but not so keen to deal with the Tar, so we were asked to deal with the problem and restore the floor as close to its original condition as possible.
To get the tiles clean and remove the horrible tar I applied a strong dilution of Tile Doctor Remove and Go, which as its name suggest is great for removing coverings from tiles. I applied the Remove and Go with a mop, left it to soak in for a few minutes and then worked it in using a rotary machine fitted with a black scrubbing pad. The soil was extracted off the floor using a wet and dry vacuum and then the process repeated until I was happy all the tar was gone.
I then gave the tiles an acid wash using Tile Doctor Acid Gel; this serves to break down alkaline mineral deposits such as cement and grout smears, it also counters any efflorescence problems which can be an issue with these old floors where no damp proof membrane has been installed.
Finally, the floor was given a rinse with clean water and a steam clean to remove any trace of cleaning products and to neutralise the tiles in preparation for sealing.
I left the floor to dry off overnight and returned to the property to seal the tiles the next day. To seal the tiles, I used three coats of Tile Doctor Seal and Go which is a water based sealer that leaves a subtle sheen finish and being water based doesn’t leave a smell as it dries. The sealer will provide durable protection going forward preventing dirt from becoming ingrained into the pores of the tile and ensuring it remains easy to clean and keeping its appearance for some time to come.
The floor now looks fantastic and gives a great impression when you come into the property which is exactly what the owner wanted.
Mick Gayton
Warwickshire Tile Doctor
 Costa Bella Builders
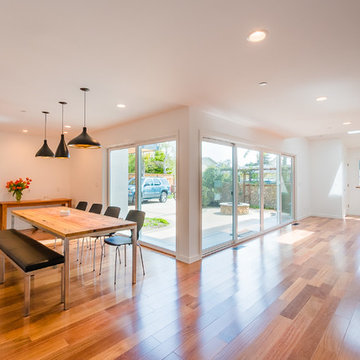
Our client was a family with younger children that came to us through the recommendations of former customers. Their existing house had been remodeled by them 10 years earlier and was well-suited to the married couple. With the addition of two younger children, they realized that the house just didn’t function very well for their family. Fortunately, the husband and wife took their time thinking about what they wanted, and by the time they met with us, had their needs well laid out. We brought in local Architect, James Stroupe, and recommended him to the client as a collaborative professional who could help us achieve their goals. This proved to be the case. Jim quickly produced design drawings for them within six weeks that clearly reflected all of the client’s needs and preferences while at the same time dramatically re-creating the home in a beautiful contemporary design.
The new home required a complete reconstruction of the existing house that left only one bathroom unaltered. New square footage was added at the lower level to expand and reconfigure the living area, while an entirely new upstairs wing was constructed to create space for a new master suite with views out toward the ocean. The entire roof was rebuilt, all new windows and interior doors were added and the full exterior received a new modern looking stucco finish. Stainless steel cable railings were added to the decks to create an updated look, and fine hardwood accents were used to pull the design together.
Our efforts produced a new three bedroom, three bath home with a large and inviting ground floor patio area, wide open living areas on the first floor with new kitchen, bathroom and dining room. The photographs in this section show the striking results- clean lines, dramatic architectural touches, and light, open and airy interior spaces. Our client was very pleased with the results.

 Screen King
These screws held down the original track. Unfortunately the screw head height was almost as tall as the track itself. This meant the door rollers hit thew heads of the screws every time the screen door opened.
This caused the person opening the screen door to pull harder which eventually led to the screen door wearing out.
 Paradise Found Construction
Jesse had inherited his townhome, and had lived there for several years. His career took him to another state, and the home was unoccupied for over a year. He decided that he would not return to Raleigh and that it was time to sell.
The 1975 home still had the original kitchen and baths, and was in need of general repair and new flooring. The HVAC system, water heater, and washer and dryer had been replaced as they aged and became non-functional, and the exterior had been maintained by the Home Owner’s Association. Jesse wanted to update the home and have it sell as quickly as possible, so we got to work determining what the best use of the budget would be to accomplish this goal.
We focused on updating the major interior design elements that would provide the most enjoyment, durability, and energy efficiency for the new homeowners.
We started with completely gutting the Kitchen and reconfiguring it by moving the refrigerator into the laundry area, and stacked the washer and dryer to save space. We replaced all of the old vinyl cabinets with durable natural wood cabinetry, and added granite counter tops and a stainless steel sink. We also removed the ceiling-hung cabinets over the counter peninsula to open up the Kitchen and bring in more light and facilitate better flow and interaction, and added a floor-to-ceiling Pantry Closet to make up for the lost storage space. All of the Kitchen appliances were replaced with new energy efficient models.
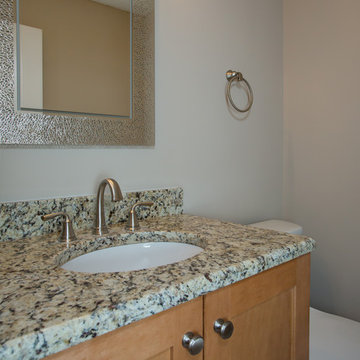
We next gutted the downstairs Powder Bath and replaced the vinyl vanity with matching cabinetry with the kitchen, and replaced the toilet (as well as all other toilets in the home) with an EPA WaterSense rated low-flow toilets. We removed the wallpaper and finished the walls smooth, replaced the lighting and mirror, and removed the carpet and installed a porcelain tile floor.
The second floor 2nd Bedroom had been left open to the Great Room with a balcony and accordion door for privacy, but it left the room open to all of the noise from the Great Room and Kitchen. In order to make the room function as a private bedroom, we removed the balcony and installed a full wall in its place.
Replacing all of the flooring was also at the top of the list, as was general repair on the walls and new paint throughout. We installed natural oak flooring in the Great Room and porcelain tile in the entry foyer. The seals on several of the exterior windows and the Master Bedroom sliding door had been compromised and needed to be replaced, as well as several interior doors and repair of all the louvered closet doors. The two upstairs Baths were functionally sound and the tile was in good shape. We replaced the toilets with EPA WaterSense rated low-flow toilets, and painted the vanities with a brighter color palette.
The end result was bright, open, and comfortable updated home ready for its new occupants.
Design Features
Durable and handsome natural wood cabinetry.
Granite Kitchen and Powder countertops.
Stainless Kitchen appliances and white refrigerator.
Stainless Kitchen sink and brushed nickel faucets.
Brushed Nickel cabinetry and door hardware.
Low-flow EPA WaterSense rated toilets.
Light and bright natural hardwood flooring.
Porcelain tile and luxury vinyl flooring.
New carpet.
Private 2nd Bedroom.
Light and bright No-VOC paints and finishes.
Energy Efficient and Green Features
Energy efficient EPA Energy Star appliances.
EPA WaterSense rated low-flow toilets.
Energy efficient EPA Energy Star windows and door.
Durable No-VOC cabinetry.
Durable porcelain tile flooring.
Low-flow faucets.
Energy efficient CFL lighting throughout.
No-VOC paints and finishes.
 Marble Doctors LLC
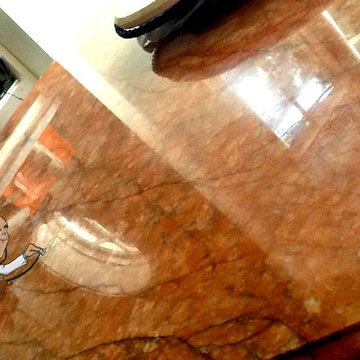
Before Photos shows etched and scratched surface:
Installing,Refinishing, Repairing and Maintaining of Natural Stone and Other Man Made Solid Surfaces in Both Commercial & Residential Settings
Company Overview
Marble Doctors are a specialized company that has been perfecting the stone trade for many years and has developed a reputation for true craftsmanship. As an individually owned company since 2008, the Marble Doctors will give you the personalized service you need and the expertise you desire. We understand that stone is an investment and a luxury, so we want to help you protect your investment and keep your stone looking its best for the longest time possible
Description
Dull Spots - Marble, Travertine, Granite, Terrazzo and other solid surfaces. Polished out to return a mirrored finish
White Spots - Stubborn spots removed once and for all via marble, limestone and travertine polishing and restoration
Scratches - Honed out to restore a smooth mirrored appearance.
Chips & Cracks - Repaired and blended to virtually disappear.
Grout - Repaired and cleaned.
 All Surface Services - Tub, Tile, Counter Restore
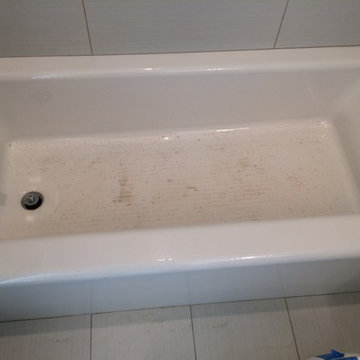
Bathtubs often become "utility sinks" on a new home construction site and get ruined in no time. This is a castiron Kohler tub that was thoroughly rusted out by careless worker.
We were hired to expertly repair the badly stained surface on the bottom. We did not refinish this tub - homeowner and the contractor were happy with the results.
 Air Duct Cleaning San Antonio
Scarlet Chaillet
Inspiration for a modern home design remodel in Austin
Inspiration for a modern home design remodel in Austin
 Westrade Projects
Crafting Outdoor Retreats:
Our hardscaping expertise took center stage, sculpting outdoor spaces into retreats that seamlessly blend nature with comfort. From stone pathways to cozy corners, every detail was crafted for relaxation.
Essential Repairs, Seamless Solutions:
Tackling essential repairs with precision, we seamlessly integrated solutions into the fabric of Minuro Blvd. Structural enhancements and meticulous fixes ensure a home that stands strong against the test of time.
Luxurious Bathroom Oases:
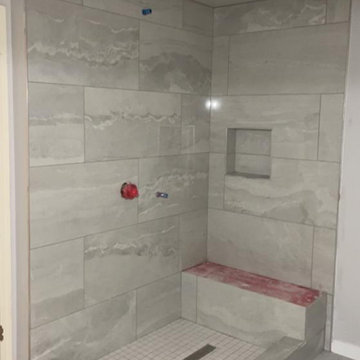
Elevating daily rituals, our bathroom renovations aimed for luxury and functionality. From spa-inspired design elements to modern amenities, we transformed bathrooms into oases of indulgence.
27