
Search results for "Tools provide" in Home Design Ideas
 Trusscore
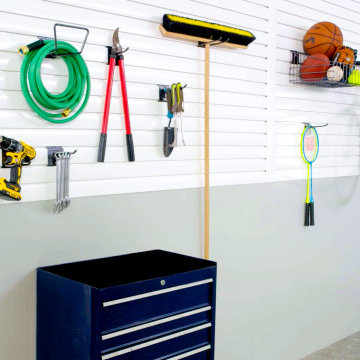
Trusscore Wall&CeilingBoard and Trusscore SlatWall combine to create an ideal garage renovation team, one that will transform your garage into a clean, bright, and organized space suitable for use as home gym, workshop, or simply as a visually striking place to store and showcase your vehicle.
A garage drywall alternative that installs directly over existing drywall or bare studs, Trusscore Wall&CeilingBoard is uniquely durable and abuse-resistant and delivers a smooth, bright, finish that will enhance the available light to deliver an amazing result.
Trusscore Wall&CeilingBoard is designed to seamlessly blend with Trusscore SlatWall and SlatWall’s suite of home organization options – wire baskets, shelves, and hooks – to provide flexible, good-looking, wall-mounted garage shelving and storage for tools and equipment.
 California Closets HQ
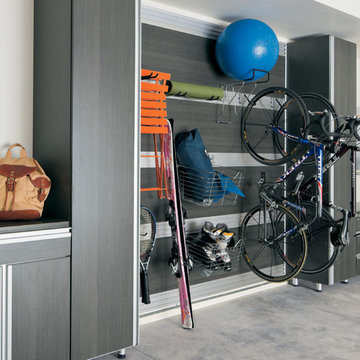
This well-organized garage provides enough room to build, fix, and play with features that allow easy access to every organized item.
• Lago® Milano Grey finish sets the tone for a neutral palette.
• Lago® Milano Grey slab door and drawer fronts contribute to the seamless look.
• Integrated extruded matte Aluminum finger pulls make opening and closing drawers and cabinets easy.
• Slat wall with accessories provides storage for tools.
• Large cabinets offer storage for tall items.
• Adjustable shelving provides flexibility for changing needs.

 Industrial Projects
Creating a comfortable outdoor living space is a priority for many homeowners and DIY enthusiasts. With rising summer temperatures, installing a shade tarp in your backyard offers an affordable and effective solution for sun protection. We’ve developed this detailed, step-by-step guide to help you confidently install a shade tarp that not only shields you from the sun but also adds aesthetic appeal to your outdoor area.
Benefits of Installing a Backyard Shade Tarp
Before diving into the installation process, let’s explore the key benefits of having a backyard shade tarp:
Provides UV Protection: Keeps your family and guests safe from harmful sun exposure.
Reduces Outdoor Temperatures: Creates a cooler, more enjoyable outdoor space.
Protects Outdoor Furniture: Extends the life of patio furniture by reducing sun damage.
Enhances Outdoor Aesthetics: Adds a modern, stylish look to your yard.
Budget-Friendly: More affordable compared to permanent structures like pergolas.
Materials and Tools You’ll Need
To begin your DIY backyard shade project, gather the following materials and tools:
Materials:
Shade tarp (UV-resistant and breathable)
Sturdy posts or existing structures (trees, fences, walls)
Mounting hardware (eye bolts, D-rings, turnbuckles, snap hooks)
Nylon or polyester rope, or stainless-steel wire
Concrete (if installing new posts)
Tools:
Power drill
Measuring tape
Level
Ladder
Wrench or adjustable spanner
Post hole digger (if installing new posts)
Step 1: Plan Your Shade Tarp Layout
The first step in installing your backyard shade tarp is careful planning. Take time to assess your outdoor area and answer these key questions:
Where is the sun’s path throughout the day?
What size and shape of tarp best suits your space?
Will you anchor the tarp to existing structures or install new posts?
What height do you want the tarp to sit at for maximum shade and airflow?
Pro Tip: Use string or garden hoses to visualize the tarp layout on the ground before making permanent decisions.
Step 2: Measure and Mark Anchor Points
Once you’ve determined the tarp’s location and orientation:
Measure the tarp dimensions.
Mark the exact points where each corner of the tarp will be anchored.
Ensure that the anchor points are at least 5–10% longer than the tarp size to allow for tensioning and slight adjustments.
Consider slope angles for water runoff. Aim for at least a 20-degree angle to prevent water pooling on the tarp.
Step 3: Install Support Posts (If Necessary)
If your backyard lacks existing anchor points like trees or fences, you’ll need to install sturdy support posts:
Dig post holes at least 24 inches deep and 8-12 inches wide for stability.
Set posts in concrete, making sure they remain plumb and level.
Allow the concrete to cure for at least 24–48 hours before applying tension from the tarp.
We recommend using pressure-treated wood, galvanized steel poles, or aluminum posts for longevity and strength.
Step 4: Install Mounting Hardware
With your anchor points ready, it’s time to install the necessary hardware:
Attach eye bolts or pad eyes securely into walls, posts, or other fixed structures.
For added flexibility and adjustability, install turnbuckles or tensioners to fine-tune the tarp’s tightness.
Connect snap hooks, D-rings, or carabiners to make assembly and disassembly easier.
Make sure all hardware is rated for outdoor use to prevent rust and corrosion.
Step 5: Attach and Tension the Shade Tarp
Now it’s time for the most satisfying part—mounting the shade tarp:
Begin by attaching one corner of the tarp to an anchor point.
Gradually attach the remaining corners, moving diagonally for even tension.
Adjust each connection point using your turnbuckles, ropes, or cables.
Pull the tarp tight enough to avoid sagging, but not so tight that it risks tearing.
Check that the tarp maintains the desired slope for rainwater runoff and adjust tension as needed.
Step 6: Final Adjustments and Safety Check
Before enjoying your new shaded area:
Inspect all anchor points and hardware for stability.
Test the tarp’s tension and make adjustments for even distribution.
Ensure that no sharp edges or loose connections remain that could damage the tarp or pose a safety hazard.
Confirm that the tarp is secure in windy conditions by giving it a gentle tug.
If you live in an area with frequent high winds, consider removing the tarp during storms to prevent damage.
Step 7: Enjoy Your Shaded Backyard Oasis
Once installed, your backyard shade tarp provides a comfortable and protective space for outdoor gatherings, relaxation, or family activities. You can decorate underneath with outdoor furniture, string lights, or potted plants to create a personalized outdoor retreat.
Maintenance Tips for Long-Lasting Shade Tarp Performance
To extend the life of your shade tarp, follow these maintenance guidelines:
Regularly check for wear and tear, especially around anchor points and seams.
Clean the tarp periodically with mild soap and water to prevent mildew buildup.
Store the tarp indoors during harsh weather seasons if it's not designed for year-round use.
Tighten hardware as needed to maintain proper tension and avoid sagging.
By following these simple care steps, your shade tarp will continue to deliver years of sun protection and outdoor comfort.
Conclusion: Upgrade Your Outdoor Space with a DIY Shade Tarp
Installing a shade tarp in your backyard is a cost-effective and rewarding DIY project. With careful planning, quality materials, and proper installation techniques, you’ll enjoy cool, shaded outdoor living all season long. This step-by-step guide ensures your project goes smoothly from start to finish.
Find the right local pro for your project
 California Closets HQ
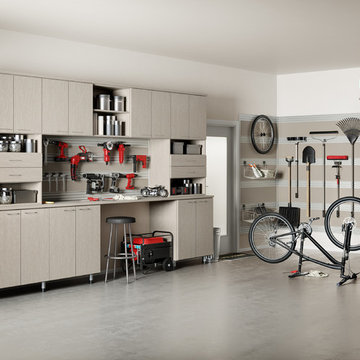
A place for tools, supplies and a workbench to boot, this storage system provides an ideal spot for working on projects.
• Lago Adriatic Mist and Classic Cashmere finishes lend an industrial look
• Slab door and drawer fronts contribute to the seamless aesthetic
• Sleek, modern handles add polish
• Slat wall with accessories provides storage for tools
• Integrated workstation creates a designated project space
• Concealed storage cabinets include adjustable shelving for changing needs

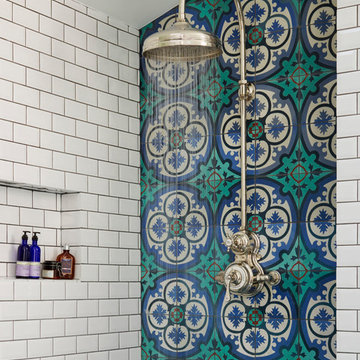
 Rustico Tile & Stone
Philadelphia Encaustic-style Cement Tile - custom made and provided by Rustico Tile and Stone. Wholesale prices and worldwide shipping for Cement Tiles.
Rustico Tile and Stone offers 2 types of this Concrete Tile. Our MeaLu Collection features this specific tile and other in-stock, ready-to-ship Cement tiles. Or customize your tile with designs from our Traditional Collection.
Learn more by calling or emailing us today! (512) 260-9111 / info@rusticotile.com
Bathroom design and installation completed by Drummonds UK - "Makers of Bathrooms"
 Stephanie Nash
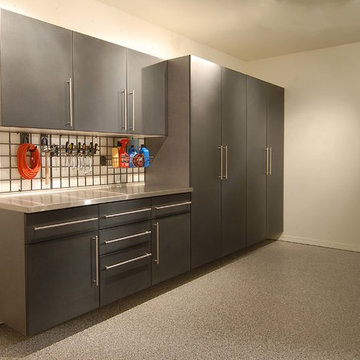
Complete your home by investing in a garage storage design that finally finishes off your much used but under-utilized garage / storage area.
Seen here in Slate Powder Coat, this design will sure to be the envy of even the most discerning neighbors. Wall-to-wall tall cabinetry coupled with a perfectly proportioned work space make for a clean and efficient design. The integrated
"Wire-Wall" shelving system provides additional storage and keeps all the tools you use the most right at your fingertips.
A variety of counter and finish options are available and include stainless steel counters and fully encapsulated powder coated door & drawer face options with a smooth but rugged surface.
Call Today to schedule your free in home consultation, and be sure to ask about our monthly promotions.
Tailored Living® & Premier Garage® Grand Strand / Mount Pleasant
OFFICE: 843-957-3309
EMAIL: jsnash@tailoredliving.com
WEB: tailoredliving.com/myrtlebeach
Sponsored
Columbus, OH
Free consultation for landscape design!

Peabody Landscape Group
Franklin County's Reliable Landscape Design & Contracting
 User
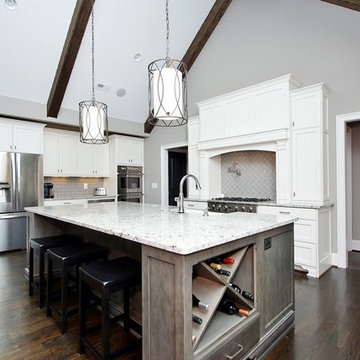
UserEat-in kitchen - large craftsman dark wood floor eat-in kitchen idea in Other with a farmhouse sink, shaker cabinets, white cabinets, granite countertops, gray backsplash, subway tile backsplash, stainless steel appliances and an island
 New Style Cabinets
Bret Jelinek - Chicago Home Photos
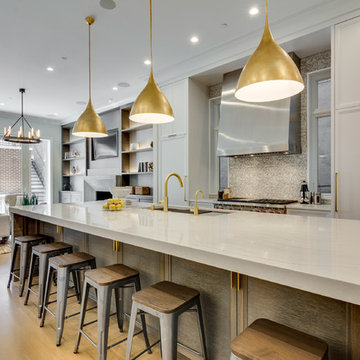
Example of a trendy galley medium tone wood floor and brown floor open concept kitchen design in Chicago with paneled appliances, an island, an undermount sink, recessed-panel cabinets, white cabinets, gray backsplash and white countertops
Example of a trendy galley medium tone wood floor and brown floor open concept kitchen design in Chicago with paneled appliances, an island, an undermount sink, recessed-panel cabinets, white cabinets, gray backsplash and white countertops
 TKS Design Group
Download our free ebook, Creating the Ideal Kitchen. DOWNLOAD NOW
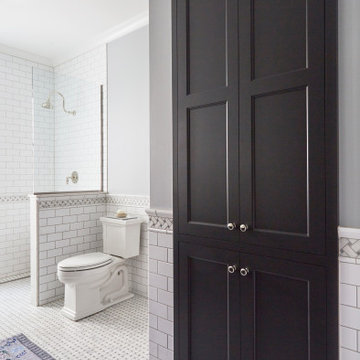
This master bath remodel is the cat's meow for more than one reason! The materials in the room are soothing and give a nice vintage vibe in keeping with the rest of the home. We completed a kitchen remodel for this client a few years’ ago and were delighted when she contacted us for help with her master bath!
The bathroom was fine but was lacking in interesting design elements, and the shower was very small. We started by eliminating the shower curb which allowed us to enlarge the footprint of the shower all the way to the edge of the bathtub, creating a modified wet room. The shower is pitched toward a linear drain so the water stays in the shower. A glass divider allows for the light from the window to expand into the room, while a freestanding tub adds a spa like feel.
The radiator was removed and both heated flooring and a towel warmer were added to provide heat. Since the unit is on the top floor in a multi-unit building it shares some of the heat from the floors below, so this was a great solution for the space.
The custom vanity includes a spot for storing styling tools and a new built in linen cabinet provides plenty of the storage. The doors at the top of the linen cabinet open to stow away towels and other personal care products, and are lighted to ensure everything is easy to find. The doors below are false doors that disguise a hidden storage area. The hidden storage area features a custom litterbox pull out for the homeowner’s cat! Her kitty enters through the cutout, and the pull out drawer allows for easy clean ups.
The materials in the room – white and gray marble, charcoal blue cabinetry and gold accents – have a vintage vibe in keeping with the rest of the home. Polished nickel fixtures and hardware add sparkle, while colorful artwork adds some life to the space.
 Realogics Sotheby's International Realty
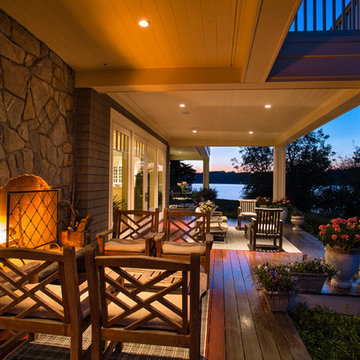
Inspiration for a large coastal backyard outdoor kitchen deck remodel in Seattle with a roof extension
 Erica Peale Design
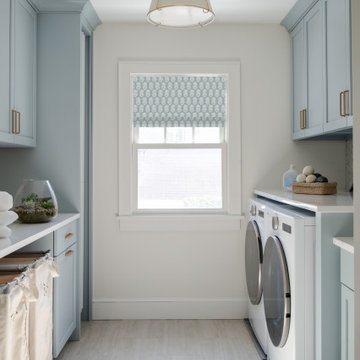
Once dark and weighed down by orange walls, this laundry room has been completely reimagined into a light-filled, uplifting space. New custom cabinetry delivers abundant hidden storage, keeping everyday essentials beautifully organized, while a dedicated laundry sink with a natural stone backsplash brings both function and a touch of luxury. Thoughtful details like pull-out drying racks make daily tasks effortless. The result is a room that feels fresh, bright, and genuinely happy—proof that even the most utilitarian spaces can be a joy to be in.
 Convenience Concepts
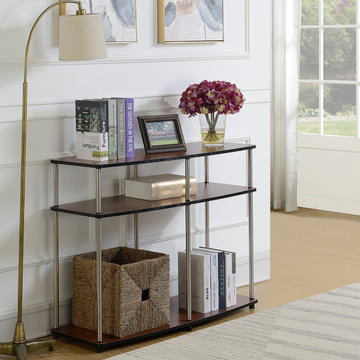
Welcome your guests with the simple and stylish Designs2Go No Tools Console Table from Convenience Concepts. Feature your console table in the living room or entryway to enjoy its versatility. This design provides three ample shelves for all your storage or display needs. Its stainless steel round poles, black PVC edge banding, and its paper melamine finish will complement any new or existing home décor. With just 4 easy steps and no tools required for assembly, you will have the Designs2Go No Tools Console Table ready to enjoy in no time. Look for more items from the Designs2Go No Tools Collection, each sold separately.

 Convenience Concepts
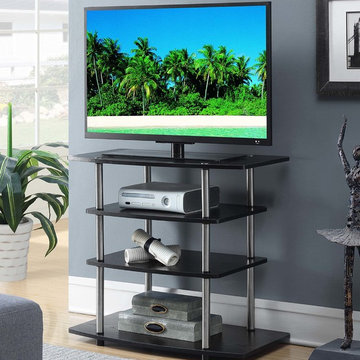
The Designs2Go No Tools Highboy TV Stand from Convenience Concepts brings a whole new meaning to easy assembly. Not only can you assemble this TV stand in 5 easy steps, but it requires absolutely no tools for assembly! Its convenience will have you watching your favorite TV show in style in no time. Boasting a modern contemporary look, it will update your current décor. Crafted from particle board and finished with a rich textured melamine overlay, its ample shelves provide enough space for all your entertainment essentials or favorite collectibles. This home entertainment unit has a frame that is constructed of stainless steel poles that ensure sturdiness and will not rust over time. This open concept furniture design was built for longevity and it’s sure to become a staple in your home. Its versatility allows this multi-functional furniture to be used in the living room, bedroom or home study. Look for additional furniture pieces from the Designs2Go No Tools Collection from Convenience Concepts and indulge in its convenience today!

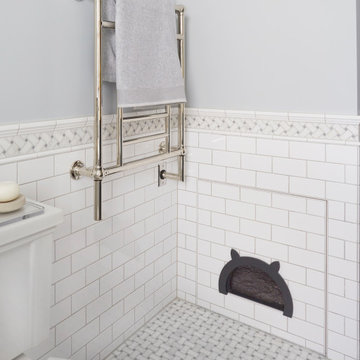 TKS Design Group
Download our free ebook, Creating the Ideal Kitchen. DOWNLOAD NOW
This master bath remodel is the cat's meow for more than one reason! The materials in the room are soothing and give a nice vintage vibe in keeping with the rest of the home. We completed a kitchen remodel for this client a few years’ ago and were delighted when she contacted us for help with her master bath!
The bathroom was fine but was lacking in interesting design elements, and the shower was very small. We started by eliminating the shower curb which allowed us to enlarge the footprint of the shower all the way to the edge of the bathtub, creating a modified wet room. The shower is pitched toward a linear drain so the water stays in the shower. A glass divider allows for the light from the window to expand into the room, while a freestanding tub adds a spa like feel.
The radiator was removed and both heated flooring and a towel warmer were added to provide heat. Since the unit is on the top floor in a multi-unit building it shares some of the heat from the floors below, so this was a great solution for the space.
The custom vanity includes a spot for storing styling tools and a new built in linen cabinet provides plenty of the storage. The doors at the top of the linen cabinet open to stow away towels and other personal care products, and are lighted to ensure everything is easy to find. The doors below are false doors that disguise a hidden storage area. The hidden storage area features a custom litterbox pull out for the homeowner’s cat! Her kitty enters through the cutout, and the pull out drawer allows for easy clean ups.
The materials in the room – white and gray marble, charcoal blue cabinetry and gold accents – have a vintage vibe in keeping with the rest of the home. Polished nickel fixtures and hardware add sparkle, while colorful artwork adds some life to the space.
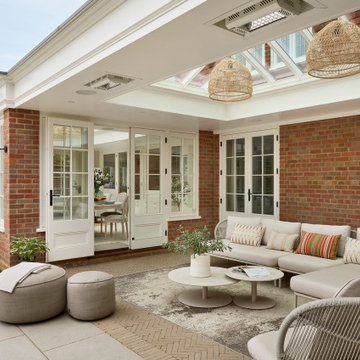
 Westbury Garden Rooms
Westbury Orangery and Loggia outdoor covered area
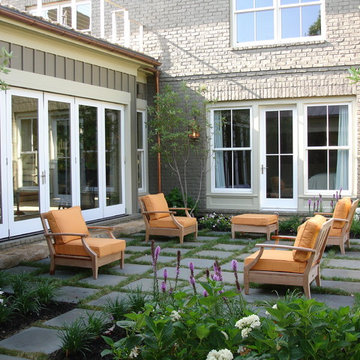
Example of a classic patio design in Essex
Example of a classic patio design in Essex
Sponsored
Columbus, OH

Snider & Metcalf Interior Design, LTD
Leading Interior Designers in Columbus, Ohio & Ponte Vedra, Florida
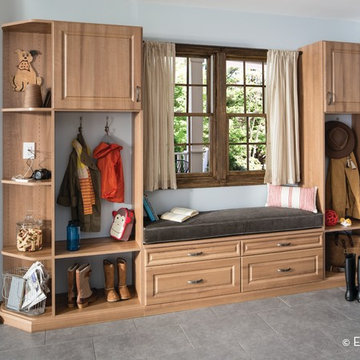
 EasyClosets
EasyClosets is the nation’s largest internet provider of do-it-yourself custom closet organizers and home organization systems. Our online design tool allows you to design your dream space and purchase high quality custom cut closet organizers and storage solutions for all areas of your home. From our online closet design tool, to our trained staff of experienced closet designers, to our high end closet organizer systems, EasyClosets is the best choice when designing your closets.
 Goggans Architecture & Interiors
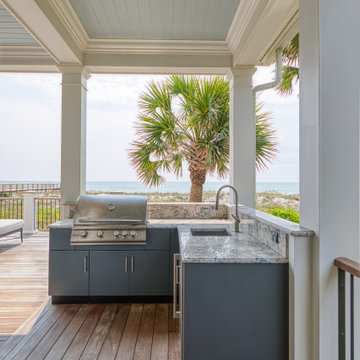
When the Owners approached Goggans Architecture about renovation of a 90’s era oceanfront house, it was clear there would be a lot more to the renovation than mere updates and remedying deferred maintenance. One of the most significant issues was how to integrate an outdoor pool given the pool had to be within the building envelope, and the house was already abutting the setback on its ocean side. A second significant challenge was how to provide a roof top deck over a pitched roof house with an attic, that was functional and attractive. Finally, creating better access from the parking area to the kitchen was a priority.
Goggans Architecture addressed the placement of a pool by creating a walled courtyard at the front, or landward side, of the house. The pool was placed on one side of the entry walkway, while its composition was balanced by a parterre garden on the other side of the walkway. The roof top deck was resolved by adding a new staircase and passageway through former attic space. By using a motorized roof hatch, the Owners could ascend to the roof deck which perched just below the roof ridge, hidden from view from the street. Relocating an underneath stair from one side of the house to a point that was closer to the kitchen resolved the access issue.
These strategic moves created other opportunities, such as expansion of the master bathroom to a portion of the front porch, while allowing an exterior stair from the bath directly to the pool. Other enhancements included placement of a large folding door in the Great room, renovation and expansion of the kitchen and exterior decks, reorganization, and replacement of the fenestration, updating all baths and interior and exterior finishes.
The extensive renovation reflects the holistic approach of Goggans Architecture, marrying landscape architecture, architecture, and interiors.
 CB Paint and Decor, Inc.
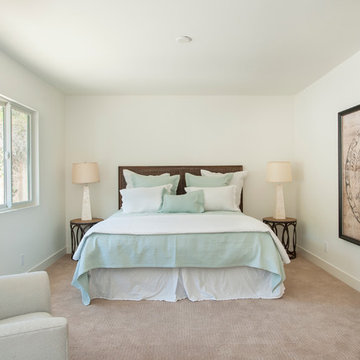
Located in Santa Barbara’s Bel Air Knolls this home is ideally located close to beaches, shopping and all of Santa Barbara’s best activities. After entering the home you will step into the great room, which serves as the heart of the homes entertaining area. The clean lines and open space seamlessly blend the kitchen, dining and living areas together. This space is light filled by large windows and French doors to the rear patio. All of the bedrooms are comfortable, bright and well appointed with finishes that compliment the home’s style. In addition to its three bedrooms, this home offers a spacious en suite master. The master boasts his and her closets, sliders to the rear patio and a beautifully appointed bath. The master bath offers new vanities, chic tile floors and an elegant step down shower.
Cooking in the brand new kitchen is a pleasure both by design and function. Large workspaces, intuitive cabinets and brand new top of the line Bosch appliances will provide all the tools you need for a simple weeknight meal or a large gathering. Complimenting the kitchens function is its beautiful design. High gloss white cabinets wrapped with white quartz counters make a dramatic statement against the wide planked hardwood floors and stainless steel appliances. After preparing the perfect meal you can simply dine in on the large bar counter or enjoy your meal al fresco on the homes patio. The grounds of the home have been updated and now offer unique steel planters, patios and water wise landscaping that serve as the perfect compliment to the homes lines.
23