
Search results for "Unhappy" in Home Design Ideas
 Custom Design & Construction
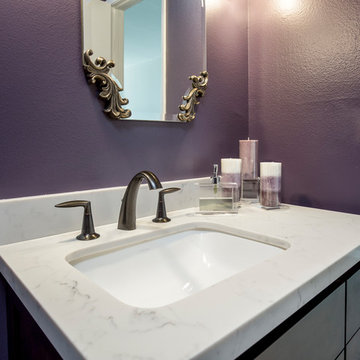
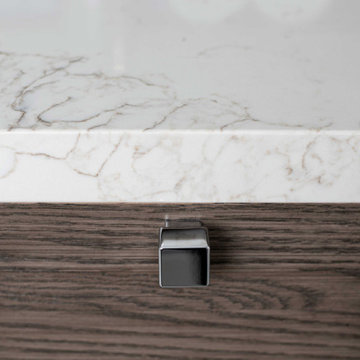
This Playa Del Rey, CA. design / build project began after our client had a terrible flood ruin her kitchen. In truth, she had been unhappy with her galley kitchen prior to the flood. She felt it was dark and deep with poor air conditioning circulating through it. She enjoys entertaining and hosting dinner parties and felt that this was the perfect opportunity to reimagine her galley kitchen into a space that would reflect her lifestyle. Since this is a condominium, we decided the best way to open up the floorplan was to wrap the counter around the wall into the dining area and make the peninsula the same height as the work surface. The result is an open kitchen with extensive counter space. Keeping it light and bright was important but she also wanted some texture and color too. The stacked stone backsplash has slivers of glass that reflect the light. Her vineyard palette was tied into the backsplash and accented by the painted walls. The floating glass shelves are highlighted with LED lights on a dimmer switch. We were able to space plan to incorporate her wine rack into the peninsula. We reconfigured the HVAC vent so more air circulated into the far end of the kitchen and added a ceiling fan. This project also included replacing the carpet and 12X12 beige tile with some “wood look” porcelain tile throughout the first floor. Since the powder room was receiving new flooring our client decided to add the powder room project which included giving it a deep plum paint job and a new chocolate cherry vanity. The white quartz counter and crystal hardware balance the dark hues in the wall and vanity.
 Bennett Design Co.
We were thrilled when our former clients called about their primary bathroom remodel. They were so unhappy with the space that they'd resorted to using it as a storage area, and the entire family shared the hallway bathroom.
Some of the most notable complaints were that the vanity and closet area had no privacy from the primary bedroom, making the space difficult to use while someone was sleeping. The oversized mirrored closet doors had settled and could hardly be opened and closed. More minor complaints included the lack of double sinks, limited vanity storage, nowhere for dirty laundry, a small shower, and poor lighting overall.
We also had a few architectural limitations. The windows in the home had recently been replaced, so we needed to retain their existing locations. Similarly, the toilet line location was very limited in this second-story room, so we needed to work around the current spot.
Our final design included a frosted glass door separating the bedroom and bathroom. This allowed for privacy but retained the natural light provided by the windows in both rooms. We also removed the wall separating the shower and toilet area from the vanity; this made both areas feel larger and more cohesive. The closet doors were replaced with new gliding doors that provide easy access to the entire closet.
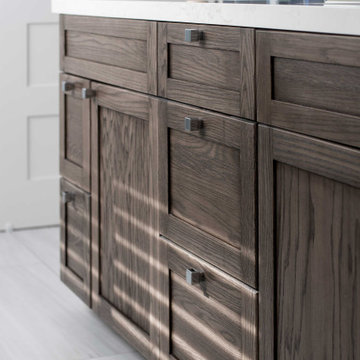
The updated vanity area includes ample drawer storage and a large recessed medicine cabinet. The cabinets are stained oak, providing a warm natural texture to balance the cool-toned manufactured tiles. The inky-blue glass wall tile is a focal point and adds a burst of color to the room. Between the new vanity and shower area is an open storage system for baskets, towel storage, and a laundry hamper.
We reconfigured a small closet in the bedroom to create an inviting and large shower. We opted for a full-width shampoo niche along the rear wall with the same accent tile we incorporated into the vanity area. We added a linear shower drain along the same wall to mirror the elongated niche
detail. 'Clear hardware' by-pass shower doors that allow the user to reach the shower controls before stepping in.
Overall, the space is bright and calm, with just the right amount of bold color and natural textures. We will soon begin remodeling the hallway bath because the entire family is now using this new space!
 Bennett Design Co.
We were thrilled when our former clients called about their primary bathroom remodel. They were so unhappy with the space that they'd resorted to using it as a storage area, and the entire family shared the hallway bathroom.
Some of the most notable complaints were that the vanity and closet area had no privacy from the primary bedroom, making the space difficult to use while someone was sleeping. The oversized mirrored closet doors had settled and could hardly be opened and closed. More minor complaints included the lack of double sinks, limited vanity storage, nowhere for dirty laundry, a small shower, and poor lighting overall.
We also had a few architectural limitations. The windows in the home had recently been replaced, so we needed to retain their existing locations. Similarly, the toilet line location was very limited in this second-story room, so we needed to work around the current spot.
Our final design included a frosted glass door separating the bedroom and bathroom. This allowed for privacy but retained the natural light provided by the windows in both rooms. We also removed the wall separating the shower and toilet area from the vanity; this made both areas feel larger and more cohesive. The closet doors were replaced with new gliding doors that provide easy access to the entire closet.
The updated vanity area includes ample drawer storage and a large recessed medicine cabinet. The cabinets are stained oak, providing a warm natural texture to balance the cool-toned manufactured tiles. The inky-blue glass wall tile is a focal point and adds a burst of color to the room. Between the new vanity and shower area is an open storage system for baskets, towel storage, and a laundry hamper.
We reconfigured a small closet in the bedroom to create an inviting and large shower. We opted for a full-width shampoo niche along the rear wall with the same accent tile we incorporated into the vanity area. We added a linear shower drain along the same wall to mirror the elongated niche
detail. 'Clear hardware' by-pass shower doors that allow the user to reach the shower controls before stepping in.
Overall, the space is bright and calm, with just the right amount of bold color and natural textures. We will soon begin remodeling the hallway bath because the entire family is now using this new space!
Find the right local pro for your project

 Frits de Vries Architect Ltd.
Ema Peter Photography
Mid-sized trendy porcelain tile and gray floor foyer photo in Vancouver with white walls and a dark wood front door
Mid-sized trendy porcelain tile and gray floor foyer photo in Vancouver with white walls and a dark wood front door
 Golden View Renovation
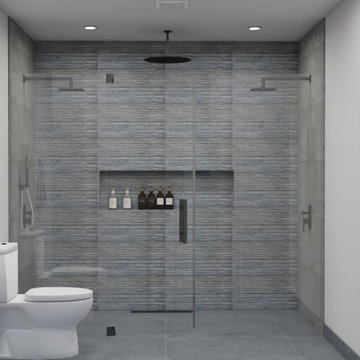
Bathroom - modern gray tile and mosaic tile porcelain tile, gray floor and double-sink bathroom idea in San Francisco with a one-piece toilet, a hinged shower door, flat-panel cabinets, white cabinets, white walls, an integrated sink and a floating vanity


 Cabinet Refresh Los Angeles CA
Jacob A. Wright
Inspiration for a mid-sized transitional dark wood floor eat-in kitchen remodel in Los Angeles with an undermount sink, recessed-panel cabinets, white cabinets, quartz countertops, green backsplash, glass tile backsplash, stainless steel appliances and a peninsula
Inspiration for a mid-sized transitional dark wood floor eat-in kitchen remodel in Los Angeles with an undermount sink, recessed-panel cabinets, white cabinets, quartz countertops, green backsplash, glass tile backsplash, stainless steel appliances and a peninsula

 Lisa Shaffer
Mixing styles is what we do best. The charm and history of this home paired perfectly with updated transitional furnishings.
Inspiration for a mid-sized transitional medium tone wood floor and brown floor living room remodel in Philadelphia with green walls, a wood fireplace surround and a wall-mounted tv
Inspiration for a mid-sized transitional medium tone wood floor and brown floor living room remodel in Philadelphia with green walls, a wood fireplace surround and a wall-mounted tv

 Imperial Tile & Stone Anaheim
Marble is fun! If you have a weakness for geometrical patterns this will be the perfect tile for you, this pattern brings together Beach glass and Calacata Marble. The best part, you get to choose the color of the glass.
 Tile Doctor Ltd
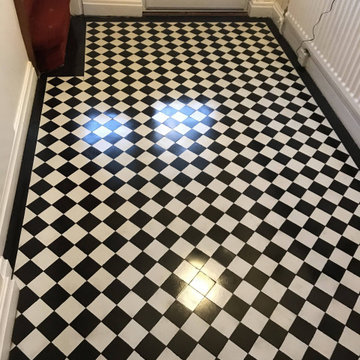
This is a great example of a Victorian Tiled floor refurbishment which I recently completed at a property in Stoke-on-Trent. If you look closely at the photographs below you will see the white tiles are looking grubby and paint splash staining from decorating. The owner was unhappy with how the floor now looked and wanted it refurbished.
Black and White Victorian tiles laid in a chequered diamond pattern is a classic style and a very popular choice for hallways at the turn of the 20th century. Over the years many have been replaced or covered up with carpet and those that survived are now a sought-after period feature that adds value to your property.
I initially cleaned the floor by applying a strong dilution of Tile Doctor Pro-Clean which was sprayed onto the floor and then left to soak in for ten minutes. Pro-Clean is our goto tile and grout cleaning product that is designed to break down dirt and remove old sealers. After ten minutes the solution was scrubbed in with a rotary machine fitted with a coarse 200-grit pad. The soil generated was rinsed off the tiles and extracted with a wet vacuum and the floor inspected.
I would see more work was needed to get the floor clean and free of staining, so I spot treated the problem areas with Tile Doctor Remove and Go which is a coatings remover. I worked in small sections leaving the product to dwell as before for 10 minutes, I then used a wallpaper steamer with handheld diamond blocks to get the ingrained dirt out of the floor. After a final rinse and extraction, the floor looked clean so, so much better than when I started.
I then left the floor to dry off overnight and came back the second day to seal the tiles first checking the moisture levels with a damp meter. Applying sealer to a damp floor will result in the floor looking patchy when it dries so I always check first. The readings were good, so I started to apply the first of five coats of sealer which for this floor I chose Tile Doctor Seal and Go Extra.
Old Victorian floors do not have a damp-proof membrane installed under the floor so its important to select a sealer that will allow moisture to rise through the tiles and evaporate on the surface, Seal and Go Extra allows for this. Choosing a non-breathable sealer can result in moisture being trapped under the floor where it can reach out to the walls leading to rising damp.
Once the floor dried it looked fantastic. In fact, my customer was so happy with the transformation she was taking pictures and sending them to her daughters as I worked; she couldn’t believe how well it was turning out.
Trevor Preece
Staffordshire Tile Doctor
 Tile Doctor Ltd
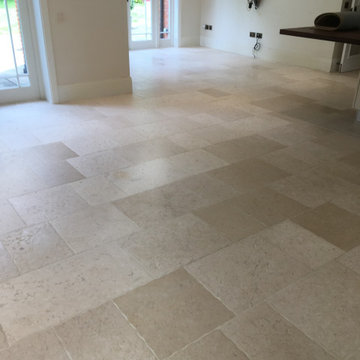
Our client had inherited this Travertine floor when purchasing in a lovely street in Walton-On-Thames, close by was the River Thames which runs all the way into London. The new owners were unhappy with the floor in that it did not look very clean, and they were keen to get this rectified. I arranged a site visit to survey the floor and see what could be done to restore its appearance.
The floor itself was in good physical condition, however, it was apparent from the level of dirt ingrained in the stone that it had not been maintained very well by the previous owner. I carried out a small test clean which came out well and they could see straight away what the floor should look really like! They were happy with my renovation quote and we agreed a mutually convenient time where I could work in relation to the COVID guidelines.
The Travertine floor was scrubbed using a mixture of Tile Doctor Pro Clean and Remove and Go. These are heavy duty cleaning products designed for use on tile and stone can be combined to form a powerful cleaning/stripping solution which is left to dwell on the floor surface. After a short while the solution was worked into the stone using a rotary machine fitted with a black scrubbing pad.
This cleaning recipe works extremely well breaking down dirt, stains, and grease in the stone. Following a machine scrub and a more manual hand scrub of the grout lines, we then pressure rinsed the soil away and then it was extracted using an industrial wet vacuum. In a couple of areas, it was necessary to repeat the process to ensure it was completely clean. Once we were satisfied that the stone was fresh and clean, the floor was left to dry off overnight, so it would be ready for sealing the following day.
After drying overnight, the floor was checked with a damp meter to make sure it was dry. Once reassured I started with the application of the fresh sealer to the floor using Tile Doctor Colour Grow Sealer which is a colour enhancing sealer that works from within by soaking into the pores of the stone. Several coats were applied allowing each one to dry before applying the next. This sealer does not provide a glossy finish, just a nice natural sheen. This brought back the contrast and natural colours in the stone, whilst adding protection to stone for many years to come.
The client was very happy with the work we carried out, the floor had come up much better than they had expected, and it really made a difference to the lovely kitchen space. The floor looked like new. I recommended the regular use of Tile Doctor Stone Soap for future cleaning which will keep the floor in great condition and ensure the longevity of the newly applied sealant.
Jonathan Oldham
South Middlesex Tile Doctor

Inspiration for a small craftsman single-wall enclosed kitchen remodel in Minneapolis with medium tone wood cabinets, granite countertops, blue backsplash, ceramic backsplash, stainless steel appliances and an island
 Tile Doctor Ltd
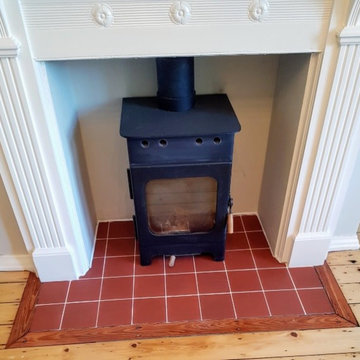
We received an inquiry from a client in Lindow End near Wilmslow Golf Club in the Cheshire stockbroker belt. They were restoring their home and were unhappy with the state of the Quarry tiled hearth under their log burning stove. We arranged a site visit to survey the tile and grout and provide a quote for restoring the appearance. The village is situated in what’s known as the ‘Cheshire Golden Triangle’ which is one of the most sought-after places to live in the UK after London. As a result, we often find ourselves in this area working on some very nice properties, so it wasn’t long before we were able to call in and survey the tiles.
As you can see from the pictures the hearth was quite dirty and the grouting had discoloured from years of use of the wood burner. The work here was a minor part of their restoration which had included significant building work. We agreed a price to carry out the work, which should only take a day and were able to return the following week.
Our first job was to cover the newly sanded and sealed wooden floors with dust sheets, so we didn’t mark them as we came in the front door to the lounge. We always try and make as little mess as possible and we are always as careful as possible.
We then sprayed Tile Doctor Pro-Clean on the fire hearth tiles. This is a multi-purpose tile and grout cleaner which would make light work of the dirty tiles. The product was left to soak into the Quarry tile and grout for about twenty minutes before being scrubbed in. The hearth was a small area, so this was done by hand and then washed down with clean water.
The dirty residue was removed using a wet vacuum then the tiles where wiped down with a clean micro fibre cloth. We then dried off the tiles using a little encouragement with a heat gun to speed up the drying process. Speed drying the tile and grout in this manor would allow us to complete the work in one visit.
Once the tiles and grout lines were dry it was clear that years of dirt and soiling had stained the grout, so although no much cleaner it was clear more work would be needed to give the grout a fresh and consistent appearance.
To address this issue with the grout we selected to apply a Sandstone Tile Doctor Grout Colourant. This is applied with a small brush and brushed it into the grout lines. It is quite a precise job but any colourant that goes onto the tiles is removed with a baby wipe before it dries. This process really transformed the look of the grout, the colourant also forms a barrier over the grout which will protect it going forward and make it easier to clean.
The Quarry tiles were then given a coat of Tile Doctor Colour Grow which is an impregnating colour enhancing sealer. This brings out the best in the quarry tiles and adds protection against future staining which will be needed given its location.
The client was very happy with the finish, in fact the hearth looked like it had been newly tiled, the impact of the recoloured grout was that striking. Sometimes the smallest jobs can be the most rewarding.
Andrew Robb
East Cheshire Tile Doctor
 Tile Doctor Ltd
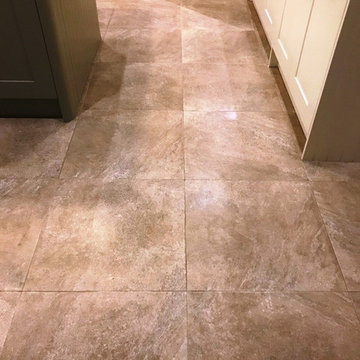
This request came from a client who lives in the Newcastle district of Jesmond who was unhappy with the appearance of their Textured Porcelain floor tiles. The problem was that the Porcelain Tiles were grouted in whilst the underfloor heating was switched on. This resulted in the grout drying out quicker than expected and the tiler struggled to get the excess grout off the tiles. To rectify the problem, the tiler tried to get the dried grout off with acid, but it didn’t work, and the floor was left looking dark and dull. Unable to rectify the problem the client was left with a disappointing pale floor and had searched around the internet for a solution.
Normally grout smears like these (aka Grout Haze) can be removed with an acidic product and Tile Doctor sell Grout Clean-up specially for this purpose. However, some grouts contain acid resistant polymers which need to broken down first. Fortunately, we have a solution for everything tile related and the system we use does not affect the main grout lines only the excess grout. I called in to do a site visit and having surveyed the problem I was confident it could resolved, I gave them a price for the work and agreed a date to return to do the job.
My first task was to spray the tiles with Tile Doctor Remove and Go, this was left to soak into the tile for around ten minutes before being scrubbed in. Remove and Go is a coatings remover that is safe to use on tile and grout; normally we use it to remove old sealers but in this case I applied it to break down the polymers. To work the product into the tile I use a buffing machine fitted with a black scrubbing pad, the mechanical advantage this gives makes the job a lot quicker. Then the slurry generated is rinsed off with water and removed with a wet vacuum. The floor was then left to dry for 30 minutes.
We were then able to remove the excess grout which was done by applying Tile Doctor Grout Clean-Up which I mentioned earlier. The process was the same, i.e. using the buffing machine and a wet vacuum to scrub the floor and extract the soil. The floor was rinsed with water to remove any trace of the products used and dried as much as possible using the wet vacuum. The underfloor heating really helped at this point to dry out the floor.
Once the floor was fully dry including the grout lines a single thin coat of Tile Doctor Colour Grow sealer was applied. The tiles were textured porcelain, so the dirt gets trapped into the textured surface if it is not sealed. We usually find one coat of Tile Doctor Colour Grow is more than enough for this, anything that hadn’t soaked in after three to five minutes was then polished off with clean dry cloths.
The client was very happy with the floor and pleased that the excess grout had been cleaned up and the floor looked as it should. Before leaving I recommended the use a pH Neutral tile cleaner for general cleaning such as Tile Doctor Neutral Tile Cleaner. There is no point sealing the tiles only to have it stripped off later with the use of a bleach based cleaner.
Raf Barrett
Tyneside Tile Doctor


 Village Home Stores
Full-overlay Rustic Beech cabinets in the "Charleston" door style and "Briarwood" finish.
Village Home Stores
Example of a large mountain style kitchen design in Chicago
Example of a large mountain style kitchen design in Chicago

 MEC
PEACOCK FANTASY - Custom Designed Peacock Wall Mural in brilliant colors. Notice how it has just the right amount of color | Have a custom mosaic idea? We can help, with our brilliant Italian-trained mosaicists and easy-to-install tiled masterpieces. Worldwide shipping available on the complete range of quality handcrafted marble & glass mosaic products. For inquires and more info, contact us: http://mecartworks.com

 JM Carpets
Large country u-shaped medium tone wood floor kitchen photo in Milwaukee with white cabinets and a peninsula

 Armed & Safe Firearms Training
full [s3e1] Power Se.ason 3 Ep.isode 1 On.line Call Me James. Alright, everything looks perfect then, and let's getting started to watch for it finally, Power s03e01: Call Me James. As the premiere of season 3, what we could expect then? James gets ready to leave Ghost behind. Angela needs to choose between honor and love. A bit reminder from "Ghost Is Dead" Bodies from Ghost's organization drop left and right, each death inching closer to Ghost and Tommy.
Tasha learns of Shawn's death, believing it to have been Ghost's work. Kanan and Ghost fight with Ghost the victor, leaving him for dead and burning the evidence. Tommy Learns of Ghost's involvement with Holly. Ghost reveals to Tommy that he was the one killing most of the members from the organization.
Soon after, Tommy shows Ghost the fake ID of Holly and goes solo. Lobo's calls Tommy wanting him to work with him or lose everything. Angela and Ghost reconcile telling her Ghost is dead, but at the risk of her possibly losing her job. Greg threatens to put Angela and Ghost in jail. The police investigate a fire at Ghost's and Kanan's fight, revealing someone escaped, strongly implying Kanan is still alive.
Know further of this show, Power is an American crime drama television series airing on Starz. The show was created by Courtney Kemp Agboh and is produced by the rapper Curtis "50 Cent" Jackson. It premiered on June 7, 2014.
On June 11, 2014, Starz renewed Power for a ten-episode second season, which began on June 6, 2015 and ended on August 15, 2015. On June 10, 2015, after a very positive critical response to its season 2 premiere, Power was renewed for a ten-episode third season which is scheduled to premiere on July 17, 2016.
Very fantastic, The series follows James St. Patrick, nicknamed "Ghost," owner of a popular New York City nightclub "Truth." In addition, he is a major player in one of the city's biggest illegal drug networks. He struggles to balance these two lives, and the balance topples when he realizes he wants to leave the drug ring in order to support his legitimate business, and commit to his mistress. He seems eerily unhappy with his life, Tommy calling it a mid-life crisis, therefore getting in a relationship with Angela.
He also has to keep his marriage with Tasha (Naughton) and his relationship with AUSA agent Angela Valdez (Loren). With help from his partner in crime Tommy Egan (Sikora), he tries to manage a double life. In the second season James is thrown out of his penthouse after Tasha found out that James took Angela to Miami.
100% working here:
http://tinyurl.com/ju79smw
http://tinyurl.com/jejqwra
Kanan (50 Cent) who spent 10 years in a drug related crime, also believes Ghost set him up. Kanan has a son Shawn, who drives Ghost around and Kanan uses him to get information on Ghost. In the season 2 finale, Ghost and Kanan indulge in an extremely dangerous fight in a dilapidated building. Ghost eventually stabs Kanan and burns him. But in the final minutes of the season finale "Ghost Is Dead", it is revealed that sprinklers had put the fire out, resulting in Kanan escaping and ends with the line "Nobody broke in, somebody broke out". Go and start watching for it after all, Power season 3, episode 1 : Call Me James.

 Greensward LLC
Andrew Cutright
Inspiration for a small traditional full sun backyard concrete paver water fountain landscape in DC Metro.
Inspiration for a small traditional full sun backyard concrete paver water fountain landscape in DC Metro.
13