
Search results for "Useable" in Home Design Ideas
 Building Designers Association of Australia
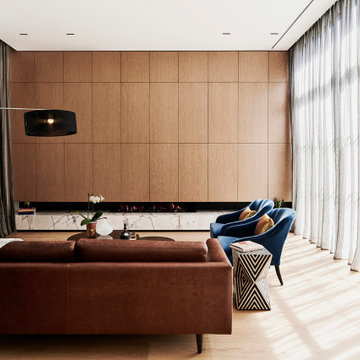
Located on a heritage-lined street in Melbourne’s Williamstown, a young family were seeking a contemporary home with ample room to grow. Benni Trajcevski of Achieve Design Group answered their call, creating the epitome of modern living concealed behind a modest façade. To achieve the long wish list including large indoor and outdoor gathering spaces to entertain family and friends, separate adult and children living and sleeping zones, and a pool suitable for year-round use, Benni has maximised every inch of the block. Seamless transitional spaces link inside with out. This flow between the indoors and outdoors is a key feature of the home, achieved through generous open floor planning and glazing. For example, large hidden sliding doors allow the pool to be closed-off for use in winter; acrylic glass panels link the pool with the sunken lounge, which includes a fire pit for year-round comfort. The inclusion of a courtyard and voids throughout create separate useable zones while maintaining the feeling of spaciousness. Orientated to the north and surrounded with floor to ceiling windows to optimise natural light, the courtyard divides the formal lounge area with the informal living area, while the first floor is divided into four separate wings for privacy and functionality. The interiors are detailed with quality materials and finishes to achieve a sleek and sophisticated aesthetic. Contrasting materials in muted tones, including tiles, steel and lightweight timbers are featured throughout. Corian and a moss green wall are unexpected features.
 Thinkterior LLC
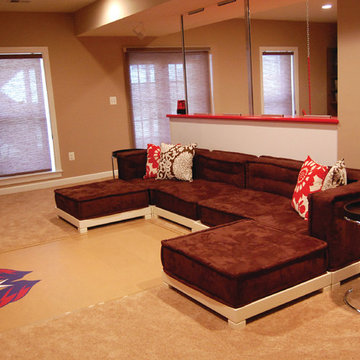
THEME There are two priorities in this
room: Hockey (in this case, Washington
Capitals hockey) and FUN.
FOCUS The room is broken into two
main sections (one for kids and one
for adults); and divided by authentic
hockey boards, complete with yellow
kickplates and half-inch plexiglass. Like
a true hockey arena, the room pays
homage to star players with two fully
autographed team jerseys preserved in
cases, as well as team logos positioned
throughout the room on custom-made
pillows, accessories and the floor.
The back half of the room is made just
for kids. Swings, a dart board, a ball
pit, a stage and a hidden playhouse
under the stairs ensure fun for all.
STORAGE A large storage unit at
the rear of the room makes use of an
odd-shaped nook, adds support and
accommodates large shelves, toys and
boxes. Storage space is cleverly placed
near the ballpit, and will eventually
transition into a full storage area once
the pit is no longer needed. The back
side of the hockey boards hold two
small refrigerators (one for adults and
one for kids), as well as the base for the
audio system.
GROWTH The front half of the room
lasts as long as the family’s love for the
team. The back half of the room grows
with the children, and eventually will
provide a useable, wide open space as
well as storage.
SAFETY A plexiglass wall separates the
two main areas of the room, minimizing
the noise created by kids playing and
hockey fans cheering. It also protects
the big screen TV from balls, pucks and
other play objects that occasionally fly
by. The ballpit door has a double safety
lock to ensure supervised use.
 The Ardent Gardener Landscape Design
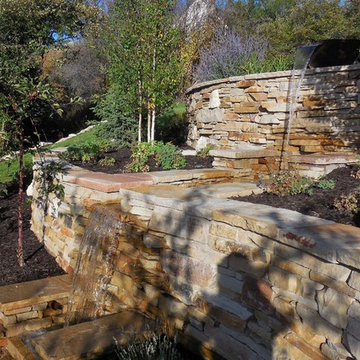
Locally quarried sandstone walls, steps, patio and pond. The design reclaimed a steep slope and made for a visually appealing area that becomes very useable. Simple plantings allow the wall to be the star. Photo: The Ardent Gardener Landscape
Find the right local pro for your project
 Mottram Architecture
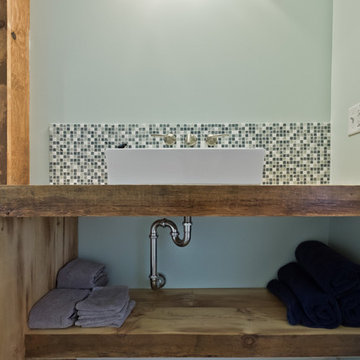
Timber frame homes offer unique challenges during a remodel. What often makes them beautiful and attractive to most homeowners, also makes them challenging for space requirements.
Context: The lovely couple that owned this home were struggling with some interesting floor plan challenges that just didn't work for their family. The loved the beautiful timbers and woodwork of their home, but the dramatically sloping ceilings on the second floor, particularly in the bathroom, just didn't work for this 1 1/2 bath home. Needing to use the skylight to approach the toilet was a less then ideal scenario. Although the bathroom footprint was more then adequate, the sloped ceiling only made half of the space useable. Check out the Before/After post on our blog to see the photos of the house pre-renovation. As much as they loved all the wood features in their home, another challenge they had was light. The wood ceiling made everything inside the house darker, even with a fantastic array of south facing windows, there were spaces in the home that felt dark and small. When they contacted us they wanted to know how could they make their brighter and more inviting, were there solutions to the 2nd floor sloped ceiling issues, and if they were going to do all of this work, how could they make their home more comfortable and efficient. A nagging water leak in the upstairs bathroom spurred them into action and here is how we solved their dilemma.
Conclusion: First, we added a little dormer to the rear of the house so we could get full headroom in nearly all of the upstairs bathroom! Then we decided to extend that dormer one more timber bay over to create a walk in closet with natural light and plenty of space. Since we were contemplating energy efficiency, we resolved a nagging issue that is present in a lot of timber frame construction, air tightness. Commonly found in timber frame construction, fiberglass insulation is installed in the rafter bays and board ceilings are installed over top. Unfortunately, board ceilings are anything but air tight, and fiberglass insulation needs to be in an airtight cavity for maximum effectiveness. So we were able to solve two issues at the same time for this homeowner. We removed the board ceiling and fiberglass insulation, we dense packed the rafter bays with cellulose insulation, and installed sheetrock in place of the boards. The boards were salvaged for re-use by the homeowner, and the space and light quality was dramatically improved. Some may think that losing the board ceiling took something away from the space, but what you'll see in the pictures is that it highly accentuates the heavy timbers and really makes them stand out in a beautiful way. Now with this added airtightness, better insulation, and brighter space, the homeowner hardly runs their wood stove, and it's so quiet in the space, an added bonus from changing the insulation. It became necessary to also add a sheetrock ceiling to the living room to hide the plumbing from the new bathroom layout above. Changing this ceiling gave the homeowner some real quality lighting that was lacking in the living room before. The brighter ceiling and new lighting layout completely transforms the living room into a space you want to hang out, even though the layout didn't change at all. When the homeowner saw the finished spaces she said "I can't believe this is my house, I want to live in this house"
Energy Efficiency: I touched a little on the efficiency above, but like all projects done with Mottram Architecture, we always want to leave you with a little extra. Timber frame construction with board ceilings and fiberglass insulation are notoriously leaky! If you want to know what we think about fiberglass insulation, check our our blog post on Why Fiberglass Insulation Sucks. By installing cellulose insulation and covering it with sheetrock we were able to greatly reduce the heat flowing out of this home. It not only improves cashflow it improves the comfort level in the space. Who wants to sit in their living room and feel a draft? Let us remind you, we are not saying cellulose insulation is an air barrier, we use the sheetrock to help with that, but it does significantly reduce the air flow over fiberglass insulation. And when we reduce the airflow, we reduce the heat flow. And when we reduce the heat flow, we reduce the need to re-heat that drafty air from outside. When it comes to energy efficiency the first and best place to start is air infiltration. We greatly reduced the air infiltration with the new insulation, but we also added a hat and warm boots. What I mean by that is, we improved the insulation in the roof, and we installed insulation in the basement. Maybe it's a silly analogy, but when you think about keeping warm, we always start with the hat and boots! With sustainability in mind, the next project will be to add a deck to the front of this house with rain catchment barrels from the metal roof. They are planning to plant a garden in the spring and the rain catchment system will help to irrigate the new garden.
Builder: East Shore Builders
Photographer: Michael Eric Berube
 Cascade West Development
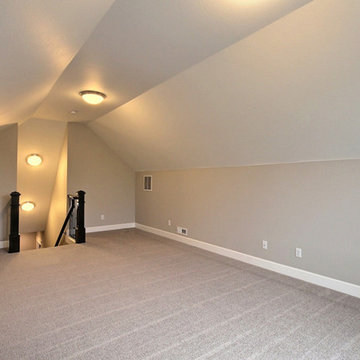
This is an upstairs Bonus Room above the 3-Car Garage.
Typically these spaces become:
-Home Gyms
-Second Family Rooms
-Theater Rooms
-Craft Rooms
-Second Private Studies
-Mixed Use Spaces
-Large Storage Areas
-Princess Suites (Sometimes)
 Mottram Architecture
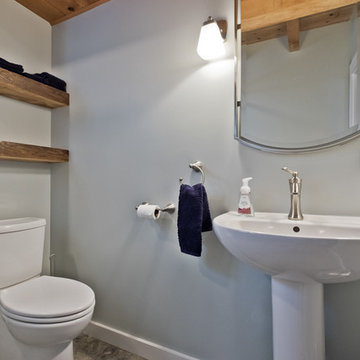
Timber frame homes offer unique challenges during a remodel. What often makes them beautiful and attractive to most homeowners, also makes them challenging for space requirements.
Context: The lovely couple that owned this home were struggling with some interesting floor plan challenges that just didn't work for their family. The loved the beautiful timbers and woodwork of their home, but the dramatically sloping ceilings on the second floor, particularly in the bathroom, just didn't work for this 1 1/2 bath home. Needing to use the skylight to approach the toilet was a less then ideal scenario. Although the bathroom footprint was more then adequate, the sloped ceiling only made half of the space useable. Check out the Before/After post on our blog to see the photos of the house pre-renovation. As much as they loved all the wood features in their home, another challenge they had was light. The wood ceiling made everything inside the house darker, even with a fantastic array of south facing windows, there were spaces in the home that felt dark and small. When they contacted us they wanted to know how could they make their brighter and more inviting, were there solutions to the 2nd floor sloped ceiling issues, and if they were going to do all of this work, how could they make their home more comfortable and efficient. A nagging water leak in the upstairs bathroom spurred them into action and here is how we solved their dilemma.
Conclusion: First, we added a little dormer to the rear of the house so we could get full headroom in nearly all of the upstairs bathroom! Then we decided to extend that dormer one more timber bay over to create a walk in closet with natural light and plenty of space. Since we were contemplating energy efficiency, we resolved a nagging issue that is present in a lot of timber frame construction, air tightness. Commonly found in timber frame construction, fiberglass insulation is installed in the rafter bays and board ceilings are installed over top. Unfortunately, board ceilings are anything but air tight, and fiberglass insulation needs to be in an airtight cavity for maximum effectiveness. So we were able to solve two issues at the same time for this homeowner. We removed the board ceiling and fiberglass insulation, we dense packed the rafter bays with cellulose insulation, and installed sheetrock in place of the boards. The boards were salvaged for re-use by the homeowner, and the space and light quality was dramatically improved. Some may think that losing the board ceiling took something away from the space, but what you'll see in the pictures is that it highly accentuates the heavy timbers and really makes them stand out in a beautiful way. Now with this added airtightness, better insulation, and brighter space, the homeowner hardly runs their wood stove, and it's so quiet in the space, an added bonus from changing the insulation. It became necessary to also add a sheetrock ceiling to the living room to hide the plumbing from the new bathroom layout above. Changing this ceiling gave the homeowner some real quality lighting that was lacking in the living room before. The brighter ceiling and new lighting layout completely transforms the living room into a space you want to hang out, even though the layout didn't change at all. When the homeowner saw the finished spaces she said "I can't believe this is my house, I want to live in this house"
Energy Efficiency: I touched a little on the efficiency above, but like all projects done with Mottram Architecture, we always want to leave you with a little extra. Timber frame construction with board ceilings and fiberglass insulation are notoriously leaky! If you want to know what we think about fiberglass insulation, check our our blog post on Why Fiberglass Insulation Sucks. By installing cellulose insulation and covering it with sheetrock we were able to greatly reduce the heat flowing out of this home. It not only improves cashflow it improves the comfort level in the space. Who wants to sit in their living room and feel a draft? Let us remind you, we are not saying cellulose insulation is an air barrier, we use the sheetrock to help with that, but it does significantly reduce the air flow over fiberglass insulation. And when we reduce the airflow, we reduce the heat flow. And when we reduce the heat flow, we reduce the need to re-heat that drafty air from outside. When it comes to energy efficiency the first and best place to start is air infiltration. We greatly reduced the air infiltration with the new insulation, but we also added a hat and warm boots. What I mean by that is, we improved the insulation in the roof, and we installed insulation in the basement. Maybe it's a silly analogy, but when you think about keeping warm, we always start with the hat and boots! With sustainability in mind, the next project will be to add a deck to the front of this house with rain catchment barrels from the metal roof. They are planning to plant a garden in the spring and the rain catchment system will help to irrigate the new garden.
Builder: East Shore Builders
Photographer: Michael Eric Berube
 Dan Davis Design
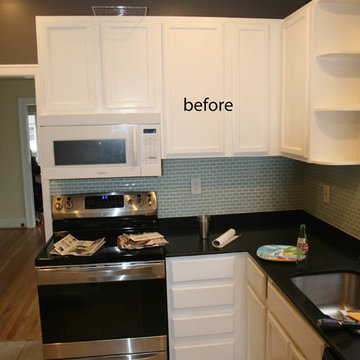
BEFORE PICTURES show how much we opened up the space, made it much more useable, and added considerable style to a small space.
Example of a small galley medium tone wood floor eat-in kitchen design in Detroit with an undermount sink, flat-panel cabinets, dark wood cabinets, quartz countertops, white backsplash, ceramic backsplash, stainless steel appliances and no island
Example of a small galley medium tone wood floor eat-in kitchen design in Detroit with an undermount sink, flat-panel cabinets, dark wood cabinets, quartz countertops, white backsplash, ceramic backsplash, stainless steel appliances and no island
 Building Designers Association of Australia
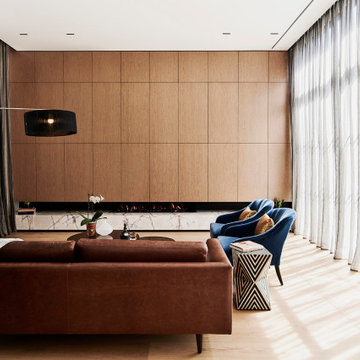
Located on a heritage-lined street in Melbourne’s Williamstown, a young family were seeking a contemporary home with ample room to grow. Benni Trajcevski of Achieve Design Group answered their call, creating the epitome of modern living concealed behind a modest façade. To achieve the long wish list including large indoor and outdoor gathering spaces to entertain family and friends, separate adult and children living and sleeping zones, and a pool suitable for year-round use, Benni has maximised every inch of the block. Seamless transitional spaces link inside with out. This flow between the indoors and outdoors is a key feature of the home, achieved through generous open floor planning and glazing. For example, large hidden sliding doors allow the pool to be closed-off for use in winter; acrylic glass panels link the pool with the sunken lounge, which includes a fire pit for year-round comfort. The inclusion of a courtyard and voids throughout create separate useable zones while maintaining the feeling of spaciousness. Orientated to the north and surrounded with floor to ceiling windows to optimise natural light, the courtyard divides the formal lounge area with the informal living area, while the first floor is divided into four separate wings for privacy and functionality. The interiors are detailed with quality materials and finishes to achieve a sleek and sophisticated aesthetic. Contrasting materials in muted tones, including tiles, steel and lightweight timbers are featured throughout. Corian and a moss green wall are unexpected features.
 Scott Turf and Landscape Company
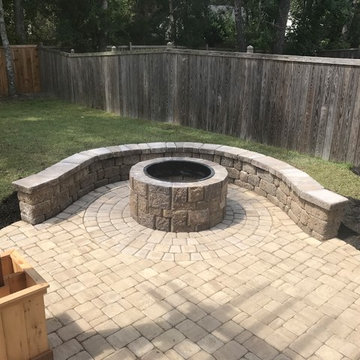
We started with a small crowded patio and we transformed it into a larger, useable outdoor living space by adding a circular seat wall with built in LED low voltage lighting, a natural wood burning fire pit, 480 sq feet of Belgard pavers, custom build Cedar Pergola and flagstone walkway for side access. We also fixed all of the disrupted sod areas and built natural areas for future planting and added Low voltage LED lighting along the flagstone pathway.
 Ornamental Gardens by Lisa
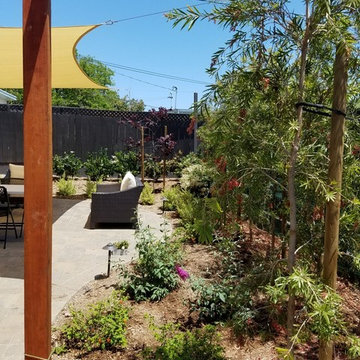
More photos of the gardens. Dwarf variegated Myrtle was used near the edges of the pavers as a soft and fragrant addition.
Inspiration for a mid-sized traditional full sun backyard landscaping in San Diego.
Inspiration for a mid-sized traditional full sun backyard landscaping in San Diego.
 Precision Decks LLC
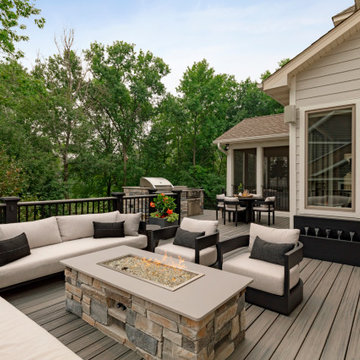
Its feeling like this kind of season! Outdoor entertaining is right around the corner, and this project has it all. From the expansive lounging area with gas fire place to its welcoming cooking and eating area with built in gas grill. Trex decking in Island Mist was used for the floor surface, while afco rails were used for the guard rails. Down below the vibe continues with this great happy hour area with built in bar with multiple refrigerators. Heaters were installed to help extend the evening on those cool nights. We installed Trex RainEscape under our decking to keep everything below the deck dry and useable even in rainy weather.
TrexRainEscape
afcocolumnsandrailings.com

 Distinctive Designs Today
William Morris Lily Arts & Crafts Design
19th century shown in documented color
80% Worsted Wool, 20% Nylon
Suitable for heavy traffic
Useable for stair runners, area rug and wall to wall
Custom colors and borders available
Borders and custom colors available
Cut or Loop pile
 H2D Architecture + Design
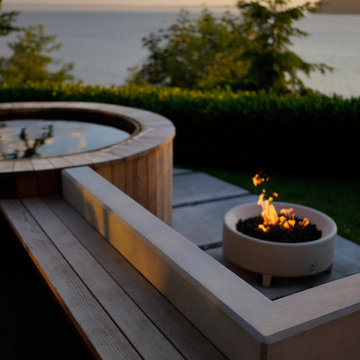
The homeowners of this Mukilteo residence partnered with H2D Architecture + Design to transform their underutilized rear deck into a highly functional outdoor living environment. The existing deck was refinished and reconfigured to create a more useable area for gathering, seamlessly extending the interior living space to the outdoors. A Struxure pergola was introduced to provide adjustable shade and light filtration, allowing the space to adapt to changing weather and seasons. Beyond the deck, the design steps down to a thoughtfully composed concrete paver patio anchored by a custom round wood hot tub, creating a warm and tactile focal point. Surrounding this feature, a built-in bench establishes a zone for relaxation and socializing, while a fire pit adds both ambiance and year-round usability. A custom screen wall was integrated to provide privacy and subtle enclosure without sacrificing openness, helping to define the space while maintaining visual connections to the landscape. The combination of multi-level seating, integrated elements, and carefully considered materials results in a cohesive outdoor retreat that supports a variety of uses.
+ Architecture + Design: H2D Architecture + Design
+ Builder: Bradley J. Rodgers Remodelling
+ Photography: Thomas Vincent
 Canadian Home Builders' Association
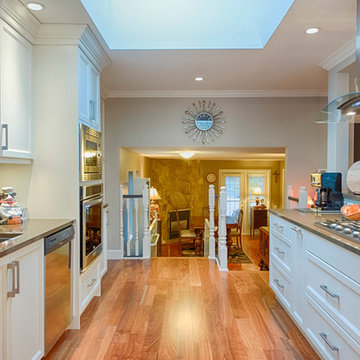
This couple had lived in their home over 20-years, with their handicapped adult daughter. 5 years-ago they added onto the back of their home to accommodate appropriate housing needs for her, such as a wheel-chair lift. However, their home needed wheelchair-accessibility, beginning with transition from daughter’s room on lower level, to main kitchen level, via existing lift. The project was budget-driven so it was critical to utilize practical cost-effective materials, while transforming home’s overall dated-look.
My House Design/Build Team Ltd. successfully opened-up the space, increased use-ability for whole family, and provided the ‘wow-factor’. The renewed kitchen is much more efficient providing a practical solution for family.
 H2D Architecture + Design
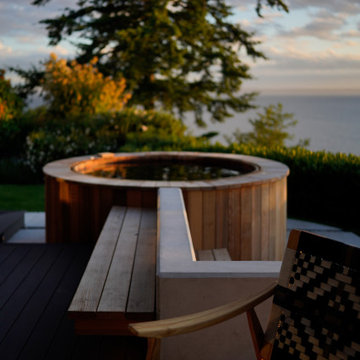
The homeowners of this Mukilteo residence partnered with H2D Architecture + Design to transform their underutilized rear deck into a highly functional outdoor living environment. The existing deck was refinished and reconfigured to create a more useable area for gathering, seamlessly extending the interior living space to the outdoors. A Struxure pergola was introduced to provide adjustable shade and light filtration, allowing the space to adapt to changing weather and seasons. Beyond the deck, the design steps down to a thoughtfully composed concrete paver patio anchored by a custom round wood hot tub, creating a warm and tactile focal point. Surrounding this feature, a built-in bench establishes a zone for relaxation and socializing, while a fire pit adds both ambiance and year-round usability. A custom screen wall was integrated to provide privacy and subtle enclosure without sacrificing openness, helping to define the space while maintaining visual connections to the landscape. The combination of multi-level seating, integrated elements, and carefully considered materials results in a cohesive outdoor retreat that supports a variety of uses.
+ Architecture + Design: H2D Architecture + Design
+ Builder: Bradley J. Rodgers Remodelling
+ Photography: Thomas Vincent
 H2D Architecture + Design
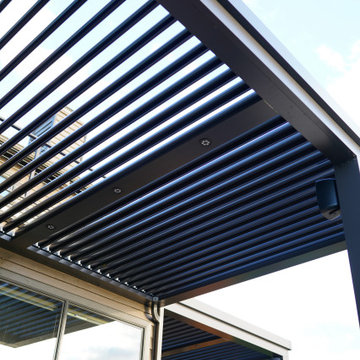
The homeowners of this Mukilteo residence partnered with H2D Architecture + Design to transform their underutilized rear deck into a highly functional outdoor living environment. The existing deck was refinished and reconfigured to create a more useable area for gathering, seamlessly extending the interior living space to the outdoors. A Struxure pergola was introduced to provide adjustable shade and light filtration, allowing the space to adapt to changing weather and seasons. Beyond the deck, the design steps down to a thoughtfully composed concrete paver patio anchored by a custom round wood hot tub, creating a warm and tactile focal point. Surrounding this feature, a built-in bench establishes a zone for relaxation and socializing, while a fire pit adds both ambiance and year-round usability. A custom screen wall was integrated to provide privacy and subtle enclosure without sacrificing openness, helping to define the space while maintaining visual connections to the landscape. The combination of multi-level seating, integrated elements, and carefully considered materials results in a cohesive outdoor retreat that supports a variety of uses.
+ Architecture + Design: H2D Architecture + Design
+ Builder: Bradley J. Rodgers Remodelling
+ Photography: Thomas Vincent

 Rae Marie Interiors, Inc.
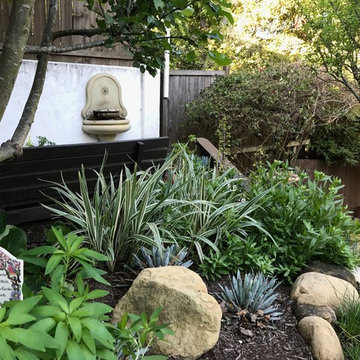
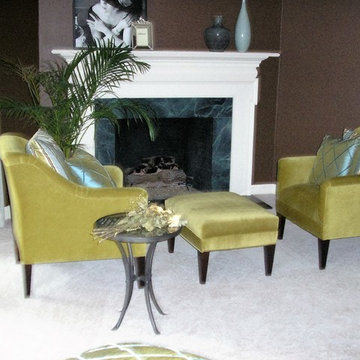
This master bedroom had a gas fireplace on an angle in the corner of the room. By placing the two chairs and ottoman in front of the fireplace, this connected the fireplace to the sleeping area and filled up that awkward space.....making that space very useable!

 Level Custom Build
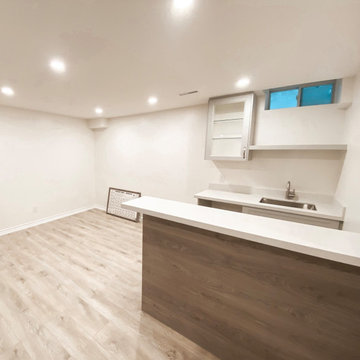
In 2022 Level Custom Build completed the full renovation of this unfinished basement. The clients were looking to add more useable square-footage to their home and increase the long-term resale value. The result was a bright, functional space with a perfect layout and amenities for hosting guests.
18