
Search results for "Weather checks" in Home Design Ideas
 User
UserRustic White Photography
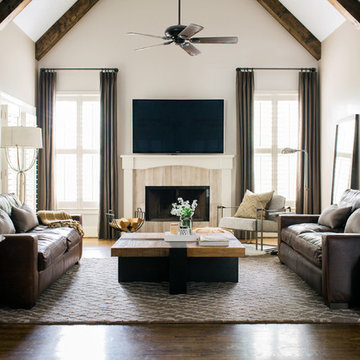
Family room - transitional dark wood floor family room idea in Atlanta with beige walls, a standard fireplace, a tile fireplace and a wall-mounted tv
Family room - transitional dark wood floor family room idea in Atlanta with beige walls, a standard fireplace, a tile fireplace and a wall-mounted tv
 Ki Arts
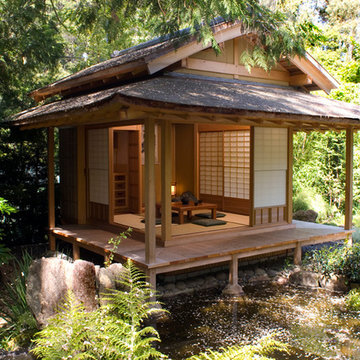
This ridge roof (kirizuma) style tea house, which has posts partly submerged in a koi pond, is constructed with Port Orford cedar. The tearoom is 4-1/2 tatami mats or approx. 9' square. The interior includes a closet kitchen (mizuya) and an alcove for displaying art (tokonoma). The tea house is enclosed by sliding shoji doors and surrounded by a veranda (engawa).

Find the right local pro for your project
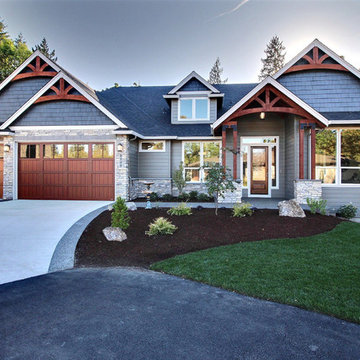
 Cascade West Development
Paint by Sherwin Williams
Body Color - Anonymous - SW 7046
Accent Color - Urban Bronze - SW 7048
Trim Color - Worldly Gray - SW 7043
Front Door Stain - Northwood Cabinets - Custom Truffle Stain
Exterior Stone by Eldorado Stone
Stone Product Rustic Ledge in Clearwater
Outdoor Fireplace by Heat & Glo
Doors by Western Pacific Building Materials
Windows by Milgard Windows & Doors
Window Product Style Line® Series
Window Supplier Troyco - Window & Door
Lighting by Destination Lighting
Garage Doors by NW Door
Decorative Timber Accents by Arrow Timber
Timber Accent Products Classic Series
LAP Siding by James Hardie USA
Fiber Cement Shakes by Nichiha USA
Construction Supplies via PROBuild
Landscaping by GRO Outdoor Living
Customized & Built by Cascade West Development
Photography by ExposioHDR Portland
Original Plans by Alan Mascord Design Associates

 Destination Homes
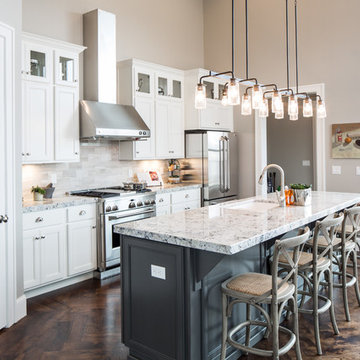
Elegant galley dark wood floor kitchen photo in Salt Lake City with an undermount sink, recessed-panel cabinets, white cabinets, gray backsplash, an island and limestone backsplash

 Donald Pell - Gardens
This is an example of a mid-sized farmhouse drought-tolerant and partial sun hillside stone retaining wall landscape in Philadelphia.
Sponsored
Westerville, OH

Custom Home Works
Franklin County's Award-Winning Design, Build and Remodeling Expert
 MAC Custom Homes
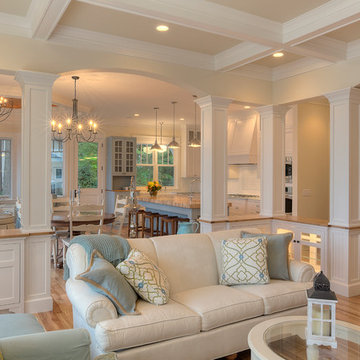
The open floor plan of this classic lakefront cottage by MAC Custom Homes welcomes friends & family to gather with great flow between the defined spaces. photo courtesy of Jason Hulet
 TERRAFIRMA Landscape
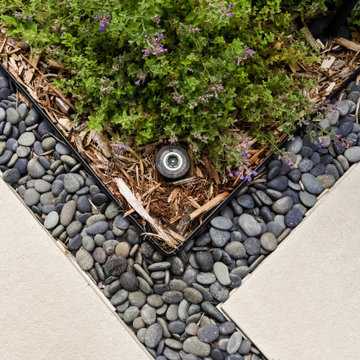
A charming flower ground cover next to the sprinkler system, infuses the area with vibrant color and lush greenery.
Inspiration for a transitional side yard concrete paver walkway in Detroit.
Inspiration for a transitional side yard concrete paver walkway in Detroit.
 Cascade West Development
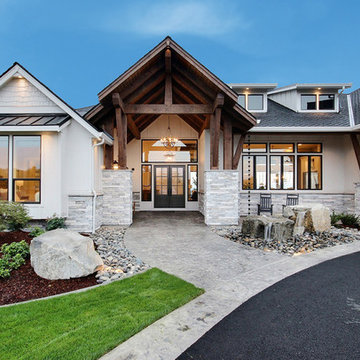
Inspired by the majesty of the Northern Lights and this family's everlasting love for Disney, this home plays host to enlighteningly open vistas and playful activity. Like its namesake, the beloved Sleeping Beauty, this home embodies family, fantasy and adventure in their truest form. Visions are seldom what they seem, but this home did begin 'Once Upon a Dream'. Welcome, to The Aurora.
 Orchard Hills Design and Construction, LLC
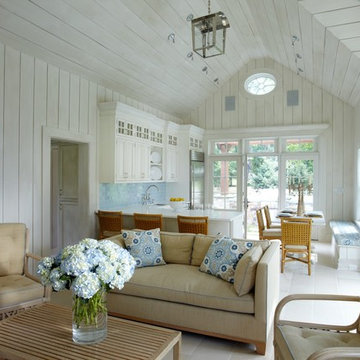
Inspiration for a coastal open concept living room remodel in New York with white walls

 Industrial Projects
Creating a comfortable outdoor living space is a priority for many homeowners and DIY enthusiasts. With rising summer temperatures, installing a shade tarp in your backyard offers an affordable and effective solution for sun protection. We’ve developed this detailed, step-by-step guide to help you confidently install a shade tarp that not only shields you from the sun but also adds aesthetic appeal to your outdoor area.
Benefits of Installing a Backyard Shade Tarp
Before diving into the installation process, let’s explore the key benefits of having a backyard shade tarp:
Provides UV Protection: Keeps your family and guests safe from harmful sun exposure.
Reduces Outdoor Temperatures: Creates a cooler, more enjoyable outdoor space.
Protects Outdoor Furniture: Extends the life of patio furniture by reducing sun damage.
Enhances Outdoor Aesthetics: Adds a modern, stylish look to your yard.
Budget-Friendly: More affordable compared to permanent structures like pergolas.
Materials and Tools You’ll Need
To begin your DIY backyard shade project, gather the following materials and tools:
Materials:
Shade tarp (UV-resistant and breathable)
Sturdy posts or existing structures (trees, fences, walls)
Mounting hardware (eye bolts, D-rings, turnbuckles, snap hooks)
Nylon or polyester rope, or stainless-steel wire
Concrete (if installing new posts)
Tools:
Power drill
Measuring tape
Level
Ladder
Wrench or adjustable spanner
Post hole digger (if installing new posts)
Step 1: Plan Your Shade Tarp Layout
The first step in installing your backyard shade tarp is careful planning. Take time to assess your outdoor area and answer these key questions:
Where is the sun’s path throughout the day?
What size and shape of tarp best suits your space?
Will you anchor the tarp to existing structures or install new posts?
What height do you want the tarp to sit at for maximum shade and airflow?
Pro Tip: Use string or garden hoses to visualize the tarp layout on the ground before making permanent decisions.
Step 2: Measure and Mark Anchor Points
Once you’ve determined the tarp’s location and orientation:
Measure the tarp dimensions.
Mark the exact points where each corner of the tarp will be anchored.
Ensure that the anchor points are at least 5–10% longer than the tarp size to allow for tensioning and slight adjustments.
Consider slope angles for water runoff. Aim for at least a 20-degree angle to prevent water pooling on the tarp.
Step 3: Install Support Posts (If Necessary)
If your backyard lacks existing anchor points like trees or fences, you’ll need to install sturdy support posts:
Dig post holes at least 24 inches deep and 8-12 inches wide for stability.
Set posts in concrete, making sure they remain plumb and level.
Allow the concrete to cure for at least 24–48 hours before applying tension from the tarp.
We recommend using pressure-treated wood, galvanized steel poles, or aluminum posts for longevity and strength.
Step 4: Install Mounting Hardware
With your anchor points ready, it’s time to install the necessary hardware:
Attach eye bolts or pad eyes securely into walls, posts, or other fixed structures.
For added flexibility and adjustability, install turnbuckles or tensioners to fine-tune the tarp’s tightness.
Connect snap hooks, D-rings, or carabiners to make assembly and disassembly easier.
Make sure all hardware is rated for outdoor use to prevent rust and corrosion.
Step 5: Attach and Tension the Shade Tarp
Now it’s time for the most satisfying part—mounting the shade tarp:
Begin by attaching one corner of the tarp to an anchor point.
Gradually attach the remaining corners, moving diagonally for even tension.
Adjust each connection point using your turnbuckles, ropes, or cables.
Pull the tarp tight enough to avoid sagging, but not so tight that it risks tearing.
Check that the tarp maintains the desired slope for rainwater runoff and adjust tension as needed.
Step 6: Final Adjustments and Safety Check
Before enjoying your new shaded area:
Inspect all anchor points and hardware for stability.
Test the tarp’s tension and make adjustments for even distribution.
Ensure that no sharp edges or loose connections remain that could damage the tarp or pose a safety hazard.
Confirm that the tarp is secure in windy conditions by giving it a gentle tug.
If you live in an area with frequent high winds, consider removing the tarp during storms to prevent damage.
Step 7: Enjoy Your Shaded Backyard Oasis
Once installed, your backyard shade tarp provides a comfortable and protective space for outdoor gatherings, relaxation, or family activities. You can decorate underneath with outdoor furniture, string lights, or potted plants to create a personalized outdoor retreat.
Maintenance Tips for Long-Lasting Shade Tarp Performance
To extend the life of your shade tarp, follow these maintenance guidelines:
Regularly check for wear and tear, especially around anchor points and seams.
Clean the tarp periodically with mild soap and water to prevent mildew buildup.
Store the tarp indoors during harsh weather seasons if it's not designed for year-round use.
Tighten hardware as needed to maintain proper tension and avoid sagging.
By following these simple care steps, your shade tarp will continue to deliver years of sun protection and outdoor comfort.
Conclusion: Upgrade Your Outdoor Space with a DIY Shade Tarp
Installing a shade tarp in your backyard is a cost-effective and rewarding DIY project. With careful planning, quality materials, and proper installation techniques, you’ll enjoy cool, shaded outdoor living all season long. This step-by-step guide ensures your project goes smoothly from start to finish.
 SUPERIOR CHIMNEY SERVICES CORPORATION
Out of sight, out of mind. That’s what happens with the poor chimney. It stands up there, straight and tall, each day taking a beating from the sun, wind, rain, snow and freeze/thaw cycles of winter. Yet, we rely on the chimney each day to take away the smoke and gasses from the fireplace, furnace and water heater appliances.
What can we do as homeowners to ensure it continues to do its job without fail?
Sweep & Check the Chimney and Fireplace
A Certified Technician performs sweep and/or inspection of nearly/over a thousand chimneys annually. You may be familiar with the 14-point certified chimney inspection accompanied by photo documentation - I’ve shown you this graphic before, but it sure is a good one. It gives you the “what and where” of the overall condition of your chimney(s). If you have any questions, you can point to the picture and the certified technician can elaborate on the relative chimney inspection-point results.
Exterior Chimney
Part of the inspection, as you will see in the picture, is to inspect the exterior of the chimney. The Certified Chimney Technician will inspect the full chimney including the chimney flashing, bricks and mortar joints, chimney crown and cap. Let’s take a look at each one.
Chimney Flashing
Chimney flashing plays a vital role to the protection of your home. It’s the piece of material that protects where chimney protrude out of the roof. To prevent water leaks and damage, the technician will inspect for any loose, missing, cracked or damaged flashing.
Brick & Mortar Joints
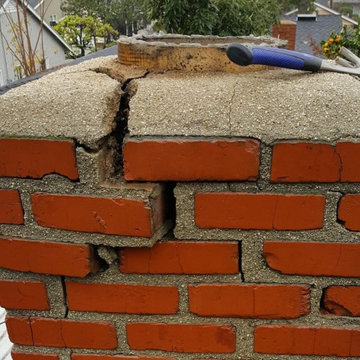
This is key. To prevent any type of major repairs, take care of minor repairs now. The technician will check for loose, cracked or spalling (chipped) bricks. If there are loose bricks and numerous cracks and chips, we’ll inspect further for any type of water leaks or water damage problems.
Chimney Crown
The concrete slab on top of the chimney is the chimney crown. It serves a very important purpose. The concrete slab acts like your chimney’s own personal roof. The technician will check if there are cracks, loose or missing pieces from the crown.
Chimney Cap
Chimney caps are also a critical component of the chimney - Every chimney needs a chimney cap for the same reasons every home needs a roof! It covers the opening of the flue. It prevents animals, debris and water from entering the chimney. The material of a chimney cap is usually made of stainless steel, as it will not rust.
Overall
If you’ve put-off getting the chimney inspected for some time, it’s best to get it checked. We’ve had some challenging weather this summer, and winter is not too far off. Take the time to give us a call and we’ll come out to give you a complete 14-point inspection with supporting photo documentation. If you don’t have a problem, fantastic, you’re ready for winter! If not, get the repairs done now so you don’t experience further damage to the interior or exterior of your home during the high-use months of winter.
Give us a call today at 877-CHIM-FIX (877-244-6349)
Sponsored
Delaware, OH

Buckeye Basements, Inc.
Central Ohio's Basement Finishing ExpertsBest Of Houzz '13-'21
 TKS Design Group
Free ebook, Creating the Ideal Kitchen. DOWNLOAD NOW
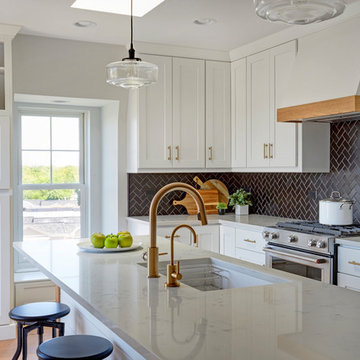
Our clients came to us looking to do some updates to their new condo unit primarily in the kitchen and living room. The couple has a lifelong love of Arts and Crafts and Modernism, and are the co-founders of PrairieMod, an online retailer that offers timeless modern lifestyle through American made, handcrafted, and exclusively designed products. So, having such a design savvy client was super exciting for us, especially since the couple had many unique pieces of pottery and furniture to provide inspiration for the design.
The condo is a large, sunny top floor unit, with a large open feel. The existing kitchen was a peninsula which housed the sink, and they wanted to change that out to an island, relocating the new sink there as well. This can sometimes be tricky with all the plumbing for the building potentially running up through one stack. After consulting with our contractor team, it was determined that our plan would likely work and after confirmation at demo, we pushed on.
The new kitchen is a simple L-shaped space, featuring several storage devices for trash, trays dividers and roll out shelving. To keep the budget in check, we used semi-custom cabinetry, but added custom details including a shiplap hood with white oak detail that plays off the oak “X” endcaps at the island, as well as some of the couple’s existing white oak furniture. We also mixed metals with gold hardware and plumbing and matte black lighting that plays well with the unique black herringbone backsplash and metal barstools. New weathered oak flooring throughout the unit provides a nice soft backdrop for all the updates. We wanted to take the cabinets to the ceiling to obtain as much storage as possible, but an angled soffit on two of the walls provided a bit of a challenge. We asked our carpenter to field modify a few of the wall cabinets where necessary and now the space is truly custom.
Part of the project also included a new fireplace design including a custom mantle that houses a built-in sound bar and a Panasonic Frame TV, that doubles as hanging artwork when not in use. The TV is mounted flush to the wall, and there are different finishes for the frame available. The TV can display works of art or family photos while not in use. We repeated the black herringbone tile for the fireplace surround here and installed bookshelves on either side for storage and media components.
Designed by: Susan Klimala, CKD, CBD
Photography by: Michael Alan Kaskel
For more information on kitchen and bath design ideas go to: www.kitchenstudio-ge.com
 Vick Construction & Remodeling
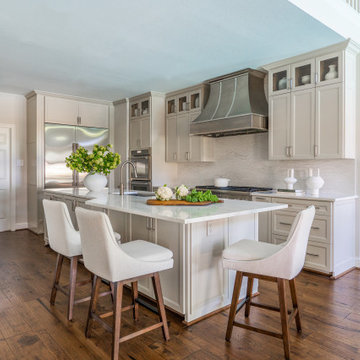
Maple shaker style cabinets, quartz countertops, large island with sink, commercial range hood
Transitional l-shaped dark wood floor and brown floor kitchen photo in Houston with quartz countertops, quartz backsplash, stainless steel appliances, an island, an undermount sink, recessed-panel cabinets, beige cabinets, gray backsplash and gray countertops
Transitional l-shaped dark wood floor and brown floor kitchen photo in Houston with quartz countertops, quartz backsplash, stainless steel appliances, an island, an undermount sink, recessed-panel cabinets, beige cabinets, gray backsplash and gray countertops
 TKS Design Group
Free ebook, Creating the Ideal Kitchen. DOWNLOAD NOW
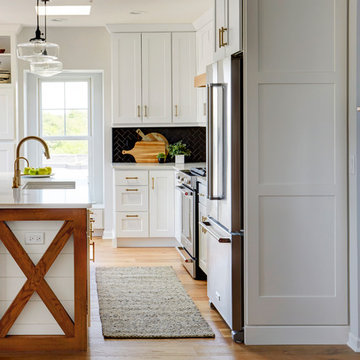
Our clients came to us looking to do some updates to their new condo unit primarily in the kitchen and living room. The couple has a lifelong love of Arts and Crafts and Modernism, and are the co-founders of PrairieMod, an online retailer that offers timeless modern lifestyle through American made, handcrafted, and exclusively designed products. So, having such a design savvy client was super exciting for us, especially since the couple had many unique pieces of pottery and furniture to provide inspiration for the design.
The condo is a large, sunny top floor unit, with a large open feel. The existing kitchen was a peninsula which housed the sink, and they wanted to change that out to an island, relocating the new sink there as well. This can sometimes be tricky with all the plumbing for the building potentially running up through one stack. After consulting with our contractor team, it was determined that our plan would likely work and after confirmation at demo, we pushed on.
The new kitchen is a simple L-shaped space, featuring several storage devices for trash, trays dividers and roll out shelving. To keep the budget in check, we used semi-custom cabinetry, but added custom details including a shiplap hood with white oak detail that plays off the oak “X” endcaps at the island, as well as some of the couple’s existing white oak furniture. We also mixed metals with gold hardware and plumbing and matte black lighting that plays well with the unique black herringbone backsplash and metal barstools. New weathered oak flooring throughout the unit provides a nice soft backdrop for all the updates. We wanted to take the cabinets to the ceiling to obtain as much storage as possible, but an angled soffit on two of the walls provided a bit of a challenge. We asked our carpenter to field modify a few of the wall cabinets where necessary and now the space is truly custom.
Part of the project also included a new fireplace design including a custom mantle that houses a built-in sound bar and a Panasonic Frame TV, that doubles as hanging artwork when not in use. The TV is mounted flush to the wall, and there are different finishes for the frame available. The TV can display works of art or family photos while not in use. We repeated the black herringbone tile for the fireplace surround here and installed bookshelves on either side for storage and media components.
Designed by: Susan Klimala, CKD, CBD
Photography by: Michael Alan Kaskel
For more information on kitchen and bath design ideas go to: www.kitchenstudio-ge.com
 Hortulus Animae llc - Mindful Garden Design
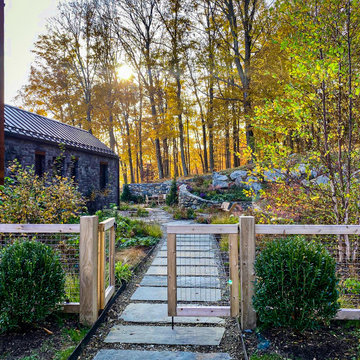
Garden Gate
Inspiration for a large contemporary partial sun front yard gravel and wood fence gate in New York.
Inspiration for a large contemporary partial sun front yard gravel and wood fence gate in New York.
Sponsored
Columbus, OH

Hope Restoration & General Contracting
Columbus Design-Build, Kitchen & Bath Remodeling, Historic Renovations
 Weather-Tek Windows & Doors
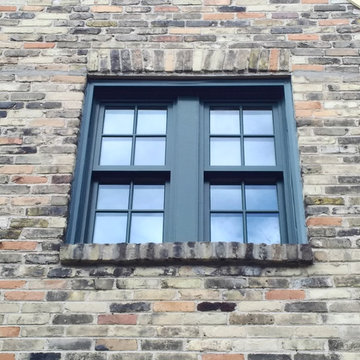
Check out these beautiful new Marvin Clad Ultimate Double Hung windows with evergreen cladding that Weather-Tek had the pleasure of installing for a family in Shorewood, WI.
Remember, we install windows through the winter months, so make sure your home is comfortable for the remainder of the cold Wisconsin winter! Check out our current promotions: https://goo.gl/D3ooju
 Five Star Tree Care
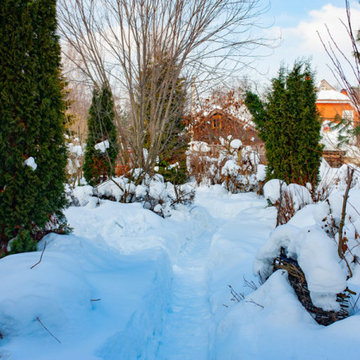
When the weather begins to get colder, this can be a dangerous time for trees. There are many reasons how the cold and other elements during winter can harm your trees and surrounding landscape. This also means that there are many ways in which you can help prevent any unfortunate accidents due to the weather.
Some of the most common reasons trees can get damaged from the cold weather are as follows:
-Root damage
-Extensive bark
-Core chewing from pests
We here at Five Star Tree Services want to provide you with the right information on how to help prevent winter tree damage.
Root Damage Prevention
Unlike the rest of the tree, which includes the stems, branches, and buds, the roots are the last part of the tree to go dormant for the winter. This means that they are more vulnerable when the weather takes a sharp cold turn. The reason this tends to happen is that the soil temperatures stay warmer than the air, hence why the branches go dormant first and the roots take longer.
There are also a number of different things that dictate soil temperatures. For instance, dry soil gets colder quicker than sodden soil. Making it so that there is more ice present in sandy or dry soils, which is how it gets colder in temperature.
If you want your soil temperatures to be higher, mulch and snow can help insulate the ground and keep it sheltered from the harsher elements. If you have recently planted a tree, the disturbed soil will now allow cold air to get at the roots, which will hinder any root development or even kill newly grown roots.
How To Prevent
For newly planted trees, you should cover the roots with 3-4 inches of wood mulch. The best thing to do is make a 6-inch circle surrounding the base of your tree but make sure to keep it away from the trunk. Doing this is going to help support the tree during the winter and help stop unusual roots from growing. Before you lay your mulch down, you should also be checking for holes or breaks in the soil and fill them in before laying your mulch down. In the fall and spring, the soil is continuously being defrosted and refreezing again. This makes the soil contract and expand and can hurt newly planted roots. It can also be enough to push them out of the ground completely! Making mulch even more important since it can provide more consistent temperatures in the soil.
If you are experiencing a dry fall with little to no rain happening, you need to give your tree a really good watering before the ground starts to freeze. Doing this is going to lower the risk of your tree getting infiltrated by ice or frost.
Pest Damage Prevention
There are plenty of things that can harm your trees when the weather turns cold. Some of these other things include:
-Sunscald
-Dieback
-Brown evergreen foliage
-Salt damage
But aside from weather related ailments, you also need to worry about the damage done by certain pests as well. This can include:
-Mice
-Hares
-Voles
-Deer
These seemingly harmless animals are known to do major damage to plants during the winter when they are foraging on things like twigs, bark, stems, and leaves. They have even been known to completely eat bushes, right to the ground, and kill trees when they destroy their bark. One of the only ways to prevent animals from chewing on the bark is by building barriers around your trees in order to keep the pests from getting at them. Luckily, making these barriers isn’t as hard as you might be thinking. There are numerous potions for you to choose from that are easy to assemble and disassemble that you can find at your local garden center or landscaping stores.
How Five Star Tree Services Can Help
Colder weather insights many potential negative things for your trees that can severely harm them, damage them, or even kill them if they are not properly protected. It is always important to make sure that your trees are properly prepared for the winter months ahead. This means utilizing preventative measures to alleviate the risks of things like root and animal damage. If you require help to prepare your trees for winter, our team at Five Star Tree Services is here to help you with our tree care services in Richmond Hill, don’t wait until it’s too late, give us a call today at (416) 990-3355!

7