Software
Houzz Logo Print
michelle_riffer

Laundry room/ powder room update from 1951 knotty pine

8 years ago
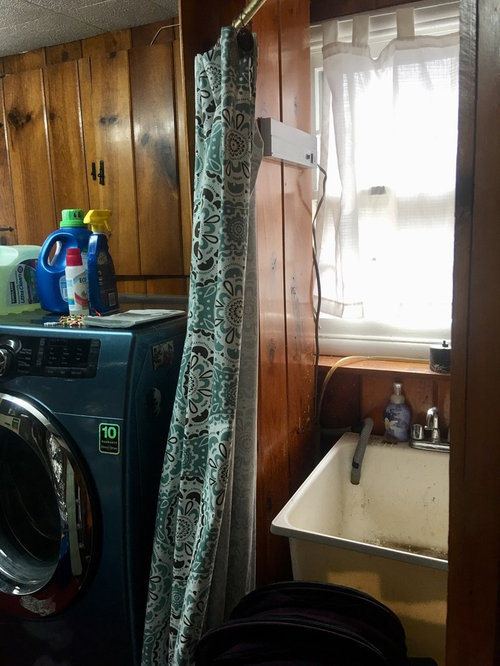
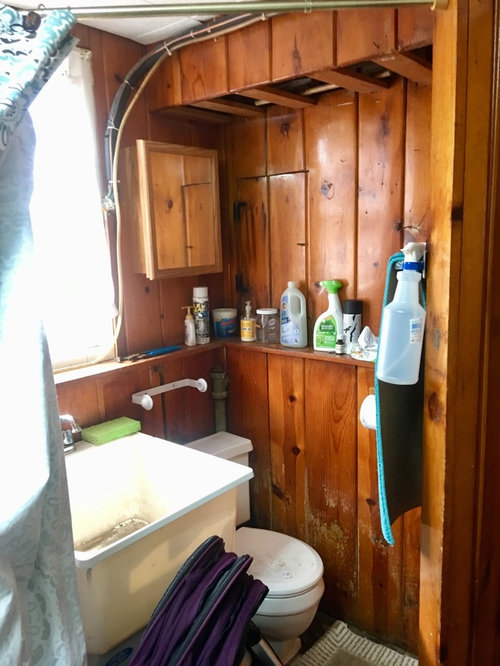
(Excuse the mess) We have a 1951 4-level home with several awkward areas, including the knotty pine laundry room - complete with a tiny toilet with no door.

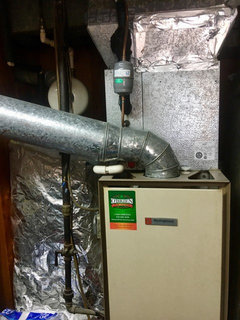
• First view is from the entrance door, into “bathroom”.
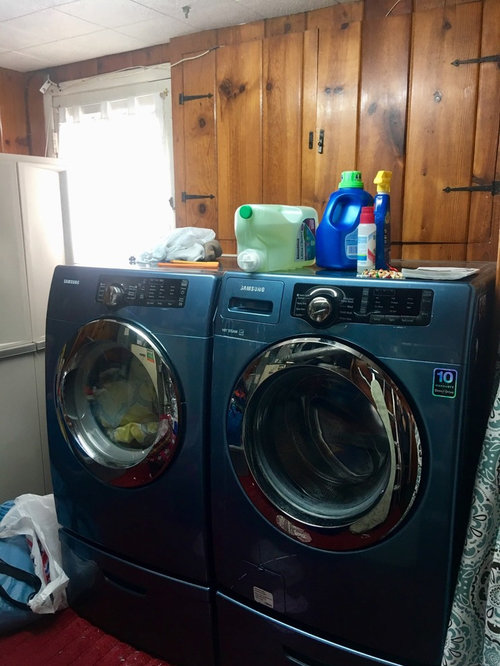
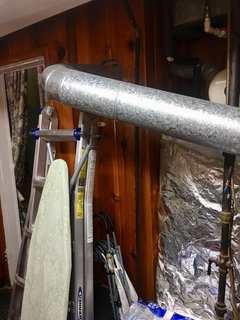
• Second is clearer pic of current “bathroom” space.
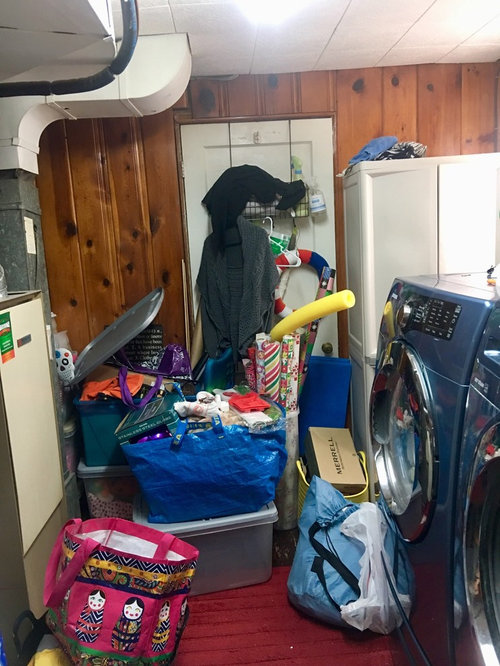
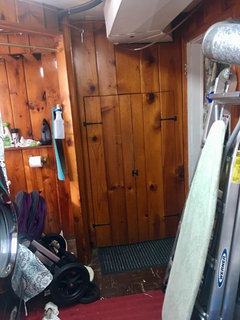
• Third is wall with W/D, fuse box is located directly over. Outside door currently caulked shut by previous owner, but I’d like to make accessible.
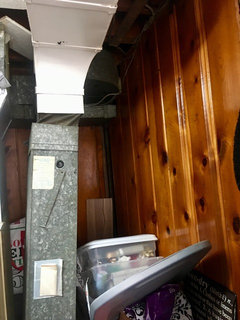
• Fourth is (a mess) looking straight across length of room. Door isn’t currently used, but leads into the entirely open L-shaped family room.
• (Will attach a few more pics in comment section)

Current plan:
- After removing everything except plumbing and washer/dryer, I want to strip, sand then whitewash the knotty pine throughout. Anything resembling a beam (mostly in bathroom) will be left as is, trim and pipes painted white.
- replace utility sink with a combo utility vanity.
- pull up tiles and paint concrete, likely a gray or white, possibly a stencil.
- ... I’m not even sure what else to consider doing here ... but some things I’ve considered:
• we need a door of some sort on that bathroom...
• patch up the door to the family room since it’s not used? Otherwise is drywall and could figure it out but not sure on the panel side...
• install IKEA-style open and closed storage on the back wall ...

ANY IDEAS OR DO’S/DON’Ts ARE VERY MUCH WELCOMED!!!

*Please excuse the mess! Just cleared 8 years of junk out of subbasement this weekend and if it didn’t have a place or new home it relocated here for the moment*

Comments (25)

  • 8 years ago
    *remaining angles*

    - pic 1: notice awkward space behind, in L-shape
    - pic 2: appliances (any reason not to paint these?)
    - pic 3: wall to entrance
    - pic 4: view from other end of lengthwise onto builtin in storage cubby
  • 8 years ago

    What is the question? Do you have a budget in mind?

  • 8 years ago
    Less of a question and more asking for advice... this seems to be a common layout in these tri+ level homes from the 50s, but searching hasn’t left me with much inspiration.
    Budget is very tight as we have a few other projects in more common areas of the house that take priority - but I can’t stand this paneling much longer, or the lack of function in the space, and with 4 small children I spend more time in there than many parts of the house. Would also like to figure a way to make the “scary” bathroom more inviting.
  • 8 years ago

    If your budget isn't big, don't bother changing the paneling. It's so interesting. Lack of function though, that's a biggy. you definitely need more storage.

    It's very hard to tell from your pictures, but I take it the bathroom is the corner of the laundry room/mudroom (?). What is behind those small paneled pine doors?

    I'm going to assume you have no garage, hence no other place to store the 2 strollers.

    A. Shelving. If it were me, I'd pay someone to come in, and build some shelving on the side of that vent thing in the first picture, to get all of that stuff up off the floor. I'd have the person build shelves under and above the slanted pipe in the 3rd picture.

    and, the storage cabinet next to the beautiful blue W/D could be maximized upwards. In fact, you could use a cabinet above the W/D (can't imagine anything in those existing pine doors above the w/d could be functionally used for anything....)

    the ladder simply has to be stored outside somewhere. perhaps you can get some kind of a shed outside to supplement for storage for seldom-used items.

    So, lots of cabinets with doors--to hide clutter.

    B. Bathroom area: I would purchase a newer, nicer narrow sink cabinet, with storage for TP, extra soap.

    I would take down the shelf next to the toilet, it looks cluttered and like something's going to fall on someone sitting down.

    If everything can be put away tidily to clear the floor, you are going to be able to breathe in there, and function! Save a bigger remodel for another day, because it's going to cost a LOT of $$$ to move anything like those ducts/vents/heater system--whatever all that stuff is. And with a bunch of little kids, the extra little bathroom probably comes in really handy.


  • 8 years ago

    Mrs. S, if I understood correctly, the fuse box is behind the doors over the w/d. Looks quite shallow but with enough depth to conceal the box and wiring.

  • 8 years ago

    Thanks for info. Clear out absolutely everything that doesn't belong there, including the stuff that just got moved there. Put in new sheet vinyl in a light color over the existing tiles (they should be tested for asbestos, also test the mastic). Replace the grimy old laundry sink with a smaller one that leaves elbow room around the toilet. Replace the toilet seat. Put the cleaning chemicals in a cupboard or up on a shelf away from the toilet.

    As for a door, we'd need to see a floor plan and more photos to see where one could be added.

    It seems unlikely that anyone would have time to iron in the basement while kids are running around upstairs. If you iron while watching kids, you may want to move the ironing equipment upstairs to the master bedroom closet or to the family room closet. Many people fold their laundry in the living room or family room, not next to the washer and dryer. See what works for your family.

  • 8 years ago

    As long as the tiles aren't crumbling there really isn't need to worry about asbestos. The area of concern is with friable material, like removing old ceiling tiles where asbestos fibers can become airborne.

  • 8 years ago

    I'm willing to bet that toilet isn't legal.

  • 8 years ago

    I like the paneling

  • 8 years ago

    Great advice above.

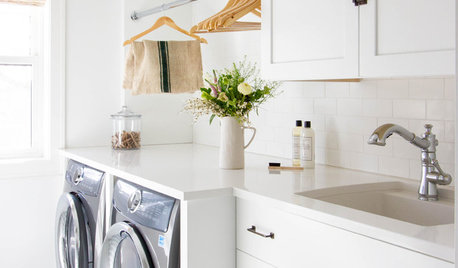
    Here is some inspiration to help visualize Your Laundry Utility Room.


    Laundry Room · More Info

    House on Kings · More Info

  • 8 years ago

    You have a good plan. I would keep all the existing hardware as it will look great when the pine is whitewashed. I would have a new door for the toilet constructed to match existing.

  • 8 years ago
    last modified: 8 years ago

    It looks to me as if some kind of "wall" was put in to enclose the toilet but it's in the middle of the window??

    What I would do is clean it out and remove the walls that were put up to enclose the toilet. I assume that there's some kind of door somewhere in the room? So when you need to pee, just close the laundry room door....I mean it's not a "public" room where everyone has to watch you, right?

    The toilet and sink (YES get a better sink and vanity but make it the same deep utility type sink with doors on the bottom to hide some of the stuff) are super useful for men and filthy kids and whatnot.

    Get rid of the walls/detritus of daily living and take another photo so we can help with any cabinets/storage.

    It can be lighter and brighter and cleaner, but let it be what it is which is a useful space.

    ETA: I would get rid of that cabinet and put a folding shelf under the window....

  • 8 years ago
    Wow! Thank you all so much, so many great suggestions. I’m going to finish clearing it this weekend and will update photos - and I’m appreciative of suggestions even with the junk everywhere.

    For the toilet, we really need it functional because we all share one full bath at this point, on the top level with bedrooms. So between the 6 of us, a functional second toilet will come in handy. We don’t have a door on the laundry room (a curtain only) because when we had the washer and dryer installed, the guy told us it was against code and he had to remove it before leaving. So I think we need something on the tiny enclosed area. It’s truly a mess, my husband (God love him) is a slob, and I despise the area as it is and have neglected to check the area before snapping the pics.

    It really has potential as a useful utility area (good point!) and I like the idea of removing the current storage cabinet, making the door functional, and installing a drop down hanging racks.

    Thank you for all the suggestions and I’ll take a look and see which questions I forgot to answer and will post cleaner pics soon.
  • 8 years ago

    Looking forward to seeing new pix.

    Yeh, tight budget, 4 kids, one bathroom--changes things. Darned Real World intruding into our dreams.

    Here are a couple of preliminary thoughts to think about...

    How about moving the laundry sink to the area under the window to the left of the W/D? Not as impossible & expensive as it seems because the water and drain lines can be extended fairly easily and would be concealed behind W/D. Washer could then drain into a standpipe connection in the extended drain from the utility sink to the existing connection (where the utility sink currently is.)

    If that is possible, it would give you some breathing space around the toilet. A new toilet designed to fit in corners might be a good option. And, if you can nudge the W/D a few inches to the left, you could get rid of the little wall that is obstructing the window. Might be room for a small handwashing sink next to the toilet.

    I know it sounds odd--but think about enclosing the toilet area with some of those public restroom type panels. Pros are that panels save space and are easy clean. Not altogether out of place given that, with the furnace, etc., it's a utility area anyway.

    Second thoughts about covering floor with sheet vinyl; pending better pix, am thinking this would be a difficult install. Tile or vinyl planks would be easier, I'm thinking. Concrete look vinyl planks are available & would look terrific with white-washed walls and the blue appliances.


  • 8 years ago

    Don't worry about the mess at all!!! This is how most of us have at least a part of our house....

  • 8 years ago
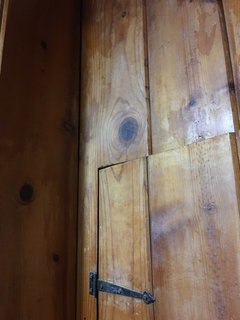
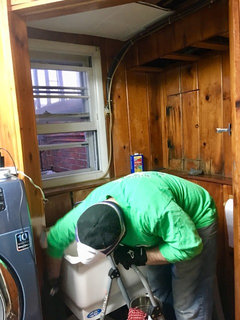
    So much great advice (and no judgement - thank you!) — I wanted to update, we’ve confirmed it’s only shellac! Thankfully, and we’ll be working on removing as much as possible tomorrow, with heat off and windows open. Pics below, including my husband cleaning his mess lol. Great tips on the floor - you’re points are right on, and given the work the walls will be I’d like an easier alternative for the floors for sure. The left window is actually a door that a previous owner caulked shut, but we’re planning to open and make functional again. Otherwise there isn’t much room for anything, but it would be ideal to move the sink elsewhere to have more wiggle room in the “bathroom”. We did take a quick look today at more narrow utility sink/ vanity combos, and while not perfect should be an improvement. At this point it feels that is still quite far in the future, but hopeful the shellac removal is quicker than I anticipate. Once again THANK YOU, I have been so delighted to find such a knowledgeable (and patient) community!!!
  • 8 years ago

    Good news that you're dealing with shellac instead of varnish or poly.

    I was thinking that the caulked shut exterior door was on the end wall but, after your post, now see what I was thinking was a window is a door. After taking another look at the photos, I see that I should have realized it was door.

    Caution about the denatured alcohol fumes. I've read that you can end up with a bad hangover/ headache. So take breaks, get lots of fresh air and don't drive! Good news is that the fumes dissipate quickly so no long lingering odor/ hazard.

  • 8 years ago
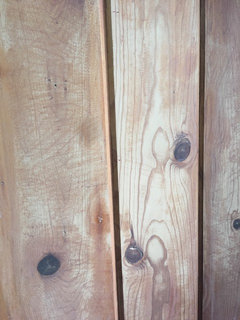
    Update: stripping was not as consistent as we’d hoped - appears there were inconsistent applications so some places respond best to 50:50 DA:Lacquer thinner and other areas just straight DA or LT. In frustration I broke out the random orbital sander and the result is so much better! (Started with 1/4 sheet sander that left figure 8s, but ROS is smoothing them out thankfully)
  • 8 years ago

    What do you plan on doing? I would just paint it white....In truth, I wouldn't have patience for that so kudos...


  • 8 years ago

    Good update, thanks. If you have new photos that show all four (three?) walls, that'd be nice to see, now that the redo is in progress.

  • 8 years ago

    following

  • 8 years ago

    Keep sanding! It looks great. Then wipe it all down with tack cloth to remove all the grit. When you go to whitewash it you'll get a great result. Here's one nice example: https://www.remodelaholic.com/how-to-whitewash-plank-wall-ceiling/

  • 8 years ago
    Oh what a fantastic link! I’m *hoping* that’s our final product, although I hadn’t considered staining first ...

    I took a day off (my arms were tired!) but will update pics tomorrow!
  • 6 years ago

    Do you happen to have any updated progress pictures?? I know this is a few years old but am going through the same process :)