Search results for "Analysis" in Home Design Ideas
Previously, this yard was burdened by a typical boulder pile pool, that was heaped higher than typical, trying to hide the towering wall behind. At first, the clients sought merely to reconfigure the BBQ that was congesting the patio, but upon further analysis, they decided it was time to strip the entire yard, leaving only the pool shell. Bianchi’s solution introduced an array of four arbors to distract the eye from the wall behind, solving what the boulder waterfall could never do.
Additionally, the wall was painted a dark earth tone to add contrast and depth. This strategy enabled the wall to recede into the distance, while the agave blue grey arbors floated forward visually from the background. Previously, the patios were a hodgepodge of deck islands that were impossible to navigate, and were of insufficient size to arrange furniture on. A well organized patio streamlined the traffic flow and the living space, featuring a cast in place concrete fire pit and banco couch, as well as a new outdoor bistro, glowing with filtered light from the canvas shade sails overhead.
A turquoise glass overflow spa became the yards focal point, sharing the space between the pool and outdoor living. The striking symmetry of the spa and pot pedestal with regal cacti arrangement behind, flanked by the arbors on either side, created a stately first impression from the front door. This teaser was just a glimpse of what could not yet be seen serving as an invitation to explore and enjoy as the yard unfolds.
See more about this project & hear from the homeowner here: https://www.youtube.com/watch?v=7eT3RkLkg5w&feature=youtu.be

4 Steps to Achieving a Rewarding Cost Effective Home Renovation
1 Home Renovation an Introduction
A home renovation due to changes in family needs and space requirements can be a challenging, but also a rewarding experience. As a homeowner, gathering and coordinating resources and possibly help from professional consultants are required. Once the construction phase has started, patience, endurance and commitment to follow through are necessary. Despite the challenges, the rewards of a well-planned and successfully completed project are meaningful, adding aesthetic and economic value, also providing the opportunity to personalize a home, encompassing the function, comfort and aesthetics to accommodate individual taste and lifestyle.
A renovation of an existing home is a viable alternative to moving or building a new home, assuming that a home is structurally sound, the expenditure to enlarge or improve can be a cost effective alternative. A home possessing charm, style, historical significance, established landscaping or an exceptional location could be a significant motivation to consider purchasing another home with the intent to renovate.
The complexity of a project could be relatively simple, changing the use of a room, consolidating two rooms into one, or opening up a room to the outdoors. It could also be a more involved task requiring planning, design and construction documents to build a second floor addition, the addition of a new wing or completely gutting the interior. Some projects could be completed in a weekend’s work or more complex projects, using a “Master Plan”, a plan which provides overall guidance; a renovation can be accomplished all at once or divided into manageable projects over a period of time. With the home evolving gradually allowing the renovation to be planned, timed and tailored to meet individual needs and circumstances.
The due diligence phase should precede the decision to renovate whether it’s an existing home or a home that is purchased with the intent to renovate. The due diligence phase will reveal the factors affecting the nature and scope of the project or if a renovation makes sense.
Every renovation project is unique relative to personal requirements, architectural style & construction type. This guide will be helpful in developing an understanding of the preliminary groundwork required to realize a successful project. If properly planned, a home renovation project can be a positive and rewarding experience resulting in a comfortable, practical and an attractive living environment.
The first step of the planning process is documenting the goals and long-range plans referred to as the “Project Program”. This will dictate the nature, scope and feasibility of the project. Providing a guide to achieving defined goals, the timing or phasing of the project and budget required to achieve the desired end result.
2 Documenting Existing Conditions
Once the “Project Program”, has been established, the next step is to determine what there is to work with. This requires documenting the home’s floor plan and site elements which includes drawing an “as built” floor & site plan consisting of the existing exterior walls, interior rooms, doors, windows, etc. and surrounding site elements, landscape and other significant exterior features. Additionally understanding and noting on the “as built” plan, the structural, mechanical and electrical systems as necessary. Gathering the “existing condition” information defines what there is to work with, creating the framework from which to facilitate and organize the decision making process and develop effective “project program” solutions.
3 Evaluating Existing Conditions
The goals and long-range plans have been established, and the existing floor plan and site elements have been documented. Before developing design solutions, the next step is to evaluate existing conditions. The evaluation includes: a detailed analysis of the structural, mechanical and electrical systems, determining the condition of the house, noting functional and aesthetic deficiencies. At the same time recognizing the home’s strengths, assets and evaluating its relationship to its site. The remaining parameters will be defined by the local jurisdiction’s zoning regulations, these regulations will define the “envelope”, within which the proposed project will be required to fit:
•required front, side & rear yard setbacks
•maximum allowable lot coverage & height
The previous three steps have provided the necessary foundation to start the design phase. The goals and long range plans have been established, existing conditions have been documented and the evaluation of what there is to work with are now in place. This will provide the framework from which to facilitate and organize design solutions. The consolidation of this information is manifested in the development of the “Master Plan” which will become the road map by which sound decision-making can be made as a home renovation evolves. Keeping the project, on a linear path, avoiding redundancies and back tracking, on time, within budget, concluding with a well crafted finished product. After all the “up front” research and documentation has been completed, the design phase of the project can now precede, with the creation of diagrammatic design drawings. Organizing interior spaces, taking into account the external elements, prevailing breezes, solar orientation, view, existing outdoor features, etc. Through the development of schematic sketches themes will emerge followed by design development drawings. Wise planning and renovation decisions can save money and time at the same time provide a well crafted finished project. The “Master Plan” provides a strategic path in the planning and decision making process leading to a successful and rewarding home renovation, which will add value and considerable enjoyment, for many years, living in a newly renovated home.
By virtue of having gone through these steps, frustrations sometimes encountered during a home renovation will be minimized, allowing the renovation to be a gratifying and rewarding experience. Being aware of the process allows one to become an “Educated Client,” which is worth quite a bit more than one might realize. The uneducated client may not realize the benefit of going through the planning, evaluation and documentation groundwork. He will only realize its benefits after having completed a prior renovation project. This rational approach keeps the design process on a direct path to achieving prescribed goals.
4 Exploring Design Solutions & Developing a Master Plan
The previous three steps have provided the necessary foundation to start the design phase. The goals and long range plans have been established, existing conditions have been documented and the evaluation of what there is to work with are now in place. This will provide the framework from which to facilitate and organize design solutions. The consolidation of this information is manifested in the development of the “Master Plan” which will become the road map by which sound decision-making can be made as a home renovation evolves. Keeping the project, on a linear path, avoiding redundancies and back tracking, on time, within budget, concluding with a well crafted finished product.
By virtue of having gone through these steps, frustrations sometimes encountered during a home renovation will be minimized, allowing the renovation to be a gratifying and rewarding experience. Being aware of the process allows one to become an “Educated Client,” which is worth quite a bit more than one might realize. The uneducated client may not realize the benefit of going through the planning, evaluation and documentation groundwork. He will only realize its benefits after having completed a prior renovation project. This rational approach keeps the design process on a direct path to achieving prescribed goals.
After all the “up front” research and documentation has been completed, the design phase of the project can now precede, with the creation of diagrammatic design drawings. Organizing interior spaces, taking into account the external elements, prevailing breezes, solar orientation, view, existing outdoor features, etc. Through the development of schematic sketches themes will emerge followed by design development drawings. Wise planning and renovation decisions can save money and time at the same time provide a well crafted finished project. The “Master Plan” provides a strategic path in the planning and decision making process leading to a successful and rewarding home renovation, which will add value and considerable enjoyment, for many years, living in a newly renovated home.

Knocking down a wall and shifting the layout improved functionality and flow, and generally enhance and modernize the aesthetic of the entire home. Now with space to entertain, gather and cook, fresh style was imperative. The other side of the kitchen was a dark living room/study that was also brightened up considerably during the makeover. In the existing living room, dark colors and pine dominated the palette making it feel like a heavy space. New custom-built cabinets in creamy white now complement fireplace and provide generous storage.
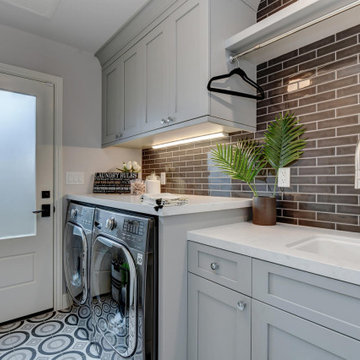
Budget analysis and project development by: May Construction, Inc. -------------------- Interior design by: Caitlin Campbell.
Find the right local pro for your project

Budget analysis and project development by: May Construction, Inc. -------------------- Interior design by: Liz Williams
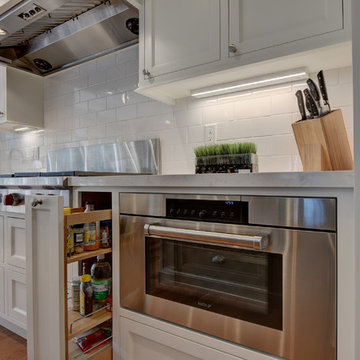
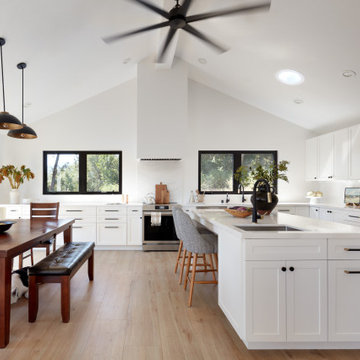
Large trendy l-shaped light wood floor and brown floor eat-in kitchen photo in San Francisco with a single-bowl sink, flat-panel cabinets, light wood cabinets, quartzite countertops, beige backsplash, subway tile backsplash, stainless steel appliances, an island and gray countertops

Scott and Janet of Elgin have had four design to build renovations with Advance Design over the last decade. We got the chance to sit down and talk with Janet about her experience working with Advance Design on so many different areas of her home. Starting with her kitchen in 2009, Janet proclaimed, “The reason we kept coming back is because our first [renovation] went so extremely well, exceeding all of my expectations.”
Since their kitchen renovation with Advance Design ten years ago, Scott and Janet have also worked with Advance to remodel their master bedroom, their power room, a wet bar, and most recently their master bath. Having renovated practically every major room in the house with the team, we asked Janet what made her experience with Advance Design so special. “We went with Advance Design because we trusted them so much more, their experience, and everything that they brought. We were confident they were giving us what we wanted for the money we were spending.”
For their most recent renovation, Scott and Janet clearly knew what to expect going into their master bath renovation. They were familiar with Advance’s step by step design process that epitomizes the “Common Sense Remodeling” philosophy applied in every project Advance creates. After once again experiencing the careful budgeting analysis, the pointed design meetings, and the clear documentation that leads up the a thoroughly managed installation, Janet’s simple summary of their experience is this; “The word I would use to describe the process is – collaboration!”
Working closely with Advance Design kitchen designer Michelle Lecinski, together they were able to develop a new master bath design that not only worked with their investment goal, but also made sense for their lifestyle. “Oh Michelle, my designer! I connected with her immediately. She spent time getting to know us, our lifestyle, even the setting of our house.” The threesome had a great experience designing and producing yet another successful project together.
When it came to their new project plans, Scott and Janet were interested in creating a relaxing “spa-like” experience in their master bath. One of the many ideas Michelle introduced during the design process was installing a Kohler Alteo series showerhead for a rain-like shower experience. This designer showerhead, mixed with the warm ambiance of the lighting and pebble accent running throughout the shower make for what Janet calls a “luxury spa essence”. From the oversized glass sliding door to the recessed niche for accessories, each special detail was considered and implemented intentionally so as to create the maximumly optimized use of the compact space. Not only was this transformation one of beauty and luxury, but special attention was given to every way possible to provide additional storage to maximize the functionality of the bath area as a whole.
Once design was complete and the bath construction project began in their home, making sure everything happened efficiently and on schedule became new priority number one. “Having a project manager made an enormous difference,” Janet said, “It was so worth it to hire professionals that knew exactly what they were doing. Even after all of these years, I wouldn’t change a thing.”
“It was a pleasure working together with Janet and Scott to create this beautiful space that will enhance their lives for many years,” says Michelle. “It is so much fun to get to do this job every day, I love that I can have this sort of impact on their lives by doing something for them [Janet & Scott] that comes so naturally to me!”
After reviewing the long-term relationship with clients like Scott and Janet, owner Todd Jurs had this to say, “Clients returning and asking us to transform that next area of their home really warms my heart. It reaffirms that every decision to please clients no matter what is always the right choice, and that our honesty and integrity along with the immense collective talent of this team is recognized and appreciated by those who continue to return to us year after year.” He continued to say, “I always say how blessed we truly are to be able to do what we do, and experiences like this one put a smile on my face every time.”

Budget analysis and project development by: May Construction
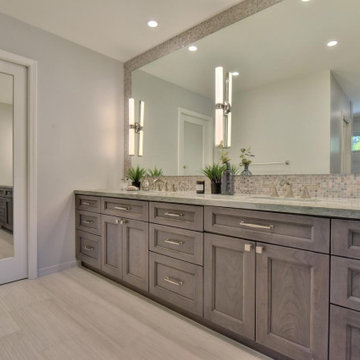
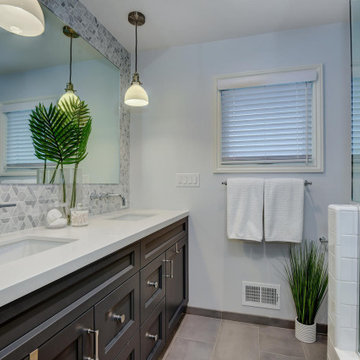
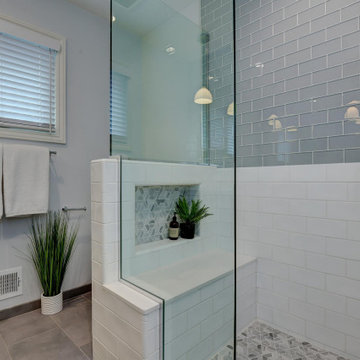
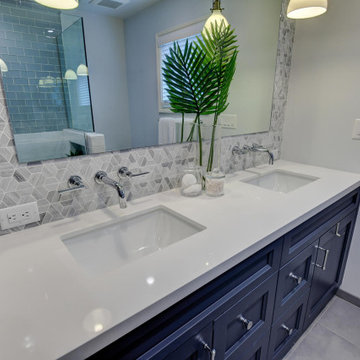
Inspiration for a mid-sized contemporary 3/4 white tile and ceramic tile ceramic tile and gray floor bathroom remodel in San Francisco with raised-panel cabinets, brown cabinets, a one-piece toilet, white walls, an undermount sink, quartzite countertops and white countertops

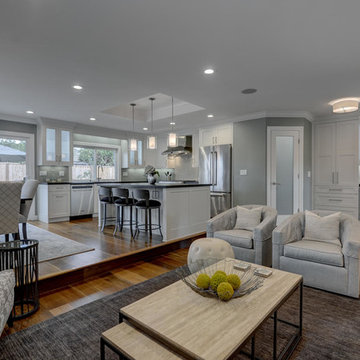
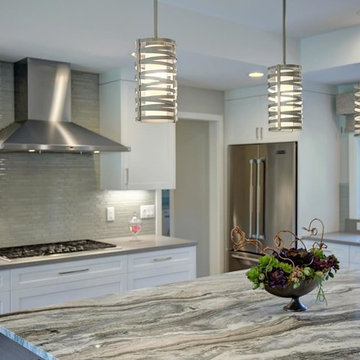
May Construction’s Design team drew up plans for a completely new layout, a fully remodeled kitchen which is now open and flows directly into the family room, making cooking, dining, and entertaining easy with a space that is full of style and amenities to fit this modern family's needs. Budget analysis and project development by: May Construction
iPad App Development
Ever since the launch of the first iPad in 2010, the device has taken the world by storm. An iPad app with profit enhancing features is the best way to increase productivity. Hiring an iPad app development company which offers customized app development for iPad, would be the best idea for business as well as personal use.
Why Choose Us?
Proficiency: we have a team of highly skilled and experienced workers who have the complete knowledge of iPad and are aware of what would suit the needs of the customer.
Cost Effective: we design iPad apps as per your budget and provide flexible payment options too.
On-time Results: we deliver results within the given time frame without any delay.
100% safety Guaranteed: We guarantee the complete safety of your data with us.
Analysis: we analyse the need of the customer and design the app accordingly after taking inputs on the same.
Innovative and Unique Features: we develop iPad apps with unique and innovative features to match the global standards.
Detailed knowledge: The team also has detailed knowledge of the pros and cons of the Apple software used in iPads like iOS SDK, programming tools like XCode IDE and interface builder, core audio, core animation, WebKit programming, core location framework etc.
Apps for various sections: we develop iPad apps for various sections of the society like shopping apps, food apps, education apps, fashion apps, social media apps, travel apps, book apps, lifestyle apps, real estate apps etc.
We have expertise and experience in application development and are proficient with all the modern day technologies to offer the best app experiences for Android, iPhone, iPad, Windows and Blackberry. We design applications to boost the profitability rate. www.mobilify.my

Previously, this yard was burdened by a typical boulder pile pool, that was heaped higher than typical, trying to hide the towering wall behind. At first, the clients sought merely to reconfigure the BBQ that was congesting the patio, but upon further analysis, they decided it was time to strip the entire yard, leaving only the pool shell. Bianchi’s solution introduced an array of four arbors to distract the eye from the wall behind, solving what the boulder waterfall could never do.
Additionally, the wall was painted a dark earth tone to add contrast and depth. This strategy enabled the wall to recede into the distance, while the agave blue grey arbors floated forward visually from the background. Previously, the patios were a hodgepodge of deck islands that were impossible to navigate, and were of insufficient size to arrange furniture on. A well organized patio streamlined the traffic flow and the living space, featuring a cast in place concrete fire pit and banco couch, as well as a new outdoor bistro, glowing with filtered light from the canvas shade sails overhead.
A turquoise glass overflow spa became the yards focal point, sharing the space between the pool and outdoor living. The striking symmetry of the spa and pot pedestal with regal cacti arrangement behind, flanked by the arbors on either side, created a stately first impression from the front door. This teaser was just a glimpse of what could not yet be seen serving as an invitation to explore and enjoy as the yard unfolds.
See more about this project & hear from the homeowner here: https://www.youtube.com/watch?v=7eT3RkLkg5w&feature=youtu.be

Budget analysis and project development by: May Construction, Inc.
Large transitional master blue tile, gray tile, green tile and matchstick tile porcelain tile and beige floor alcove shower photo in San Francisco with recessed-panel cabinets, gray cabinets, an undermount tub, an undermount sink, a two-piece toilet, a hinged shower door, quartz countertops and blue walls

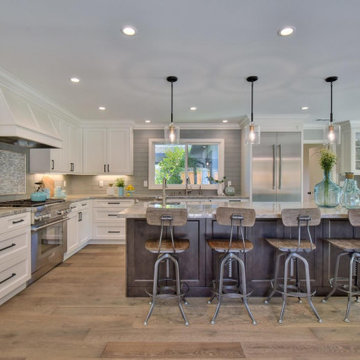
Neutral comfortable colors now cover the walls, stunning stained barn doors and a large kitchen island highlights the length of the room and the openness of the space which connects the new living room and dining room. The center island features a prep sink and a casual spot for family dining, creating a warm, cheery environment perfect for entertaining.
Budget analysis and project development by: May Construction
Budget analysis and project development by: May Construction, Inc. -------------------- Interior design by: Liz Williams
Eat-in kitchen - large contemporary l-shaped light wood floor and brown floor eat-in kitchen idea in San Francisco with a single-bowl sink, flat-panel cabinets, light wood cabinets, quartzite countertops, beige backsplash, subway tile backsplash, stainless steel appliances, an island and gray countertops

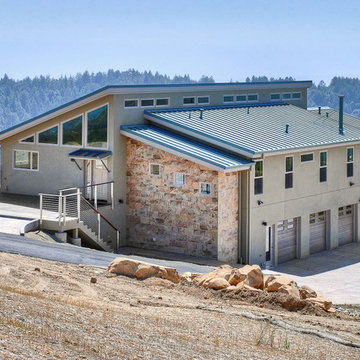
In this complete rebuild of a mid-century modern home, the design flows from an analysis of the varied site conditions already present and reinforces key relationships to the site while establishing new ones. From a relocated street level entry, a careful sequence follows the slope and curates the vertical movement through the home from earthbound experience to the open sky and panoramic views. Each level takes on a different purpose - first, establishing new ties to the street, then anchoring family spaces to the south-facing garden, turning inwardly focused at the sleeping level, and ultimately dissolving at the top level living spaces and roof deck to reveal panoramic connections to the city and bay. Image by Joe Fletcher.

What You Should Know About Fuel Tanks
Home heating solutions can encompass electrical, gas, solar and oil based systems. When one talks about oil tanks that are used as home heating systems, there are a few important things to keep in mind.
Start with the installer
A high-quality, professional and expert installer of oil or fuel tanks can certainly help you make the decision on which type of tank is the best for your property. When you decide on underground fuel tanks, you should make sure that they are:
• Compliant with all statutory requirements.
• Made of steel and polyurethane.
• Covered by guarantee.
• Supported by backfill material, leak detection systems and tank supports.
Aboveground fuel tanks are easier to maintain simply because they are more accessible. Even the smallest of oil or fuel leaks can be detected almost immediately. But even here, an installer should give you premium quality tanks. These tanks:
• Should have secondary containment.
• Should be corrosion resistant.
• Should have proper support as well.
Installation
Installation for both – underground and above ground tanks is a technical and complex process. The installation process for both will start with a technician visiting your home and making an assessment of aspects such as:
• Measuring the space.
• Taking stock of the distance from your home to the tank, pipes and so on.
• The supports needed for the tank and so on.
If it is an above ground tank, then it may also need bollards to protect it from vehicles. An underground tank will need containment sumps and drop tubes and so on.
The combination of components will be decided by the installer and you can certainly ask for a complete breakup of the same and get the costs for the same as well.
Remediation
Repair and remediation of above and underground tanks is a critical task. In fact, many problems associated with underground fuel storage tanks can be eliminated if the home owner invests time and resources into periodic analysis and examination of the same.
A fuel tank that has been installed above the ground will be easier to access but repair and remediation of both types of tanks will entail:
• Soil sampling.
• Extent of oil contamination.
• Assessment of leaks and the extent and number of the same.
• Drawing up a plan for dealing with all problem areas.
Removal
Every fuel tank has a shelf life. At some point of time or the other, the fuel tank will need to be removed. When it comes to above ground installations, the removal company will need to assess the type of fuel and the knowhow on emptying the tank completely.
The tank will also need to be cleaned completely before being loaded on to a vehicle that can take it away to a recycling unit or disposal unit. Underground tanks can be removed or closed or treated as abandoned depending on the condition of the tank and official licenses. For instance, a tank can be treated as closure in place if the removal of the same is going to compromise the safety of structures above the ground.

Budget analysis and project development by: May Construction, Inc. -------------------- Interior design by: Liz Williams
Example of a large trendy l-shaped light wood floor and brown floor eat-in kitchen design in San Francisco with a single-bowl sink, flat-panel cabinets, light wood cabinets, quartzite countertops, beige backsplash, subway tile backsplash, stainless steel appliances, an island and gray countertops

"Luxury Bathroom Wallpaper Installation in Berkeley – Where Eco-Conscious Design Meets Urban Sophistication"
Transform your bathroom into a sanctuary with our premium wallpaper installation services in Berkeley. As your local sustainable wallcovering specialists, we combine high-design aesthetics with environmentally responsible materials perfect for Berkeley’s discerning homeowners.
Why Berkeley Chooses Our Bathroom Wallpaper
✔ Non-Toxic & Green Certified – Low-VOC adhesives, FSC-certified papers
✔ Steam-Resistant Technology – Mold-proof installations for Berkeley’s humid microclimates
✔ Designer Collaborations – Featuring local Bay Area artists
✔ Historic Home Expertise – Perfect for Craftsman and mid-century bathrooms
✔ Free Eco-Consultation – Including material lifecycle analysis
Signature Berkeley Bathroom Styles
? Eco-Modern – Organic textures with clean lines
? Campus Collegiate – Library-inspired prints and book textures
? Bay View – Abstract watercolor maps of the East Bay
? Arts & Crafts Revival – Authentic Greene & Greene patterns
Our Sustainable Service Includes:
✅ Zero-Waste Installation (85% material recycling rate)
✅ Water-Based Sealants (Toxics-Free Berkeley compliant)
✅ 3D Augmented Reality Preview
✅ 5-Year Performance Guarantee
Recent Client Praise:
“Installed our master bath wallpaper around vintage tile with museum-quality precision!” – The Nguyen Family, North Berkeley

Budget analysis and project development by: May Construction
Mid-sized minimalist kids' blue tile and porcelain tile porcelain tile, gray floor and single-sink bathroom photo in San Francisco with shaker cabinets, white cabinets, a one-piece toilet, blue walls, an undermount sink, quartz countertops, white countertops, a niche and a freestanding vanity

Bold Brass accents and marble flooring style this bathroom feminine classic with a touch of vintage elegance.
This glamorous Mountain View ensuite bathroom features a custom crisp white double sink and lit mirrored vanity, crystal Knobs, eye catching brass fixtures, a warm jet soaking tub and a stylish barn door that provides the perfect amount of privacy. Accent metallic glass tile add the perfect touch of modern masculinity in the corner stand up shower and tub niches, every inch of this master bathroom was well designed and took new levels to adding stylish design to functionality.
Budget analysis and project development by: May Construction
The basement remained unused for years. Our design analysis took us from Rec Room to Sewing Room to Game Room to Home Theater to Work out Room. Our challenge was to create an open concept space where all of these activities could take place simultaneously. Family Home in Greenwood, Seattle, WA - Kitchen, Teen Room, Office Art, by Belltown Design LLC, Photography by Julie Mannell

Budget analysis and project development by: May Construction, Inc. -------------------- Interior design by: Caitlin Campbell.
Inspiration for a mid-sized contemporary light wood floor wine cellar remodel in San Francisco
35