
Search results for "Deep cleaning" in Home Design Ideas

 Nextday Cleaning - Fairfax
Enjoy a cleaner home with professional cleaning services tailored to your needs. From deep and recurring cleaning to move-in/out, spring, carpet, upholstery, and one-time cleaning, services can be customized based on your home and cleaning requirements.

 Jules Duffy Designs
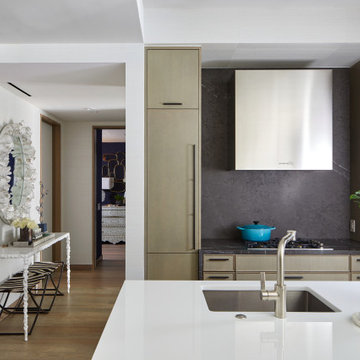
Luxury Manhattan apartment kitchen. Easy on the eyes, easy workspaces and easy cleaning. Plenty of storage. Walk through hallway to Family Room "Nest". Master Bedroom and Study to the right (not visible).
Find the right local pro for your project
 Top Shelf Design
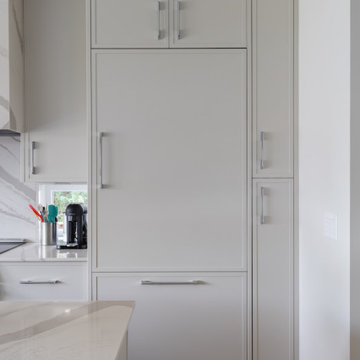
Example of a small l-shaped light wood floor and beige floor open concept kitchen design in Vancouver with an undermount sink, flat-panel cabinets, gray cabinets, quartz countertops, gray backsplash, stone slab backsplash, paneled appliances, a peninsula and gray countertops
 Tile Doctor Ltd
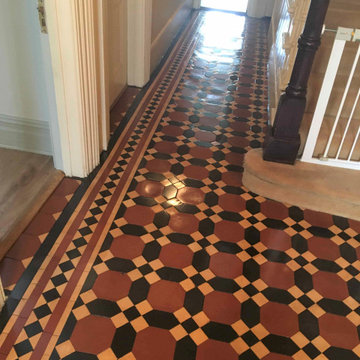
This Victorian tiled hallway floor at a property in Twickenham was in great physical condition considering its age but just hadn’t been cleaned or sealed in quite a few years. Over the years the protective sealer has worn away and dirt tracked in from outside had sunk deep into the pores of the tile. The floor looked dull, and my customer was finding it hard to clean and maintain effectively.
To remove the ground in dirt from within the pores of the tile I needed to apply a strong cleaning product that would breakdown the dirt and deal with any remaining sealer left on the floor. Usually, I find the sealer down the center of the hallway is worn away with use, but you still find traces towards the wall. To do the renovation effectively I would need to remove all the sealer during cleaning otherwise you risk an uneven appearance.
The best sealer stripper and cleaner for the job is a product called Tile Doctor Remove and Go so I mopped a strong dilution onto the floor and then left it to soak in for around fifteen minutes. To get the best from this product it’s advised to give it a long dwell time thereby allowing it to break down old sealer and dissolve the dirt and contaminants.
The floor was then scrubbed with a rotary floor machine to work the product into the pores of the tile and release the trapped dirt. After the first pass the floor was rinsed with a little water and the soil extracted using a machine. After inspecting the floor some areas were re-treated using the same process to ensure all the sealer and dirt had been removed.
After a final inspection I left the tiles to dry off overnight.
The following day I returned and started by taking moisture readings from different parts of the floor. Its not a good idea to apply a sealer to a damp tile and damp areas should be dried out with a heat gun first.
My client was keen to have a classic shiny appearance, so I chose Tile Doctor Seal and Go to add protection to the tiles. The sealer will prevent dirt becoming ingrained in the tile and protect the floor from staining caused by spillages whilst making it very easy for our customer to maintain in the future. As you can see from the pictures, it also gives a nice sheen finish to add lustre to the floor as requested by my customer.
Before leaving we had a quick chat about maintaining the floor and a warning about the use of strong floor cleaning products which can be over strong and prematurely strip the sealer away over time. For this floor I recommend Tile Doctor Neutral cleaner which is an effective cleaner but as its name suggests is pH neutral and mild enough not to harm the sealer.
Jonathan Oldham
South Middlesex Tile Doctor
 Tile Doctor Ltd
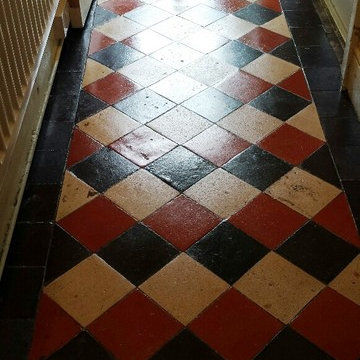
The pictures below were taken at a house in the town of Merthyr Tydfil, which is located not too far north of Cardiff. My client was keen to keep her very old Quarry tiled floor – which dated back to 1905 – intact. The floor had understandably seen a large amount of traffic in its lifetime, and was now in dire need of a professional restoration, including a thorough clean and seal.
First, I completed a survey of the area and provided my client with a quote. After completing many similar jobs in the past, I generally have a good idea of what the final result will look like. I passed on some images of a final result to my client, who was happy for me to begin my work.
On the first day, my first task was to take run some damp tests which were fine; it’s always good to know up front if there are likely to be any damp issues. Next I covered the floor with water to take the surface suction out and waited fifteen minutes before applying a cocktail of Tile Doctor NanoTech Heavy Build-Up cleaner mixed with Pro-Clean and Grout clean-up covering the whole floor. I then immediately starting to work the solution into the floor with a rotary machine fitted with a coarse black pad. The solution was then rinsed off with water which was then extracted with a wet vacuum as I worked. For stubborn areas I applied more of the previously mixed solution scrubbed into the floor with coarse wire wool by hand followed by further rinsing with water.
Each of the products used serves a particular purpose. Pro-Clean is a strong high-alkaline cleaner for natural stone, while NanoTech HBU is a particularly powerful cleaner that uses nano-sized particles to penetrate deep into the stone to get underneath and lift out ingrained dirt and stains. Grout Clean-Up, as the name implies, is a product for resolving grout related problems such as removing grout smears from tile surfaces aka grout haze.
After completing the clean I left the house for 48 hours, to leave enough time for the floor to dry completely in preparation for sealing. Upon my arrival back at the house I conducted some more damp tests to check that the floor was dry enough to seal using the previous readings as a benchmark. The results indicated that I was fine to proceed with the seal, so I applied a total of eight coats of Tile Doctor Seal & Go for durable protection. This was the product I recommended to my client as she wanted a nice, soft shine for her surface seal.
As you can see from the photos, the desired result was achieved to a high standard and needless to say my client was delighted with the transformation.
Julian Iancono
South East Wales
 Tile Doctor Ltd
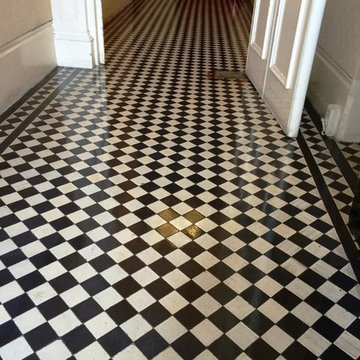
Recently, I was asked to do some Tile Doctoring at Palmeira Square, in the seaside city of Brighton and Hove, to restore the Victorian tiled floor of one of the downstairs offices. Palmeira Square is a residential area which was first developed in the mid-19th century during the reign of Queen Victoria, so many of the buildings feature some fantastic original Victorian tile floors. Although there are many large terraced houses and even mansions in the area, some of the buildings have been converted into offices for commercial use. My client, who leased the downstairs office, managed to persuade the other tenants to employ professional help to restore the tiles, and so I was asked to come in to clean and seal the floor to get it back to looking its best.
With Palmeira Square being quite a lively area, I made sure to fence off the front door area from the wandering public. My first job was to apply Tile Doctor Remove & Go to the floor, a heavy duty stripper, multi-purpose stripper that was able to remove the stubborn marks, stains and ingrained dirt on and between the tiles. In particular, Remove & Go helped to remove some rust stains I found near the door hinges.
I left the product to sit and work its magic for twenty minutes, and during this time I began cleaning the floor using a buffing pad, which is suitable for use on all types of floor (except polished stone), and a solution of Tile Doctor Pro-Clean diluted with water. The combination of a buffing pad and Pro-Clean helped to remove the general dirt and grime that had built up over time in this high traffic area of the office. After the cleaning was complete, the black tiles appeared grey because any remaining sealer had been removed. However, the colour would return after resealing the tiles, which was my next job.
I returned to the office after two days to seal the Victorian tile floor. To do this, I needed to use Tile Doctor Seal & Go, which meant I had to ask the office workers to keep off the floor for most of the day. This is because I needed to apply six coats of Seal & Go to the floor, and each coat takes roughly fourty minutes to dry. Seal & Go provides a stain-resistant surface seal and a durable low-sheen finish, which will help keep this floor looking great for a long time, even with a high traffic of workers coming in and out of the office.
Luckily, it was a warm day outside, and the floor dried quickly, leaving a shiny, deep black surface. Both my client and I were very happy with the result. The client was also pleasantly surprised to see that I had been able to remove the rust stains near the door.

Sponsored
Columbus, OH

Hope Restoration & General Contracting
Columbus Design-Build, Kitchen & Bath Remodeling, Historic Renovations

 User
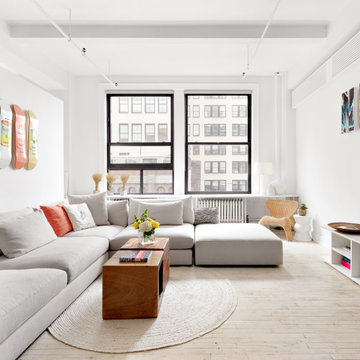
UserInspiration for a contemporary light wood floor and beige floor family room remodel in New York with white walls and a tv stand
 lavish
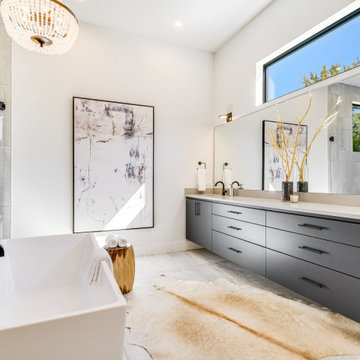
Walking into this reimagined primary bath feels like stepping into a boutique spa. The entire space is wrapped in a soft, barely-there blush-white wall color that reads almost like warm light itself, creating an instantly calming atmosphere that the design then builds upon thoughtfully.
Twin sage blue-gray vanities run along both sides of the room, each finished in a shaker-style painted cabinetry with polished chrome bar pulls and topped with a gorgeous Calacatta-style quartz — the same material flowing seamlessly across countertops and up as a low backsplash. Above each vanity hang individual black rounded-rectangle mirrors with matching chrome picture-light sconces, creating a clean, modern hotel-bath aesthetic that feels crisp without being cold.
The walk-in shower is the undeniable heart of the room — a generous double-entry wet room featuring dual rainfall showerheads, dual handheld wand fixtures, and a natural light source through a privacy glass window that floods the space with soft, diffused daylight. Large format white wall tile set in a simple grid pattern keeps the shower feeling expansive and serene, while large-format Calacatta marble-look porcelain tile on the floor carries the quartz veining language from the vanities underfoot throughout the entire bathroom. A polished chrome heated towel rack mounted on the bathroom wall adds a luxurious, spa-grade detail — warm towels waiting after every shower. A teak wood bath mat on the floor completes the spa atmosphere perfectly.
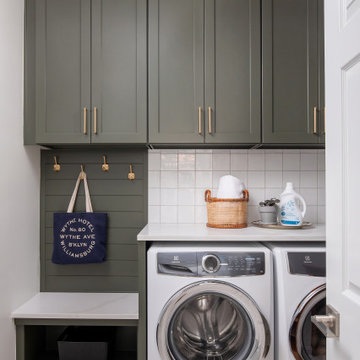
The Laundry Room
Just steps away, the laundry room received an equally remarkable transformation — one that proves this hardworking space can be just as design-forward as any other room in the house. Deep hunter green painted cabinetry with brushed brass bar pulls commands the room from floor to ceiling, creating a rich, dramatic palette that feels collected and intentional rather than builder-grade.
Upper shaker-style cabinets maximize storage above the machines, while a tall pantry-style column cabinet on the end wall provides floor-to-ceiling concealed storage for supplies. A painted shiplap accent panel between the upper cabinets and the counter is fitted with a row of brass coat hooks — a dual-purpose detail that adds texture and hang space for bags and reusable totes. The counter surface in white quartz sits above the side-by-side front-load washer and dryer, creating a functional folding station. A white square tile backsplash behind the machines adds a clean, easy-care surface that holds its own against the bold green cabinetry. A built-in wood bench with open storage below creates a secondary mudroom function, while a warm-toned live-edge wood floating shelf adds organic contrast. A custom built walnut open bookcase tucked at the room's end provides stylish overflow storage that gives the space personality beyond its utility.
 Amy A. Alper, Architect
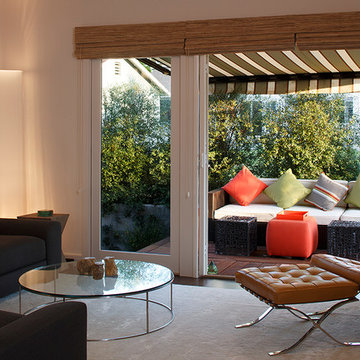
Inspiration for a contemporary open concept living room remodel in San Francisco with white walls
 Giulietti Schouten Weber Architects
Photos By; Nate Grant
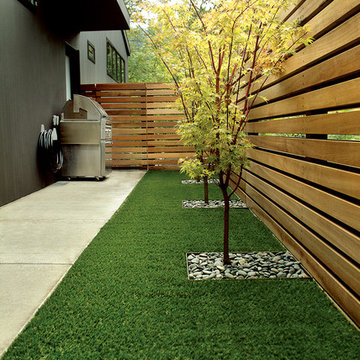
Design ideas for a contemporary side yard wood fence landscaping in Portland.
Design ideas for a contemporary side yard wood fence landscaping in Portland.
 Archer & Buchanan Architecture, Ltd.
Angle Eye Photography
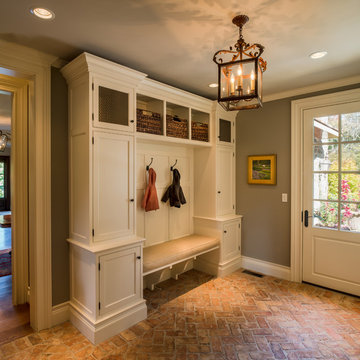
Inspiration for a large timeless brick floor entryway remodel in Philadelphia with gray walls and a white front door
Inspiration for a large timeless brick floor entryway remodel in Philadelphia with gray walls and a white front door


 TKS Design Group
Free ebook, Creating the Ideal Kitchen. DOWNLOAD NOW
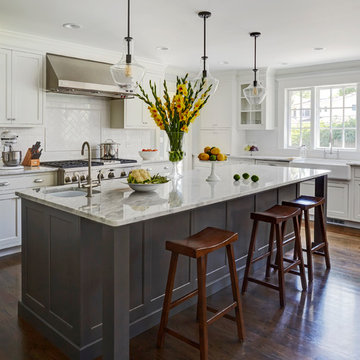
Our clients and their three teenage kids had outgrown the footprint of their existing home and felt they needed some space to spread out. They came in with a couple of sets of drawings from different architects that were not quite what they were looking for, so we set out to really listen and try to provide a design that would meet their objectives given what the space could offer.
We started by agreeing that a bump out was the best way to go and then decided on the size and the floor plan locations of the mudroom, powder room and butler pantry which were all part of the project. We also planned for an eat-in banquette that is neatly tucked into the corner and surrounded by windows providing a lovely spot for daily meals.
The kitchen itself is L-shaped with the refrigerator and range along one wall, and the new sink along the exterior wall with a large window overlooking the backyard. A large island, with seating for five, houses a prep sink and microwave. A new opening space between the kitchen and dining room includes a butler pantry/bar in one section and a large kitchen pantry in the other. Through the door to the left of the main sink is access to the new mudroom and powder room and existing attached garage.
White inset cabinets, quartzite countertops, subway tile and nickel accents provide a traditional feel. The gray island is a needed contrast to the dark wood flooring. Last but not least, professional appliances provide the tools of the trade needed to make this one hardworking kitchen.
Designed by: Susan Klimala, CKD, CBD
Photography by: Mike Kaskel
For more information on kitchen and bath design ideas go to: www.kitchenstudio-ge.com
 Blackbox design studios
Mark Heywood
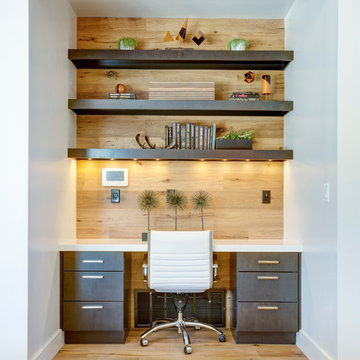
Small trendy built-in desk medium tone wood floor study room photo in Salt Lake City with white walls
Small trendy built-in desk medium tone wood floor study room photo in Salt Lake City with white walls
 Haven Design and Construction
Matthew Niemann Photography
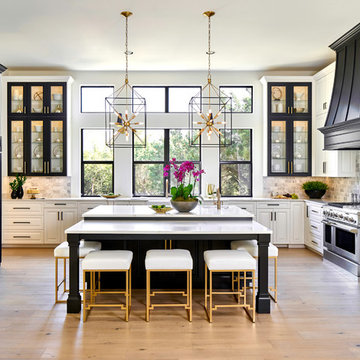
Example of a transitional u-shaped light wood floor and beige floor kitchen design in Austin with a farmhouse sink, raised-panel cabinets, gray backsplash, paneled appliances, an island, white countertops, quartz countertops, white cabinets and stone tile backsplash
Example of a transitional u-shaped light wood floor and beige floor kitchen design in Austin with a farmhouse sink, raised-panel cabinets, gray backsplash, paneled appliances, an island, white countertops, quartz countertops, white cabinets and stone tile backsplash
 2id Interiors
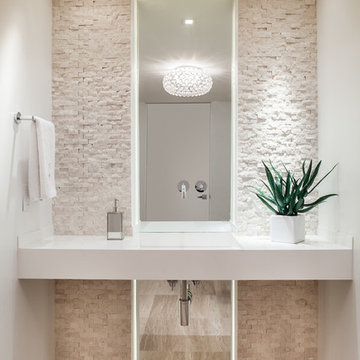
Inspiration for a small contemporary beige tile and stone tile light wood floor and beige floor powder room remodel in Miami with an integrated sink, white walls, open cabinets, white cabinets, a two-piece toilet, quartzite countertops and white countertops
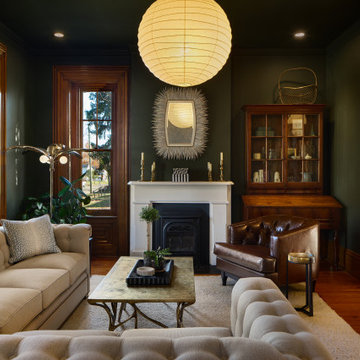
Sponsored
Columbus, OH

Wannemacher Interiors
Customized Award-Winning Interior Design Solutions in Franklin Cnty OH
 Nar Design Group
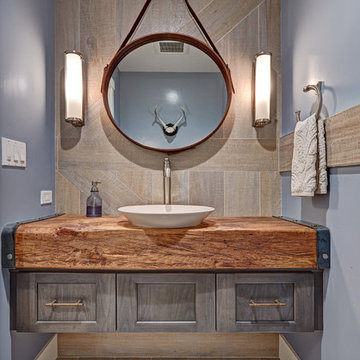
Our carpenters labored every detail from chainsaws to the finest of chisels and brad nails to achieve this eclectic industrial design. This project was not about just putting two things together, it was about coming up with the best solutions to accomplish the overall vision. A true meeting of the minds was required around every turn to achieve "rough" in its most luxurious state.
Featuring: Floating vanity, rough cut wood top, beautiful accent mirror and Porcelanosa wood grain tile as flooring and backsplashes.
PhotographerLink
 YAMINI DESIGNS
Spectrum Studio
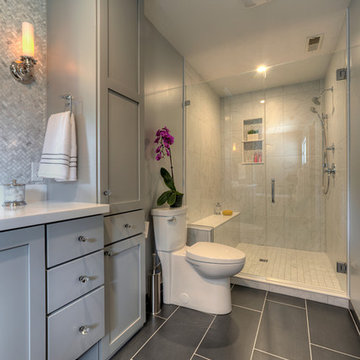
Alcove shower - transitional white tile black floor alcove shower idea in Chicago with shaker cabinets, gray cabinets, a two-piece toilet and gray walls
Alcove shower - transitional white tile black floor alcove shower idea in Chicago with shaker cabinets, gray cabinets, a two-piece toilet and gray walls
 Castle Homes
Reed Brown Photography
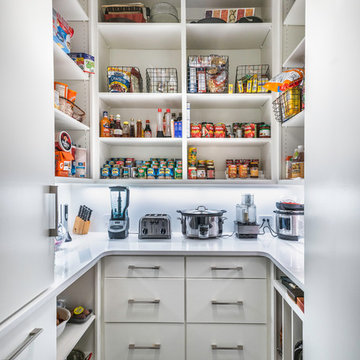
Example of a trendy u-shaped gray floor kitchen pantry design in Nashville with open cabinets, white cabinets and white countertops
Example of a trendy u-shaped gray floor kitchen pantry design in Nashville with open cabinets, white cabinets and white countertops
71