
Search results for "Formulated" in Home Design Ideas

 Coco Maison Design
We reimagined a closed-off room as a mighty mudroom with a pet spa for the Pasadena Showcase House of Design 2020. It features a dog bath with Japanese tile and a dog-bone drain, storage for the kids’ gear, a dog kennel, a wi-fi enabled washer/dryer, and a steam closet.
---
Project designed by Courtney Thomas Design in La Cañada. Serving Pasadena, Glendale, Monrovia, San Marino, Sierra Madre, South Pasadena, and Altadena.
For more about Courtney Thomas Design, click here: https://www.courtneythomasdesign.com/
To learn more about this project, click here:
https://www.courtneythomasdesign.com/portfolio/pasadena-showcase-pet-friendly-mudroom/

 Fratantoni Interior Designers
Luxury Transitional Home by Fratantoni Design, Fratantoni Interior Design, and Fratantoni Luxury Estates.
Follow us on Twitter, Facebook, Instagram and Pinterest for more inspiring photos of our work!

 Richmond Commercial Painting
Richmond Commercial Painting provides full-service Milwaukee commercial interior painting for commercial buildings.We are skilled at applying all types of floor and wall coverings. We perform electrostatic painting for heat registers, bathroom stalls, or elevator doors and frames.
There is a lot more to commercial interior painting than just brushing, rolling or spraying a coating on a substrate. Preparation for painting, particularly on rehabilitation jobs, can be very involved and require elaborate equipment and technical expertise. In commercial painting and repaints there is usually production and office equipment and furniture to protect. There is a need for project coordination to assure the smooth, non-disruptive flow of the work.
Milwaukee commercial interior painting often calls for specialized coatings because of environmental and high traffic concerns. The right equipment and expertise are required for the proper application of highly technical coatings. Unlike some of the other painting companies in the area, these production elements are readily available at Richmond Painting. The highly experienced staff of project coordinators and applicators is familiar with the equipment and coatings materials to assure owners of the best possible experience in any commercial interior painting project.
Our commercial painting pros apply coatings to ceilings, walls and floors with attention to detail and care for the surrounding elements of the room. They apply acrylic ceiling and wall textures as well as latex paints. They finish floors in a wide variety of materials formulated to provide attractive, durable, high-traffic surfaces. Richmond Painting is a one-stop source of all commercial interior painting projects, large or small.
Our successfully completed projects list includes schools, hospitals, hotels, nursing homes, office complexes, warehouses, factories, high-rise apartment buildings and a host of others. We have experience in every type of commercial structure between Racine and Milwaukee.
commercial interior painting in milwaukeeRichmond Painting is in Racine, WI and from this central point we dispatch crews to projects throughout the Milwaukee area, including the northern suburbs of Washington Mequon, Grafton, Cedarburg, and southern areas like Pleasant Prairie, Sommers , Racine, Oak creek, and even as far south as Libertyville, IL in some cases. We serve any professional commercial coatings needs within Racine, Kenosha, Milwaukee, Waukesha , Walworth, Washington and Ozaukee counties.
The estimating and project coordination experts at Richmond Painting and Decorating are available to assist in every step of a Milwaukee commercial interior painting project. We work with owners on budgeting, with general contractors on the critical flow chart for the coatings part of their contracts and with designers on materials and color selections. Where coatings are the majority of a contract, we assume the overall project coordination and completion responsibilities. We take pride in our work and do everything humanly possible to assure a successful completion of the job.
When a project is done right the first time, the proper material is used by highly qualified applicators and the job is done with a minimum of disruption to an active business, it is well worth the money spent. It really costs no more to get the very best.
Again, we provide commercial painting services to a wide local area including; but not limited to: Bethesda, Alexandria, Potomac, Arlington, Great Falls, Vienna, Silver Spring, Fairfax, McLean, Rockville, and Woodbridge.
Find the right local pro for your project

 Betty Wasserman Art & Interiors
Modern luxury meets warm farmhouse in this Southampton home! Scandinavian inspired furnishings and light fixtures create a clean and tailored look, while the natural materials found in accent walls, casegoods, the staircase, and home decor hone in on a homey feel. An open-concept interior that proves less can be more is how we’d explain this interior. By accentuating the “negative space,” we’ve allowed the carefully chosen furnishings and artwork to steal the show, while the crisp whites and abundance of natural light create a rejuvenated and refreshed interior.
This sprawling 5,000 square foot home includes a salon, ballet room, two media rooms, a conference room, multifunctional study, and, lastly, a guest house (which is a mini version of the main house).

 Bardet Construction
Grouted vinyl tile that looks like traditional tile.
Inspiration for a small eclectic white tile and ceramic tile vinyl floor and multicolored floor alcove bathtub remodel in Sacramento with furniture-like cabinets, gray cabinets, a two-piece toilet, gray walls, an undermount sink, marble countertops and gray countertops
Inspiration for a small eclectic white tile and ceramic tile vinyl floor and multicolored floor alcove bathtub remodel in Sacramento with furniture-like cabinets, gray cabinets, a two-piece toilet, gray walls, an undermount sink, marble countertops and gray countertops
 Riddle Construction & Design
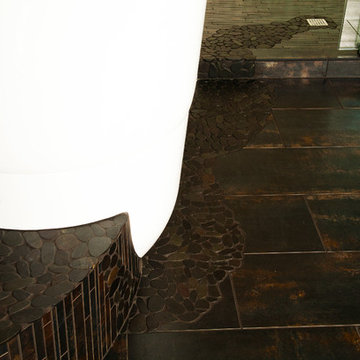
close up of pebble tile design around soaking tub.
Inspiration for a large asian master white tile and porcelain tile porcelain tile home design remodel in Seattle with a vessel sink, flat-panel cabinets, medium tone wood cabinets, quartz countertops, a two-piece toilet and beige walls
Inspiration for a large asian master white tile and porcelain tile porcelain tile home design remodel in Seattle with a vessel sink, flat-panel cabinets, medium tone wood cabinets, quartz countertops, a two-piece toilet and beige walls
 Richmond Commercial Painting
Richmond Commercial Painting provides full-service Milwaukee commercial interior painting for commercial buildings.We are skilled at applying all types of floor and wall coverings. We perform electrostatic painting for heat registers, bathroom stalls, or elevator doors and frames.
There is a lot more to commercial interior painting than just brushing, rolling or spraying a coating on a substrate. Preparation for painting, particularly on rehabilitation jobs, can be very involved and require elaborate equipment and technical expertise. In commercial painting and repaints there is usually production and office equipment and furniture to protect. There is a need for project coordination to assure the smooth, non-disruptive flow of the work.
Milwaukee commercial interior painting often calls for specialized coatings because of environmental and high traffic concerns. The right equipment and expertise are required for the proper application of highly technical coatings. Unlike some of the other painting companies in the area, these production elements are readily available at Richmond Painting. The highly experienced staff of project coordinators and applicators is familiar with the equipment and coatings materials to assure owners of the best possible experience in any commercial interior painting project.
Our commercial painting pros apply coatings to ceilings, walls and floors with attention to detail and care for the surrounding elements of the room. They apply acrylic ceiling and wall textures as well as latex paints. They finish floors in a wide variety of materials formulated to provide attractive, durable, high-traffic surfaces. Richmond Painting is a one-stop source of all commercial interior painting projects, large or small.
Our successfully completed projects list includes schools, hospitals, hotels, nursing homes, office complexes, warehouses, factories, high-rise apartment buildings and a host of others. We have experience in every type of commercial structure between Racine and Milwaukee.
commercial interior painting in milwaukeeRichmond Painting is in Racine, WI and from this central point we dispatch crews to projects throughout the Milwaukee area, including the northern suburbs of Washington Mequon, Grafton, Cedarburg, and southern areas like Pleasant Prairie, Sommers , Racine, Oak creek, and even as far south as Libertyville, IL in some cases. We serve any professional commercial coatings needs within Racine, Kenosha, Milwaukee, Waukesha , Walworth, Washington and Ozaukee counties.
The estimating and project coordination experts at Richmond Painting and Decorating are available to assist in every step of a Milwaukee commercial interior painting project. We work with owners on budgeting, with general contractors on the critical flow chart for the coatings part of their contracts and with designers on materials and color selections. Where coatings are the majority of a contract, we assume the overall project coordination and completion responsibilities. We take pride in our work and do everything humanly possible to assure a successful completion of the job.
When a project is done right the first time, the proper material is used by highly qualified applicators and the job is done with a minimum of disruption to an active business, it is well worth the money spent. It really costs no more to get the very best.
Again, we provide commercial painting services to a wide local area including; but not limited to: Bethesda, Alexandria, Potomac, Arlington, Great Falls, Vienna, Silver Spring, Fairfax, McLean, Rockville, and Woodbridge.
 Douglah Designs
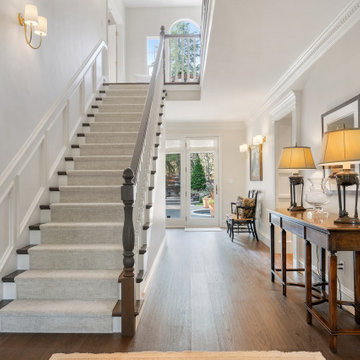
This traditional renovation project by our Lafayette studio was a joy to work on. The entryway sets the tone with its grandeur and sophistication, boasting a warm and welcoming ambiance that's perfect for greeting guests. The bedrooms are peaceful retreats, featuring a cozy and comfortable atmosphere ideal for rest and relaxation.
The family room exudes elegance and charm, creating a space that's ideal for both entertaining and unwinding. The dining room is designed for gathering with loved ones, with its tasteful decor and comfortable seating. The bathrooms, with luxurious amenities and a serene atmosphere, promotes relaxation and rejuvenation.
The kitchen is a chef's dream, with its top-of-the-line appliances, high-quality finishes, and ample counter space for meal prep. The laundry room is both functional and stylish, making this household task a breeze. Whether you're hosting a dinner party or simply spending a cozy night in, this traditional renovation project has everything you need to live comfortably and luxuriously.
 Windy City Painters
Does your iron fence look like Chicago winters have been winning the battle for years? That slow orange spread across pickets and rails is not just an eyesore - it is active corrosion undermining the structural integrity of metalwork that frames some of Chicago's most architecturally significant residential properties. Windy City Painters addresses iron fence rust at the source, using professional-grade rust conversion chemistry and direct-to-metal coatings engineered for the specific abuse Chicago's climate delivers.
PROJECT OVERVIEW
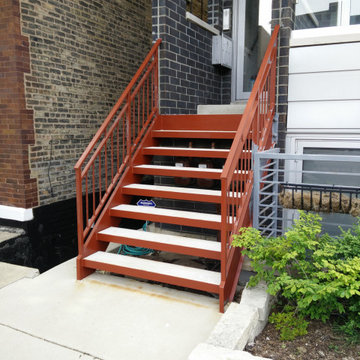
This project involved a heavily rusted ornamental iron fence on a Chicago North Side residential property. Rust had progressed beyond surface oxidation into moderate pitting on lower rails, a pattern Windy City Painters sees frequently on properties within blocks of treated roadways where salt drift accelerates corrosion. The scope included mechanical descaling, chemical rust conversion, DTM priming, and a durable gloss topcoat matched to the original fence color.
MATERIALS AND PRODUCTS
Ospho Rust Converter: A phosphoric acid-based treatment that chemically reacts with iron oxide, converting it to iron phosphate - a stable, paintable compound. Corroseal Water-Based Rust Converter is an alternative for situations requiring lower VOC handling. Rust-Oleum Professional DTM Primer and Sherwin-Williams DTM Acrylic Coating serve as the primary coating system, formulated for direct metal adhesion with built-in rust inhibitors. For structurally compromised sections, welding is coordinated before any chemical or coating work begins.
THE PROCESS
Step 1 - Mechanical Preparation: Wire wheel grinding on an angle grinder removes loose rust scale, mill scale, and flaking paint. For advanced pitting, Windy City Painters deploys a needle gun descaler, which impacts the metal surface thousands of times per minute to drive scale from deep cavities. This step determines whether the fence can be coated or needs welding first.
Step 2 - Chemical Rust Conversion: Ospho or Corroseal is brushed onto all remaining rust surface. These products do not simply seal rust - they react with it. The conversion process takes 24 hours to fully cure before topcoating. Skipping this step is the single most common reason iron fence paint jobs fail prematurely.
Step 3 - DTM Priming: Sherwin-Williams DTM or Rust-Oleum DTM primer is applied by brush to ensure full penetration around decorative elements, picket tips, and weld joints. Spray application is used on open sections for even film build. DTM formulations bond directly to prepared metal without a separate shop primer.
Step 4 - Finish Coating: A DTM topcoat in gloss or semi-gloss provides the final weather barrier. Gloss is preferred for iron fencing because the harder surface sheds water more effectively and resists dirt adhesion between maintenance cycles. Windy City Painters applies two finish coats for maximum film thickness.
CHICAGO-SPECIFIC CHALLENGES
Chicago's freeze-thaw cycle is the primary enemy of iron fence coatings. Water infiltrates micro-cracks in paint film, freezes, expands, and delaminate coating from beneath. Properties on the North Side and Near West Side also contend with lake-effect humidity that keeps metal surfaces damp for extended periods, slowing cure times and promoting under-film corrosion if preparation is inadequate. Greystones and Victorian brownstones typically feature ornate cast iron or wrought iron fencing with complex geometries that trap moisture and demand hand-brush application to fully coat recesses.
WHAT TO EXPECT LONG-TERM
A properly prepared and coated iron fence in Chicago should hold 5-8 years before requiring recoating. Annual inspection of weld joints, picket tips, and base rails closest to grade will identify early rust return. Addressing small spots with touch-up converter and primer extends service life significantly between full recoats.
PRO TIPS
Tip 1: Never pressure wash a rusted iron fence immediately before painting. Water drives moisture into pits and delays the surface drying needed for chemical converter adhesion. Allow 48 hours of dry weather before prep begins.
Tip 2: Picket tips and rail ends are the first failure points. These end-grain equivalent areas on metal concentrate corrosion. Ask your painter to apply an extra brush coat to every tip and terminus.
Tip 3: Black is the traditional and most durable color choice for iron fencing. Dark pigments absorb UV rather than reflecting it, reducing thermal cycling stress on the paint film at color change boundaries.
FAQ
Q: What does iron fence painting cost in Chicago?
A: Most residential iron fence painting in Chicago ranges from $400 to $1,200 depending on linear footage, rust severity, prep method required, and whether structural welding is needed before Windy City Painters can coat the surface.
Q: How do I know if my fence needs a welder before painting?
A: If you can press a screwdriver through a rail or picket, the metal wall has failed. Windy City Painters inspects all fencing before quoting and identifies weld-required sections so repairs happen before any coating investment.
Q: Is Ospho or Corroseal better for my fence?
A: Both convert rust effectively. Ospho is solvent-based and fast-acting, preferred for heavy rust. Corroseal is water-based with lower odor, preferred in enclosed or residential settings where off-gassing is a concern. Windy City Painters selects based on site conditions.
Q: Can iron fence painting be done in winter in Chicago?
A: Application requires temperatures above 50 degrees Fahrenheit for DTM coatings to cure properly. Most iron fence painting in Chicago runs April through October, with scheduling flexibility based on extended warm stretches.
Q: How do I maintain my fence between professional recoats?
A: Inspect annually in spring. Sand any rust spots to bare metal with 80-grit paper, apply Ospho, let cure 24 hours, then spot-prime with DTM primer and touch up with finish coat. Windy City Painters offers maintenance inspections.
Q: Do you paint courtyard building fences and coach house gates?
A: Yes. Multi-unit courtyard buildings and coach houses are common in the North Side neighborhoods Windy City Painters serves. We coordinate with property managers and HOAs for larger perimeter fence projects.
Q: How long after painting can I touch the fence?
A: DTM coatings are typically dry to touch in 2-4 hours and hard dry in 24 hours. Full cure for maximum hardness takes 7 days. Windy City Painters advises against pressure washing or heavy contact during that cure window.
Visit windypainters.com to request your free iron fence assessment and project quote.

 Tile Doctor Ltd
This ground floor flat in the City of Oxford had been converted from a shop which as you can imagine, was quite complex. One significant element involved in the conversation was the restoration of an old Quarry tiled floor which ran through the main hallway and had for many years been covered in a commercial linoleum covering.
When the linoleum covering was removed, the sheer amount of glue which had been used to affix it had completely ruined the appearance and condition of the Quarry tiles. There was also a lot of concrete in the bathroom, and our client was keen to have this removed in the hope that the tiles beneath were salvageable.
My first task at the property was to deal with the adhesive. I covered the entire floor area with Tile Doctor Remove and Go and then covered it with a plastic sheet and leaving it to soak into the glue and break it down overnight. Remove and Go is powerful stripper with a long-dwell time, formulated to break down adhesives and paint stains, amongst other coatings.
I returned the next day and, removing the plastic sheeting, I scrubbed the floor with a carbon brush attached to a rotary floor scrubber to remove the huge glue deposits. I worked in sections, rinsing each area of the floor with water after it had been scrubbed. Once I had finished the entire floor there was still some glue remaining, so I covered it again with a solution of Remove and Go combined with Tile Doctor HBU Nanotech, which utilises nano-sized particles to get underneath tough stains, dissolve them, and lift them out. I left this solution on the floor for about two hours to dwell and scrubbed it again.
During the next day of work, I used a very coarse 100 grit diamond burnishing pad to manually grind away the remaining stubborn bits of glue. Paying attention to the bathroom, I used a 50-grit coarse milling pad followed up with a 100-grit diamond burnishing pad to do the same to the area of concrete.
The next part of the process was to use Tile Doctor Grout Clean Up to acid wash the floor. This was successful in removing the last bits of cement and the remaining residue of the glue. To complete the cleaning process, I then rinsed the floor with plenty of water and vacuumed up any soiled solution.
I opted to leave the floor alone for a couple of days to fully dry off so that it could be sealed upon my return. This is crucial as any moisture or damp issues can damage the performance of the sealer and expose the floor to further ingrained dirt and staining.
To seal the floor, I used Tile Doctor Colour Grow. This is an impregnating sealer that also enhances the natural reddish shades in the Quarry. I applied two coats of the sealer, giving the floor the natural look matte finish the customer desired.
The customer was very impressed with the results of this thorough restoration. She even left the following feedback:
“I cannot recommend this service enough. The Oxford Tile Doctor (Barry) was a superstar: he cleaned up the tiles in my hallway, which were covered in a very thick layer of glue, and removed concrete from the tiles. They now look superb and I’m really happy with the outcome. Barry was always on time, considerate, and kept me up to date. The quote for the job was exactly right. I would not hesitate to recommend him.”

 Apsara Interior Design
 Photographer Tertius Bune.
Yves Klein, Table D'Oree. 1961 Gold Leaf and Plexi. Pair of Chairs are by Nanna Ditzel. Fiberglass. Denmark 1960.
Inspiration for a contemporary living room remodel in New York
Inspiration for a contemporary living room remodel in New York
 Tile Doctor Ltd
Roundhay is an affluent area of North Leeds which is well-known for the fantastic Roundhay Park. The park is large enough to contain two lakes, extensive woodland, formal gardens and even golf courses! It’s the premier attraction for anyone fortunate enough to live in the area, or anyone visiting from nearby.
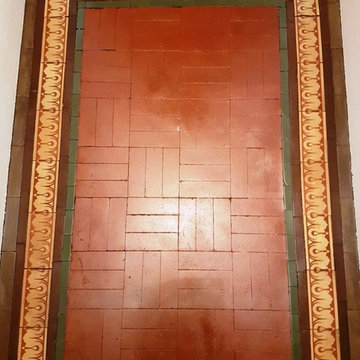
I recently visited a customer who lives in Roundhay and was looking for help in restoring the small Victorian tiled entranceway at the front of her house. The tiles were in a shocking state, but it’s not hard to imagine why – the entrance to a house receives a lot of foot traffic and is not typically taken care of regularly. These tiles were also marked with paint splashes left over from decoration work, making them look even worse.
The appearance of the entranceway did not set the right standard for the rest of the house, so the property owner was keen to have it restored professionally.
The appearance of the entranceway did not set the right standard for the rest of the house, so the property owner was keen to have it restored professionally.
The appearance of the entranceway did not set the right standard for the rest of the house, so the property owner was keen to have it restored professionally.
The appearance of the entranceway did not set the right standard for the rest of the house, so the property owner was keen to have it restored professionally.
I informed the customer that I could have the tiles rejuvenated within a day’s work. To begin, I used a scrapper and wire wool brush to manually remove some of the most stubborn paint marks.
Following this, I applied a strong solution of Tile Doctor Remove and Go, before leaving the product to dwell for about an hour. Remove and Go is multi-purpose stripping agent that can remove any adhesive and paint deposits, as well as many types of old coatings and sealers.
To work the product deep into the tiles, I agitated with an abrasive cleaning pad and then rinsed the area with fresh water. This had the desired affect and all the unsightly paint marks were removed.
Next, I gave the floor another thorough clean to remove any general muck and ingrained dirt. This was done using our high-alkaline cleaner, which we typically use on Victorian tiles, known as Tile Doctor Pro-Clean. In fact, Pro-Clean is a very reliable cleaner for all types of tile and grout including natural stone, Limestone, Slate and Travertine, amongst others.
Since I told the customer I would able to finish the job within a day, I dried the floor quickly using a heat gun so it could be sealed there and then. To seal the floor, I applied four coats of Tile Doctor Seal and Go, which is a topical sealer formulated to provide maximum protection along with a high-quality, low sheen finish.
As you can see from the photos above, the entranceway was absolutely transformed. These tiles are now a true asset to the rest of the property, rather than looking out of place! I’m please to say my customer was amazed by how quickly such a big difference could be made and left the following glowing feedback.
I can’t believe the before and after pictures. The restoration of the tiles is top quality, they are so much brighter and richer in colour – especially without the garage paint hiding the detail! Nigel did an amazing job, even better than I could have hoped for, and is a lovely guy as well. Would definitely recommend.
Nigel Stoker
North West Yorkshire Tile Doctor
 Tile Doctor Ltd
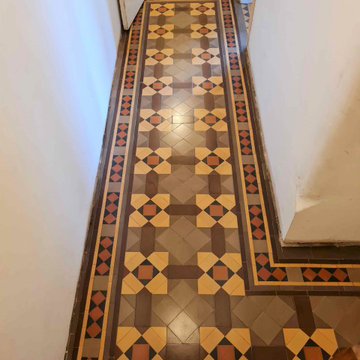
We were contacted by a customer in West Kirby who needed help renovating a Victorian tiled hallway in a house they had just purchased. Kirby is a desirable seaside location North of Heswall that expanded with the arrival of the railway in 1848. The railway brought a demand for property and so it’s not unusual to find housing stock in this area dating back to the Victorian era.
The Victorian tiles at this property appear to have been neglected by the previous owner and were now looking very dull and marked by paint from decorating; all the colours looked washed out and the floor was now looking very unappealing.
The good news however is that this problem is not uncommon and with a deep clean and a fresh sealer applied it can be transformed. I gave the owner a quote which was accepted a date agreed for my return to do the work.
On the first day the floor was sprayed with a neat solution of Tile Doctor Remove and Go which is a powerful alkaline cleaning and stripping agent used to remove old seals and paint. The solution was left to dwell for about twenty minutes so it could soak in and get to work. It was then scrubbed into the tiles using a coarse 200-grit pad fitted to a heavy buffing machine. Water was then added to the floor for lubrication and the soils released from the pores of the tile during scrubbing was removed by with a wet vacuum.
To treat the stubborn paint stains and remains of what I suspect was carpet adhesive a hand scraper and wire brush was used, this was made easier by the Remove and Go which had softened the paint etc.
The next stage was to give the Victorian tiles a mild acid wash using Acid Gel which is applied to the floor, scrubbed in, and rinsed off with a little water then extracted using the wet vacuum. We always recommend an acid wash for old floors like these as it will counter any efflorescent salts resident in the tiles and helps to remove other mineral contaminates and old grout that can mask the true beauty of the tiles.
I left the tiles to dry out for two days before returning to apply the sealer, first checking it was dry by testing for moisture in various places with an electronic damp tester. It’s not a good idea to apply a sealer to a damp floor so we always check first.
Satisfied the floor was dry, I started applying a coat of Tile Doctor Colour Grow which is a colour enhancing impregnating sealer that helps to bring out the true colours in the tile. This was allowed to dry for thirty minutes and then followed up five coats of Tile Doctor Seal and Go Extra which is a breathable sealer that leaves a lovely satin finish and builds on the protection.
Once done the Victorian hallway tiles looked so much cleaner and healthier. It was quite a transformation and the new sealer had given the floor a nice low sheen shine which the customer was very happy with.
For aftercare cleaning I left them with a bottle of Tile Doctor Neutral Cleaner which is specially formulated for cleaning sealed tiles. We don’t recommend tile cleaning products you find on supermarket shelves as the are usually too strong and can strip a sealer off the floor prematurely. If your choosing another product to clean your floor always read the label to make sure its compatible.
Andrew Robb
Merseyside Tile Doctor

 Millz House
Check out this beautiful garage floor coating on display in the Fall Parade of Homes, 2842 Deer Hill Road in Medina. Now is a great time to consider updating your garage with a beautiful, functional floor coating.

 THE UP STUDIO
Free Float is a pool house that continues UP's obsession with contextual contradiction. Located on a three acre estate in Sands Point NY, the modern pool house is juxtaposed against the existing traditional home. Using structural gymnastics, a column-free, simple shading area was created to protect occupants from the summer sun while still allowing the structure to feel light and open, maintaining views of the Long Island Sound and surrounding beaches.
Photography : Harriet Andronikides


 T.A. French - Custom Builder
Example of a mid-sized transitional dark wood floor and brown floor double front door design in Austin with gray walls and a black front door
 Adobe Interiors
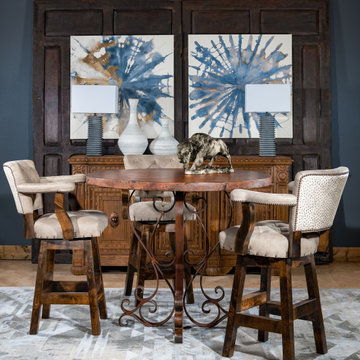
We are thrilled to introduce our exquisite Chisum Socorro Barstool, a captivating addition to any home dining or living area. The barstool boasts a robust hardwood framing that exudes the essence of rustic western charm, while the hand-sanded leather, accentuated by a contrasting ostrich pattern leather on the outback, enhances the stool's overall appeal. The seat and back are beautifully button-tufted, adding a touch of sophistication to the design. The stool is available in both bar and counter height options, and features a full 360 degree swivel, making it an ideal choice for any space.
The carefully crafted design features brass-studded accents and a solid hardwood framing that elevate the stool's motif, while the armrests' gentle sloping feature contrasts the sturdily squared hard lines of the base of the barstool, creating a perfect blend of elegance and authenticity. The Chisum Socorro Barstool is exclusively handcrafted and designed to provide a unique and authentic experience, adding rustic and elegant charm to any space.
We are confident that our Chisum Socorro Barstool will not only meet but exceed your expectations with its stand-alone character, beauty, and charm. Whether as a dynamic set or a standalone piece, this classic barstool is 100% American-made to the highest standards of quality and craftsmanship, offering exceptional durability and longevity. Experience the epitome of rustic elegance with our Chisum Socorro Barstool, available in both bar and counter height options, and featuring a full 360 degree swivel and beautiful button-tufted seat and back. Add a touch of sophistication to your home today.
Overall Barstool Dimensions: 43" H x 26" W x 22" D
Seat Height: 30"
Top of Arm Height: 40"
Overall Counter Stool Dimension: 38" H x 26" W x 22" D
Seat Height: 25"
Top of Arm Height: 35"
Leather Description: Dyes and waxes are hand applied to South American raw material to impart a transparent clarity. This coupled with substrate gives the leather a sophisticated, pebble grain appearance. All of the aniline dyes applied to the hides are hand rubbed in North Carolina by skilled artisans drawing from years of creative experience creating an impressive patina. The absence of pigments adds to the natural softness of the hides. A light protective top, utilizing a proprietary formulation developed by the tannery creates the exquisite touch Legends is know for and makes the leather suitable for active family homes. Because of the depth and transparency of this leather, natural markings will be exposed and should not be confused as defects or deficiencies, but appreciated as Nature's Autograph of Authenticity found in the finest full grain leathers.
Embossed Leather Description: The leather hide is first embossed with an ostrich pattern and then colored by applying two base color coats of micro pigments. The leather is then wiped-off to give it a contrast of colors utilizing the base color combination. This color contrast is further accented by two additional top coat colors that are wiped-on by hand to give the leather a beautiful antique look. The last step is to slightly protect the hand work of the leather hide with a lacquer topcoat that provides great depth and warmth to the finished product.
100% top grain cowhide leather is characterized by variations in shade, texture, color and grain. Healed marks and scars are to be expected and enhance the natural beauty of the hides. These variations should not be considered defects as they are normal and unique features of genuine 100% top grain cowhide leather.
Frame Construction: Made with American Alder Wood, our frames are glued, screwed and dowelled at the joints. Two coats of high quality stain is hand rubbed on the wood finish and then sealed with industrial grade clear coat.
 Windy City Painters
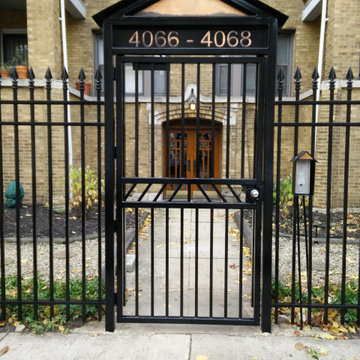
s your ornamental iron fence flaking rust onto the sidewalk every time Chicago wind kicks up? That is not a cosmetic problem - it is a sign that bare metal is exposed to moisture and the corrosion cycle is accelerating. Windy City Painters restores iron fencing on Chicago greystones, two-flats, Victorian brownstones, and courtyard buildings using professional-grade rust conversion and rust-inhibitive systems designed for the Midwest climate.
PROJECT OVERVIEW
Ornamental iron fence painting in Chicago is a multi-stage restoration process, not a simple brush-and-go job. Chicago properties - particularly the dense residential streetscapes of the North Side and Near West Side - feature decorative iron fencing that ranges from simple tubular picket to elaborate spear-top and scroll designs. When paint fails on iron, rust accelerates quickly. Windy City Painters evaluates each fence for structural rust-through, surface rust, and paint adhesion before recommending a scope of work.
MATERIALS AND PRODUCTS
Rust conversion: Ospho (phosphoric acid-based) or Corroseal (latex rust converter) depending on rust severity and surface porosity. Both chemically convert iron oxide into a stable compound that primer bonds to permanently rather than simply coating over active rust.
Primer: Rust-Oleum DTM (Direct to Metal) rust-inhibitive primer or Sherwin-Williams DTM Acrylic Coating primer, both formulated to penetrate weld seams, crevices, and pitted metal surfaces where brush application is essential.
Finish coat: Sherwin-Williams DTM Acrylic in satin or semi-gloss for UV resistance, color retention, and flexibility through freeze-thaw cycles. Two finish coats applied by brush for full coverage on ornamental profiles.
THE PROCESS
Step 1 - Mechanical Preparation: Wire wheel grinding with angle grinders removes loose rust and failing paint across flat rail surfaces. Needle gun descaling reaches weld joints, picket bases, and decorative scroll details where wire wheels cannot access. Windy City Painters inspects for rust-through after mechanical prep and flags any sections needing welding before painting proceeds.
Step 2 - Rust Conversion: Ospho or Corroseal is applied by brush to all remaining rust-affected surfaces. Ospho reacts with iron oxide over 24 hours, converting it to iron phosphate. Corroseal encapsulates and converts simultaneously. Both products create a chemically stable surface that dramatically improves primer adhesion on previously rusted iron fence sections.
Step 3 - Primer Application: Rust-Oleum DTM or Sherwin-Williams DTM rust-inhibitive primer is worked into every joint, crevice, and ornamental detail by brush - never sprayed alone on open ironwork where overspray and thin coverage risk undercutting. Full wet film thickness is verified before drying. Windy City Painters does not rush cure times between coats.
Step 4 - Finish Coats: Two coats of Sherwin-Williams DTM Acrylic topcoat are applied by brush for maximum film build on vertical pickets and horizontal rails. Color is matched to original or updated per homeowner preference. Semi-gloss finish resists dirt accumulation and makes future cleaning easier between repainting cycles.
CHICAGO-SPECIFIC CHALLENGES
Chicago presents iron fence painting conditions that milder climates do not. Road salt spray from city streets migrates onto fence bases through snowplow activity and foot traffic. Freeze-thaw cycling - sometimes occurring 30 or more times per winter - expands and contracts metal faster than paint can flex if film build is inadequate. High summer humidity slows cure times and risks blushing in topcoats applied too early in the morning. Windy City Painters schedules iron fence work during appropriate temperature and humidity windows and never applies coatings when rain is forecast within 24 hours.
WHAT TO EXPECT LONG-TERM
A properly prepped and primed iron fence in Chicago should hold a quality DTM finish for 5-8 years before needing significant maintenance. Annual inspection of base welds and picket bottoms - areas where water pools - catches early rust before it requires full mechanical prep again. Touch-up painting of isolated spots extends coating life significantly.
PRO TIPS
Tip 1: Never let a painter skip straight to topcoat on a rusty fence. Active rust under paint fails within one or two seasons. Ospho or Corroseal conversion is non-negotiable on Chicago iron.
Tip 2: Inspect fence picket bases at ground level every fall. That is where water collects, salt concentrates, and rust begins its worst work. Early touch-up costs far less than full restoration.
Tip 3: Request brush application on ornamental ironwork rather than spray-only. Brush work ensures wet paint is physically worked into every joint and crevice where rust originates.
Ready to restore your iron fence? Visit windypainters.com to schedule a free estimate with Windy City Painters.
Q: What does iron fence painting cost in Chicago? A: Iron fence painting in Chicago typically runs $8-$18 per linear foot. Rust severity, fence height, ornamental detail complexity, and whether welding repairs are needed all affect the final cost for professional iron fence restoration.
Q: How do you treat rust before painting an iron fence? A: Windy City Painters uses Ospho or Corroseal rust converters after mechanical prep. These products chemically neutralize iron oxide, creating a stable surface that rust-inhibitive primer bonds to permanently rather than painting over active corrosion.
Q: What primer is best for painting a rusty iron fence in Chicago? A: Rust-Oleum DTM and Sherwin-Williams DTM rust-inhibitive primers are our go-to products for iron fence painting in Chicago. Both are formulated for direct metal application and resist the moisture and freeze-thaw stress Chicago winters produce.
Q: How long does painted iron fencing last in Chicago? A: A professionally prepped and primed iron fence in Chicago holds a quality DTM finish for 5-8 years. Annual inspection of base welds and low points, with spot touch-up as needed, extends that service life considerably.
Q: Do I need a welder before painting my iron fence? A: If rust has eaten through fence rails or pickets structurally, Windy City Painters will identify those sections during prep and recommend welding before any primer or paint is applied. Painting over structurally failed metal is a waste of money.
Q: Can I paint an iron fence myself? A: DIY iron fence painting without proper rust conversion and DTM primer systems almost always fails within two seasons in Chicago. Professional prep, product selection, and application technique are why Windy City Painters results last 5-8 years.
Q: What neighborhoods does Windy City Painters serve for iron fence work? A: Windy City Painters serves Chicago North Side and Near West Side neighborhoods, working on greystones, two-flats, Victorian brownstones, courtyard buildings, and coach houses throughout the city.
 Tile Doctor Ltd
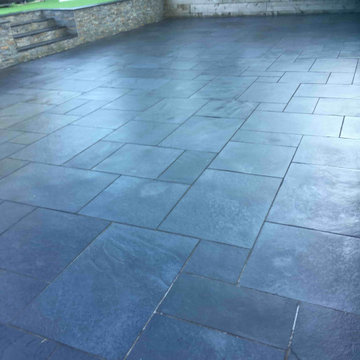
The photographs below are of an 80m2 Black Limestone Patio that was laid in rear garden of a property in Sandbach. All was going well until the installer decided to clean up the stone and remove the excess grout (aka grout haze) using brick acid. This is common practice in the trade after laying a patio however what they failed to realise is that Limestone can be marked by acids and in fact can be dissolved over time. This left the patio looking drained and in quite a state as you can imagine.
In an attempt to restore the black colour of the stone, the tiler painted on a restoration product however with the grout haze still present on the stone all this did was to add to the problems. Frustrated the customer decided to call Tile Doctor and so I went over to see what could be done.
I quickly deducted that the brick acid will have damaged the surface of the stone so to restore it I ran some tests on a small part of the patio that I been badly affected using a series of diamond encrusted burnishing pads of different grits. The pads successfully demonstrated that the appearance could be restored and impressed with the difference I was given the job of renovating all 80m2.
Being outside weather was an issue and I had to reschedule until a dry weather window appeared. Cleaning during damp weather isn’t a problem, it’s the sealer which needs to be applied when the sone is dry to get the right result.
Made with industrial diamonds and available in different sizes and grits, burnishing pads are ideal for restoring the appearance of polished stone floors. The first step was to work on the most badly damaged tiles with a coarse 100 and then 200-grit diamond milling pad fitted to a weighted rotary machine and lubricated with water. This took off the ruined top layer of the limestone bringing up the virgin stone underneath.
Next the patio was worked on with a 400-grit diamond burnishing pad, followed by 800-grit, and then 1500-grit pad. Each pad further renovates the appearance of the stone (Honing) and had to be rinsed after each pad to remove the slurry that is generated.
With 80m2 of Limestone paving to cover it took four days to completely restore all the stone using this method. It was tough work, but it made an incredible difference and naturally was far more cost effective than replacing the patio.
With the stone cleaned up the last step was to restore the natural black colour in the Limestone with an application of Tile Doctor Stone-Oil which restores the deep black colour and adds texture to the stone, it’s also an impregnating sealer in its own right that adds protection and improves mechanical strength once cured.
I allowed this to dry overnight then returned the next day to finish the patio restoration with a further coat of Tile Doctor Ultra-Seal, a no-sheen natural-looking sealer formulated to provide maximum stain protection without altering the colour of the stone.
The customer was delighted with the transformation, what was one an uninviting ugly area now looks fantastic and welcoming. Impressed with the result they left the following glowing feedback:
“Kamila is A M A Z I N G! From discussing our issue over the phone to meeting her in person, her advice and professionalism was second to none. She worked hard to repair our outdoor patio and we are thrilled with her results! We would happily recommend Kamila and wish her every success with her business in the future! Thank you Kamila! X
Kamila Logonzy
East Cheshire Tile Doctor
25