
Search results for "Identify" in Home Design Ideas
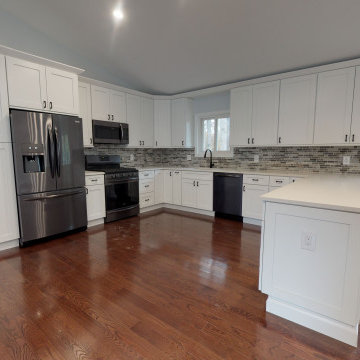
 Mayflower Construction Group
How to Tell When a Design Trend is Timeless
Design trends come and go, but some styles withstand the test of time. Whether in architecture, interior design, or branding, timeless design is one that remains relevant and appealing for decades. But how can you tell if a trend is truly timeless or just a fleeting fad? Here are key indicators to help you identify designs that will never go out of style.
1. Simplicity Over Complexity
Timeless designs are often clean, simple, and functional. They avoid excessive ornamentation or gimmicky elements that might feel outdated in a few years. Classic materials, neutral color palettes, and well-balanced proportions contribute to a look that remains fresh over time.
2. Rooted in Functionality
If a design prioritizes function as much as form, it is more likely to endure. Practicality and usability should be at the core, ensuring that the design continues to serve its purpose efficiently. In construction, for example, well-planned layouts and durable materials contribute to long-lasting appeal.
3. Inspired by Nature
Natural elements, such as stone, wood, and earth tones, have always been a staple of timeless design. Since nature itself is everlasting, incorporating organic textures and colors helps create a look that never feels outdated.
4. Influenced by History, Not Hype
Timeless designs often take cues from historical influences that have proven their longevity. Architectural styles like mid-century modern, classical, and industrial remain relevant because they have strong foundations in design principles rather than passing fads.
5. Balanced and Harmonious Composition
Good design follows fundamental principles such as symmetry, proportion, and scale. If a trend maintains a sense of balance and harmony, it’s more likely to stand the test of time. Designs that feel chaotic or unbalanced tend to fade quickly as they become overwhelming or impractical.
6. Adaptability Across Different Eras
A timeless design is versatile enough to blend with evolving styles and trends. Whether paired with modern elements or classic details, it should integrate seamlessly without looking out of place.
7. Enduring Materials and Craftsmanship
Materials and craftsmanship play a major role in a design’s longevity. High-quality materials like marble, hardwood, and concrete age beautifully, while cheap, synthetic alternatives often deteriorate and lose appeal. Investing in quality ensures a long-lasting impact.
8. Avoiding Overly Trendy Details
Fads are often characterized by extreme variations in color, form, or material. If a design heavily relies on a specific moment’s aesthetic (like neon colors in the '80s or millennial pink in the 2010s), it will likely feel outdated once the hype fades.
9. Emotional Connection and Comfort
Timeless design tends to evoke a sense of comfort, nostalgia, or familiarity. Whether in architecture, web design, or fashion, people gravitate toward designs that make them feel at ease and connected to something meaningful.
Conclusion
The key to identifying a timeless design trend is recognizing qualities that prioritize longevity, function, and balance over fleeting hype. Whether designing a website, a home, or a brand identity, choosing elements that are simple, high-quality, and adaptable will ensure lasting appeal.
Do you want a design that stands the test of time? Let’s create something that never goes out of style!
 Jonathan Vincent Design
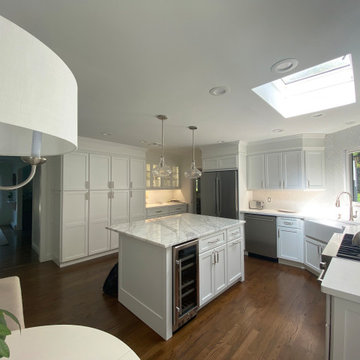
We used a gorgeous calcutta marble slab for the center island, with white cabinets for a crisp, clean and simple look.
Example of a mid-sized beach style u-shaped dark wood floor and brown floor eat-in kitchen design in New York with a farmhouse sink, recessed-panel cabinets, white cabinets, marble countertops, white backsplash, ceramic backsplash, stainless steel appliances, an island and white countertops
Example of a mid-sized beach style u-shaped dark wood floor and brown floor eat-in kitchen design in New York with a farmhouse sink, recessed-panel cabinets, white cabinets, marble countertops, white backsplash, ceramic backsplash, stainless steel appliances, an island and white countertops
 Dream Kitchens
CONTACT
These home owners initially contacted their Designer to identify the reason that the floor in their upstairs bedroom suffered from a noticeable slant. The floor problem actually impacted a small bathroom and adjoining study also.
Early on, the decision was made to re-design the footprint for the 3 rooms in conjunction with repairing the uneven floor. The approach was to gut all three spaces of walls and floors and start from scratch. The new spaces were designed with the clients needs for accessibility in mind.
DESIGN
The design effort included identifying the products to be used throughout the spaces. This included everything from the flooring to the wall paint. Kohler plumbing fixtures and Adelphi cabinetry were decided on first. A radiant heat grid was included for the bathroom floor. Lighting, paint and tile soon followed. Wood flooring was installed throughout the adjoining spaces.
The master bedroom was redesigned to allow for entry from the study or the master bath via pocket doors. The study was given an access to the master bath also. The hardwood flooring ties the bedroom and study together and gives each room a very spacious feel. The original master bedroom was changed to incorporate a large walk-in closet that features custom storage throughout. The study that also doubles as the IT center for the home was updated with custom book cases and cabinetry from Adelphi Cabinets.
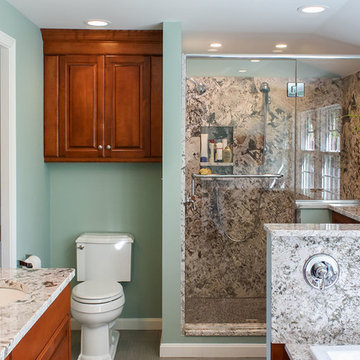
When discussing the reapportioning of the entire space for the individual rooms the bathroom was given priority. The previous small bathroom did not include a window for natural light. The new design corrected that in a big way by incorporating an existing bedroom window into the new space. The decision was made early on to allow for the inclusion of a large shower with full granite walls and custom plate glass surround. The shower system includes both fixed and hand held shower heads. A thermostatic control system was included to eliminate scalding. A large bench seat of matching granite allows for relaxing while getting squeaky clean. A separate air massage tub from Kohler centered under the new windows allows for a relaxed moment while being caressed by all those tiny bubbles. His and her side by side vanity sinks allows for efficient use of the space. The Caxton sinks and coordinated toilet were selected to match the color of the tub and do so beautifully!
CONSTRUCTION
We started the project not knowing what we were going to find. The slanting floor upstairs was not evident in the ceiling of the first floor
Once the demolition had been completed it was evident that the floor joists were at the heart of the problem. The home had been framed with floor joists that had been strung together to increase their length. Over time and with the house settling, the strung together joists started to droop from their connection point. This was concealed on the first floor by a large HVAC duct running through the garage. This was corrected by the addition of two laminated beams in the ceiling of the first floor (luckily in the garage) that re-supported the offending joists.
THE END
The project was a huge success in terms of problem solving and designing with budget and time frame in mind. The overall impact of the new space is impressive both visually and from a practicality point of view. The new master suite with upscale bathroom and study adds significant value to the home and the home owners quality of life!
Find the right local pro for your project

 Azimuth Works Inc.
This was a mission critical exterior door installation as this home is right on the water looking over to Fauntleroy and it gets a lot of intense weather. It was critical that we identify all of the problematic water intrusion points when we pulled out the old failed door. We did a patient and comprehensive test of the exterior to make sure we had identified all of the problem areas before we began interior restoration. The restoration of the interior was done only after all water intrusion problem areas had been tested and proven to be sealed over the course of several weeks. The client was very pleased with the thorough approach we took to the project.

 Dream Kitchens
CONTACT
These home owners initially contacted their Designer to identify the reason that the floor in their upstairs bedroom suffered from a noticeable slant. The floor problem actually impacted a small bathroom and adjoining study also.
Early on, the decision was made to re-design the footprint for the 3 rooms in conjunction with repairing the uneven floor. The approach was to gut all three spaces of walls and floors and start from scratch. The new spaces were designed with the clients needs for accessibility in mind.
DESIGN
The design effort included identifying the products to be used throughout the spaces. This included everything from the flooring to the wall paint. Kohler plumbing fixtures and Adelphi cabinetry were decided on first. A radiant heat grid was included for the bathroom floor. Lighting, paint and tile soon followed. Wood flooring was installed throughout the adjoining spaces.
The master bedroom was redesigned to allow for entry from the study or the master bath via pocket doors. The study was given an access to the master bath also. The hardwood flooring ties the bedroom and study together and gives each room a very spacious feel. The original master bedroom was changed to incorporate a large walk-in closet that features custom storage throughout. The study that also doubles as the IT center for the home was updated with custom book cases and cabinetry from Adelphi Cabinets.
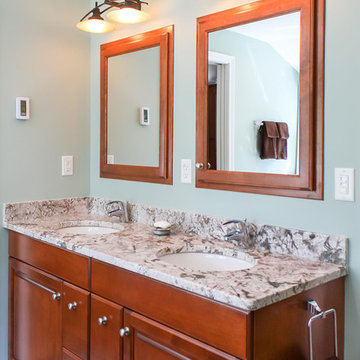
When discussing the reapportioning of the entire space for the individual rooms the bathroom was given priority. The previous small bathroom did not include a window for natural light. The new design corrected that in a big way by incorporating an existing bedroom window into the new space. The decision was made early on to allow for the inclusion of a large shower with full granite walls and custom plate glass surround. The shower system includes both fixed and hand held shower heads. A thermostatic control system was included to eliminate scalding. A large bench seat of matching granite allows for relaxing while getting squeaky clean. A separate air massage tub from Kohler centered under the new windows allows for a relaxed moment while being caressed by all those tiny bubbles. His and her side by side vanity sinks allows for efficient use of the space. The Caxton sinks and coordinated toilet were selected to match the color of the tub and do so beautifully!
CONSTRUCTION
We started the project not knowing what we were going to find. The slanting floor upstairs was not evident in the ceiling of the first floor
Once the demolition had been completed it was evident that the floor joists were at the heart of the problem. The home had been framed with floor joists that had been strung together to increase their length. Over time and with the house settling, the strung together joists started to droop from their connection point. This was concealed on the first floor by a large HVAC duct running through the garage. This was corrected by the addition of two laminated beams in the ceiling of the first floor (luckily in the garage) that re-supported the offending joists.
THE END
The project was a huge success in terms of problem solving and designing with budget and time frame in mind. The overall impact of the new space is impressive both visually and from a practicality point of view. The new master suite with upscale bathroom and study adds significant value to the home and the home owners quality of life!
 Jordan Design Build Group
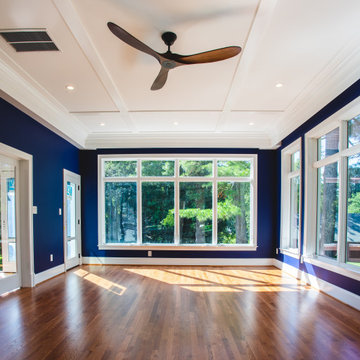
JDBG is wrapping up work on an expansive 2-story sunroom addition that also included modifications to the existing home’s interior and significant exterior improvements as well. The original project brief was to provide a conditioned 4-season sunroom addition where the homeowners could relax and enjoy their wooded views. As we delved deeper into our client’s overall objectives, it became clear that this would be no ordinary sunroom addition. The resulting 16’x25’ sunroom is a showstopper with 10’ high ceilings and wall to wall windows offering expansive views of the surrounding landscape.
As we recommend with most addition projects, the process started with our Preliminary Design Study to determine project goals, design concepts, project feasibility and associated budget estimates. During this process, our design team worked to ensure that both interior and exterior were fully integrated. We conducted in-depth programming to identify key goals and needs which would inform the design and performed a field survey and zoning analysis to identify any constraints that could impact the plans. The next step was to develop conceptual designs that addressed the program requirements.
Using a combination of 3-D massing, interior/exterior renderings, precedent imaging and space planning, the design concept was revised and refined. At the end of the study we had an approved schematic design and comprehensive budget estimates for the 2-story addition and were ready to move into design development, construction documentation, trade coordination, and final pricing. A complex project such as this involves architectural and interior design, structural and civil engineering, landscape design and environmental considerations. Multiple trades and subs are engaged during construction, from HVAC to electrical and plumbing, framers, carpenters and masons, roofers and painters just to name a few. JDBG was there every step of the way to ensure quality construction.
Other notable features of the renovation included expanding the home’s existing dining room, incorporating a custom ‘dish room,’ and providing fully conditioned storage and his & her workrooms on the lower level. A new front portico will visually connect the old and new structures and a brand new roof, shutters and paint will further transform the exterior. Thoughtful planning was also given to the landscape, including a back deck, stone patio and walkways, plantings and exterior lighting. Stay tuned for more photos as this sunroom addition nears completion.
 Jordan Design Build Group
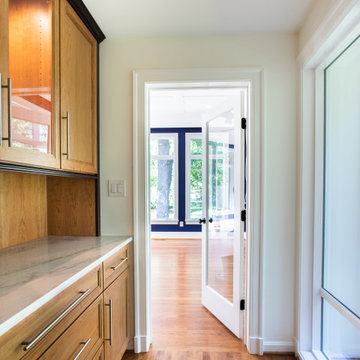
JDBG is wrapping up work on an expansive 2-story sunroom addition that also included modifications to the existing home’s interior and significant exterior improvements as well. The original project brief was to provide a conditioned 4-season sunroom addition where the homeowners could relax and enjoy their wooded views. As we delved deeper into our client’s overall objectives, it became clear that this would be no ordinary sunroom addition. The resulting 16’x25’ sunroom is a showstopper with 10’ high ceilings and wall to wall windows offering expansive views of the surrounding landscape.
As we recommend with most addition projects, the process started with our Preliminary Design Study to determine project goals, design concepts, project feasibility and associated budget estimates. During this process, our design team worked to ensure that both interior and exterior were fully integrated. We conducted in-depth programming to identify key goals and needs which would inform the design and performed a field survey and zoning analysis to identify any constraints that could impact the plans. The next step was to develop conceptual designs that addressed the program requirements.
Using a combination of 3-D massing, interior/exterior renderings, precedent imaging and space planning, the design concept was revised and refined. At the end of the study we had an approved schematic design and comprehensive budget estimates for the 2-story addition and were ready to move into design development, construction documentation, trade coordination, and final pricing. A complex project such as this involves architectural and interior design, structural and civil engineering, landscape design and environmental considerations. Multiple trades and subs are engaged during construction, from HVAC to electrical and plumbing, framers, carpenters and masons, roofers and painters just to name a few. JDBG was there every step of the way to ensure quality construction.
Other notable features of the renovation included expanding the home’s existing dining room, incorporating a custom ‘dish room,’ and providing fully conditioned storage and his & her workrooms on the lower level. A new front portico will visually connect the old and new structures and a brand new roof, shutters and paint will further transform the exterior. Thoughtful planning was also given to the landscape, including a back deck, stone patio and walkways, plantings and exterior lighting. Stay tuned for more photos as this sunroom addition nears completion.
 Dream Kitchens
CONTACT
These home owners initially contacted their Designer to identify the reason that the floor in their upstairs bedroom suffered from a noticeable slant. The floor problem actually impacted a small bathroom and adjoining study also.
Early on, the decision was made to re-design the footprint for the 3 rooms in conjunction with repairing the uneven floor. The approach was to gut all three spaces of walls and floors and start from scratch. The new spaces were designed with the clients needs for accessibility in mind.
DESIGN
The design effort included identifying the products to be used throughout the spaces. This included everything from the flooring to the wall paint. Kohler plumbing fixtures and Adelphi cabinetry were decided on first. A radiant heat grid was included for the bathroom floor. Lighting, paint and tile soon followed. Wood flooring was installed throughout the adjoining spaces.
The master bedroom was redesigned to allow for entry from the study or the master bath via pocket doors. The study was given an access to the master bath also. The hardwood flooring ties the bedroom and study together and gives each room a very spacious feel. The original master bedroom was changed to incorporate a large walk-in closet that features custom storage throughout. The study that also doubles as the IT center for the home was updated with custom book cases and cabinetry from Adelphi Cabinets.
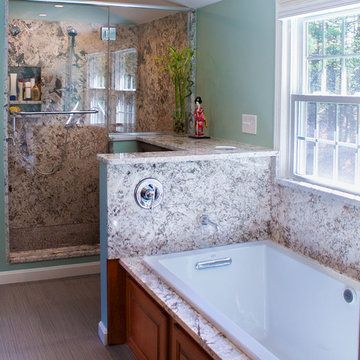
When discussing the reapportioning of the entire space for the individual rooms the bathroom was given priority. The previous small bathroom did not include a window for natural light. The new design corrected that in a big way by incorporating an existing bedroom window into the new space. The decision was made early on to allow for the inclusion of a large shower with full granite walls and custom plate glass surround. The shower system includes both fixed and hand held shower heads. A thermostatic control system was included to eliminate scalding. A large bench seat of matching granite allows for relaxing while getting squeaky clean. A separate air massage tub from Kohler centered under the new windows allows for a relaxed moment while being caressed by all those tiny bubbles. His and her side by side vanity sinks allows for efficient use of the space. The Caxton sinks and coordinated toilet were selected to match the color of the tub and do so beautifully!
CONSTRUCTION
We started the project not knowing what we were going to find. The slanting floor upstairs was not evident in the ceiling of the first floor
Once the demolition had been completed it was evident that the floor joists were at the heart of the problem. The home had been framed with floor joists that had been strung together to increase their length. Over time and with the house settling, the strung together joists started to droop from their connection point. This was concealed on the first floor by a large HVAC duct running through the garage. This was corrected by the addition of two laminated beams in the ceiling of the first floor (luckily in the garage) that re-supported the offending joists.
THE END
The project was a huge success in terms of problem solving and designing with budget and time frame in mind. The overall impact of the new space is impressive both visually and from a practicality point of view. The new master suite with upscale bathroom and study adds significant value to the home and the home owners quality of life!

 Five Star Tree Care
During the summer, certain tree pests are particularly active and bent on the destruction of your beloved trees. Spider mites are one of these pests that like to make themselves at home all over your plants. Their only goal in life is to eat plant leaves. A great way to stop their destruction is being able to recognize the warning signs of their infestation. Once you have identified them, you can take care of them and put in precautions in order to keep them away and stop any future problems from them. We here at Five Star Tree Services have come up with ways that you can identify this pest and get rid of it before it’s too late for your precious plants.
Some Info on Spider Mites
You might have seen these little pests before but didn’t know what they were. They are these tiny creatures that are related to ticks and spiders.
What They Look Like
In order to see them properly, you will need to look at them through a magnifying glass. These little bugs come in a number of different patterns and colours. Being so incredibly small, they are roughly a millimeter at the most. For reverence, that’s about as thick as your credit card. Trying to look at them without a magnifying glass, all you might see are these tiny moving dots that might be brown, red, black, or yellow.
Causes of Spider Mites
Due to their shier tininess, these little invaders can waltz right into your gardens undetected. It’s even possible that you have bought a plant for a nursery or garden center that has had spider mites on them. They can even be brought into your garden by the wind. These little pests have the ability to spread very quickly due to their ability to eat a number of different plants. They are not very picky when it comes to eating your plants. They like outdoor and indoor plants, deciduous and evergreen, virtually nothing is safe from them.
How To Tell You Have Spider Mites
Spider mites prefer to cut and feed on the bottoms of tree leaves, however, the damage they do can be seen at the top of the leaf. Three key things to look for that indicate you have a spider mite infestations are:
Yellowing or bronze look to your tree in one or many different areas (common with a big infestation)
Silky webs that are woven around the leaves and stems
Little yellow or white spots appearing at the top of the leaves/needles
If you are suspicious that your plant has spider mites, one way to know for sure is holding a sheet of paper under an infected branch and shaking it. You will be able to see the little mites on the paper.
Rid Your Plants of Spider Mites
Whether it’s the summer or winter, follow these tips for treating spider mites.
Summer:
You can use a forceful water spray to knock them off of your tree. Once they are gone, periodically use your hose to rinse your trees for the season. Make sure to get the bottom of the leaves because this is where the mites like to live.
Winter:
This also includes any time before the buds come out in the spring. If your tree has spider mites, during this time, you will only see the eggs settled on the branches of your tree. Apply dormant oil to all the eggs before they hatch.
It is also handy to know what natural predators eat spider mites. Certain rival insects such as lacewings and predator beetles will aid in getting rid of your pesky mites.
Preventing Spider Mites
Spider mites are most active during drought season. When trees are stressed, this is when they attack. If you are experiencing extended hot days and long dry periods, it is important to keep your trees hydrated. This means giving them at least an inch of water a week and making sure you have enough mulch around them.
How Five Star Tree Service Can Help
Spider mites are a pest. Catching them before they do any permanent damage is important. If using the dormant oil or spraying your tree with water doesn’t seem to be working, you can give us at Five Star Tree Services a call at (416) 990-3355 and we will come and help take care of them. Visit our website to see a full list of our available tree care services in Toronto!

 Power Pest Services
Bed bugs are small parasitic insects that feed off human blood. Bed bugs are not known to transmit disease, but they can cause a number of health issues, such as allergies, skin eruptions, and psychological distress. Bed bugs are active during the night and tend to hide within dark and cramped spaces in the daytime. Power Pest Services Professional Bed Bug Exterminator provides a variety of bed bug removal services designed to quickly and effectively eliminate bed bug infestation from your house or office. The Power Pest Services team begins every bed bug extermination project with a thorough examination in order to identify the severity of the Bed Bug Problem. After the problem is identified, the team will work together to create a treatment plan that meets your specific requirements and needs of yours.

 Senergy360, LLC.
Capturing the critical importance of EMF testing, this professional photo showcases a certified inspector using a state-of-the-art EMF meter to measure dirty electricity levels near a home's electrical panel. The meter's digital display glows with clear numerical readings, while the inspector's careful positioning demonstrates proper testing technique for accurate measurements.
Dirty electricity testing is crucial for modern homes because:
Poor power quality can affect both human health and electronic equipment performance. When your home's electrical system carries microsurges and voltage spikes (dirty electricity), it can contribute to headaches, fatigue, and sleep issues. Additionally, sensitive electronics may malfunction or have shortened lifespans when exposed to poor power quality.
Dirty electricity often stems from modern devices like LED lights, smart appliances, solar inverters, and dimmer switches. These technologies, while energy-efficient, can create electrical noise that travels throughout your home's wiring. Professional testing helps identify problematic areas and guides targeted solutions like whole-house filters or circuit-specific interventions.
For families concerned about creating a truly healthy home environment, dirty electricity testing is an essential but often overlooked assessment. Our comprehensive testing services help identify EMF hotspots and power quality issues, allowing us to recommend effective mitigation strategies for a cleaner electrical environment.
[Note: This description would pair well with a photo on Houzz showcasing EMF inspection services and healthy home practices.]


 Masterworks Window Fashions & Design, LLC
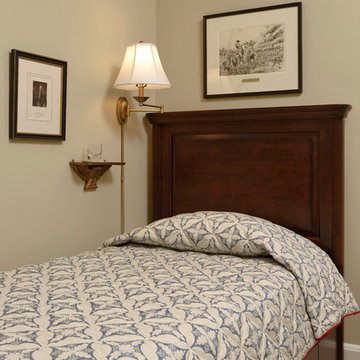
In each of the New Jersey Suite bedrooms, an assortment of beds were replaced with new captain's beds from Durham, to add additional storage for guests under the beds. The Monmouth Room had no space for a nightstand, so a small shelf with eagle base was placed on the wall to serve as a spot to place a glass of water, or reading glasses at night. Brass plaques were added to some of the works of art, to identify their subject matter and artist, or identify the portrait as needed. Swing arm lamps by the beds provide reading light. The outline quilted coverlets were made by Virginia Quilting, Inc. to my specifications. Bob Narod, Photographer. Design by Linda H. Bassert, Masterworks Window Fashions & Design, LLC.
 Kindred Outdoors + Surrounds
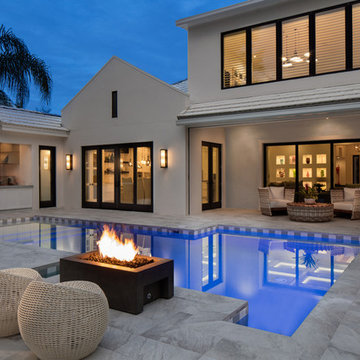
Lyra Fire Bowl in Black Sand Honed
Lyra exudes a modern linear design with a gently sloped fire feature. Sharp 90 degree inset walls add to this unique monolithic concrete design. The ideal application for any residential or commercial outdoor living space.
Dimensions: 42″ L x 24″ W x 15″ H
Approximate Weight: 360
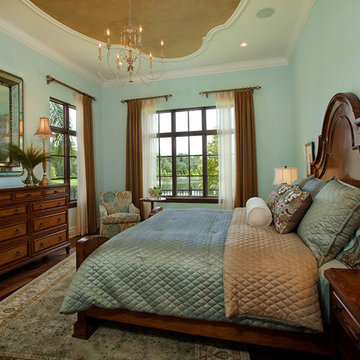
Architect & Builder & Interior Designer - Phil Kean Design Group, http://philkeandesigns.com/
Photography - Uneek Luxury Tours, http://www.uneekluxurytours.com/

 Jordan Design Build Group
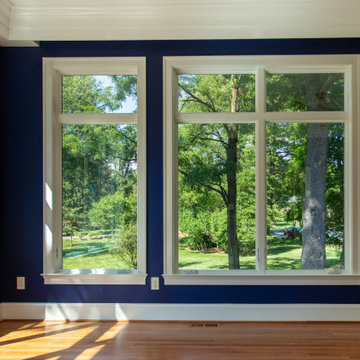
JDBG is wrapping up work on an expansive 2-story sunroom addition that also included modifications to the existing home’s interior and significant exterior improvements as well. The original project brief was to provide a conditioned 4-season sunroom addition where the homeowners could relax and enjoy their wooded views. As we delved deeper into our client’s overall objectives, it became clear that this would be no ordinary sunroom addition. The resulting 16’x25’ sunroom is a showstopper with 10’ high ceilings and wall to wall windows offering expansive views of the surrounding landscape.
As we recommend with most addition projects, the process started with our Preliminary Design Study to determine project goals, design concepts, project feasibility and associated budget estimates. During this process, our design team worked to ensure that both interior and exterior were fully integrated. We conducted in-depth programming to identify key goals and needs which would inform the design and performed a field survey and zoning analysis to identify any constraints that could impact the plans. The next step was to develop conceptual designs that addressed the program requirements.
Using a combination of 3-D massing, interior/exterior renderings, precedent imaging and space planning, the design concept was revised and refined. At the end of the study we had an approved schematic design and comprehensive budget estimates for the 2-story addition and were ready to move into design development, construction documentation, trade coordination, and final pricing. A complex project such as this involves architectural and interior design, structural and civil engineering, landscape design and environmental considerations. Multiple trades and subs are engaged during construction, from HVAC to electrical and plumbing, framers, carpenters and masons, roofers and painters just to name a few. JDBG was there every step of the way to ensure quality construction.
Other notable features of the renovation included expanding the home’s existing dining room, incorporating a custom ‘dish room,’ and providing fully conditioned storage and his & her workrooms on the lower level. A new front portico will visually connect the old and new structures and a brand new roof, shutters and paint will further transform the exterior. Thoughtful planning was also given to the landscape, including a back deck, stone patio and walkways, plantings and exterior lighting. Stay tuned for more photos as this sunroom addition nears completion.
 Pure Salt Interiors
Steph Anderson Photography
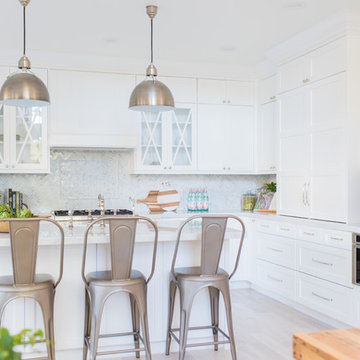
Mid-sized cottage l-shaped light wood floor eat-in kitchen photo in Orange County with a farmhouse sink, quartzite countertops, white backsplash, marble backsplash, stainless steel appliances, shaker cabinets, white cabinets and an island
Mid-sized cottage l-shaped light wood floor eat-in kitchen photo in Orange County with a farmhouse sink, quartzite countertops, white backsplash, marble backsplash, stainless steel appliances, shaker cabinets, white cabinets and an island
 Designs West - Telluride, CO
Stephanie Malsed
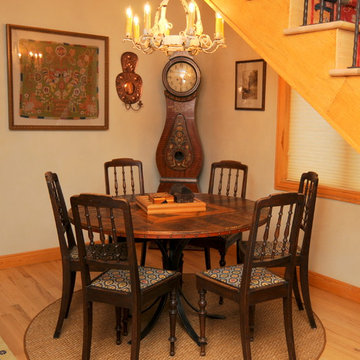
Example of a large transitional dining room design in Denver
Example of a large transitional dining room design in Denver
34