
Search results for "Including additional" in Home Design Ideas
 Visbeen Architects
Builder: J. Peterson Homes
Interior Designer: Francesca Owens
Photographers: Ashley Avila Photography, Bill Hebert, & FulView
Capped by a picturesque double chimney and distinguished by its distinctive roof lines and patterned brick, stone and siding, Rookwood draws inspiration from Tudor and Shingle styles, two of the world’s most enduring architectural forms. Popular from about 1890 through 1940, Tudor is characterized by steeply pitched roofs, massive chimneys, tall narrow casement windows and decorative half-timbering. Shingle’s hallmarks include shingled walls, an asymmetrical façade, intersecting cross gables and extensive porches. A masterpiece of wood and stone, there is nothing ordinary about Rookwood, which combines the best of both worlds.
Once inside the foyer, the 3,500-square foot main level opens with a 27-foot central living room with natural fireplace. Nearby is a large kitchen featuring an extended island, hearth room and butler’s pantry with an adjacent formal dining space near the front of the house. Also featured is a sun room and spacious study, both perfect for relaxing, as well as two nearby garages that add up to almost 1,500 square foot of space. A large master suite with bath and walk-in closet which dominates the 2,700-square foot second level which also includes three additional family bedrooms, a convenient laundry and a flexible 580-square-foot bonus space. Downstairs, the lower level boasts approximately 1,000 more square feet of finished space, including a recreation room, guest suite and additional storage.
 Landmark Homes
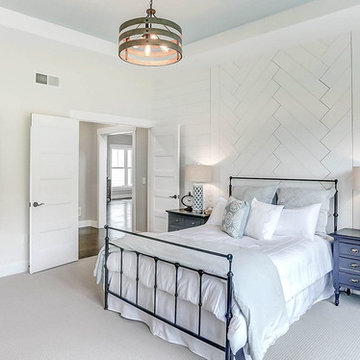
This grand 2-story home with first-floor owner’s suite includes a 3-car garage with spacious mudroom entry complete with built-in lockers. A stamped concrete walkway leads to the inviting front porch. Double doors open to the foyer with beautiful hardwood flooring that flows throughout the main living areas on the 1st floor. Sophisticated details throughout the home include lofty 10’ ceilings on the first floor and farmhouse door and window trim and baseboard. To the front of the home is the formal dining room featuring craftsman style wainscoting with chair rail and elegant tray ceiling. Decorative wooden beams adorn the ceiling in the kitchen, sitting area, and the breakfast area. The well-appointed kitchen features stainless steel appliances, attractive cabinetry with decorative crown molding, Hanstone countertops with tile backsplash, and an island with Cambria countertop. The breakfast area provides access to the spacious covered patio. A see-thru, stone surround fireplace connects the breakfast area and the airy living room. The owner’s suite, tucked to the back of the home, features a tray ceiling, stylish shiplap accent wall, and an expansive closet with custom shelving. The owner’s bathroom with cathedral ceiling includes a freestanding tub and custom tile shower. Additional rooms include a study with cathedral ceiling and rustic barn wood accent wall and a convenient bonus room for additional flexible living space. The 2nd floor boasts 3 additional bedrooms, 2 full bathrooms, and a loft that overlooks the living room.
 Landmark Homes
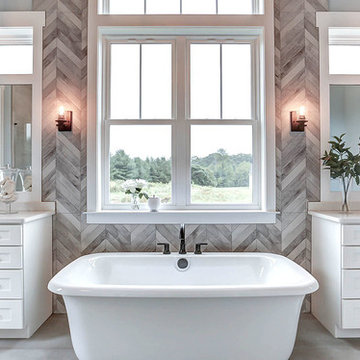
This grand 2-story home with first-floor owner’s suite includes a 3-car garage with spacious mudroom entry complete with built-in lockers. A stamped concrete walkway leads to the inviting front porch. Double doors open to the foyer with beautiful hardwood flooring that flows throughout the main living areas on the 1st floor. Sophisticated details throughout the home include lofty 10’ ceilings on the first floor and farmhouse door and window trim and baseboard. To the front of the home is the formal dining room featuring craftsman style wainscoting with chair rail and elegant tray ceiling. Decorative wooden beams adorn the ceiling in the kitchen, sitting area, and the breakfast area. The well-appointed kitchen features stainless steel appliances, attractive cabinetry with decorative crown molding, Hanstone countertops with tile backsplash, and an island with Cambria countertop. The breakfast area provides access to the spacious covered patio. A see-thru, stone surround fireplace connects the breakfast area and the airy living room. The owner’s suite, tucked to the back of the home, features a tray ceiling, stylish shiplap accent wall, and an expansive closet with custom shelving. The owner’s bathroom with cathedral ceiling includes a freestanding tub and custom tile shower. Additional rooms include a study with cathedral ceiling and rustic barn wood accent wall and a convenient bonus room for additional flexible living space. The 2nd floor boasts 3 additional bedrooms, 2 full bathrooms, and a loft that overlooks the living room.
Find the right local pro for your project
 Landmark Homes
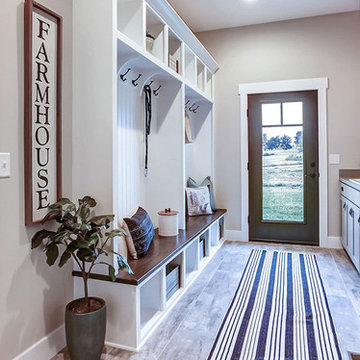
This grand 2-story home with first-floor owner’s suite includes a 3-car garage with spacious mudroom entry complete with built-in lockers. A stamped concrete walkway leads to the inviting front porch. Double doors open to the foyer with beautiful hardwood flooring that flows throughout the main living areas on the 1st floor. Sophisticated details throughout the home include lofty 10’ ceilings on the first floor and farmhouse door and window trim and baseboard. To the front of the home is the formal dining room featuring craftsman style wainscoting with chair rail and elegant tray ceiling. Decorative wooden beams adorn the ceiling in the kitchen, sitting area, and the breakfast area. The well-appointed kitchen features stainless steel appliances, attractive cabinetry with decorative crown molding, Hanstone countertops with tile backsplash, and an island with Cambria countertop. The breakfast area provides access to the spacious covered patio. A see-thru, stone surround fireplace connects the breakfast area and the airy living room. The owner’s suite, tucked to the back of the home, features a tray ceiling, stylish shiplap accent wall, and an expansive closet with custom shelving. The owner’s bathroom with cathedral ceiling includes a freestanding tub and custom tile shower. Additional rooms include a study with cathedral ceiling and rustic barn wood accent wall and a convenient bonus room for additional flexible living space. The 2nd floor boasts 3 additional bedrooms, 2 full bathrooms, and a loft that overlooks the living room.

 By Design Interiors Inc
The redesign of the foyer included the addition of a board and batten detail on the walls, new wood flooring, along with new railing that gave the home the character and warmth it so greatly needed.
We also included a unique bench with a lovely base detail and a lovely antique mirrored pendant light.
The stairwell was also designed to include an accent light integrated into the base trim which not only serves the function of illumination, but also adds warmth. The homeowner also had a fun idea of adding all the family members names on the risers going up to the second floor.
 Visbeen Architects
Builder: J. Peterson Homes
Interior Designer: Francesca Owens
Photographers: Ashley Avila Photography, Bill Hebert, & FulView
Capped by a picturesque double chimney and distinguished by its distinctive roof lines and patterned brick, stone and siding, Rookwood draws inspiration from Tudor and Shingle styles, two of the world’s most enduring architectural forms. Popular from about 1890 through 1940, Tudor is characterized by steeply pitched roofs, massive chimneys, tall narrow casement windows and decorative half-timbering. Shingle’s hallmarks include shingled walls, an asymmetrical façade, intersecting cross gables and extensive porches. A masterpiece of wood and stone, there is nothing ordinary about Rookwood, which combines the best of both worlds.
Once inside the foyer, the 3,500-square foot main level opens with a 27-foot central living room with natural fireplace. Nearby is a large kitchen featuring an extended island, hearth room and butler’s pantry with an adjacent formal dining space near the front of the house. Also featured is a sun room and spacious study, both perfect for relaxing, as well as two nearby garages that add up to almost 1,500 square foot of space. A large master suite with bath and walk-in closet which dominates the 2,700-square foot second level which also includes three additional family bedrooms, a convenient laundry and a flexible 580-square-foot bonus space. Downstairs, the lower level boasts approximately 1,000 more square feet of finished space, including a recreation room, guest suite and additional storage.
 Alair Homes Arlington
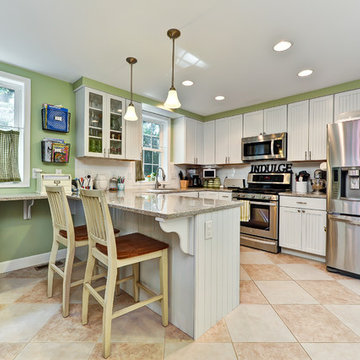
Addition and whole house renovation to 1940's Arlington colonial home; doubling the square-footage. Includes new Kraftmaid Cabinets, new appliances, new dining area, new living room area, full basement playroom, new master, and new guest room.
Featuring Kraftmaid white cabinets in the new kitchen, with stainless steel appliances.

Sponsored
Columbus, OH

Hope Restoration & General Contracting
Columbus Design-Build, Kitchen & Bath Remodeling, Historic Renovations
 Dovetail Renovation, Inc.
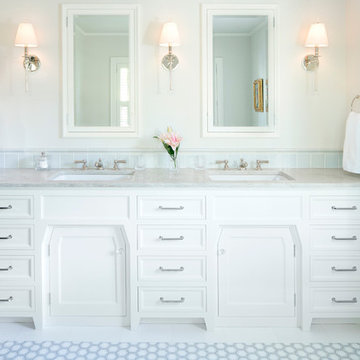
Bathroom - traditional master blue tile and subway tile multicolored floor bathroom idea in Minneapolis with recessed-panel cabinets, white cabinets, white walls, an undermount sink and gray countertops
 Ross Design Inc.
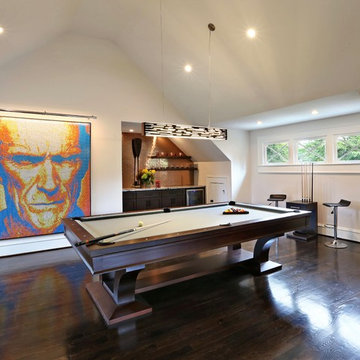
The Studio Space above the bar is used as a mancave. the pool table occupies center space with a large tv out of view to the left. The bar includes a small, well stocked beer cooler. There is 3/4 bath behind the ultimate tough guy created from small Rubik's cubes.
Photography: Tracy Witherspoon
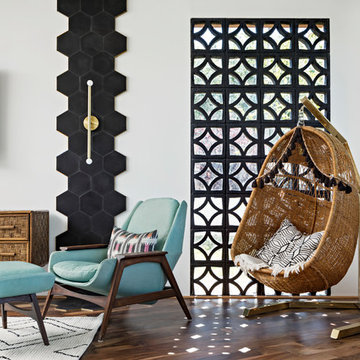
Example of a 1950s medium tone wood floor family room design in Phoenix with white walls, no fireplace and a wall-mounted tv
 Landmark Homes
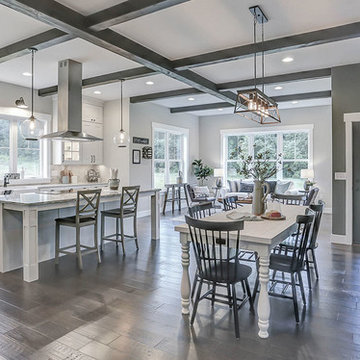
This grand 2-story home with first-floor owner’s suite includes a 3-car garage with spacious mudroom entry complete with built-in lockers. A stamped concrete walkway leads to the inviting front porch. Double doors open to the foyer with beautiful hardwood flooring that flows throughout the main living areas on the 1st floor. Sophisticated details throughout the home include lofty 10’ ceilings on the first floor and farmhouse door and window trim and baseboard. To the front of the home is the formal dining room featuring craftsman style wainscoting with chair rail and elegant tray ceiling. Decorative wooden beams adorn the ceiling in the kitchen, sitting area, and the breakfast area. The well-appointed kitchen features stainless steel appliances, attractive cabinetry with decorative crown molding, Hanstone countertops with tile backsplash, and an island with Cambria countertop. The breakfast area provides access to the spacious covered patio. A see-thru, stone surround fireplace connects the breakfast area and the airy living room. The owner’s suite, tucked to the back of the home, features a tray ceiling, stylish shiplap accent wall, and an expansive closet with custom shelving. The owner’s bathroom with cathedral ceiling includes a freestanding tub and custom tile shower. Additional rooms include a study with cathedral ceiling and rustic barn wood accent wall and a convenient bonus room for additional flexible living space. The 2nd floor boasts 3 additional bedrooms, 2 full bathrooms, and a loft that overlooks the living room.
 Visbeen Architects
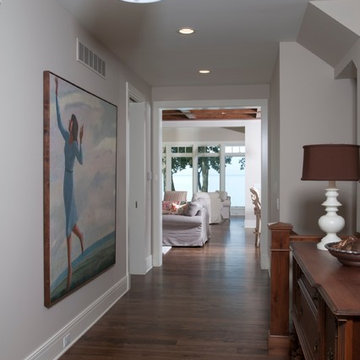
Forget just one room with a view—Lochley has almost an entire house dedicated to capturing nature’s best views and vistas. Make the most of a waterside or lakefront lot in this economical yet elegant floor plan, which was tailored to fit a narrow lot and has more than 1,600 square feet of main floor living space as well as almost as much on its upper and lower levels. A dovecote over the garage, multiple peaks and interesting roof lines greet guests at the street side, where a pergola over the front door provides a warm welcome and fitting intro to the interesting design. Other exterior features include trusses and transoms over multiple windows, siding, shutters and stone accents throughout the home’s three stories. The water side includes a lower-level walkout, a lower patio, an upper enclosed porch and walls of windows, all designed to take full advantage of the sun-filled site. The floor plan is all about relaxation – the kitchen includes an oversized island designed for gathering family and friends, a u-shaped butler’s pantry with a convenient second sink, while the nearby great room has built-ins and a central natural fireplace. Distinctive details include decorative wood beams in the living and kitchen areas, a dining area with sloped ceiling and decorative trusses and built-in window seat, and another window seat with built-in storage in the den, perfect for relaxing or using as a home office. A first-floor laundry and space for future elevator make it as convenient as attractive. Upstairs, an additional 1,200 square feet of living space include a master bedroom suite with a sloped 13-foot ceiling with decorative trusses and a corner natural fireplace, a master bath with two sinks and a large walk-in closet with built-in bench near the window. Also included is are two additional bedrooms and access to a third-floor loft, which could functions as a third bedroom if needed. Two more bedrooms with walk-in closets and a bath are found in the 1,300-square foot lower level, which also includes a secondary kitchen with bar, a fitness room overlooking the lake, a recreation/family room with built-in TV and a wine bar perfect for toasting the beautiful view beyond.

 Talon Construction Inc.
Designing and building a kitchen addition is a complex process that involves multiple steps and considerations. Here is a general outline to help you get started on your kitchen addition project:
Define Your Goals and Budget:
• Determine the purpose of the kitchen addition. Is it for more cooking space, a dining area, or a combination of both?
• Establish a realistic budget for your project. Consider all costs, including construction, permits, materials, and furnishings.
Hire a Design Professional:
• Seek the services of a design build company who specializes in kitchen additions.
• Discuss your vision, needs, and budget with the design professional to create a design concept.
Site Evaluation:
• Assess the existing space and structural condition of your home to ensure it can support the addition.
• Consider factors like zoning regulations, setbacks, and building codes.
Design Development:
• Collaborate with your design professional to refine the concept, including the layout, size, and architectural style.
• Choose materials, finishes, and fixtures that fit your design and budget.
Obtain Permits:
• Consult with your local design build contractor to determine the necessary permits and approvals.
• Prepare and submit all required documents, including architectural drawings and engineering plans.
Create Construction Documents:
• Work with your design build professional to develop detailed construction drawings and specifications.
• These documents will serve as a guide for contractors during construction.
Hire a design build contractor:
• Check references, credentials, and licenses before selecting a contractor.
• Sign a detailed contract that outlines the scope of work, timeline, and payment schedule.
Construction Phase:
• Demolition: If needed, remove any existing structures or walls.
• Foundation: Construct the foundation for the addition.
• Framing: Build the structural framework of the addition.
• Plumbing, Electrical, and HVAC: Install or update utilities as required.
• Insulation: Ensure proper insulation for energy efficiency.
• Drywall and Finish Work: Complete the walls and ceilings.
• Flooring and Cabinetry: Install flooring and kitchen cabinets.
• Appliances and Fixtures: Add appliances, plumbing fixtures, and lighting.
• Paint and Finish: Apply paint and finishes to achieve the desired look.
• Final Inspection: Schedule inspections to ensure compliance with building codes.
Final Inspections and Approvals:
• Arrange for final inspections to ensure the addition meets all safety and code requirements.
• Obtain any necessary certificates of occupancy or compliance.
Move In and Enjoy:
• Once all inspections and approvals are received, you can move into your new kitchen addition and start enjoying it.
Remember that every kitchen addition project is unique, so adapt this outline to your specific needs and circumstances. Consulting with professionals and obtaining the required permits and inspections is crucial to a successful and safe project.
Sponsored
Columbus, OH

Structural Remodeling
Franklin County's Heavy Timber Specialists | Best of Houzz 2020!
 Talon Construction Inc.
Designing and building a kitchen addition is a complex process that involves multiple steps and considerations. Here is a general outline to help you get started on your kitchen addition project:
Define Your Goals and Budget:
• Determine the purpose of the kitchen addition. Is it for more cooking space, a dining area, or a combination of both?
• Establish a realistic budget for your project. Consider all costs, including construction, permits, materials, and furnishings.
Hire a Design Professional:
• Seek the services of a design build company who specializes in kitchen additions.
• Discuss your vision, needs, and budget with the design professional to create a design concept.
Site Evaluation:
• Assess the existing space and structural condition of your home to ensure it can support the addition.
• Consider factors like zoning regulations, setbacks, and building codes.
Design Development:
• Collaborate with your design professional to refine the concept, including the layout, size, and architectural style.
• Choose materials, finishes, and fixtures that fit your design and budget.
Obtain Permits:
• Consult with your local design build contractor to determine the necessary permits and approvals.
• Prepare and submit all required documents, including architectural drawings and engineering plans.
Create Construction Documents:
• Work with your design build professional to develop detailed construction drawings and specifications.
• These documents will serve as a guide for contractors during construction.
Hire a design build contractor:
• Check references, credentials, and licenses before selecting a contractor.
• Sign a detailed contract that outlines the scope of work, timeline, and payment schedule.
Construction Phase:
• Demolition: If needed, remove any existing structures or walls.
• Foundation: Construct the foundation for the addition.
• Framing: Build the structural framework of the addition.
• Plumbing, Electrical, and HVAC: Install or update utilities as required.
• Insulation: Ensure proper insulation for energy efficiency.
• Drywall and Finish Work: Complete the walls and ceilings.
• Flooring and Cabinetry: Install flooring and kitchen cabinets.
• Appliances and Fixtures: Add appliances, plumbing fixtures, and lighting.
• Paint and Finish: Apply paint and finishes to achieve the desired look.
• Final Inspection: Schedule inspections to ensure compliance with building codes.
Final Inspections and Approvals:
• Arrange for final inspections to ensure the addition meets all safety and code requirements.
• Obtain any necessary certificates of occupancy or compliance.
Move In and Enjoy:
• Once all inspections and approvals are received, you can move into your new kitchen addition and start enjoying it.
Remember that every kitchen addition project is unique, so adapt this outline to your specific needs and circumstances. Consulting with professionals and obtaining the required permits and inspections is crucial to a successful and safe project.
 Talon Construction Inc.
Designing and building a kitchen addition is a complex process that involves multiple steps and considerations. Here is a general outline to help you get started on your kitchen addition project:
Define Your Goals and Budget:
• Determine the purpose of the kitchen addition. Is it for more cooking space, a dining area, or a combination of both?
• Establish a realistic budget for your project. Consider all costs, including construction, permits, materials, and furnishings.
Hire a Design Professional:
• Seek the services of a design build company who specializes in kitchen additions.
• Discuss your vision, needs, and budget with the design professional to create a design concept.
Site Evaluation:
• Assess the existing space and structural condition of your home to ensure it can support the addition.
• Consider factors like zoning regulations, setbacks, and building codes.
Design Development:
• Collaborate with your design professional to refine the concept, including the layout, size, and architectural style.
• Choose materials, finishes, and fixtures that fit your design and budget.
Obtain Permits:
• Consult with your local design build contractor to determine the necessary permits and approvals.
• Prepare and submit all required documents, including architectural drawings and engineering plans.
Create Construction Documents:
• Work with your design build professional to develop detailed construction drawings and specifications.
• These documents will serve as a guide for contractors during construction.
Hire a design build contractor:
• Check references, credentials, and licenses before selecting a contractor.
• Sign a detailed contract that outlines the scope of work, timeline, and payment schedule.
Construction Phase:
• Demolition: If needed, remove any existing structures or walls.
• Foundation: Construct the foundation for the addition.
• Framing: Build the structural framework of the addition.
• Plumbing, Electrical, and HVAC: Install or update utilities as required.
• Insulation: Ensure proper insulation for energy efficiency.
• Drywall and Finish Work: Complete the walls and ceilings.
• Flooring and Cabinetry: Install flooring and kitchen cabinets.
• Appliances and Fixtures: Add appliances, plumbing fixtures, and lighting.
• Paint and Finish: Apply paint and finishes to achieve the desired look.
• Final Inspection: Schedule inspections to ensure compliance with building codes.
Final Inspections and Approvals:
• Arrange for final inspections to ensure the addition meets all safety and code requirements.
• Obtain any necessary certificates of occupancy or compliance.
Move In and Enjoy:
• Once all inspections and approvals are received, you can move into your new kitchen addition and start enjoying it.
Remember that every kitchen addition project is unique, so adapt this outline to your specific needs and circumstances. Consulting with professionals and obtaining the required permits and inspections is crucial to a successful and safe project.
 Talon Construction Inc.
Designing and building a kitchen addition is a complex process that involves multiple steps and considerations. Here is a general outline to help you get started on your kitchen addition project:
Define Your Goals and Budget:
• Determine the purpose of the kitchen addition. Is it for more cooking space, a dining area, or a combination of both?
• Establish a realistic budget for your project. Consider all costs, including construction, permits, materials, and furnishings.
Hire a Design Professional:
• Seek the services of a design build company who specializes in kitchen additions.
• Discuss your vision, needs, and budget with the design professional to create a design concept.
Site Evaluation:
• Assess the existing space and structural condition of your home to ensure it can support the addition.
• Consider factors like zoning regulations, setbacks, and building codes.
Design Development:
• Collaborate with your design professional to refine the concept, including the layout, size, and architectural style.
• Choose materials, finishes, and fixtures that fit your design and budget.
Obtain Permits:
• Consult with your local design build contractor to determine the necessary permits and approvals.
• Prepare and submit all required documents, including architectural drawings and engineering plans.
Create Construction Documents:
• Work with your design build professional to develop detailed construction drawings and specifications.
• These documents will serve as a guide for contractors during construction.
Hire a design build contractor:
• Check references, credentials, and licenses before selecting a contractor.
• Sign a detailed contract that outlines the scope of work, timeline, and payment schedule.
Construction Phase:
• Demolition: If needed, remove any existing structures or walls.
• Foundation: Construct the foundation for the addition.
• Framing: Build the structural framework of the addition.
• Plumbing, Electrical, and HVAC: Install or update utilities as required.
• Insulation: Ensure proper insulation for energy efficiency.
• Drywall and Finish Work: Complete the walls and ceilings.
• Flooring and Cabinetry: Install flooring and kitchen cabinets.
• Appliances and Fixtures: Add appliances, plumbing fixtures, and lighting.
• Paint and Finish: Apply paint and finishes to achieve the desired look.
• Final Inspection: Schedule inspections to ensure compliance with building codes.
Final Inspections and Approvals:
• Arrange for final inspections to ensure the addition meets all safety and code requirements.
• Obtain any necessary certificates of occupancy or compliance.
Move In and Enjoy:
• Once all inspections and approvals are received, you can move into your new kitchen addition and start enjoying it.
Remember that every kitchen addition project is unique, so adapt this outline to your specific needs and circumstances. Consulting with professionals and obtaining the required permits and inspections is crucial to a successful and safe project.
 Talon Construction Inc.
Designing and building a kitchen addition is a complex process that involves multiple steps and considerations. Here is a general outline to help you get started on your kitchen addition project:
Define Your Goals and Budget:
• Determine the purpose of the kitchen addition. Is it for more cooking space, a dining area, or a combination of both?
• Establish a realistic budget for your project. Consider all costs, including construction, permits, materials, and furnishings.
Hire a Design Professional:
• Seek the services of a design build company who specializes in kitchen additions.
• Discuss your vision, needs, and budget with the design professional to create a design concept.
Site Evaluation:
• Assess the existing space and structural condition of your home to ensure it can support the addition.
• Consider factors like zoning regulations, setbacks, and building codes.
Design Development:
• Collaborate with your design professional to refine the concept, including the layout, size, and architectural style.
• Choose materials, finishes, and fixtures that fit your design and budget.
Obtain Permits:
• Consult with your local design build contractor to determine the necessary permits and approvals.
• Prepare and submit all required documents, including architectural drawings and engineering plans.
Create Construction Documents:
• Work with your design build professional to develop detailed construction drawings and specifications.
• These documents will serve as a guide for contractors during construction.
Hire a design build contractor:
• Check references, credentials, and licenses before selecting a contractor.
• Sign a detailed contract that outlines the scope of work, timeline, and payment schedule.
Construction Phase:
• Demolition: If needed, remove any existing structures or walls.
• Foundation: Construct the foundation for the addition.
• Framing: Build the structural framework of the addition.
• Plumbing, Electrical, and HVAC: Install or update utilities as required.
• Insulation: Ensure proper insulation for energy efficiency.
• Drywall and Finish Work: Complete the walls and ceilings.
• Flooring and Cabinetry: Install flooring and kitchen cabinets.
• Appliances and Fixtures: Add appliances, plumbing fixtures, and lighting.
• Paint and Finish: Apply paint and finishes to achieve the desired look.
• Final Inspection: Schedule inspections to ensure compliance with building codes.
Final Inspections and Approvals:
• Arrange for final inspections to ensure the addition meets all safety and code requirements.
• Obtain any necessary certificates of occupancy or compliance.
Move In and Enjoy:
• Once all inspections and approvals are received, you can move into your new kitchen addition and start enjoying it.
Remember that every kitchen addition project is unique, so adapt this outline to your specific needs and circumstances. Consulting with professionals and obtaining the required permits and inspections is crucial to a successful and safe project.
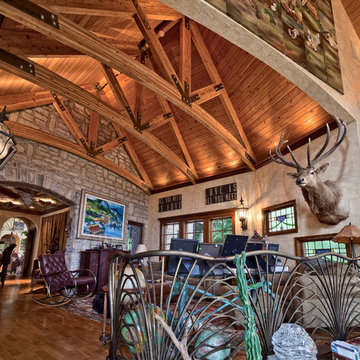
Sponsored
Columbus, OH
Structural Remodeling
Franklin County's Heavy Timber Specialists | Best of Houzz 2020!
 Talon Construction Inc.
Designing and building a kitchen addition is a complex process that involves multiple steps and considerations. Here is a general outline to help you get started on your kitchen addition project:
Define Your Goals and Budget:
• Determine the purpose of the kitchen addition. Is it for more cooking space, a dining area, or a combination of both?
• Establish a realistic budget for your project. Consider all costs, including construction, permits, materials, and furnishings.
Hire a Design Professional:
• Seek the services of a design build company who specializes in kitchen additions.
• Discuss your vision, needs, and budget with the design professional to create a design concept.
Site Evaluation:
• Assess the existing space and structural condition of your home to ensure it can support the addition.
• Consider factors like zoning regulations, setbacks, and building codes.
Design Development:
• Collaborate with your design professional to refine the concept, including the layout, size, and architectural style.
• Choose materials, finishes, and fixtures that fit your design and budget.
Obtain Permits:
• Consult with your local design build contractor to determine the necessary permits and approvals.
• Prepare and submit all required documents, including architectural drawings and engineering plans.
Create Construction Documents:
• Work with your design build professional to develop detailed construction drawings and specifications.
• These documents will serve as a guide for contractors during construction.
Hire a design build contractor:
• Check references, credentials, and licenses before selecting a contractor.
• Sign a detailed contract that outlines the scope of work, timeline, and payment schedule.
Construction Phase:
• Demolition: If needed, remove any existing structures or walls.
• Foundation: Construct the foundation for the addition.
• Framing: Build the structural framework of the addition.
• Plumbing, Electrical, and HVAC: Install or update utilities as required.
• Insulation: Ensure proper insulation for energy efficiency.
• Drywall and Finish Work: Complete the walls and ceilings.
• Flooring and Cabinetry: Install flooring and kitchen cabinets.
• Appliances and Fixtures: Add appliances, plumbing fixtures, and lighting.
• Paint and Finish: Apply paint and finishes to achieve the desired look.
• Final Inspection: Schedule inspections to ensure compliance with building codes.
Final Inspections and Approvals:
• Arrange for final inspections to ensure the addition meets all safety and code requirements.
• Obtain any necessary certificates of occupancy or compliance.
Move In and Enjoy:
• Once all inspections and approvals are received, you can move into your new kitchen addition and start enjoying it.
Remember that every kitchen addition project is unique, so adapt this outline to your specific needs and circumstances. Consulting with professionals and obtaining the required permits and inspections is crucial to a successful and safe project.
 Talon Construction Inc.
Designing and building a kitchen addition is a complex process that involves multiple steps and considerations. Here is a general outline to help you get started on your kitchen addition project:
Define Your Goals and Budget:
• Determine the purpose of the kitchen addition. Is it for more cooking space, a dining area, or a combination of both?
• Establish a realistic budget for your project. Consider all costs, including construction, permits, materials, and furnishings.
Hire a Design Professional:
• Seek the services of a design build company who specializes in kitchen additions.
• Discuss your vision, needs, and budget with the design professional to create a design concept.
Site Evaluation:
• Assess the existing space and structural condition of your home to ensure it can support the addition.
• Consider factors like zoning regulations, setbacks, and building codes.
Design Development:
• Collaborate with your design professional to refine the concept, including the layout, size, and architectural style.
• Choose materials, finishes, and fixtures that fit your design and budget.
Obtain Permits:
• Consult with your local design build contractor to determine the necessary permits and approvals.
• Prepare and submit all required documents, including architectural drawings and engineering plans.
Create Construction Documents:
• Work with your design build professional to develop detailed construction drawings and specifications.
• These documents will serve as a guide for contractors during construction.
Hire a design build contractor:
• Check references, credentials, and licenses before selecting a contractor.
• Sign a detailed contract that outlines the scope of work, timeline, and payment schedule.
Construction Phase:
• Demolition: If needed, remove any existing structures or walls.
• Foundation: Construct the foundation for the addition.
• Framing: Build the structural framework of the addition.
• Plumbing, Electrical, and HVAC: Install or update utilities as required.
• Insulation: Ensure proper insulation for energy efficiency.
• Drywall and Finish Work: Complete the walls and ceilings.
• Flooring and Cabinetry: Install flooring and kitchen cabinets.
• Appliances and Fixtures: Add appliances, plumbing fixtures, and lighting.
• Paint and Finish: Apply paint and finishes to achieve the desired look.
• Final Inspection: Schedule inspections to ensure compliance with building codes.
Final Inspections and Approvals:
• Arrange for final inspections to ensure the addition meets all safety and code requirements.
• Obtain any necessary certificates of occupancy or compliance.
Move In and Enjoy:
• Once all inspections and approvals are received, you can move into your new kitchen addition and start enjoying it.
Remember that every kitchen addition project is unique, so adapt this outline to your specific needs and circumstances. Consulting with professionals and obtaining the required permits and inspections is crucial to a successful and safe project.
 Finch Design & Production inc
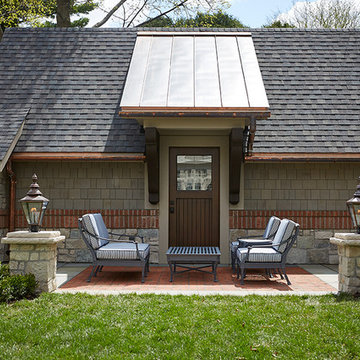
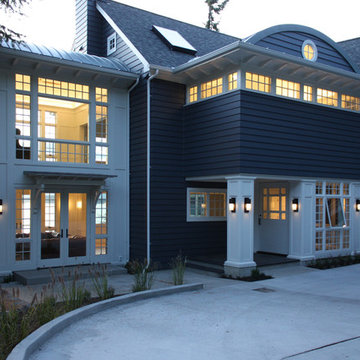
Additions to the existing house included addition living space on the main floor and a new master suite sitting area to the left, and a new entry sequence and master bath to the right. Both additions included corbelled awnings, wood panelling, and barrel roofs with standing seam metal roofing.
29