
Search results for "Initially start" in Home Design Ideas
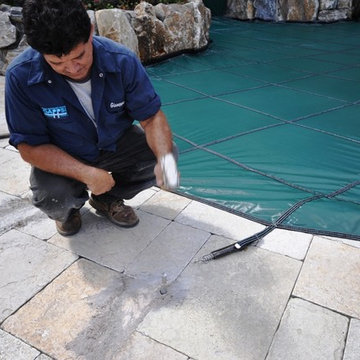
 Gappsi
Mesh covers are the most common way to safeguard your pool during the winter. A winter cover has to be strong and made of good quality material. There are many manufactures of pool liners and mesh safety covers, and mesh covers can be ordered according to the initial pool liner measurements.
Gappsi can supply and install a mesh pool cover, we are authorized dealers and installers for every brand, from Loop-Loc, Merlin, Lathem, Vynall and many other others.
Manufactures make many grades of covers, the better the grade the more expensive to cover is. Tight thin mesh and strong fibers used to manufacture the covers will give your pool cover the quality to last for many years.
Swimming pool winter covers installed by Gappsi will give you all the protection, security, and safety you need for your family, pets, and neighbors. Winter pool covers are manufactured to let the water from the rain drain through. Also, it allows you to put your pump in the middle of the cover and allow the extra water in the pool to come through and get pumped out. Winter covers are manufactured in all mesh or solid rubber with a 24x24 mesh hole in the center to let water drain into the pool. Anchors are installed in the patio about 36 inches away from the swimming pool. The way they are installed is by drilling a hole in the patio, brass anchors are slid through, and the cover is then attached to the anchors. If the patio is not installed correctly, the cover may become loose and it will not be as safe as it should be.
The Gappsi way of installation starts with the proper installation of the patio. Four foot wide slabs with reinforced rebar are always installed around the swimming pool to prevent settling of the patio, then the finished paving material is installed over the concrete base. The Gappsi installation of the safety pool cover is then installed over the patio by drilling holes straight through the finished paving material all the way down into the concrete base. A sleeve is installed into the hole about 6 inches into the patio going through the 4 inches of concrete base and further in the ground, and a brass screw pin is then installed into the pipe. By unscrewing the brass screw pin; it comes up above the patio and allows for the cover ring hooks to attach to the brass screw. After this is all done for every strap of the cover, your Gappsi installed pool cover is safe to walk on with no chance of breaking.
 Camdan Interiorz and Construction
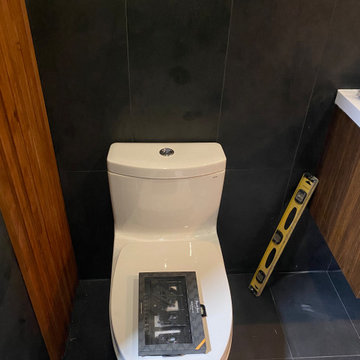
Client had several bathrooms in his home but this particular one he found himself using much, so it was time for him to update to his vision of a man cave. we worked closely with the client on the entire process, after our initial consultation with client we did a draft design and mood board for the client, then we started sourcing materials etc. Once our final decisions were made on products we proceeded with the renovation. this was an absolutely amazing transformation, very chic and upscale and we now have a very happy client..Please scroll through pics to see his final text to our team and now we are in process of doing another bathroom for him in the same home.
 Evenflow Interiors
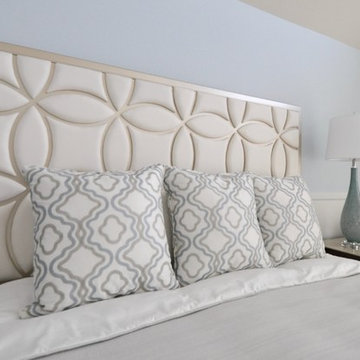
Our clients never felt their summer home had reached its full potential. After our initial walk through, we could see they were right.
Beautiful water views gave us our color palette right from the start.
We let the beach hues dictate this design. Soft blues, grays, whites and neutrals marry perfectly with open spaces of his home,
Each piece of furniture chosen with high style and ultimate comfort in mind,
This home has officially arrived!
Find the right local pro for your project
 Reico Kitchen & Bath
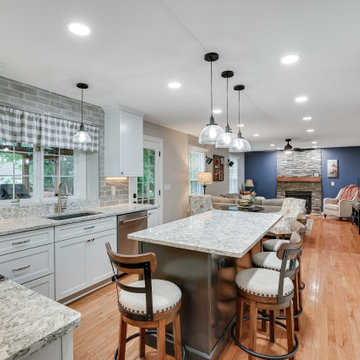
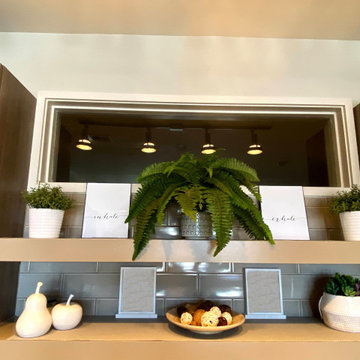
Designed by Carolina Maholik of Reico Kitchen & Bath in Chantilly VA, in collaboration with Victoriano Home Improvements, this transitional kitchen design features Merillat Masterpiece cabinets in the Martel Evercore door style in two finishes, Dove White (perimeter cabinets) and Riverbed (kitchen island). The kitchen countertops are Cambria Berywn.
The kitchen includes a tile backsplash in Elon Opal in Gray 3x12 with a Light Pewter grout and Maytag, Whirlpool and KitchenAid appliances.
“The clients were very big on the function of their space,” said Carolina. “The largest issue we faced was finding a balance between brightening and updating the look of the space while also not sacrificing the functionality of their daily lives. Many design iterations brought us back to classic beauty with an updated look that was the main gathering space of their home. My favorite aspect was seeing the once hated window box over the sink be transformed by updating the initial focal point of the space and create harmony with the rest of the space!”
“Every aspect of our kitchen was a pleasure, from start to finish. We knew the minute we met Carolina that she would be the right person to design our kitchen and guide us through the process,” said the client. “Because Reico truly values its customers, indicated by both their words and their actions, our confidence never wavered. Carrie responded to all communications nearly instantaneously, and like Carolina, she made us feel like we were the only customers in her world.”
“The care that the entire Reico team brought to the table and the patience Carolina extended were much appreciated. She really listens and has talent for sifting through all the talk to get to the best design. We love that our kitchen has a wide appeal and is very us. It is light and bright while remaining warm and inviting.”
Photos courtesy of BTW Images LLC.
 Heidi Reis / Abode Agency LLC
This living room started from a blank canvas. The client had just recently moved in and had no furniture except for a desk in her office. My initial goal was to figure out what she was looking for, her preferred style, and color palette. She told me her must-haves: plenty of seating for friend gatherings, lots of plants, neutral tones, and a midcentury style with a twist.
Given her preferences and needs, I went to work. Luckily, I’m quite savvy with resources including Facebook Marketplace, Next Door, Offer-up, and Instagram as well as using various online and local retailers.
This renovation was designed by Heidi Reis with Abode Agency LLC, she serves clients in Atlanta including but not limited to Intown neighborhoods such as: Grant Park, Inman Park, Midtown, Kirkwood, Candler Park, Lindberg area, Martin Manor, Brookhaven, Buckhead, Decatur, and Avondale Estates.
For more information on working with Heidi Reis, click here: https://www.AbodeAgency.Net/
 Home Dr Pros LLC
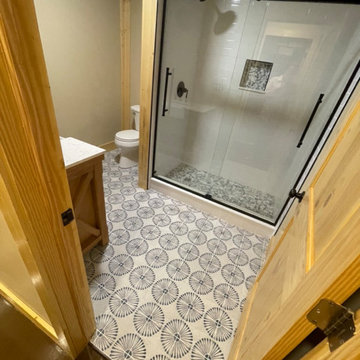
We're excited to showcase our latest work in home remodeling and renovation! Our team collaborates closely with homeowners to create stunning new room additions, enhancing both space and functionality. Our kitchen remodeling services transform outdated spaces into modern, efficient, and stylish areas that become the heart of the home. Bathroom remodeling is another specialty, where we focus on integrating high-end fixtures, stylish vanities, and spacious walk-in showers. From the initial consultation to the final touches, our collaborative approach ensures every detail aligns with the homeowner's vision. Our general contractor services also include various upgrades, such as new flooring, updated lighting, and improved insulation. We take pride in making homes more beautiful and comfortable. Contact us to start your home improvement journey today!
Home Dr Pros LLC is a general contractor providing room additions, kitchen remodeling, and bathroom conversions in Knoxville, Maryville, Farragut, and the greater Knoxville area.
 Tile Doctor Ltd
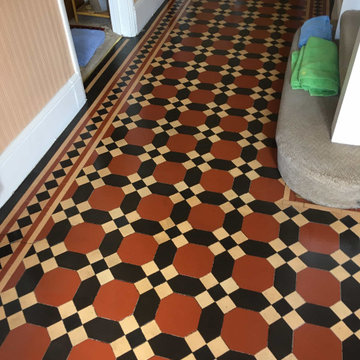
This Victorian floor in Twickenham, Middlesex was in good physical condition for its age but needed a good deep clean. Our customer had informed us that they had never cleaned or sealed the floor in the sixteen years that they had lived there so it was well overdue.
I went over to survey the floor and completed a test clean on a small section of tiling to see which products/techniques would work best. I like to do this as it demonstrates to the client what can be done, and it allows me to come up with an accurate price for doing the work.
As you can see from the pictures, there was quite a difference in the test patch compared to the rest of the floor. Years of foot traffic from the street had taken its’ toll and the floor was very dirty. Luckily, the floor was in very good condition and had not worn too badly.
Once they had seen the test patch, they were confident that it would be worth go ahead with my quote. It would ensure that the period feature was retained for many years to come. The colours on the floor were quite faded so it would be nice to get it restored.
I started the cleaning process by first taping up the surrounding skirting boards and doors to ensure they were protected from potential splashing. Cleaning involved spraying the Victorian tiles with a strong dilution of Tile Doctor Pro-Clean which is a dedicated Tile and Grout cleaning product. This was left to soak in for about ten minutes and then scrubbed in using a black pad fitted to a heavy-duty rotary scrubber.
This gives the floor a good mechanical scrub and works wonders releasing the ground-in dirt and soil from the tiles. The strong dilution of Pro-Clean will also remove any remaining sealers from the tile, however after sixteen years I doubted there would much trace of sealer left. Once done the floor was rinsed with water and all the soils removed with a wet vacuum.
Following the initial clean the colours were already much stronger. Next step however was to improve on that by giving the floor an acid rinse using Tile Doctor Grout Clean-Up. This removes mineral deposits and generally brightens up the appearance of the tile. After another round of scrubbing the floor was rinsed with our high-pressure washer and then vacuumed, extracting all of the dirty water and dirt away in one go. The floor was looking a lot better and was left to dry overnight.
After allowing the floor to dry overnight, we returned the next day to seal the floor. First, checking the floor was dry using the damp meter. Floors of this age can take a little longer to dry as there is no damp-proof membrane so it’s always worth checking as applying a sealer to damp tiles is not a good idea.
Once I was satisfied it was dry eight coats of Tile Doctor Seal and Go sheen finish sealer were applied. This takes a while to do as each coat needs to dry before applying the next. The sealer will protect the Victorian tiles for dirt and stains, it also enhanced the colours in the tile and will make it easier to keep the floor clean going forward.
My client was very pleased with the floor and mentioned that they should have called me in sooner! For aftercare cleaning I recommended Tile Doctor Neutral Clean which is an effective cleaner with a neutral pH, its designed for cleaning tiles without degrading the sealer.
Jonathan Oldham
South Middlesex Tile Doctor
 D. A. Dunlevy
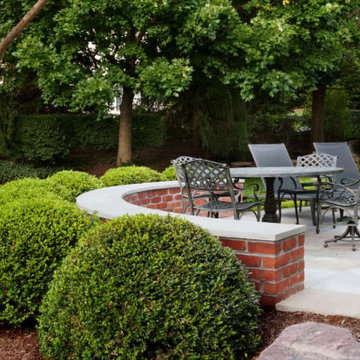
A 20-year partnership creates a green space that is ever-evolving.
Many of our clients continue a partnership with D. A. Dunlevy long after the initial design and build is finished. This elegant Potomac residence started the journey with stone walls and ornamental plantings being installed in 1999. Since then, we have provided ongoing landscape maintenance, as well as adding new elements that fit in organically with the original design. Most recently, D. A. Dunlevy designed and built a flagstone patio and fire pit, and put in additional plantings to expand the gardens. This project is a perfect example of how an outdoor space can change and mature over the years, and how implementing new design ideas can keep things fresh for the homeowners.
 Kitchen Design Concepts
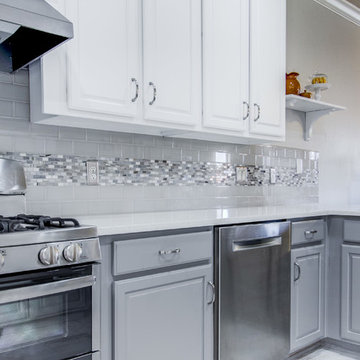
When we initially met with our clients, they expressed the need for modernization and updating. The original kitchen had good quality cabinetry but had standard finishes and lacked a little bit of design. With utilizing this kitchen already good bones, and a “few” updates, it’s almost as if it’s a brand new kitchen! This included a fresh new finish for the cabinetry, new countertops, backsplash, and fixtures. Want to learn more about how we transformed this kitchen? Continue reading below!
Cabinetry
As mentioned above, the kitchen already had great bones. Refinishing cabinetry is not only a great way to save money but a wonderful way to recycle and revamping what you already have. All, we needed to do was remove the door and drawer fronts, paint the cabinet boxes and paint the fronts. Voila! We have a two-tone white and grey kitchen! Already the space was looking fresh and brand new. However, no stopping there. While we were at it, we updated some other stuff as well. Keep reading below!
Countertops
Having lived with laminate tops for a while, our clients were starting to notice the wear and tear from its daily use. So, they wanted something that would not only last but also is easy to maintain. There’s no better choice than quartz! They decided on a 3cm Caesarstone in Nougat – a great pairing with newly finished cabinetry!
Backsplash
Having had 12×12 standard tiles as the backsplash, there were lots left to be desired. With tons of options of tile out there, we decided on utilizing two different tile styles as the backsplash. For the main field tile, we have a 3×6 H-line in Pumice, and an accent tile in Daltile Frost Snow marble. Simple, classic, and clean!
Fixtures
Lastly, the finishing touches of the kitchen, are not just finishing touches. They provide functionality to the space! The sink and faucet are not only beautiful pieces but something you use every single day, so they must be something that works for our client’s space. Our clients decided on a Blanco Quattrus super single bowl in stainless steel, and a Blanco faucet and soap dispenser.
 Aardvark Architecture
This proposal is for a new two-story home on the vacant heavily wooded lot with an existing 150-foot-long driveway lined by several beautiful oak trees culminating in a behemoth 43-inch oak tree where the driveway meets the main lot. The far end of the driveway terminates in a grove of three 43/40/43-inch redwoods and at the very center of the vacant lot stands a gargantuan V-twin 59-inch redwood tree paired with a “small” 29-inch redwood tree. The owners want to build a beautiful contemporary-styled home for their family that fully enjoys and embraces the mature trees on their cozy 65-foot by 100-foot lot.
As with all small, constrained lots, this project’s site design started first with meeting the relatively large parking and car maneuvering requirements. Menlo Park’s Department of Transportation typically requires side-facing garages to have 24-feet of backup space. So that they could give the largest feature redwood tree on site an added four feet (50%) of clearance outside of its critical root zone, the owners agreed to install a vehicle turntable at the end of their driveway to eliminate the extra four feet of space needed to back up and turnaround. This allowed them to pull their garage forward an additional four feet towards the front property line on the panhandle side, drastically reducing the rest of the home’s impact on the gargantuan V-Twin paired redwood tree at the center of the lot.
One of the owners has mobility issues, and accordingly, they first sought to design a one-story floor plan that incorporated all their family’s needs including plenty of covered patio and deck space to enjoy our fantastic California weather. But that single-story footprint spread too far into the critical root zones of several of the redwood trees on site, even despite the use of the vehicle turntable. During my interview process with the owners, they made it clear to me that one of their primary concerns is ensuring that the largest trees on site would thrive and become features of their new home after construction is complete. The single-story designs that removed the grove of three huge redwood trees were non-starters, as was the skimpy 5x10 master bath I designed when trying to squeeze the whole house program into an overly compromised single-story design. It was therefore deemed necessary to go with a two-story design despite the owner’s mobility issues. This two-story design has a much more compact ground floor footprint and has no bedrooms downstairs, other than the detached ADU. The owners must give up the floor area and incur the costs to install a residential elevator to access their upstairs master suite.
Our ground floor footprint is smaller due to the two-story design decision, and our foundation is pulled away from the trees thanks to the vehicle turntable. Yet, a tiny portion of the home’s ground floor footprint still encroaches into the critical root zones of the largest 59” redwood tree. Therefore, as outlined in the Arborist Report prepared by Aesculus Arboricultural Consulting, the structural engineers are incorporating an array of drilled piers and shallow-grade beams for the main home’s foundation and deck area nearest the redwood’s critical root zone. This drilled piers and grade beam foundation is a type of “bridging” foundation as outlined in Aesculus’ report to preserve the health of these trees that the property was designed around. The rest of the foundation will be constructed as an insulated slab-on-grade foundation to minimize the number of steps and ramps needed for the owners to enjoy their home and patio areas.
Despite the owner’s desire to keep as many trees as possible on site, and despite the smaller ground floor footprint and the advantage of the vehicle turntable, the need for a 20x20-foot garage and 20x20/25-foot guest parking space on our panhandle lot requires the removal of two heritage trees in the required driveway, a 16” coast redwood, and a 17” coast redwood. An alternate design, such as swapping the garage and guest parking locations north-to-south, still requires the removal of these two trees for vehicle maneuvering but has the added disadvantage of cutting off the home’s sightlines to the behemoth 43” oak tree just outside the currently proposed front patio space and living room. Jim Redman of Elements Landscape is proposing 13 new trees be planted on site to replace the lost value of these two heritage coast redwood trees.
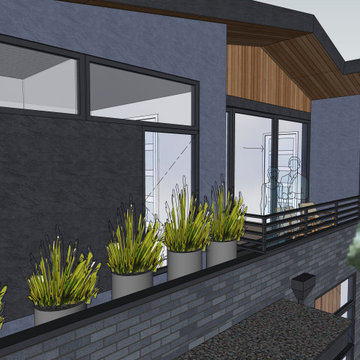
This contemporary architectural design features clean lines, and an abundance of full-height windows and large skylights to best take in the immense trees on site. To blend in with the forest-like setting, the home boasts a mix of rich textures and features a color palette of natural wood tones contrasted with dark blue and black. Once through the new steel gate at the street and down the 150-foot tree-lined driveway, a large covered front patio becomes visible past the neighbor’s detached accessory structure. The covered patio is just across the driveway from the beautiful 43” behemoth coast live oak. The single plane of the covered patio roof is delicately supported by a pair of steel posts in a “V-twin” configuration much like the largest redwood trees that tower over the center of the lot and will still be visible above the new two-story home, even from the front yard. The patio is covered in a dark-colored standing seam roof, with steel C-channel fascias, and tongue-and-groove wood ceiling planks on the underside. Generously sized skylights on the patio roof and inside the living area allow for impressive views of the amazing oak canopy as well as precious natural light.
Supporting the sloped covered patio on the other side is the two-car garage with a secondary bedroom suite stacked above the garage. This two-story volume is to be clad in vertical clear-coated redwood siding, to tie in with the grove of three 43-inch redwood trees just beyond. The garage door, and the bank of windows for Bedroom#2 above feature a steel fascia eyebrow header feature to provide shade and overhang protection, as we are not proposing a large overhang at this “redwood trunk”. The garage and bedroom volume are pulled 16 feet away from the side property line, instead of the minimum required setback of 6’-6”, thus leaving plenty of room for the redwood grove and existing mature pear tree to continue to thrive. This existing mature green screen in this 16-foot-wide side yard is a feature worth soaking in, which is why tall windows with low sill heights are proposed for both the stairs and the upstairs hallway. Though it may be infrequent to approve side-facing 2nd floor windows with sill heights as low as what we’re proposing, we are confident that the mature green screen and the over 16-foot-wide side yard are sufficient to provide for the continued privacy of our neighbor’s rear yard space, especially considering theses windows are in walkway zones.
The covered patio at the front entry is also bound by the 10-foot-tall living room. The great room is clad in a dark blue brick veneer, which wraps around all three sides of the living room. Upon entering the home from the covered patio, you are immediately greeted with one of the most impressive features of the home’s design: a 10-foot-tall by 24-foot-wide set of sliding glass doors. From the entry, this huge opening gives merely an initial glimpse of the massive trunks of the gargantuan V-twin redwoods sitting at the center of the lot. All three sliding glass panels open directly out into the smaller partially covered deck in the rear. This roof overhang element matches the design of the front patio with a steel C-channel fascia and a large skylight. But the rear deck’s roof element is set flat at a ten-foot ceiling height so that the living room’s ceiling seems to float above and out beyond the expanse of full-height sliding doors, thus creating an indoor-outdoor living space that will feel much larger than the home’s actual footprint. This rear covered deck is smaller than the patio in the front and also has a mix of solid and open-slatted roofing to allow for more solar access for the relatively small amount of open sky available.
The downstairs living room is open to the dining and kitchen areas, as well as the stair-and-elevator tower beyond. The stair tower is very open and glassy, and the stairs wind up and around the redwood-clad elevator tower. From certain perspectives in the 16-foot-wide side yard, it will almost seem as if the grove of three redwoods has a fourth tree that the house and the stairs were carefully built around. Other than the 3-foot-wide windows, the exterior walls of the stair tower, downstairs utility spaces, and Bedroom#3 above are finished in cement plaster, painted dark blue and black. The sloped roof over the stair-and-elevator tower continues cleanly over the area of upstairs Bedroom#3. This roof level is set by the side daylight plane and only yields an inside wall height of just under 6 feet in height. The owners are satisfied that the rest of this upstairs room has a nice vaulted ceiling to make up for the one short wall under the daylight plane.
The rest of the ground floor adjacent to the stair tower consists of a small utility wing containing a half-bath, laundry, storage area, and an exterior alcove for the electric heat pump HVAC unit. This short wing also gives more accessible access to the rear yard deck, as well as a backdrop for an outdoor kitchen. The bright white stone backsplash for the outdoor kitchen provides contrast to the otherwise consistent use of cement plaster painted dark blue and black for the two-story wing closest to the detached ADU. Though Bedroom#3 is stacked directly above this small wing, it is relatively short to comply with the side daylight plane of this narrow lot. Still, to further help break up the scale of this wall, another steel fascia eyebrow element is set about 8 feet above the rear deck.
The master suite sits centered above the ten-foot-tall great room. The master bedroom and its balcony, as well as the master bathtub area, have a commanding view of the central redwood trees and their impressive canopy, though the balcony is mostly recessed and should pose no privacy concerns to the neighbor’s rear yards. The master balcony parapet is clad in the same brick veneer continuing up from the living room below. A dark-painted metal rail makes up the rest of the open guardrail height. The entire length of the master balcony is comprised of 9-foot-tall sliding glass doors, but the area above the doors, as well as the area below the master bathroom windows, is accented with more redwood siding. The remainder of the master suite bathroom and walk-in closet is finished in cement plaster painted dark blue. The master bathroom has one side yard-facing window but will be frosted glass for both the owner’s and the neighbor’s privacy.
The 2nd floor is capped under a simple gable roof design with one roof ridge and varying eave and rake overhangs depending on the 2nd-floor layout and solar orientation. Since these roof planes are quite difficult to see in the middle of the heavily wooded panhandle lot, we are proposing a white TPO roofing for these two upper roof planes as a more sustainable choice compared to more dark-colored roofing like the covered patios and detached ADU.
The owners also wish to build a detached 292-square-foot Accessory Dwelling Unit (ADU) as an office and guest suite. For the ADU foundation to be situated outside the central redwood tree’s critical root zone, this relatively tiny structure takes advantage of the narrower 4-foot side and rear setbacks allowed for ADUs smaller than 800 square feet. The small L-shaped detached ADU frames a wonderful quasi-courtyard around the gargantuan V-twin redwoods at the center of the lot. The ADU shares a matching material palette consisting of cement plaster painted blue and black, vertical redwood siding and soffits, and thin brick veneer. The ADU also features large full-height windows. The only difference between the main home and the ADU material palette is that the roofing will be a dark composition shingle roofing since it will be quite visible from the master balcony.
 Home Dr Pros LLC
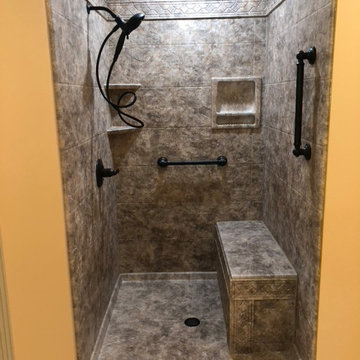
We're excited to showcase our catalog of bathroom projects, where collaboration with homeowners brought their vision to life! Our team worked closely with the clients to design and install beautiful new bathrooms that enhance both space and functionality. The bathroom remodels feature custom tile work, sleek bath accessories, and expertly crafted tub and shower conversions making it the heart of the home. From the initial consultation to the final touches, our partnership with the homeowners ensured every detail was perfect. We also completed various general contractor tasks, including new flooring, updated lighting, and improved insulation. We take pride in turning ideas into reality, making homes more beautiful and comfortable. Reach out to us to start your next home improvement project!
Home Dr Pros is a general contractor in Knoxville, TN that remodels kitchens, basements, attics, and tub & shower conversions in Knoxville and the greater Knoxville area.
 Reflections Interior Design
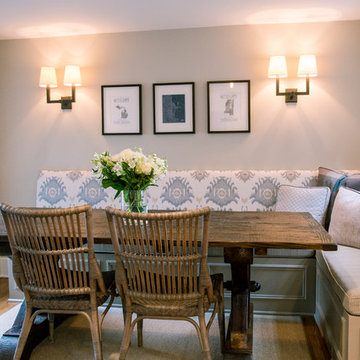
We initially were hired to work with our clients on their upstairs bathrooms. Once we started working together the upstairs bathrooms were put on hold and instead we updated the entire first floor!
We painted or put wallpaper in each space and added new pieces of furniture to blend with existing pieces. Lighting was updated and added throughout. Staying in tune with the original character of the home was an important focus and we paid close attention to that in our selection of light fixtures, furniture and fabrics. We added a hall closet, put wainscoting in the dining room, updated the fireplace tile surround and added details to the living room bookcase. The kitchen got a fresh new look with minimal renovating - we removed some cabinetry, added floating shelves, tiled the wall and designed a custom built-in breakfast nook. We most recently worked on converting an upstairs sun porch to a home office. We opened up the ceilings, added hardwood flooring to match the rest of the house and furnished it with a few of our client's existing pieces and some new. The end result of this project is a beautiful and welcoming space that we feel truly reflects our clients!
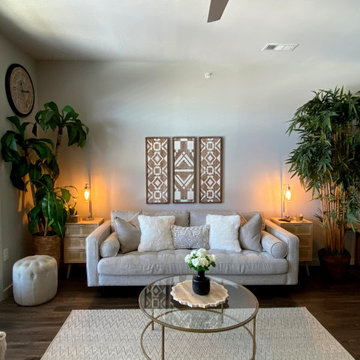 Heidi Reis / Abode Agency LLC
This living room started from a blank canvas. The client had just recently moved in and had no furniture except for a desk in her office. My initial goal was to figure out what she was looking for, her preferred style, and color palette. She told me her must-haves: plenty of seating for friend gatherings, lots of plants, neutral tones, and a midcentury style with a twist.
Given her preferences and needs, I went to work. Luckily, I’m quite savvy with resources including Facebook Marketplace, Next Door, Offer-up, and Instagram as well as using various online and local retailers.
This renovation was designed by Heidi Reis with Abode Agency LLC, she serves clients in Atlanta including but not limited to Intown neighborhoods such as: Grant Park, Inman Park, Midtown, Kirkwood, Candler Park, Lindberg area, Martin Manor, Brookhaven, Buckhead, Decatur, and Avondale Estates.
For more information on working with Heidi Reis, click here: https://www.AbodeAgency.Net/
 Media Rooms Inc
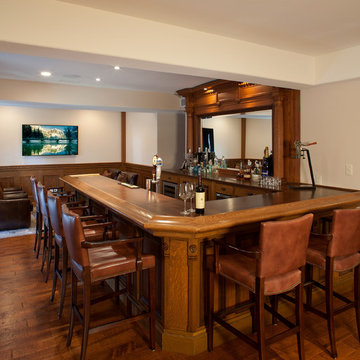
This lower level renovation started out as a simple project. The family wanted to install a home theater in their unfinished basement. Initially it was only going to be a space with a home theater where they could occasionally watch a movie or a sporting event.
Once the theater design was complete, the clients embraced the elegance of the custom cherry wood cabinetry, columns and wainscoting. In addition, by having all of the audio video components hidden out of sight, the room would have a serene, peaceful ambience.
The theater design enticed the clients to finish off the rest of the basement. A bar area was designed with an antique bar, and a lounge area with a fireplace was also constructed. As the layout evolved and the placement of the bar was resolved a perfect area for a wine cellar became evident. Once the clients realized how comfortable the space would be, they understood that they would probably be spending more time in the basement than they originally anticipated. This thought led them to want two large flat panel TVs on the walls in the bar area so they could watch several events at the same time.
They love the theater. The 110” screen and quality audio video system is a constant source of entertainment for the entire family. They use the entire basement frequently as a gathering point for family and friends.
 Aardvark Architecture
This proposal is for a new two-story home on the vacant heavily wooded lot with an existing 150-foot-long driveway lined by several beautiful oak trees culminating in a behemoth 43-inch oak tree where the driveway meets the main lot. The far end of the driveway terminates in a grove of three 43/40/43-inch redwoods and at the very center of the vacant lot stands a gargantuan V-twin 59-inch redwood tree paired with a “small” 29-inch redwood tree. The owners want to build a beautiful contemporary-styled home for their family that fully enjoys and embraces the mature trees on their cozy 65-foot by 100-foot lot.
As with all small, constrained lots, this project’s site design started first with meeting the relatively large parking and car maneuvering requirements. Menlo Park’s Department of Transportation typically requires side-facing garages to have 24-feet of backup space. So that they could give the largest feature redwood tree on site an added four feet (50%) of clearance outside of its critical root zone, the owners agreed to install a vehicle turntable at the end of their driveway to eliminate the extra four feet of space needed to back up and turnaround. This allowed them to pull their garage forward an additional four feet towards the front property line on the panhandle side, drastically reducing the rest of the home’s impact on the gargantuan V-Twin paired redwood tree at the center of the lot.
One of the owners has mobility issues, and accordingly, they first sought to design a one-story floor plan that incorporated all their family’s needs including plenty of covered patio and deck space to enjoy our fantastic California weather. But that single-story footprint spread too far into the critical root zones of several of the redwood trees on site, even despite the use of the vehicle turntable. During my interview process with the owners, they made it clear to me that one of their primary concerns is ensuring that the largest trees on site would thrive and become features of their new home after construction is complete. The single-story designs that removed the grove of three huge redwood trees were non-starters, as was the skimpy 5x10 master bath I designed when trying to squeeze the whole house program into an overly compromised single-story design. It was therefore deemed necessary to go with a two-story design despite the owner’s mobility issues. This two-story design has a much more compact ground floor footprint and has no bedrooms downstairs, other than the detached ADU. The owners must give up the floor area and incur the costs to install a residential elevator to access their upstairs master suite.
Our ground floor footprint is smaller due to the two-story design decision, and our foundation is pulled away from the trees thanks to the vehicle turntable. Yet, a tiny portion of the home’s ground floor footprint still encroaches into the critical root zones of the largest 59” redwood tree. Therefore, as outlined in the Arborist Report prepared by Aesculus Arboricultural Consulting, the structural engineers are incorporating an array of drilled piers and shallow-grade beams for the main home’s foundation and deck area nearest the redwood’s critical root zone. This drilled piers and grade beam foundation is a type of “bridging” foundation as outlined in Aesculus’ report to preserve the health of these trees that the property was designed around. The rest of the foundation will be constructed as an insulated slab-on-grade foundation to minimize the number of steps and ramps needed for the owners to enjoy their home and patio areas.
Despite the owner’s desire to keep as many trees as possible on site, and despite the smaller ground floor footprint and the advantage of the vehicle turntable, the need for a 20x20-foot garage and 20x20/25-foot guest parking space on our panhandle lot requires the removal of two heritage trees in the required driveway, a 16” coast redwood, and a 17” coast redwood. An alternate design, such as swapping the garage and guest parking locations north-to-south, still requires the removal of these two trees for vehicle maneuvering but has the added disadvantage of cutting off the home’s sightlines to the behemoth 43” oak tree just outside the currently proposed front patio space and living room. Jim Redman of Elements Landscape is proposing 13 new trees be planted on site to replace the lost value of these two heritage coast redwood trees.
This contemporary architectural design features clean lines, and an abundance of full-height windows and large skylights to best take in the immense trees on site. To blend in with the forest-like setting, the home boasts a mix of rich textures and features a color palette of natural wood tones contrasted with dark blue and black. Once through the new steel gate at the street and down the 150-foot tree-lined driveway, a large covered front patio becomes visible past the neighbor’s detached accessory structure. The covered patio is just across the driveway from the beautiful 43” behemoth coast live oak. The single plane of the covered patio roof is delicately supported by a pair of steel posts in a “V-twin” configuration much like the largest redwood trees that tower over the center of the lot and will still be visible above the new two-story home, even from the front yard. The patio is covered in a dark-colored standing seam roof, with steel C-channel fascias, and tongue-and-groove wood ceiling planks on the underside. Generously sized skylights on the patio roof and inside the living area allow for impressive views of the amazing oak canopy as well as precious natural light.
Supporting the sloped covered patio on the other side is the two-car garage with a secondary bedroom suite stacked above the garage. This two-story volume is to be clad in vertical clear-coated redwood siding, to tie in with the grove of three 43-inch redwood trees just beyond. The garage door, and the bank of windows for Bedroom#2 above feature a steel fascia eyebrow header feature to provide shade and overhang protection, as we are not proposing a large overhang at this “redwood trunk”. The garage and bedroom volume are pulled 16 feet away from the side property line, instead of the minimum required setback of 6’-6”, thus leaving plenty of room for the redwood grove and existing mature pear tree to continue to thrive. This existing mature green screen in this 16-foot-wide side yard is a feature worth soaking in, which is why tall windows with low sill heights are proposed for both the stairs and the upstairs hallway. Though it may be infrequent to approve side-facing 2nd floor windows with sill heights as low as what we’re proposing, we are confident that the mature green screen and the over 16-foot-wide side yard are sufficient to provide for the continued privacy of our neighbor’s rear yard space, especially considering theses windows are in walkway zones.
The covered patio at the front entry is also bound by the 10-foot-tall living room. The great room is clad in a dark blue brick veneer, which wraps around all three sides of the living room. Upon entering the home from the covered patio, you are immediately greeted with one of the most impressive features of the home’s design: a 10-foot-tall by 24-foot-wide set of sliding glass doors. From the entry, this huge opening gives merely an initial glimpse of the massive trunks of the gargantuan V-twin redwoods sitting at the center of the lot. All three sliding glass panels open directly out into the smaller partially covered deck in the rear. This roof overhang element matches the design of the front patio with a steel C-channel fascia and a large skylight. But the rear deck’s roof element is set flat at a ten-foot ceiling height so that the living room’s ceiling seems to float above and out beyond the expanse of full-height sliding doors, thus creating an indoor-outdoor living space that will feel much larger than the home’s actual footprint. This rear covered deck is smaller than the patio in the front and also has a mix of solid and open-slatted roofing to allow for more solar access for the relatively small amount of open sky available.
The downstairs living room is open to the dining and kitchen areas, as well as the stair-and-elevator tower beyond. The stair tower is very open and glassy, and the stairs wind up and around the redwood-clad elevator tower. From certain perspectives in the 16-foot-wide side yard, it will almost seem as if the grove of three redwoods has a fourth tree that the house and the stairs were carefully built around. Other than the 3-foot-wide windows, the exterior walls of the stair tower, downstairs utility spaces, and Bedroom#3 above are finished in cement plaster, painted dark blue and black. The sloped roof over the stair-and-elevator tower continues cleanly over the area of upstairs Bedroom#3. This roof level is set by the side daylight plane and only yields an inside wall height of just under 6 feet in height. The owners are satisfied that the rest of this upstairs room has a nice vaulted ceiling to make up for the one short wall under the daylight plane.
The rest of the ground floor adjacent to the stair tower consists of a small utility wing containing a half-bath, laundry, storage area, and an exterior alcove for the electric heat pump HVAC unit. This short wing also gives more accessible access to the rear yard deck, as well as a backdrop for an outdoor kitchen. The bright white stone backsplash for the outdoor kitchen provides contrast to the otherwise consistent use of cement plaster painted dark blue and black for the two-story wing closest to the detached ADU. Though Bedroom#3 is stacked directly above this small wing, it is relatively short to comply with the side daylight plane of this narrow lot. Still, to further help break up the scale of this wall, another steel fascia eyebrow element is set about 8 feet above the rear deck.
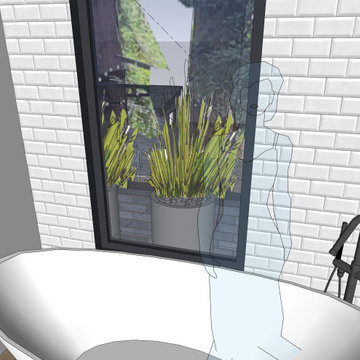
The master suite sits centered above the ten-foot-tall great room. The master bedroom and its balcony, as well as the master bathtub area, have a commanding view of the central redwood trees and their impressive canopy, though the balcony is mostly recessed and should pose no privacy concerns to the neighbor’s rear yards. The master balcony parapet is clad in the same brick veneer continuing up from the living room below. A dark-painted metal rail makes up the rest of the open guardrail height. The entire length of the master balcony is comprised of 9-foot-tall sliding glass doors, but the area above the doors, as well as the area below the master bathroom windows, is accented with more redwood siding. The remainder of the master suite bathroom and walk-in closet is finished in cement plaster painted dark blue. The master bathroom has one side yard-facing window but will be frosted glass for both the owner’s and the neighbor’s privacy.
The 2nd floor is capped under a simple gable roof design with one roof ridge and varying eave and rake overhangs depending on the 2nd-floor layout and solar orientation. Since these roof planes are quite difficult to see in the middle of the heavily wooded panhandle lot, we are proposing a white TPO roofing for these two upper roof planes as a more sustainable choice compared to more dark-colored roofing like the covered patios and detached ADU.
The owners also wish to build a detached 292-square-foot Accessory Dwelling Unit (ADU) as an office and guest suite. For the ADU foundation to be situated outside the central redwood tree’s critical root zone, this relatively tiny structure takes advantage of the narrower 4-foot side and rear setbacks allowed for ADUs smaller than 800 square feet. The small L-shaped detached ADU frames a wonderful quasi-courtyard around the gargantuan V-twin redwoods at the center of the lot. The ADU shares a matching material palette consisting of cement plaster painted blue and black, vertical redwood siding and soffits, and thin brick veneer. The ADU also features large full-height windows. The only difference between the main home and the ADU material palette is that the roofing will be a dark composition shingle roofing since it will be quite visible from the master balcony.
 Kitchen Design Concepts
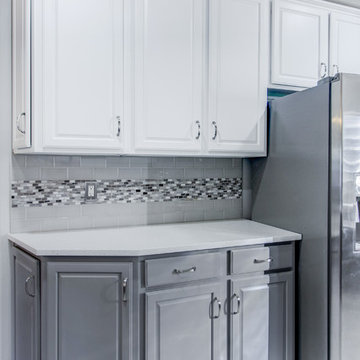
When we initially met with our clients, they expressed the need for modernization and updating. The original kitchen had good quality cabinetry but had standard finishes and lacked a little bit of design. With utilizing this kitchen already good bones, and a “few” updates, it’s almost as if it’s a brand new kitchen! This included a fresh new finish for the cabinetry, new countertops, backsplash, and fixtures. Want to learn more about how we transformed this kitchen? Continue reading below!
Cabinetry
As mentioned above, the kitchen already had great bones. Refinishing cabinetry is not only a great way to save money but a wonderful way to recycle and revamping what you already have. All, we needed to do was remove the door and drawer fronts, paint the cabinet boxes and paint the fronts. Voila! We have a two-tone white and grey kitchen! Already the space was looking fresh and brand new. However, no stopping there. While we were at it, we updated some other stuff as well. Keep reading below!
Countertops
Having lived with laminate tops for a while, our clients were starting to notice the wear and tear from its daily use. So, they wanted something that would not only last but also is easy to maintain. There’s no better choice than quartz! They decided on a 3cm Caesarstone in Nougat – a great pairing with newly finished cabinetry!
Backsplash
Having had 12×12 standard tiles as the backsplash, there were lots left to be desired. With tons of options of tile out there, we decided on utilizing two different tile styles as the backsplash. For the main field tile, we have a 3×6 H-line in Pumice, and an accent tile in Daltile Frost Snow marble. Simple, classic, and clean!
Fixtures
Lastly, the finishing touches of the kitchen, are not just finishing touches. They provide functionality to the space! The sink and faucet are not only beautiful pieces but something you use every single day, so they must be something that works for our client’s space. Our clients decided on a Blanco Quattrus super single bowl in stainless steel, and a Blanco faucet and soap dispenser.
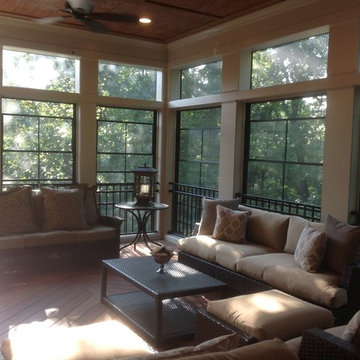
 Atlanta Porch & Patio
At Atlanta Porch & Patio we are dedicated to building beautiful custom porches, decks, and outdoor living spaces throughout the metro Atlanta area. Our mission is to turn our clients’ ideas, dreams, and visions into personalized, tangible outcomes. Clients of Atlanta Porch & Patio rest easy knowing each step of their project is performed to the highest standards of honesty, integrity, and dependability. Our team of builders and craftsmen are licensed, insured, and always up to date on trends, products, designs, and building codes. We are constantly educating ourselves in order to provide our clients the best services at the best prices.
We deliver the ultimate professional experience with every step of our projects. After setting up a consultation through our website or by calling the office, we will meet with you in your home to discuss all of your ideas and concerns. After our initial meeting and site consultation, we will compile a detailed design plan and quote complete with renderings and a full listing of the materials to be used. Upon your approval, we will then draw up the necessary paperwork and decide on a project start date. From demo to cleanup, we strive to deliver your ultimate relaxation destination on time and on budget.
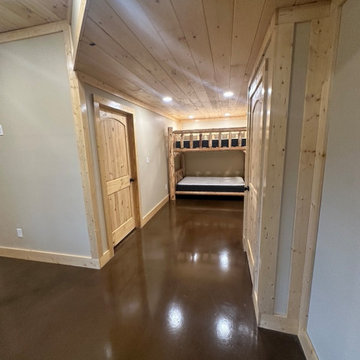 Home Dr Pros LLC
We're excited to showcase our latest work in home remodeling and renovation! Our team collaborates closely with homeowners to create stunning new room additions, enhancing both space and functionality. Our kitchen remodeling services transform outdated spaces into modern, efficient, and stylish areas that become the heart of the home. Bathroom remodeling is another specialty, where we focus on integrating high-end fixtures, stylish vanities, and spacious walk-in showers. From the initial consultation to the final touches, our collaborative approach ensures every detail aligns with the homeowner's vision. Our general contractor services also include various upgrades, such as new flooring, updated lighting, and improved insulation. We take pride in making homes more beautiful and comfortable. Contact us to start your home improvement journey today!
Home Dr Pros LLC is a general contractor providing room additions, kitchen remodeling, and bathroom conversions in Knoxville, Maryville, Farragut, and the greater Knoxville area.
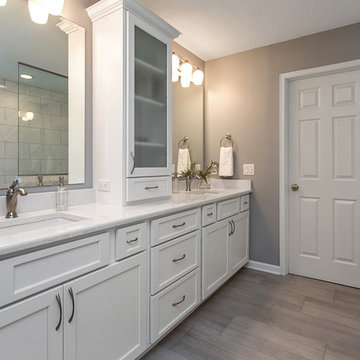
 Red House Remodeling
Initially this master bath was home to a small standard size shower and linen closet that left too little vanity space on one side of the room, and awkward open space on the other. Our professional design team started with a clean slate to maximize the floor plan and give these homeowners not only an updated master bath, but a master bath that better fit the space and their functional needs. Now the homeowners have plenty of vanity space along with a lavish shower and soaking tub for relaxation.
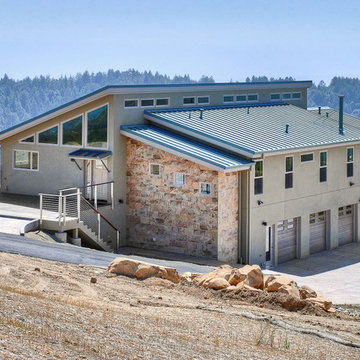
 Costa Bella Builders
This sustainable project was completed on a private 80 acre view parcel in the hills above Corralitos, CA. The owners were drawn to us through the Green Building link on our website and after an initial meeting, hired us to manage the preliminary feasibility studies, site work, design and eventual construction.
With this type of project, we start at the beginning; making sure that development on the site is both possible and practical before we spend a lot of our client’s budget on plans that may not be suitable. After we determined that building on the property would be permitted by the Santa Cruz County Building and Planning Departments, we completed several feasibility steps that included:
•A geologic review
• Percolation test (for septic)
• Water well probability analysis
• Grading analysis
• Biologic review
• Site survey and topographic mapping
• Earthquake zone and archeological clearances
With these steps finished, we set up interviews with several local architects that we partner with to find the one that was most appealing to our client. The owners were integral to the process and agreed with our choice of Daniel Silvernail, Architect. He impressed the clients with his gracious nature and open attitude; welcoming feedback and the preferences they had throughout the design process. In addition to being very reasonably priced, Mr. Silvernail quickly gave his attention to the preliminary design plans. After client reviews and approval the full architectural and construction blueprints were finished. We had the complete ready-to-submit-for-permit documents in less than 10 weeks; this included structural engineering, energy calculations and Green Building ratings. We were all impressed by his professionalism throughout the design and building process.
21