
Search results for "Involves electrical" in Home Design Ideas
 Middlefork Luxury Home Builders
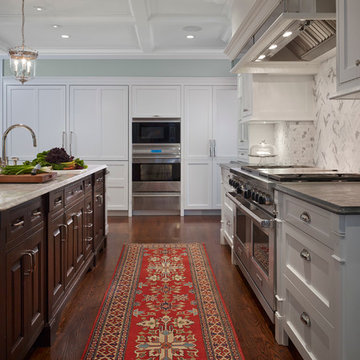
Middlefork was retained to update and revitalize this North Shore home to a family of six.
The primary goal of this project was to update and expand the home's small, eat-in kitchen. The existing space was gutted and a 1,500-square-foot addition was built to house a gourmet kitchen, connected breakfast room, fireside seating, butler's pantry, and a small office.
The family desired nice, timeless spaces that were also durable and family-friendly. As such, great consideration was given to the interior finishes. The 10' kitchen island, for instance, is a solid slab of white velvet quartzite, selected for its ability to withstand mustard, ketchup and finger-paint. There are shorter, walnut extensions off either end of the island that support the children's involvement in meal preparation and crafts. Low-maintenance Atlantic Blue Stone was selected for the perimeter counters.
The scope of this phase grew to include re-trimming the front façade and entry to emphasize the Georgian detailing of the home. In addition, the balance of the first floor was gutted; existing plumbing and electrical systems were updated; all windows were replaced; two powder rooms were updated; a low-voltage distribution system for HDTV and audio was added; and, the interior of the home was re-trimmed. Two new patios were also added, providing outdoor areas for entertaining, dining and cooking.
Tom Harris, Hedrich Blessing
 InnovationLand
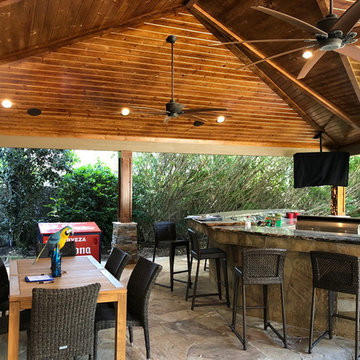
This huge covered patio in Houston offers a warm, dry, beautiful gathering space for friends and family!
The clients, Tim and Julie Burke of Spring, TX wanted something more waterproof than the small gazebo where they often entertained friends and family.
The Burkes asked for a large, shingled roof extension that matched the existing house.
We gave them an 800-square-foot covered patio with a gabled roof and a gorgeous tongue-and-groove wooden ceiling. The hip roof on one one side covers the existing outdoor kitchen and the outdoor bathroom the Burkes want to build themselves.
On the other side is a sloped roof creating a breezeway and sitting area between the patio and house.
We also installed the best permanent outdoor heating system we could find – Solaira quartz infrared heating units. Able to throw more heat further and more evenly than portable units, these electric-powered heaters can be installed up and out of sight. You don’t have to lug them around, refuel them with propane and worry about storing them. When you need them, all you need to do is a push a button!
When heat strikes, however – as it does for any covered patio in Houston – the Burkes can cool off with two industrial-sized outdoor ceiling fans.
Two TVs were also added to the existing outdoor kitchen. The Burkes started enjoying those right away, using them to watch the NCAA Final Four basketball championship with their family.
We also built an addition onto the outdoor kitchen island that houses an ice maker and extra seating. We also replaced the countertops with new granite.
Very few times do you actually get the service you expect,” reads the Houzz review of this covered patio by the clients, Tim and Julie Burke. “But in this case, it went further than we had ever previously experienced.”
The computer drawings, they add, really helped them and the homeowners’ association visualize how the project would look when final and all that would be involved: “They really listened to what we needed and so far, it has surpassed our expectations.”
They also appreciated the constant communication, quality workmanship, last-minute accommodations and tidying up at the end of the day.
“Overall, this has been a great experience, and we love our outdoor space!”
 Jordan Design Build Group
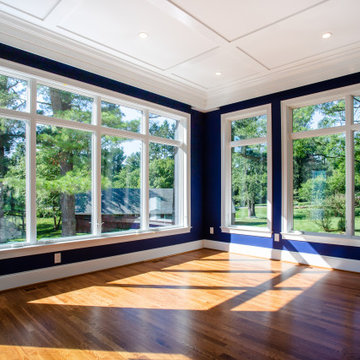
JDBG is wrapping up work on an expansive 2-story sunroom addition that also included modifications to the existing home’s interior and significant exterior improvements as well. The original project brief was to provide a conditioned 4-season sunroom addition where the homeowners could relax and enjoy their wooded views. As we delved deeper into our client’s overall objectives, it became clear that this would be no ordinary sunroom addition. The resulting 16’x25’ sunroom is a showstopper with 10’ high ceilings and wall to wall windows offering expansive views of the surrounding landscape.
As we recommend with most addition projects, the process started with our Preliminary Design Study to determine project goals, design concepts, project feasibility and associated budget estimates. During this process, our design team worked to ensure that both interior and exterior were fully integrated. We conducted in-depth programming to identify key goals and needs which would inform the design and performed a field survey and zoning analysis to identify any constraints that could impact the plans. The next step was to develop conceptual designs that addressed the program requirements.
Using a combination of 3-D massing, interior/exterior renderings, precedent imaging and space planning, the design concept was revised and refined. At the end of the study we had an approved schematic design and comprehensive budget estimates for the 2-story addition and were ready to move into design development, construction documentation, trade coordination, and final pricing. A complex project such as this involves architectural and interior design, structural and civil engineering, landscape design and environmental considerations. Multiple trades and subs are engaged during construction, from HVAC to electrical and plumbing, framers, carpenters and masons, roofers and painters just to name a few. JDBG was there every step of the way to ensure quality construction.
Other notable features of the renovation included expanding the home’s existing dining room, incorporating a custom ‘dish room,’ and providing fully conditioned storage and his & her workrooms on the lower level. A new front portico will visually connect the old and new structures and a brand new roof, shutters and paint will further transform the exterior. Thoughtful planning was also given to the landscape, including a back deck, stone patio and walkways, plantings and exterior lighting. Stay tuned for more photos as this sunroom addition nears completion.
Find the right local pro for your project
 Middlefork Luxury Home Builders
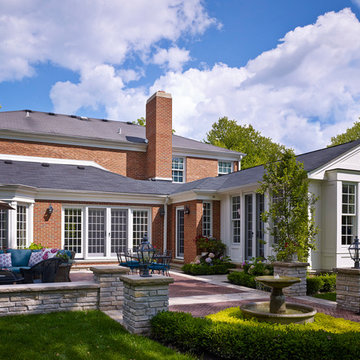
Middlefork was retained to update and revitalize this North Shore home to a family of six.
The primary goal of this project was to update and expand the home's small, eat-in kitchen. The existing space was gutted and a 1,500-square-foot addition was built to house a gourmet kitchen, connected breakfast room, fireside seating, butler's pantry, and a small office.
The family desired nice, timeless spaces that were also durable and family-friendly. As such, great consideration was given to the interior finishes. The 10' kitchen island, for instance, is a solid slab of white velvet quartzite, selected for its ability to withstand mustard, ketchup and finger-paint. There are shorter, walnut extensions off either end of the island that support the children's involvement in meal preparation and crafts. Low-maintenance Atlantic Blue Stone was selected for the perimeter counters.
The scope of this phase grew to include re-trimming the front façade and entry to emphasize the Georgian detailing of the home. In addition, the balance of the first floor was gutted; existing plumbing and electrical systems were updated; all windows were replaced; two powder rooms were updated; a low-voltage distribution system for HDTV and audio was added; and, the interior of the home was re-trimmed. Two new patios were also added, providing outdoor areas for entertaining, dining and cooking.
Tom Harris, Hedrich Blessing
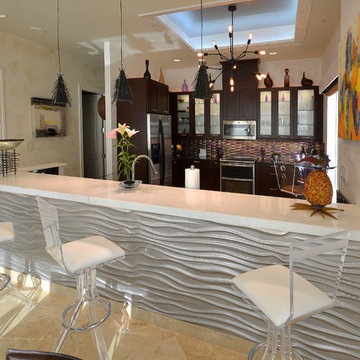
 Kitchen & Bathroom Remodel by Cutting Edge
We waved our Cutting Edge magic wand over the place, and the results were simply amazing.
The wing wall at left was removed, which involved re-routing a considerable bit of plumbing and electrical
Scot Trueblood, Paradise Aerial Imagery
 NB Interiors UK
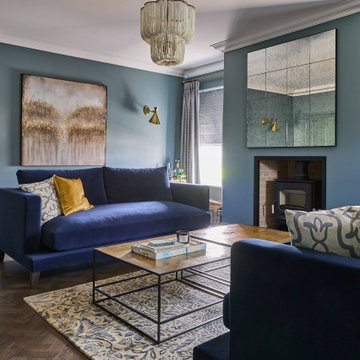
Drawing room/living room
Large trendy formal and enclosed dark wood floor and brown floor living room photo in Essex with blue walls, a wood stove, a plaster fireplace and a wall-mounted tv
Large trendy formal and enclosed dark wood floor and brown floor living room photo in Essex with blue walls, a wood stove, a plaster fireplace and a wall-mounted tv
 YORK ENTERPRISES LLC
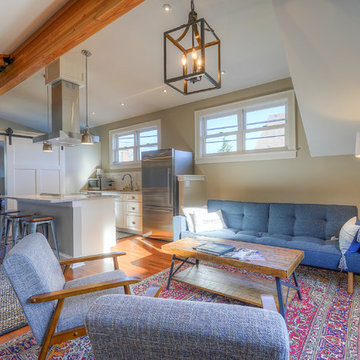
This detached accessory dwelling unit/garage combo was a labor of love by the homeowner to provide a place for family to comfortably live independently. Everyone involved is proud of the workmanship. This project was a part of the Residential Infill Pilot Program. Over 150 yards of dirt/mud was removed. Our mason successfully matched the brick to the main home. The vaulted ceiling and short wall give the living space an open feel. This project is a perfect example of a homeowner working with the government and the trades to achieve a new space that blends in with the neighborhood.

 Billdr Renovation
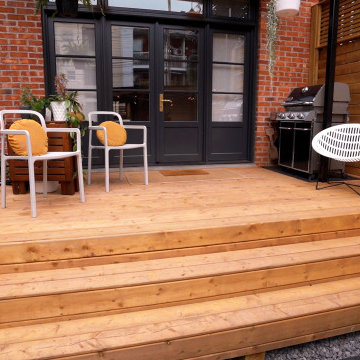
The aim of this project was to bring intimacy and versatility to a duplex backyard with the addition of a new patio, garden, shed, and fence, sourced from treated wood. This project involved removing the existing soil, landscaping, installing fences, building a patio and a shed. The client also took the opportunity to install a charging station for their electric vehicle.
 Mara Solow Interiors
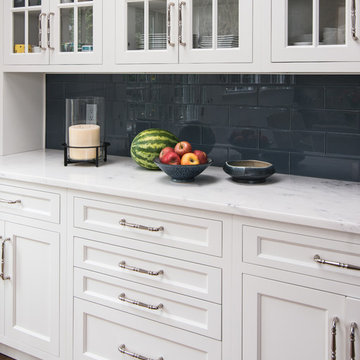
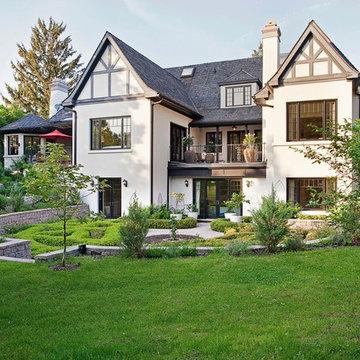
This House is located in a Historic Area of Westchester NY. The Tudor Homes which have been lovingly restored add charm to the tree lined streets. This project was a total renovation which involved resurfacing stucco walls, electrical, plumbing, flooring, and restoration of existing oak details.
Photo by: Stefan Radtke
 Murakami Design Inc.
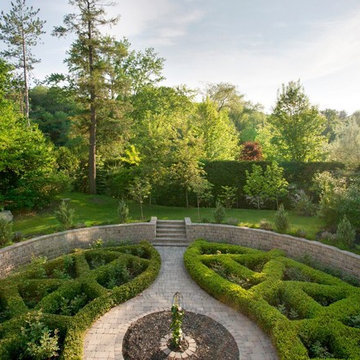
At Murakami Design Inc., we are in the business of creating and building residences that bring comfort and delight to the lives of their owners.
Murakami provides the full range of services involved in designing and building new homes, or in thoroughly reconstructing and updating existing dwellings.
From historical research and initial sketches to construction drawings and on-site supervision, we work with clients every step of the way to achieve their vision and ensure their satisfaction.
We collaborate closely with such professionals as landscape architects and interior designers, as well as structural, mechanical and electrical engineers, respecting their expertise in helping us develop fully integrated design solutions.
Finally, our team stays abreast of all the latest developments in construction materials and techniques.
 Homeowner Services of Michigan LLC
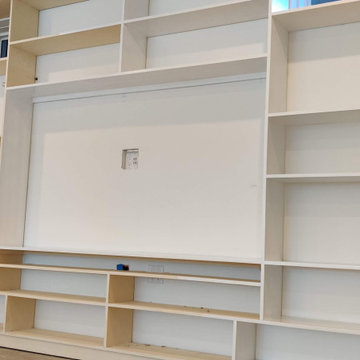
Our clients envisioned a complete basement renovation that would transform the space into a functional and inviting area. We began by thoroughly understanding their needs and preferences, ensuring that every detail was aligned with their vision. The project involved installing spray foam insulation to enhance energy efficiency and comfort. We carefully removed existing partition walls to accommodate the new design, seamlessly constructing and installing new interior walls.
Our team provided and installed updated electrical and plumbing services, ensuring everything met current codes and specifications. To create a comfortable environment, we introduced a new HVAC zone, seamlessly integrating it with the home’s existing system. The renovation included the construction of a new bathroom, kitchen, office space, and living area, all tailored to the client’s specifications.
Attention to detail was paramount, with custom shelving and vinyl plank flooring adding both functionality and aesthetic appeal. Throughout the project, we maintained open communication, ensuring the clients were informed and satisfied with every step.
Our dedication to excellence and client satisfaction resulted in a beautifully renovated basement that perfectly matched the client's vision. At Homeowner Services of Michigan, we are committed to bringing your home renovation dreams to life with precision, care, and a focus on your needs.
 Murakami Design Inc.
At Murakami Design Inc., we are in the business of creating and building residences that bring comfort and delight to the lives of their owners.
Murakami provides the full range of services involved in designing and building new homes, or in thoroughly reconstructing and updating existing dwellings.
From historical research and initial sketches to construction drawings and on-site supervision, we work with clients every step of the way to achieve their vision and ensure their satisfaction.
We collaborate closely with such professionals as landscape architects and interior designers, as well as structural, mechanical and electrical engineers, respecting their expertise in helping us develop fully integrated design solutions.
Finally, our team stays abreast of all the latest developments in construction materials and techniques.
 User
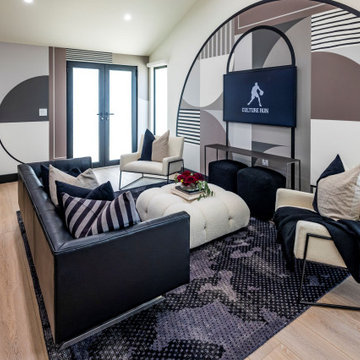
UserAll Weather teamed up with the Property Brothers and Queen of Broadway Idina Menzel on this week’s episode of HGTV’s hit show CELEBRTIY IOU. In the Idina Menzel’s Slam Dunk Reno episode, Idina pivots from her award-winning stage, film and music success to give back and surprise her good friend and son’s basketball coach James, by transforming his detached garage into a dedicated office and athletic retreat.
James Hunt founded Culture Run, a youth basketball program that gives kids the skills to succeed in both basketball and life. With IDINA MENZEL’S surprise renovation, James is one step closer to running a centralized training facility and headquarters where kids can drop by for counseling, basketball tips, and more.
When the PROPERTY BROTHERS meet up with Idina to demo the garage, they involve her in every step. Menzel gets her hands dirty by swinging a sledgehammer, operating an electric hand saw and removing storage bins. “I didn’t know they get as down and dirty as they do,” Menzel commented. “I also didn’t know they were gonna have me do so much!” Menzel also helped choose the tile, cabinets, hardware, flooring and the overall color palette.
All the effort was worthwhile because Menzel was able to surprise James with the basketball hangout and showstopping of his dreams. The newly dedicated office and athletic retreat features All Weather SERIES 7000 French Swing Doors and SERIES 5000 casement and fixed windows to allow natural light and fresh air in; a sleek kitchenette with an induction cooktop; a modern bathroom with a 7 1/2′ tall shower head for basketball players; a comfortable seating area for James to review film, meet with his players or simply relax; and a unique basketball themed wall mural.
Check out more PROJECT PHOTS here.
Now in its third season, Celebrity IOU gives celebrities a chance to show their deepest gratitude to friends, family and mentors by giving them a surprise renovation courtesy of Drew and Jonathan Scott.
 Aegis Construction
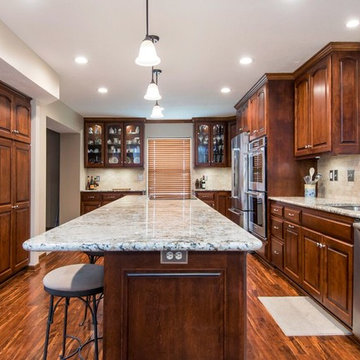
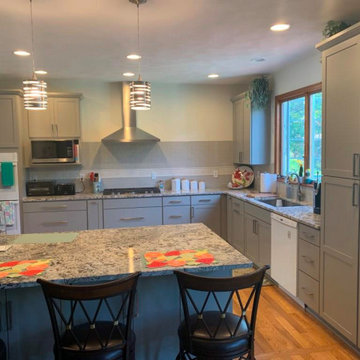
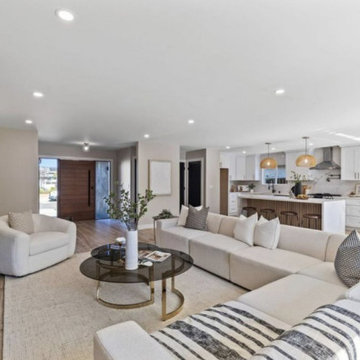
This kitchen remodel involved combing the space of the original kitchen and the dining room. The wall between the two was removed and the new space was formed. The walls and ceilings were stripped down to the framing and the plumbing, electrical and HVAC were modified. New plaster walls and ceilings were installed. The original hardwood floors were weaved together and refinished. The window over the sink was replaced with a new shorter window. The design and selections for this project were provided by a 3rd party designer.
 DevArt8 Construction
DevArt8 takes immense pride in showcasing one of our most remarkable achievements - a full home remodel that exemplifies the perfect fusion of creativity, innovation, and craftsmanship. This comprehensive transformation was more than just a renovation; it was a complete reimagination of the space.
From the moment our team stepped foot into the project, we knew that we had the opportunity to create something truly extraordinary. With a seamless blend of contemporary aesthetics and functional design, every aspect of the home was carefully curated to reflect the client's unique taste and lifestyle. The project involved intricate structural modifications, innovative use of space, and the finest selection of materials sourced from trusted suppliers. As we navigated through each phase of the remodel, our team ensured clear communication, unparalleled attention to detail, and unwavering commitment to delivering excellence. The result? A breathtaking home that not only surpassed the client's expectations but also set new standards in the world of luxury living.
At DevArt8, we thrive on the joy of turning houses into dream homes, and this full home remodel serves as a true testament to our dedication to transforming spaces into works of art.

 Talon Construction Inc.
Designing and building a kitchen addition is a complex process that involves multiple steps and considerations. Here is a general outline to help you get started on your kitchen addition project:
Define Your Goals and Budget:
• Determine the purpose of the kitchen addition. Is it for more cooking space, a dining area, or a combination of both?
• Establish a realistic budget for your project. Consider all costs, including construction, permits, materials, and furnishings.
Hire a Design Professional:
• Seek the services of a design build company who specializes in kitchen additions.
• Discuss your vision, needs, and budget with the design professional to create a design concept.
Site Evaluation:
• Assess the existing space and structural condition of your home to ensure it can support the addition.
• Consider factors like zoning regulations, setbacks, and building codes.
Design Development:
• Collaborate with your design professional to refine the concept, including the layout, size, and architectural style.
• Choose materials, finishes, and fixtures that fit your design and budget.
Obtain Permits:
• Consult with your local design build contractor to determine the necessary permits and approvals.
• Prepare and submit all required documents, including architectural drawings and engineering plans.
Create Construction Documents:
• Work with your design build professional to develop detailed construction drawings and specifications.
• These documents will serve as a guide for contractors during construction.
Hire a design build contractor:
• Check references, credentials, and licenses before selecting a contractor.
• Sign a detailed contract that outlines the scope of work, timeline, and payment schedule.
Construction Phase:
• Demolition: If needed, remove any existing structures or walls.
• Foundation: Construct the foundation for the addition.
• Framing: Build the structural framework of the addition.
• Plumbing, Electrical, and HVAC: Install or update utilities as required.
• Insulation: Ensure proper insulation for energy efficiency.
• Drywall and Finish Work: Complete the walls and ceilings.
• Flooring and Cabinetry: Install flooring and kitchen cabinets.
• Appliances and Fixtures: Add appliances, plumbing fixtures, and lighting.
• Paint and Finish: Apply paint and finishes to achieve the desired look.
• Final Inspection: Schedule inspections to ensure compliance with building codes.
Final Inspections and Approvals:
• Arrange for final inspections to ensure the addition meets all safety and code requirements.
• Obtain any necessary certificates of occupancy or compliance.
Move In and Enjoy:
• Once all inspections and approvals are received, you can move into your new kitchen addition and start enjoying it.
Remember that every kitchen addition project is unique, so adapt this outline to your specific needs and circumstances. Consulting with professionals and obtaining the required permits and inspections is crucial to a successful and safe project.
 Talon Construction Inc.
Designing and building a kitchen addition is a complex process that involves multiple steps and considerations. Here is a general outline to help you get started on your kitchen addition project:
Define Your Goals and Budget:
• Determine the purpose of the kitchen addition. Is it for more cooking space, a dining area, or a combination of both?
• Establish a realistic budget for your project. Consider all costs, including construction, permits, materials, and furnishings.
Hire a Design Professional:
• Seek the services of a design build company who specializes in kitchen additions.
• Discuss your vision, needs, and budget with the design professional to create a design concept.
Site Evaluation:
• Assess the existing space and structural condition of your home to ensure it can support the addition.
• Consider factors like zoning regulations, setbacks, and building codes.
Design Development:
• Collaborate with your design professional to refine the concept, including the layout, size, and architectural style.
• Choose materials, finishes, and fixtures that fit your design and budget.
Obtain Permits:
• Consult with your local design build contractor to determine the necessary permits and approvals.
• Prepare and submit all required documents, including architectural drawings and engineering plans.
Create Construction Documents:
• Work with your design build professional to develop detailed construction drawings and specifications.
• These documents will serve as a guide for contractors during construction.
Hire a design build contractor:
• Check references, credentials, and licenses before selecting a contractor.
• Sign a detailed contract that outlines the scope of work, timeline, and payment schedule.
Construction Phase:
• Demolition: If needed, remove any existing structures or walls.
• Foundation: Construct the foundation for the addition.
• Framing: Build the structural framework of the addition.
• Plumbing, Electrical, and HVAC: Install or update utilities as required.
• Insulation: Ensure proper insulation for energy efficiency.
• Drywall and Finish Work: Complete the walls and ceilings.
• Flooring and Cabinetry: Install flooring and kitchen cabinets.
• Appliances and Fixtures: Add appliances, plumbing fixtures, and lighting.
• Paint and Finish: Apply paint and finishes to achieve the desired look.
• Final Inspection: Schedule inspections to ensure compliance with building codes.
Final Inspections and Approvals:
• Arrange for final inspections to ensure the addition meets all safety and code requirements.
• Obtain any necessary certificates of occupancy or compliance.
Move In and Enjoy:
• Once all inspections and approvals are received, you can move into your new kitchen addition and start enjoying it.
Remember that every kitchen addition project is unique, so adapt this outline to your specific needs and circumstances. Consulting with professionals and obtaining the required permits and inspections is crucial to a successful and safe project.
 Ashton Renovations
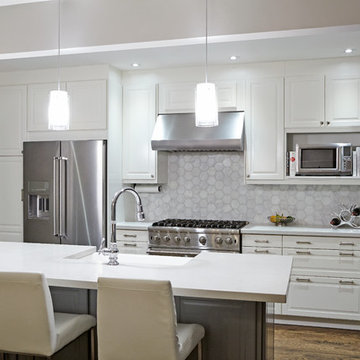
Our clients wanted to open up the first floor of their home from front to back. This involved removing a bearing wall, and a block outside partition. This included the back room into the main floor space and opened up more light from the double doors in the backyard. The main floor included renovation of the entire HVAC boiling system, electrical, plumbing, and finishing materials. The traditional features of the main floor work well with the IKEA cabinets and London Gray CeasarStone Quartz countertops.
 Katie Hutchison Studio
Custom-built in the early eighties, this contemporary home was cloaked in all brown board siding with brown windows and a cumbersome street-facing carport. The current owners had raised their family there on property that borders serene conservation land. Now they were ready for a new, brighter exterior look that would include all new windows to take in the exquisite view, unobscured by the fog of failing window seals; new siding that wouldn’t be subject to woodpecker wear and tear; a refinished screen porch; a new garage to replace the undersized carport; and new entry access. On the interior, they wanted the new, fresh vibe to extend to the design of three renovated modern bathrooms.
In response, KHS proposed black-framed windows throughout in simpler configurations; fiber-cement (and PVC) exterior cladding in three textures to differentiate functions and features; a unifying light-gray and white palette teamed with clear-finished mahogany/sapele to carry across the exterior as well as the bathroom renovations; a stream-lined screen porch with cable rails; a new shed-roofed garage to resolve the exterior massing; and a new covered walkway entrance delivering those arriving into a repurposed interior space.
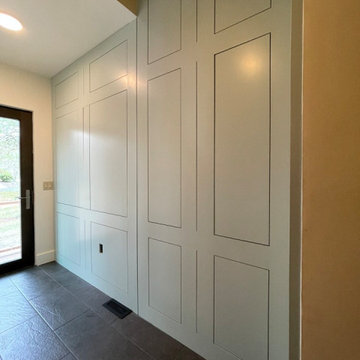
Once the overall design was resolved, the owners elected to complete the work in phases over several years. Phase 1 included renovating the powder room, guest bathroom, and primary bathroom, and refreshing the screen porch. See the reconceived modern bathrooms here on the KHS website. Next came constructing the new garage and entry, which on the interior included new floor tile and a new entry wall-paneling system to conceal electrical, solar, and security panels/controls. Phase III involved installing the rest of the new windows and completing the comprehensive new exterior cladding and palette to tie the earlier phases together. To cap it off, KHS worked with the owners to select new clean-lined furnishings for the living area in colors inspired by their coastal view.
 Renovisions
This North Shore of Boston client wanted to make a change; she decided to purchase a seaside antique home and was up for the challenge to re-design and remodel. Her plan involved re-locating her mother from Florida to the newly added wing of the house when the remodel was in full swing.
We believed that what was standing between our client and the kitchen of her dreams was a well thought out, creative design and a wall or two…
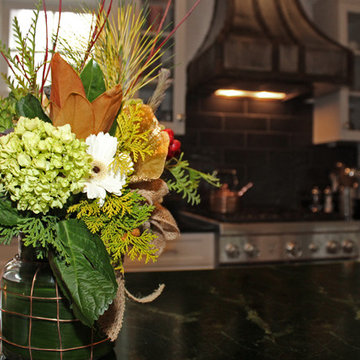
Once outdated and worn, this 1830 antique kitchen was closed off from the family room and dining spaces. The newly re-configured kitchen with re-claimed wide-plank wood floors and restorations to wood cladding on the ceiling, beam and open corner shelving really warmed up the room and welcomes friends, neighbors and relatives. Wood bead board paneling around the island cabinetry along with mixed metals, tie in nicely with the stunning soapstone countertops with distinctive copper-colored veining, creating a beautiful vintage appeal.
Styled to look like an old-fashioned stove, this steel range boasts modern conveniences such as dual-fuel (gas burners and electric oven) and a convection oven crowned by a custom steel hood adorned with rivets and metal trims.
To enrich the vintage feel, a white farm-style fire clay apron sink was installed that also evokes a classic and time- honored feel.
Although the process was daunting as it presented several challenges, it was a rewarding experience when the project was completed. Our client and her mother were absolutely thrilled with the final results.
“Thank you to Cathy and Ed very much for all your assistance with my kitchen planning! I’m fortunate to have had your input and expertise! It was great seeing you and spending time together and my mom really liked you both. I would welcome you to stop by and say hello when you’re headed to Portsmouth or the north shore. All the best!”
-Jill P.
19