
Search results for "Major focus" in Home Design Ideas
 Shapiro & Company Architects
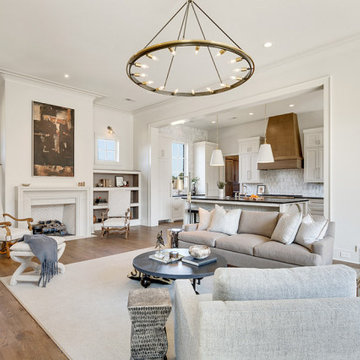
Shapiro & Company was pleased to be asked to design the 2019 Vesta Home for Johnny Williams. The Vesta Home is the most popular show home in the Memphis area and attracted more than 40,000 visitors. The home was designed in a similar fashion to a custom home where we design to accommodate the family that might live here. As with many properties that are 1/3 of an acre, homes are in fairly close proximity and therefore this house was designed to focus the majority of the views into a private courtyard with a pool as its accent. The home’s style was derived from English Cottage traditions that were transformed for modern taste.
Interior Designers:
Garrick Ealy - Conrad Designs
Kim Williams - KSW Interiors
Landscaper:
Bud Gurley - Gurley’s Azalea Garden
Photographer:
Carroll Hoselton - Memphis Media Company
 Brigham Interiors
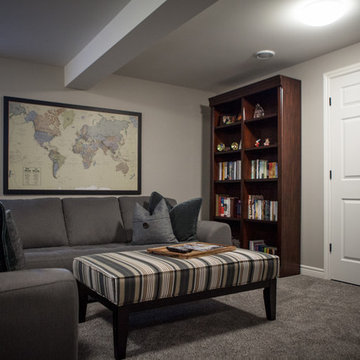
One year after completing the main level renovation, in 2015, my client experienced a major flood in her basement. So a year sooner than we had planned, we were working with the disaster management team on a complete renovation of the basement. Our focus was a multifunctional family room with ample space and comfort for a hockey loving family with growing teenagers. We also reworked a cramped bathroom with a stand up shower stall to allow for a full tub and shower surround while making the small space more efficient. This renovation was also completed with custom window treatments and throw cushions, artwork framing and placement.
 BlueStar
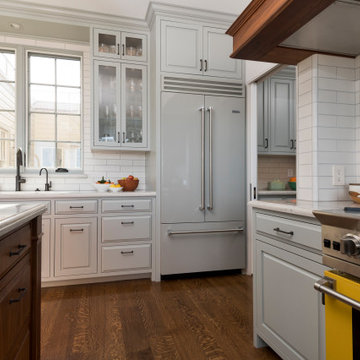
A San Francisco resident for over 30 years, Boitano purchased his home in the mid 1990’s, after falling in love with its peerless views of Alcatraz and the Golden Gate Bridge. While he did an initial facelift when he first moved in, Boitano is now completing a major renovation of the entire home, with the kitchen being one of the most exciting new spaces.
“The kitchen is the nucleus of the house. So when we started the overall house redesign, we focused our attention on the kitchen first. Everything was centered on entertaining—from small and unplugged, to large and elegant, “said Boitano.
The kitchen design was inspired by the Italian countryside and has the air of an ageless, rustic Tuscan village; it is highlighted by the range hood wall that is covered in handmade lacquered Fireclay wall tiles. “I wanted an open floor plan with the option to close off the space for charity functions and events. I eventually found huge pocket doors to separate the dining room from the kitchen,” said Boitano.
Boitano sought out appliances that would replicate the power and performance of restaurant equipment so he could entertain like a pro at home and, at the same time, fit his personal design aesthetic. His new kitchen is outfitted with BlueStar® appliances, including a range, salamander broiler, ventilation hood and a refrigerator that he custom designed to suit his performance and design needs.
The BlueStar® honey yellow 48” Platinum range offers unsurpassed power and performance featuring industry-leading 25,000 BTU open burners, an innovative interchangeable griddle/charbroiler and a true European Convection PowR Oven™. Boitano loves the powerful cooktop with even, open burners, and, he said, “I really love the industrial lines, the black grates and the contrasting beautiful yellow color. It’s like a piece of art.”
Find the right local pro for your project
 A to Z Renovations
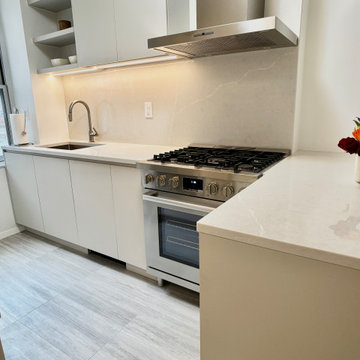
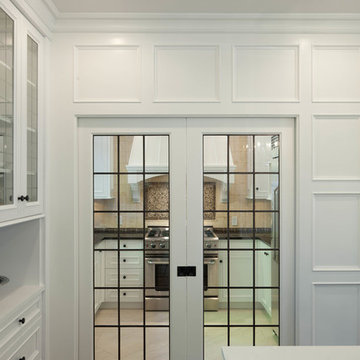
This East Village kitchen design focuses on a sleek, integrated look using high-pressure laminate cabinetry in a soft grey tone and matching custom panels for all major appliances. The space is defined by Bria Elephantino quartz countertops and a full-height backsplash that complements the white-honed porcelain floor tiles. Professional-grade Bosch appliances and matte black Brizo fixtures are used throughout, while clever architectural details—like hidden lighting grooves and a custom cabinet to mask utility pipes—ensure the kitchen is both highly functional and visually uncluttered.
 Novell Design Build & Novella Outdoors
This is a major renovation of a character home, in the Shaughnessy neighbourhood of Vancouver, BC. It is a landmark building with historical significance. We focused on appropriate design detailing to suit the era of the home while incorporating modern comforts and features.
 Schulte Design Build
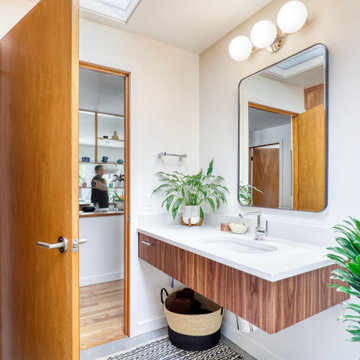
Schulte Design Build completed a major remodel of two bathrooms and the front entryway of a mid-century modern home. The project focused on enhancing both aesthetics and functionality, especially for ADA and accessibility purposes. The entryway was updated with a new sidelight and a bright blue door, replacing the old double door. The hallway was widened, and the bathroom was remodeled to be ADA-compliant, featuring grab bars and a roll-in shower to accommodate the homeowners' son who uses a wheelchair.
During the design phase, Schulte Design Build provided guidance on finishes and materials, ensuring the design complemented the home's mid-century style. The team maintained clear communication regarding pricing, change orders, and timelines, and kept the living space organized and sectioned off during construction. The project was executed with craftsmanship and attention to detail, making the remodeling process seamless and enjoyable for the homeowners.
 Brigham Interiors
One year after completing the main level renovation, in 2015, my client experienced a major flood in her basement. So a year sooner than we had planned, we were working with the disaster management team on a complete renovation of the basement. Our focus was a multifunctional family room with ample space and comfort for a hockey loving family with growing teenagers. We also reworked a cramped bathroom with a stand up shower stall to allow for a full tub and shower surround while making the small space more efficient. This renovation was also completed with custom window treatments and throw cushions, artwork framing and placement.


 Keri Murray Architecture
The Canton Farmhouse Project is an exciting new build project that has me focused on the Farmhouse Style Home with a modern twist! This decidedly American style is experiencing a major resurgence, appealing to those who prefer the classic, comforting style of a simpler time. It's a blend of architectural details, most easily recognized by its covered porches, simple forms, and natural finishes.
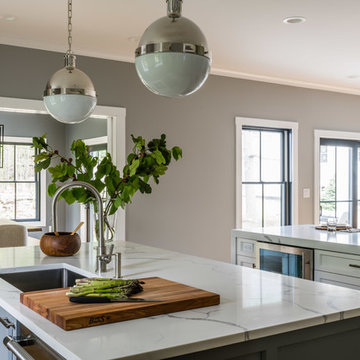
3600 SF new build single family home. Highlight: Farmhouse kitchen void of upper cabinets but features a large walk-in pantry. The connected dining room features pocket doors to separate the spaces as desired. A central prep island features gray cabinets while the waterfall peninsula is set for gather and eating.
Photo Credit: Jessica Delaney Photography
 Lemon Remodeling & Services
Planning a Modern Kitchen Remodel
Every successful kitchen remodeling project begins with careful planning. Before construction starts, it is important to evaluate the existing layout, cabinet storage, lighting conditions, appliance placement, and how the kitchen connects to surrounding living spaces.
For this project, the primary design goals included:
Creating a brighter open concept kitchen
Improving functionality and circulation
Increasing pantry and cabinet storage
Maximizing natural light with skylight integration
Creating a clean and timeless design aesthetic
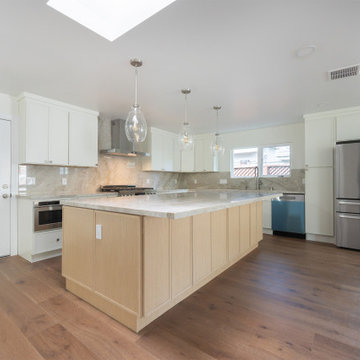
The final layout centered around a large kitchen island that functions as both a workspace and gathering area. Open concept kitchens remain highly desirable because they improve communication between living areas while helping the home feel larger and more connected.
Importance of Natural Light
Natural lighting plays a major role in modern kitchen remodeling. In this renovation, the skylight significantly improved brightness throughout the space and helped create a softer, more inviting atmosphere during the day.
Combined with recessed lighting and pendant fixtures above the island, the layered lighting design provides both functional task lighting and balanced ambient illumination.
Construction and Material Selection
Kitchen remodeling projects require coordination between multiple construction trades including demolition, framing, electrical, plumbing, drywall, flooring, cabinetry, countertops, and finish carpentry.
Bi-Color Kitchen Remodel Design
One of the standout features of this project is the bi-color kitchen remodel design. The warm natural wood island creates contrast against the surrounding white cabinetry while maintaining a clean and balanced appearance.
This approach helps:
Add visual depth to the kitchen
Create separation between functional zones
Prevent the space from feeling overly monochromatic
Introduce warmth into modern kitchen designs
The oversized island also provides additional storage, countertop workspace, and seating opportunities for everyday use and entertaining.
Countertops, Cabinetry, and Finishes
The kitchen includes:
Quartz countertops with waterfall-style edges
Custom shaker-style cabinetry
Stainless steel appliances
Modern pendant lighting
Wide plank engineered hardwood flooring
Full-height backsplash surfaces
The neutral color palette was selected to create a timeless appearance while allowing flexibility for future décor and furniture changes.
Pantry Kitchen Renovation
Storage planning is one of the most important aspects of kitchen remodeling. The pantry kitchen renovation focused on improving organization and accessibility while maximizing usable storage space.
Modern pantry systems help homeowners:
Reduce countertop clutter
Improve kitchen organization
Store small appliances more efficiently
Increase long-term functionality
Thoughtful storage design can significantly improve the daily usability of a kitchen without increasing square footage.
Real Estate Value and Long-Term Benefits
Kitchen remodeling remains one of the highest-value residential renovation projects in the Bay Area real estate market. A professionally designed open concept kitchen can improve buyer perception, increase property appeal, and modernize outdated layouts.
Features such as large islands, skylights, pantry storage, and bi-color cabinetry continue to remain highly desirable among homeowners and future buyers alike.
Common Kitchen Remodeling Mistakes
Some common mistakes homeowners should avoid include:
Insufficient lighting design
Poor circulation planning
Limited storage solutions
Choosing low-durability materials
Overcrowded layouts
Inadequate electrical preparation
Working with experienced remodeling professionals can help avoid costly design and construction issues later in the process.
Common Questions
How long does a kitchen remodel usually take?
Most kitchen remodeling projects take approximately 6–12 weeks depending on the project scope, inspections, material lead times, and structural modifications.
Do kitchen remodels require permits?
Permits are often required when plumbing, electrical, structural, or layout changes are involved. Requirements vary depending on the city and scope of work.
What is a bi-color kitchen remodel?
A bi-color kitchen remodel uses two cabinet finishes or tones to create visual contrast and a more customized design appearance.
Does an open concept kitchen increase home value?
Open concept kitchens are highly desirable because they improve functionality, natural lighting, and overall flow throughout the home.
Conclusion
A well-planned kitchen remodeling project combines thoughtful design, quality craftsmanship, and durable materials to create a space that is both functional and visually appealing. Features such as skylight integration, open concept layouts, pantry kitchen renovations, and bi-color cabinetry continue to remain popular among Bay Area homeowners seeking timeless and practical kitchen designs.
Careful planning, professional coordination, and attention to detail are essential for creating a kitchen that performs well aesthetically and functionally for many years.
------->
If you’re planning a kitchen remodeling project, consulting with an experienced contractor can help simplify the design and construction process while avoiding costly mistakes.
Book a consultation:
calendly.com/lemonremodeling
 A to Z Renovations
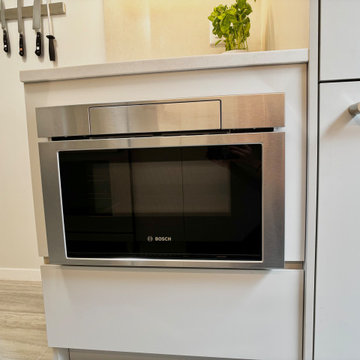
This East Village kitchen design focuses on a sleek, integrated look using high-pressure laminate cabinetry in a soft grey tone and matching custom panels for all major appliances. The space is defined by Bria Elephantino quartz countertops and a full-height backsplash that complements the white-honed porcelain floor tiles. Professional-grade Bosch appliances and matte black Brizo fixtures are used throughout, while clever architectural details—like hidden lighting grooves and a custom cabinet to mask utility pipes—ensure the kitchen is both highly functional and visually uncluttered.
 Just the Thing Decorating, Staging, and Windows
This recent renovation project began with a desire to open up the kitchen to the family room. Today everyone seems to want the big island to live and entertain around, right?
I always recommend taking your time during the planning phase—6 weeks at least! Kitchens and bathrooms are highly functional areas, so you want to give yourself time to think thoughts like, “where am I going to put all my plastic cups?” I ask my clients lots of questions during this phase to help them design a kitchen that truly has a place for everything. Appliances and plumbing are part of this phase as well.
Once the cabinet design was finalized, the demo began! Because that troublesome wall was load bearing, so the GC, Miland Home Construction, had to install a beam to support the second floor. But once that was done, boy we had a lot of space to work with!
Picking your countertops is a little like picking an ice cream flavor: you really want to see all your options! Not only is function important here, but your counter material is really a major element of the kitchen, so pick one you love! This client fell in love with Taj Mahal Quartzite.
The backsplash was the next layer of fun. Now the mood of the kitchen becomes clear. Will it be elegant? Homey? Rustic? Picking the lighting then becomes like the fine tuner on a microscope, adjusting the view to its perfect clarity.
With construction underway, and the mood of the new space established, soft furnishings become the focus. Layering in luxurious, yet durable fabrics are the name of the game for most families. We all want beautiful spaces that can stand up to spouses, kids, and pets! It’s always a lot fun to select a deep and comfy sofa and chairs!
The finishing touches are what really give the project that designer look—so be sure to save room in the budget for art, window treatments, and accessories. In this home I wallpapered the wall behind the tv with a subtle grasscloth, selected a large abstract to center the room, and echoed its colors throughout the accessories. The result is eye-pleasing indeed: soft, textured, interesting and peaceful. This busy family was thrilled with the results.
 Phoenix Home Remodeling
Jennifer & Gary aimed to enhance their kitchen’s functionality and style. The existing layout and flooring were kept, allowing the focus to stay on adding sleek cabinetry, refined surfaces, and thoughtful lighting updates.
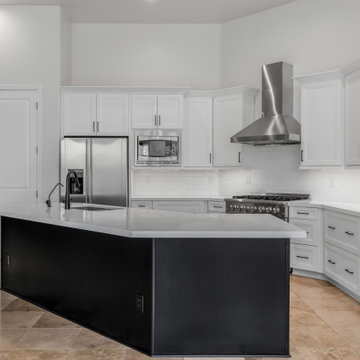
The kitchen underwent a full demo with all cabinets and counters removed. New base and upper cabinets in Waypoint’s 570F Painted Linen finish were installed along the perimeter.
For contrast and dimension, the island was outfitted in the same Waypoint style but in a Painted Black finish. A cabinet side panel was added to frame the refrigerator cleanly, and the pony wall was wrapped in cabinet panels for continuity.
Backsplash tile from Arizona Tile’s Concerto line was installed in a white glossy finish using a brick lay pattern. Schluter Jolly trim in Bright White was used to finish the edges. The backsplash reached from countertop to the bottom of the upper cabinets.
The kitchen sink was upgraded to a Blanco Precis 50/50 double basin in metallic grey, paired with a Delta Essa pull-down faucet in matte black.
A new InSinkErator Contractor 1HP disposal and all under-sink plumbing were installed, with the homeowner keeping their existing RO system.
Lighting played a major role in this remodel. Seven recessed LED trims were added to the ceiling, LED strip lighting was installed beneath the upper cabinets, and a new chandelier was placed above the dining area for added ambiance.
 Paradise Found Construction
Jesse had inherited his townhome, and had lived there for several years. His career took him to another state, and the home was unoccupied for over a year. He decided that he would not return to Raleigh and that it was time to sell.
The 1975 home still had the original kitchen and baths, and was in need of general repair and new flooring. The HVAC system, water heater, and washer and dryer had been replaced as they aged and became non-functional, and the exterior had been maintained by the Home Owner’s Association. Jesse wanted to update the home and have it sell as quickly as possible, so we got to work determining what the best use of the budget would be to accomplish this goal.
We focused on updating the major interior design elements that would provide the most enjoyment, durability, and energy efficiency for the new homeowners.
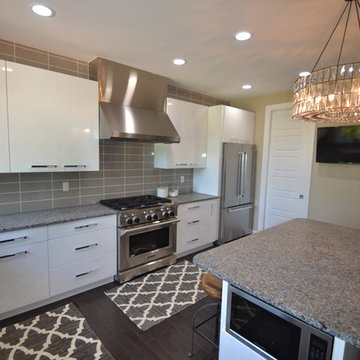
We started with completely gutting the Kitchen and reconfiguring it by moving the refrigerator into the laundry area, and stacked the washer and dryer to save space. We replaced all of the old vinyl cabinets with durable natural wood cabinetry, and added granite counter tops and a stainless steel sink. We also removed the ceiling-hung cabinets over the counter peninsula to open up the Kitchen and bring in more light and facilitate better flow and interaction, and added a floor-to-ceiling Pantry Closet to make up for the lost storage space. All of the Kitchen appliances were replaced with new energy efficient models.
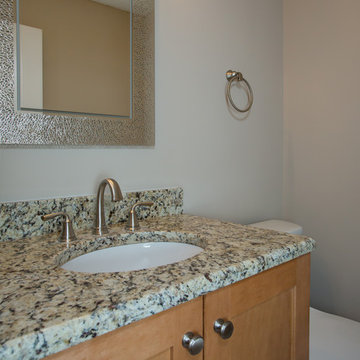
We next gutted the downstairs Powder Bath and replaced the vinyl vanity with matching cabinetry with the kitchen, and replaced the toilet (as well as all other toilets in the home) with an EPA WaterSense rated low-flow toilets. We removed the wallpaper and finished the walls smooth, replaced the lighting and mirror, and removed the carpet and installed a porcelain tile floor.
The second floor 2nd Bedroom had been left open to the Great Room with a balcony and accordion door for privacy, but it left the room open to all of the noise from the Great Room and Kitchen. In order to make the room function as a private bedroom, we removed the balcony and installed a full wall in its place.
Replacing all of the flooring was also at the top of the list, as was general repair on the walls and new paint throughout. We installed natural oak flooring in the Great Room and porcelain tile in the entry foyer. The seals on several of the exterior windows and the Master Bedroom sliding door had been compromised and needed to be replaced, as well as several interior doors and repair of all the louvered closet doors. The two upstairs Baths were functionally sound and the tile was in good shape. We replaced the toilets with EPA WaterSense rated low-flow toilets, and painted the vanities with a brighter color palette.
The end result was bright, open, and comfortable updated home ready for its new occupants.
Design Features
Durable and handsome natural wood cabinetry.
Granite Kitchen and Powder countertops.
Stainless Kitchen appliances and white refrigerator.
Stainless Kitchen sink and brushed nickel faucets.
Brushed Nickel cabinetry and door hardware.
Low-flow EPA WaterSense rated toilets.
Light and bright natural hardwood flooring.
Porcelain tile and luxury vinyl flooring.
New carpet.
Private 2nd Bedroom.
Light and bright No-VOC paints and finishes.
Energy Efficient and Green Features
Energy efficient EPA Energy Star appliances.
EPA WaterSense rated low-flow toilets.
Energy efficient EPA Energy Star windows and door.
Durable No-VOC cabinetry.
Durable porcelain tile flooring.
Low-flow faucets.
Energy efficient CFL lighting throughout.
No-VOC paints and finishes.
 Amy Pearson Design
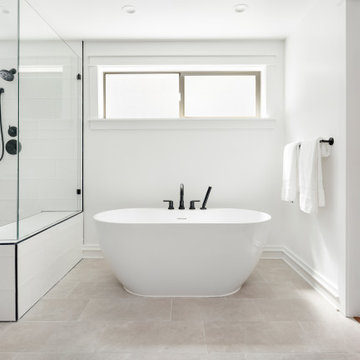
While the majority of APD designs are created to meet the specific and unique needs of the client, this whole home remodel was completed in partnership with Black Sheep Construction as a high end house flip. From space planning to cabinet design, finishes to fixtures, appliances to plumbing, cabinet finish to hardware, paint to stone, siding to roofing; Amy created a design plan within the contractor’s remodel budget focusing on the details that would be important to the future home owner. What was a single story house that had fallen out of repair became a stunning Pacific Northwest modern lodge nestled in the woods!
 Drury Design
The Setup
For this primary bath, our clients—empty nesters who recently updated their entire first floor—wanted a fresh, sophisticated look that would harmonize with the rest of their home’s new design. The original space included a large corner tub and a layout that, while functional, felt outdated and oversized for their needs. The goal was to update the bathroom with a layout that suited them perfectly without moving walls or major fixtures.
Design objectives:
Remove the large, outdated corner tub and replace it with a freestanding tub
Expand and modernize the shower while keeping privacy in mind
Update cabinetry for more organized, efficient storage
Improve lighting with stylish yet understated fixtures to brighten the room
Create a cozy, timeless atmosphere in the large space, maintaining functionality
The Remodel
Design challenges to be solved:
Striking Balance with Lighting – The clients wanted a statement fixture that could enhance the overall design without feeling overwhelming or taking away from the open, airy atmosphere.
Maximizing Existing Footprint – The clients wanted to avoid altering the floor plan, meaning the layout remained mostly the same. The focus was on enhancing the room’s functionality within the existing footprint.
Retaining Coziness – With the removal of the oversized tub deck, there was a need to keep the space from feeling too vast and empty, ensuring it felt cozy and inviting despite the open layout.
Adding Hidden Storage – The master closet was not attached to the bathroom, and the clients wanted a discreet way to store a hamper within the bath area without cluttering the room.
The Renewed Space
Design solutions:
Freestanding Tub on an Angle – Replacing the old corner tub with a sleek, freestanding tub allowed the space to feel open and modern. Positioned at an angle, the tub brings balance to the layout and provides an inviting focal point while still preserving walk-around space for added functionality.
Expanded Shower with Privacy Enhancements – The original, smaller shower was transformed with a larger footprint, half-wall for privacy, and contemporary brushed nickel fixtures, adding both style and function. A herringbone marble accent tile halfway up the shower walls adds a touch of sophistication without overwhelming the space.
Custom Vanity with Built-in Hamper – A small pull-out hamper was added to the corner of the vanity, providing discreet storage and eliminating the need for a standalone basket. The cabinetry was reconfigured to be more functional and organized for the couple’s daily routines.
Lighting that Complements the Room – The lighting selection was central to the redesign, with the client gravitating toward a bubble chandelier she had admired. After exploring several options, they chose a smaller size to provide a soft accent without dominating the space, tying in with the bathroom’s overall light and airy feel.
The newly remodeled primary bath exudes a classic, calm atmosphere with a carefully chosen mix of textures and materials. The large porcelain floor tiles mimic the look of wood, lending a warm, traditional touch. Lightly textured cream tiles and brushed nickel fixtures create a soft and cohesive look, while the subtle herringbone marble accent in the shower adds just the right amount of elegance. Round mirrors above the vanities complement the curves of the freestanding tub, softening the room’s overall look and adding a touch of femininity. The result is a bright, timeless space tailored perfectly for the homeowners’ lifestyle.
 Century Tile
Avenue One
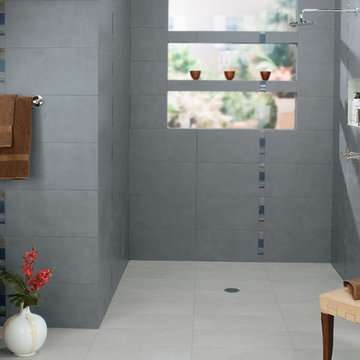
Photo features Municipal Gray 12 x 24 on the floor in a grid pattern. Wall features Nightlife 12 x 24 in a grid pattern with Nightlife/Midnight Sky 2 x 12 accent.
We are a customer driven company, focused on increasing our sales and market share. We differ from our competition by our products, presentation, and service while continuing to support our reputation for value and selection. Quickly put…to make Century Tile “simply the best."
Century Tile’s eleven locations and commitment to Chicago for over 65 years; First Quality Flooring, Value Pricing, Best In-stock Selection and Knowledgeable Staff.
We also have the Midwest’s largest in-stock selection of flooring.
We carry over 10,000 styles and colors of floor coverings which we import direct; as well as carry many of the major flooring brands domestically offered.
Century Tile’s size and buying power allows us to offer you the best selection of products at the lowest price and best value in Chicago that you can take home today.
Century Tile offers you Chicago’s most knowledgeable people who have an average of 12 years flooring experience. Our sales staff will assist you with any flooring project that you might have.
 RHEINZINK
Inspired by noted American architect Norman Jaffe, the strikingly contemporary Sagaponack Residence on Long Island is highlighted by distinctively unique angles both inside and out. Jaffe was widely recognized for his contemporary residential style and use of natural materials and passive solar forms of design for his many South Long Island beach houses.
The 2,700 sq. ft. private residence is located one-half mile from the Atlantic coast and sited in an area that was originally characterized by long vistas over farm fields to the ocean beyond. Now, the area is thickly built up with weekend homes. The project was meant to address this change by creating a place that focuses on the immediate landscape and provides a garden environment for the owner.
A collaborative arrangement between two architectural firms brought the project to life. Andrew Reyniak, principal at ARAPC, New York, was architect of record; Mark Anthony C. Verzosa, principal at +macv, Sag Harbor, NY, was design consultant and general contractor.
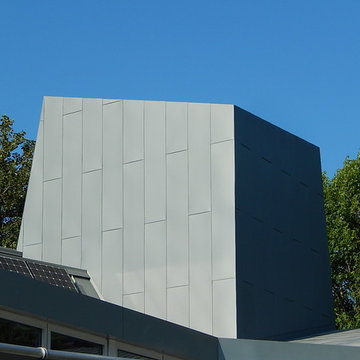
“We knew we wanted to use zinc from the beginning,” Verzosa said. “We wanted a material that had a life.” Approximately 5,500 sq. ft. of prePATINA blue-grey RHEINZINK was specified to provide the life and the look that the design team sought. RHEINZINK Vertical Angled Standing Seam Panels and Flat Lock Tiles clad the exterior along with rough-sawn, locally-sourced white cedar. RHEINZINK Double Lock Standing Seam Panels were used on the roof.
“The RHEINZINK is obviously a very versatile material,” according to Verzosa. “The color blends very well into the environment and the sky in particular. And we like the way it patinas and self-heals.”
The unique design of the house incorporates unusual angles on both the exterior and interior. “There’s not a lot of 90 degree or horizontal plumb walls,” Verzosa said. “The dramatic geometry of the building created complicated detailing on the project.”
Fabrication and installation of the RHEINZINK panels was done by Metropan Systems, Inc., Bayside, NY. The company specializes in zinc façade and roofing projects, according to John Gushue, president. “We’ve done more than 60 zinc projects since 2001 and the majority have been RHEINZINK,” Gushue said. “If I could do zinc every day, I would.”
The unusual geometry of the Sagaponack Residence made for a challenging installation. “There was nothing cookie cutter about this job,” according to Gushue. “We began meeting with the architect about a year before actually starting the work in order to incorporate the very best detailing. Every fastener is hidden and there’s no caulk on the façade. Many of the RHEINZINK panels were fabricated on-site in order to bend around corners. And the flashing details had to be meticulous.”
The design of the project presents a modern, artistic look in every aspect. “Of all the zinc projects we’ve done, this is my favorite,” Gushue said. “It was a great job to be on. And properly maintained, it could last for 150 years.”
 Rhodes Architecture + Light
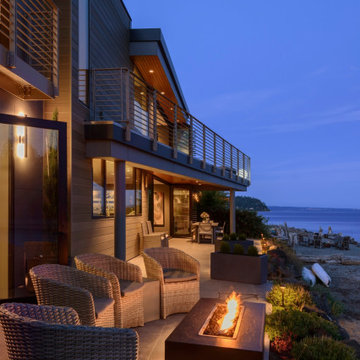
A transformation inspired by the owner’s love of modern architecture, art and color (and the adjacent sand, rock, water, and the northwest landscape), the Indianola House sought to bring the soul of a home to a colorless muted box. The original house was a drab 1990’s-era box with no personality or presence sited on a beautiful secluded bay, facing water and island views, northwest of the City of Seattle. The existing mono-colored stucco-clad exterior and pyramidal glass-block openings had led the neighborhood to dub the structure, unflatteringly, “The Miami Vice House”.
Rhodes Architecture’s Residential Architects careful use of natural light, rich, collaged finishes and ability to open the house to gardens, beach, and outdoor gathering was critical to the design. The house soon became “The Gallery”.
The original home’s grey stucco exterior made the house seem both large and featureless; the introduction of no-maintenance exterior materials that collage and complement each other was a goal of the homeowner and the Seattle Architects who teamed up for this residential design. The bloated scale of the house cried out for the establishment and definition of the parts of the structure, a breaking down of the home’s form and its apparent bland size.
Living, sleeping, and bathing areas that started as staid spaces were in need of opening to the natural environment with additions of large doors, folding glass walls and useable balconies were crucial to each space having a dialogue with the outdoors.
The owner’s extensive art collection was highlighted and became the focus of interior places, well-lit naturally and through a new lighting system. Energy use and sustainable systems were a key component of the design which used high-efficacy lighting, better cladding on a rain-screen system, high-efficiency doors and windows, new insulation and weather barriers, and which added a photovoltaic-generated electrical system. The contemporary design sought to integrate all of these systems, materials, and finishes into a seamless whole that lent interest and drama to a residence which was previously lusterless.
How radically this house was transformed is evident in the exteriors, gardens and the natural spaces the house now opens to, as well as the gallery-like interiors. This home is a stunning testament to what is possible “before-and-after” when remade by Rhodes Architecture + Light.
The clients are an older couple with long professional and political careers, a love of art and a clear desire to connect with the Northwest environment and enliven their daily lives with spaces full of color and natural light.
Rhodes Architecture + Light was hired in 2019 to add new exteriors and interiors, natural light, larger openings to beach and bay, seismic and foundation upgrades to the home, and to infuse life into the house through the re-use of existing space and varied materials, color, textures, and lighting. The only actual change to the exterior “shell” of the house was the introduction of a low “gull-wing” roof with wood soffits above the central atrium space, to add drama and bring natural light into the entry gallery space. Interior spaces, including bedrooms and bathrooms, were re-planned and opened to each other, to greater natural light, to roof decks, and to the incredible views and sea-side environment.
The Builder, Fairbank Construction Company of Bainbridge Island, Washington, met the challenge of the design, first completely deconstructing the finishes inside and out, then precisely interlocking new claddings, windows and doors, cabinetry, finishes and a new gull-wing central roof in a beautiful transformation. The construction was total, thorough, and very detailed, resulting a house that, far from seeming a “remodeling”, is far more present and fitting to the owner’s lives and the natural environment than the house we started with.
 Skön Kitchens Ltd.
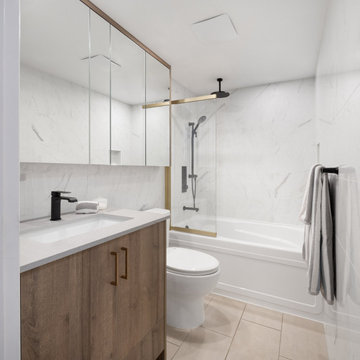
Modern Elegance in Yaletown: We recently had the pleasure of completing a stunning kitchen and bathroom renovation in a sleek Yaletown condo. Our client came to us with a vision to modernize both spaces, and thanks to our decades of experience in full-home renovations, we were able to bring that vision to life.
This project didn’t require any major layout changes — instead, the focus was on updating the finishes and maximizing the functionality of each space. The goal? To create a contemporary, light-filled home that’s perfect for entertaining, while keeping the design in harmony with the rest of the condo.
 JRP Design & Remodel
After purchasing their ideal ranch style home built in the ‘70s, our clients had requested some major updates and needs throughout the house. The couple loved to cook and desired a large kitchen with professional appliances and a space that connects with the family room for ultimate entertaining. The husband wanted a retreat of his own with office space and a separate bathroom. Both clients disliked the ‘70s aesthetic of their outdated master suite and agreed that too would need a complete update.
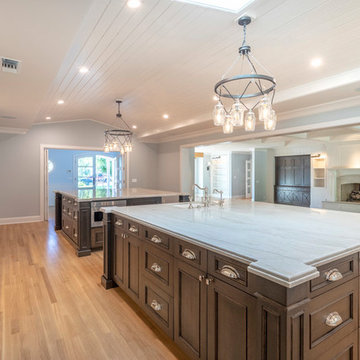
The JRP Team focused on the strategic removal of several walls between the entrance, living room, and kitchen to establish a new balance by creating an open floor plan that embraces the natural flow of the home. The luxurious kitchen turned out to be the highlight of the home with beautifully curated materials and double islands. The expanded master bedroom creates space for a relocated and enlarged master bath with walk-in closet. Adding new four panel doors to the backyard of the master suite anchors the room, filling the space with natural light. A large addition was necessary to accommodate the "Man Cave" which provides an exclusive retreat complete with wet bar– perfect for entertaining or relaxing. The remodel took a dated, choppy and disconnected floor plan to a bespoke haven sparkling with natural light and gorgeous finishes.
PROJECT DETAILS:
• Style: Traditional
• Countertops: Quartzite - White Pearl (Cloudy)
• Cabinets: Dewils, Lakewood (Frameless), Maple, Just White / Brittany Blue / Shadow Gray
• Hardware/Plumbing Fixture Finish: Polished Chrome
• Lighting Fixtures: Chandeliers
• Flooring: White Oak – Galleher, Limestone / Brushed
• Tile/Backsplash: Ceramic – Emser, Craft, Garft Gray in Gloss
• Paint Color: Perspective
• Other Details: Pot Filler / Coffered Ceiling & Fireplace in Dining Room
• Photographer: J.R. Maddox
43