
Search results for "Masking" in Home Design Ideas
 SEA Group Germany
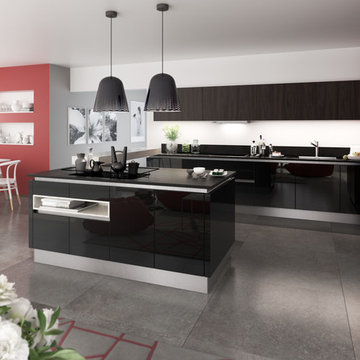
Mid-sized trendy l-shaped open concept kitchen photo in Stuttgart with black cabinets and a peninsula
 SHIALICE
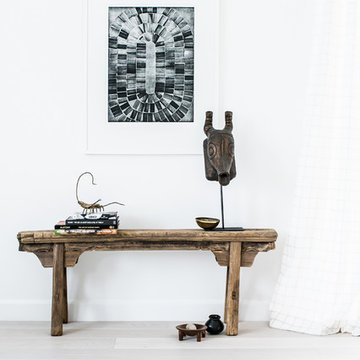
Elvia Perrin Etching;
Vintage African mask;
Storybook bench from Rejuvenation;
Street Art books.
Mid-sized 1950s open concept light wood floor living room photo in Los Angeles with white walls
Mid-sized 1950s open concept light wood floor living room photo in Los Angeles with white walls
 Fusion Bowling
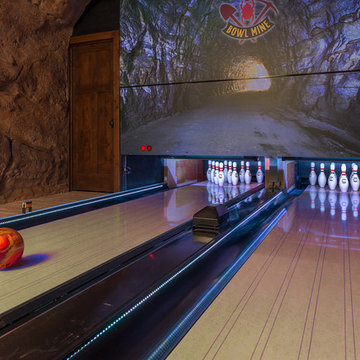
A custom home bowling alley installed in a recreation building adjacent to the main house. The theme is based on a nearby old gold mine. Faux rock and mine shaft timbers adorn the walls and ceiling. The bowling lanes have a "Honey Maple" color pattern with a mineshaft photo and custom logo on the masking unit. Guest bowling balls were custom made for this project in a maroon/orange/yellow swirl design.
Find the right local pro for your project
 Mid-Atlantic Door Group, Inc.
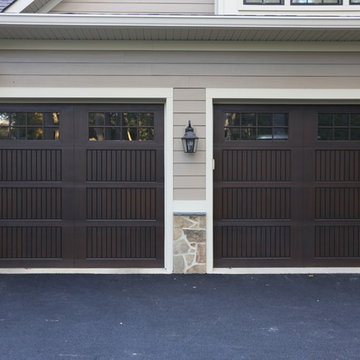
Overhead Door's Impression collection captures the warmth, beauty and detail of natural wood garage doors without the maintenance. These doors feature a wood-grain fiberglass surface while masking durable steel construction. The Impression Collection doors are available in various panel styles, 10 different stain choices, as well as multiple window, glass and decorative hardware options.
 Bonnie McCarthy
Photo: Bonnie McCarthy © 2015 Houzz
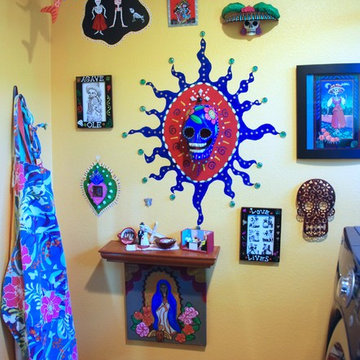
Home design - eclectic home design idea in Los Angeles
Home design - eclectic home design idea in Los Angeles
 Braswell Design+Build
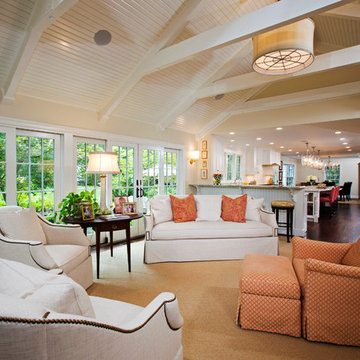
This client sought to update their recently purchased home in Alexandria. A gourmet kitchen that complemented the size of the home and property was a top priority. They wanted more light-filled and connected living spaces for their growing family. Updating the finishes throughout the home was also a necessity.
Design challenges included an existing utility space that occupied a large portion of the kitchen footprint, making the kitchen cramped and narrow. In addition, the foyer was dark, confined and uninviting as a result of its organization and enclosed nature of the main stair.
To overcome the challenges, we relocated the utilities, creating a more usable footprint for the kitchen. The aging furnace was replaced with a high efficiency furnace located in a newly insulated and conditioned crawl space. A new hot water heater was placed in the finished attic, and the electrical panel was also relocated. Then, we designed a portion of the kitchen to mask the need for dropped structural headers: the refrigerator, freezer and pantry were placed under the area that necessitated a drop bulkhead, creating a sleek built-in area for the appliances.
Once the utilities were moved, the kitchen could be opened up to a large family room and designed with a much-improved layout. Two new four-panel exterior doors replaced small doors at the family room to connect the main living space with the beautiful yard. In addition, white bead board was added to the family room ceiling, creating more visual continuity with the adjacent white kitchen.
To transform the foyer into a grand and welcoming entry, a small amount of space was taken from a large second floor bedroom, and the entire second floor structure was supported with a series of flush beams to allow the stair to be opened and expose the rail. New glass doors to the den, relocated at an angle from the main stair provide the foyer with more natural light and a wider, more inviting path to the kitchen.
In the master suite, the bedroom and bathroom entry doors were relocated to improve the room’s layout and offer more bathroom privacy and space for a walk-in closet. A room forgotten by the previous owner was turned into a family mudroom with built-ins and wainscoting to keep the family organized in style.
Photography by Greg Hadley
 Jessica Cain
Photo: Jessica Cain © 2017 Houzz
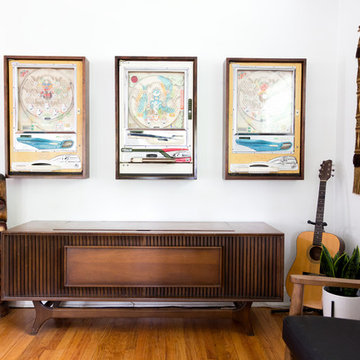
1950s open concept family room photo in Kansas City with white walls and no tv
1950s open concept family room photo in Kansas City with white walls and no tv
 Braswell Design+Build
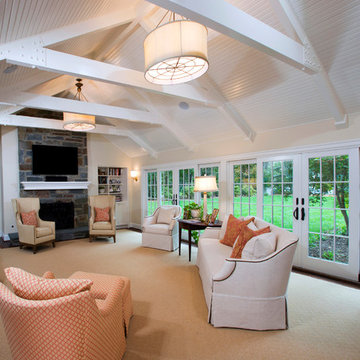
This client sought to update their recently purchased home in Alexandria. A gourmet kitchen that complemented the size of the home and property was a top priority. They wanted more light-filled and connected living spaces for their growing family. Updating the finishes throughout the home was also a necessity.
Design challenges included an existing utility space that occupied a large portion of the kitchen footprint, making the kitchen cramped and narrow. In addition, the foyer was dark, confined and uninviting as a result of its organization and enclosed nature of the main stair.
To overcome the challenges, we relocated the utilities, creating a more usable footprint for the kitchen. The aging furnace was replaced with a high efficiency furnace located in a newly insulated and conditioned crawl space. A new hot water heater was placed in the finished attic, and the electrical panel was also relocated. Then, we designed a portion of the kitchen to mask the need for dropped structural headers: the refrigerator, freezer and pantry were placed under the area that necessitated a drop bulkhead, creating a sleek built-in area for the appliances.
Once the utilities were moved, the kitchen could be opened up to a large family room and designed with a much-improved layout. Two new four-panel exterior doors replaced small doors at the family room to connect the main living space with the beautiful yard. In addition, white bead board was added to the family room ceiling, creating more visual continuity with the adjacent white kitchen.
To transform the foyer into a grand and welcoming entry, a small amount of space was taken from a large second floor bedroom, and the entire second floor structure was supported with a series of flush beams to allow the stair to be opened and expose the rail. New glass doors to the den, relocated at an angle from the main stair provide the foyer with more natural light and a wider, more inviting path to the kitchen.
In the master suite, the bedroom and bathroom entry doors were relocated to improve the room’s layout and offer more bathroom privacy and space for a walk-in closet. A room forgotten by the previous owner was turned into a family mudroom with built-ins and wainscoting to keep the family organized in style.
Photography by Greg Hadley
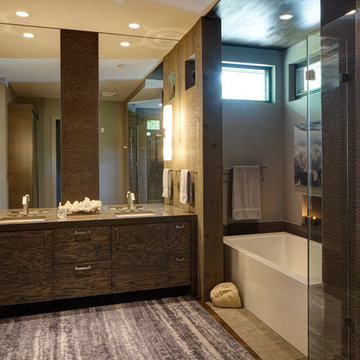
 Fredman Design Group
The homeowners had a very hands-on approach to the design process. From the color of hardwood floors, to the tile, cabinets, countertops and lighting, every selection was made in collaboration – the design team informed every decision. Their art collection serves as mile markers of a well-traveled life.
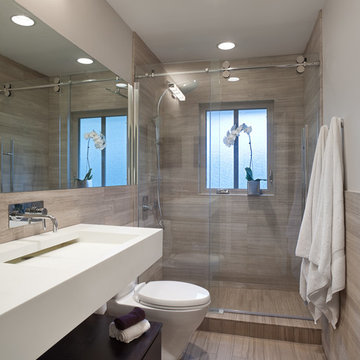
 zpd+a and roomTEN design
streamlined bathroom design
photography by Tyler Mallory || www.tylermallory.com
Inspiration for a mid-sized modern kids' gray tile and stone tile marble floor alcove shower remodel in Chicago with furniture-like cabinets, dark wood cabinets, solid surface countertops, a two-piece toilet, gray walls and an integrated sink
Inspiration for a mid-sized modern kids' gray tile and stone tile marble floor alcove shower remodel in Chicago with furniture-like cabinets, dark wood cabinets, solid surface countertops, a two-piece toilet, gray walls and an integrated sink
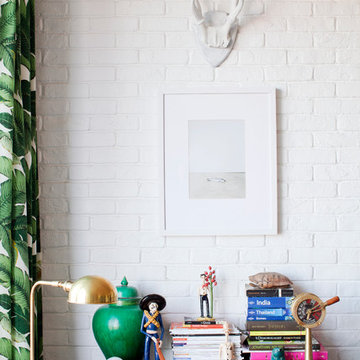
 PlaidFox Studio
Photo Credits: Janis Nicolay
Example of a small eclectic loft-style light wood floor living room design in Vancouver with white walls
Example of a small eclectic loft-style light wood floor living room design in Vancouver with white walls
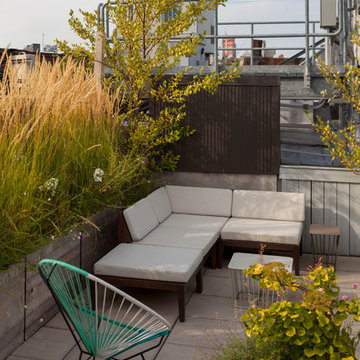
 Staghorn NYC
The owners of this shared Brooklyn rooftop garden needed to create three individual spaces without feeling too closed off, dark, or boxed in. The solution is a series of custom cedar trellises at varying heights mixed with lightweight planters that delineate each of the owner's deeded spaces. Flowering vines grow through the trellises to provide added privacy during the warmer months as well as pops of color and texture. River birch trees offer dappled shade and dimension, flowering perennials add color, fragrance, and attract pollinators, and ornamental grasses provide texture and movement while also masking some ugly HVAC units. The resulting rooftop space is open and breezy while also giving each family their own special private oasis.
 A.Kitchen Design House
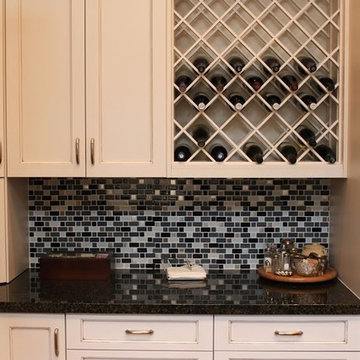
The kitchen and baths in this home were a mix of styles, materials, and textures. The client wanted to incorporate many parts of his life into the space. We did this by including some masks he bought while traveling, along with a touch of Asian influence in the guest bathroom, and retro vibe in the master bath. Brookhaven Recessed Panel Cabinetry is used throughout the home.
Cabinetry Design by Ashley Kasper. Photography by Laura Minor.
 Braswell Design+Build
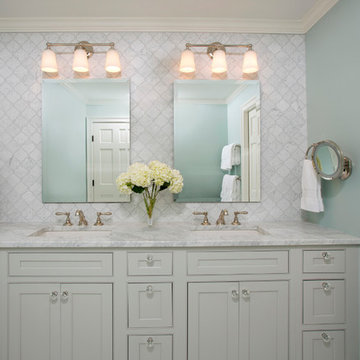
This client sought to update their recently purchased home in Alexandria. A gourmet kitchen that complemented the size of the home and property was a top priority. They wanted more light-filled and connected living spaces for their growing family. Updating the finishes throughout the home was also a necessity.
Design challenges included an existing utility space that occupied a large portion of the kitchen footprint, making the kitchen cramped and narrow. In addition, the foyer was dark, confined and uninviting as a result of its organization and enclosed nature of the main stair.
To overcome the challenges, we relocated the utilities, creating a more usable footprint for the kitchen. The aging furnace was replaced with a high efficiency furnace located in a newly insulated and conditioned crawl space. A new hot water heater was placed in the finished attic, and the electrical panel was also relocated. Then, we designed a portion of the kitchen to mask the need for dropped structural headers: the refrigerator, freezer and pantry were placed under the area that necessitated a drop bulkhead, creating a sleek built-in area for the appliances.
Once the utilities were moved, the kitchen could be opened up to a large family room and designed with a much-improved layout. Two new four-panel exterior doors replaced small doors at the family room to connect the main living space with the beautiful yard. In addition, white bead board was added to the family room ceiling, creating more visual continuity with the adjacent white kitchen.
To transform the foyer into a grand and welcoming entry, a small amount of space was taken from a large second floor bedroom, and the entire second floor structure was supported with a series of flush beams to allow the stair to be opened and expose the rail. New glass doors to the den, relocated at an angle from the main stair provide the foyer with more natural light and a wider, more inviting path to the kitchen.
In the master suite, the bedroom and bathroom entry doors were relocated to improve the room’s layout and offer more bathroom privacy and space for a walk-in closet. A room forgotten by the previous owner was turned into a family mudroom with built-ins and wainscoting to keep the family organized in style.
Photography by Greg Hadley

 FS Landscaping Contractors, Inc.
Traditional pool design
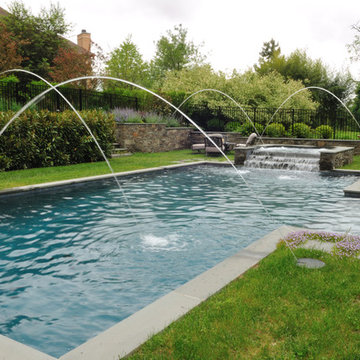
Inspiration for a large rustic backyard stone and custom-shaped natural pool fountain remodel in Philadelphia
Inspiration for a large rustic backyard stone and custom-shaped natural pool fountain remodel in Philadelphia
 Fusion Bowling
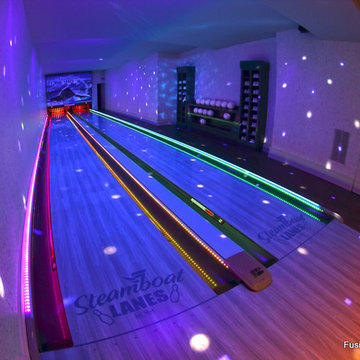
Luxury home builders Sound Beach Partners hired Fusion Bowling to create a custom basement bowling alley for their clients in Greenwich, Connecticut. The homeowners wanted the theme of the room to be based on their favorite skiing destination -- Steamboat, Colorado. The project features Pro Lanes with Illustrious Maple color pattern, "winter wonderland" lighting effects, custom sky blue pins, and Brunswick GS-X pinsetter machines. The masking unit, guest bowling balls, pins, and lanes all feature custom logos.
 Barrera Remodel & Lawn
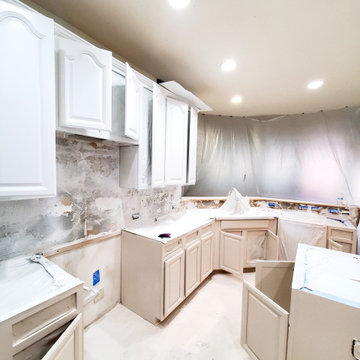
Upper cabinets- Sw Pure white & Base cabinets SW Accessible Beige- this creating a two tone paint cabinet!
Amazing
Laundry room - transitional laundry room idea in Houston
Laundry room - transitional laundry room idea in Houston
 Windy City Painters
Refresh Your Space with the Best Kitchen Cabinet Painting in Chicago!
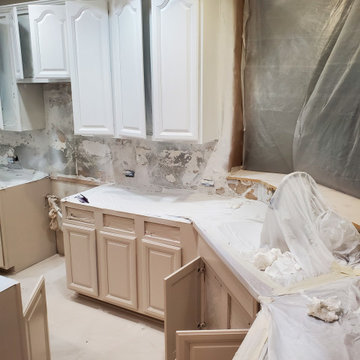
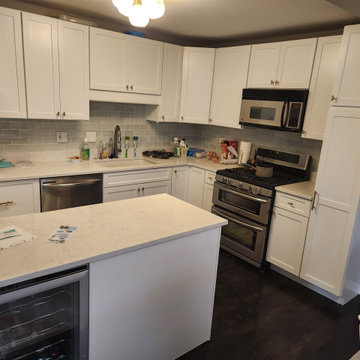
Looking for a Kitchen Cabinet Painting Transformation in Wicker Park? Our premier Chicago painting company just completed this stunning cabinet refinishing project, proving that you don't need a full remodel to achieve a high-end, designer look.
As local Chicago painters specializing in professional cabinet painting, we understand the unique aesthetic of Windy City homes—from historic bungalows to modern West Loop condos. Our team focuses on high-durability finishes and meticulous cabinet spraying techniques that deliver a smooth, factory-like appearance. From thorough degreasing and sanding to the final topcoat, every step is handled with the expert care your home deserves. These Wicker Park homeowners are absolutely thrilled with their kitchen's modern new vibe!
Kitchen Cabinet Painting: Frequently Asked Questions
How long does the professional kitchen cabinet painting process typically take from start to finish?
Most residential projects take between five to seven business days. This timeframe includes the removal of doors for off-site spraying, meticulous on-site masking of your kitchen "shell," and the necessary curing time between coats to ensure a rock-hard, durable finish.
What type of paint or finish do you use to ensure the cabinets don't chip or peel over time?
We utilize industrial-grade Italian coatings or high-end waterborne alkyd enamels specifically formulated for cabinetry. These products are much harder than standard wall paint, providing superior resistance to moisture, kitchen grease, and the daily wear and tear of a busy Chicago household.
Do I need to empty all of my kitchen cabinets and drawers before the painters arrive?
While you don't necessarily need to empty the backs of the shelves, we require all items to be moved at least six inches back from the front edges. However, for the best dust-free results, we highly recommend emptying them completely to protect your cookware.
Can you paint cabinets that are made of laminate, thermofoil, or or dark-stained oak?
Yes, we can! The secret lies in the bonding primer. We use specialized high-adhesion primers that "bite" into slick surfaces like laminate or seal the grain of deep oak, ensuring the color stays vibrant and the surface remains perfectly smooth without peeling.
How should I clean and maintain my newly painted cabinets to keep them looking fresh for years?
To maintain the finish, simply wipe them down with a soft microfiber cloth and a gentle mixture of warm water and mild dish soap. Avoid using harsh chemical cleaners, abrasive scrubbing pads, or wax-based polishes, as these can break down the protective topcoat over time.
39