
Search results for "Problem solvers ready" in Home Design Ideas
 Howell Custom Building Group
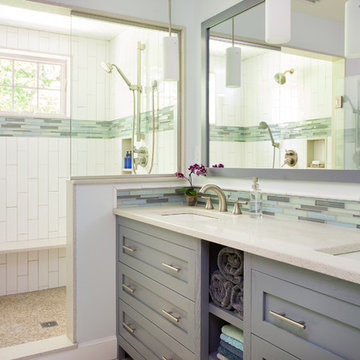
This project consisted of remodeling an existing master bath and closet. The owners asked for a
functional and brighter space that would more easily accommodate two people simultaneously getting ready for work. The original bath had multiple doors that opened into each other, a small dark shower, and little natural light. The solution was to add a new shed dormer to expand the room’s footprint. This proved to be an interesting structural problem, as the owners did not want to involve any of the first floor spaces in the project. So, the new shed was hung off of the existing rafters (in a sense this bath is hanging from the rafters.)
The expanded space allowed for a generous window in the shower, with a high window sill height to provide privacy from the back yard. The Strasser vanities were a great value and had the desired finish. The mirror frame and center shelves were painted to match the cabinet finish. The shower can easily function for two, allowing for their busy morning schedules. All of the fixtures matched nicely in a brushed nickel finish.
Toto Eco Dartmouth toilet; Fairmont undermount Rectangular sinks; Toto widespread lav faucet; Toto multispray handshower and showerhead
Photography by Emily O'brien
 Gardner Homes
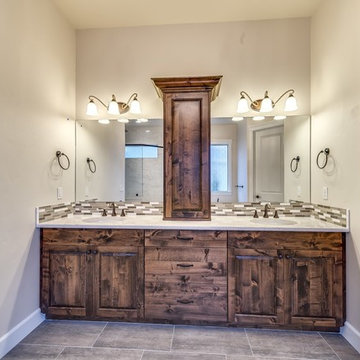
Relaxing in this master bathroom will be no problem. Just look around at the beautiful finishes that make you feel like you are entering a spa ready to leave the stress of the day behind.
Photography by Tourfactory
 Kitchen Solvers of Sandy Springs
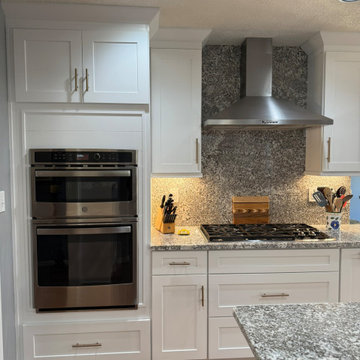
Our clients contacted us as they wanted to update their kitchen to give it a fresh new look. We started by tearing out the old cabinets, backsplash and countertops to get the space ready. They decided to do all new cabinets throughout the kitchen with a white shaker door. Next, we installed a new granite countertop and backsplash that really made the space stand out. Now our homeowners finally have the new kitchen they were dreaming of.
Find the right local pro for your project
 Corvus Construction
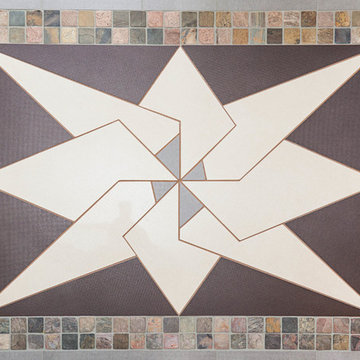
Sometimes great things come from small things and this entryway project was exactly like that. This very small yet interesting project started almost by accident.
Entryway TileI had completed a tile job a few months before and had some high quality porcelain tile left over. It was nice tile so I was hesitant to toss it out but after moving the pile around my shop for several months I finally decided to throw it away. While loading my pickup with miscellaneous construction garbage – and this great tile – one of my neighbors stopped by for a chat about some of my recent projects.
I showed him the great left over tile that I was throwing away and asked him if he had any interest in taking it off my hands – for free. He said he was actually thinking about replacing his existing tile landing at his house because although it had been redone just a few years ago, it had cracked. We went over and took a look at his landing and decided the scrap tile might be a perfect solution.
tile floorI told my neighbor “you come up with any design you want, and I’ll bring that to life.” He came up with an idea and sketched out the idea within a couple of days. As soon as I looked at the sketches, I knew it was going to be a very challenging project, but I also knew it would be a rewarding project I would be proud to put the Corvus name on.
We took the final sketch and imported it into a graphics design program to make the focal point of the design work within the existing space and fine tune the look of the project to fit the available space of the entryway. This was going to be a highly customized undertaking that was going to be all about the details.
Because every tile had to be custom cut, I printed out the final design from the program to create a stencil to trace the outline on each tile. After all of the painstaking tile cutting, I laid it out in a mock-up on the entry floor. Then we were ready to overcome our next challenge – the flexing and moving sub floor.
The existing tile landing that we were replacing had been installed just a few years earlier but had already cracked down the center. This fracture made me realize that we needed to find a way to somehow decouple the substrate from the finished tile surface to prevent the same problem from cropping up again.
tile floor entrywayI decided to go with a Schluter-DITRA™ tile underlay for this job. Working with DITRA™ was surprisingly simple. The only thing you need to remember is to use unmodified thinset mortar when setting tile over this substrate, because modified thinset would take a very long time to cure. We also decided to use QuartzLock™ urethane grout for the floor because it expands and contracts when the floor flexes under foot traffic and could help prevent future cracking.
In the end the project came out great! My neighbor is thrilled and can’t wait to show it off to anyone that stops by. This is a great example of how custom work can really amp up the appeal of your home and how a small change can make a big difference in the look of your home.
 Kitchen Solvers of Allentown
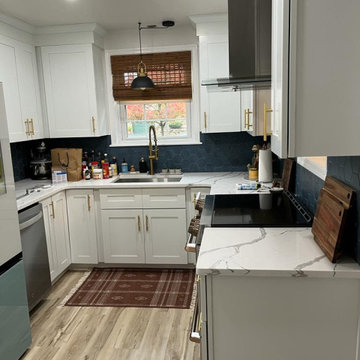
Beautiful kitchen remodeling project where the homeowner wanted to give their kitchen a new look while also changing the layout. We started by tearing out the existing cabinets and repositioning the refrigerator and oven onto different walls. We were then ready to start installing the new cabinets. They went with the Nantucket door in a polar white color. Next, we installed a new Calacatta with dark grey vein quartz countertop and a blue hexagon shaped backsplash. To finish the new look, we added a new vinyl floor. Now this homeowner has a beautiful new kitchen.
 Florida Green Construction Inc.
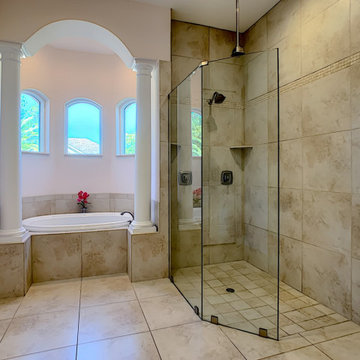
LUXURY BUILDER’S MODEL HOME FOR SALE
Save approx. $30,000 or more over 10 years in this Green home. Plus, continued savings over the lifetime of your home.
GRAND AWARD AND GRAND REALTORS CHOICE AWARD FROM THE PARADE OF HOMES 2017
ESTIMATED HOMEOWNERS’ MONTHLY EXPENSES TO LIVE IN THIS GREEN HOME.
Your monthly utility bills for electricity and water are about $ 150 per month. Homeowners’ insurance about $ 60 per month. Total of all your required payments are approximately $ 210 per month in this home.
You will live without financial problems in this elegant, economical and healthy to live in luxury home, in a certified Green City Palm Coast with a comfortable climate and a clean environment.
If you are not ready to move, we provide full-service property management for you.
 Florida Green Construction Inc.
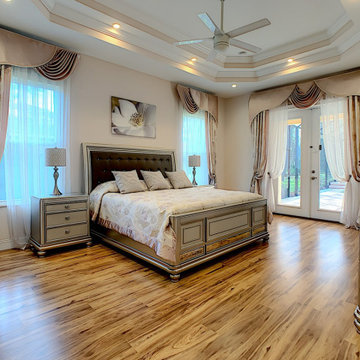
LUXURY BUILDER’S MODEL HOME FOR SALE
Save approx. $30,000 or more over 10 years in this Green home. Plus, continued savings over the lifetime of your home.
GRAND AWARD AND GRAND REALTORS CHOICE AWARD FROM THE PARADE OF HOMES 2017
ESTIMATED HOMEOWNERS’ MONTHLY EXPENSES TO LIVE IN THIS GREEN HOME.
Your monthly utility bills for electricity and water are about $ 150 per month. Homeowners’ insurance about $ 60 per month. Total of all your required payments are approximately $ 210 per month in this home.
You will live without financial problems in this elegant, economical and healthy to live in luxury home, in a certified Green City Palm Coast with a comfortable climate and a clean environment.
If you are not ready to move, we provide full-service property management for you.
 Kitchen Solvers of the Gulf Coast
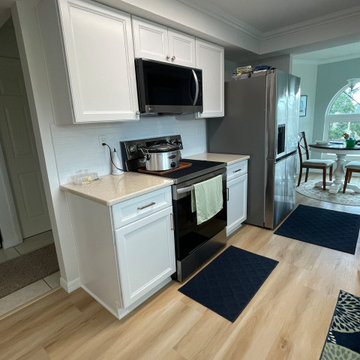
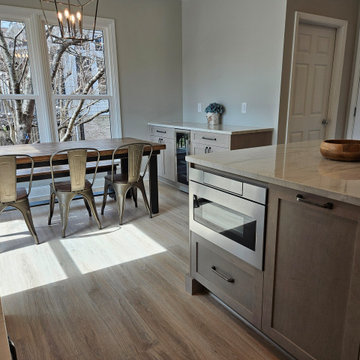
For this kitchen remodeling project, our homeowners were looking to give their kitchen a much-needed refresh with new cabinets. They were ready to change their old dark cabinets to something lighter. They picked birch cabinets with our Maui door style done in an arctic white color. Next, we installed a new Fairbourne quartz countertop and a ProGen Mirage floor. Now these homeowners have the kitchen of their dreams.
 Kitchen Solvers of Spring Hill
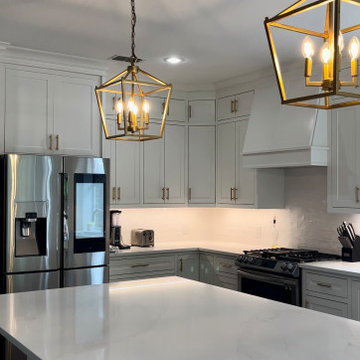
We started working with these clients over a year ago and after several other projects were completed, they were ready to upgrade the kitchen to match what they had created with the rest of the house. Though we didn’t change the layout much we improved upon every aspect of it. From removing the massive shallow pantries for a more functional one with roll-out trays, and better utilized island with drawers and a pull-out trash, removed the bar top, added a dry bar for better use of the eating area and their beloved coffee, shifted all the base cabinets to maximize every square inch of space, and a custom build hood with a removable front panel! What was once dull and boring is not warm and welcoming with luxurious touches!
 Kitchen Solvers of Charleston
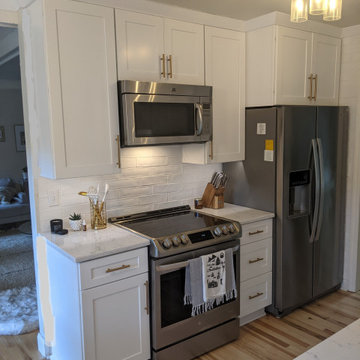
This 1960’s kitchen came to us in a state of major disarray to say the least. The owner had previously tried to remove the doors and drawer fronts and paint everything. However, she quickly realized that this approach would only put a band aid on a larger problem, and she reached out to us to install all new cabinets for her. She went with the Catalina shaker door done in maple and in the Polar white color. We brought the cabinets to the ceiling and added matching shaker crown molding. Next, we installed a new Cambria quartz countertop in Swanbridge and a Spanish handmade subway tile backsplash. Now this homeowner has the kitchen of her dreams.
 Kitchen Solvers of McKinney
Our clients contacted us to help them give their kitchen a much-needed update. They were looking to get more storage space out of their new cabinets as well. We tore out the old cabinets, backsplash and countertop to get the space ready. For the new cabinets, they went with a shaker door in a pure white color and the cabinets were extended to the ceiling. Next, we installed a new Calacatta Rain Gold quartz countertop and a 3x6 white bevel subway tile backsplash. We also added many storage solution items like base cabinet pull outs and a cutlery divider. Gold accents and a new custom hood were the finishing touches to this stunning transformation.
 Mr. Electric of Pensacola
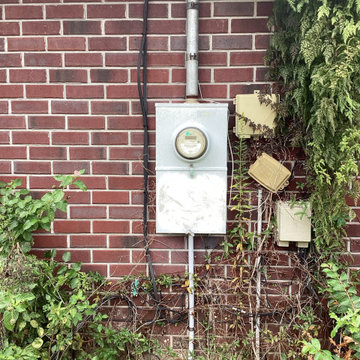
After a Pensacola homeowner experienced issues with a Level 2 EV charger installed by Florida Power & Light (FPL), our team at Mr. Electric of Pensacola diagnosed the problem as a surge issue combined with an undersized breaker. We upgraded the electrical system with a 50-amp breaker and whole-home surge protection to provide safe, reliable charging. The project was completed with testing to ensure the system was fully functional and code-compliant. The homeowner also joined our Mr. Electric Advantage Plan, which provides a 15% discount on services and doubles the warranty from one to two years. Now, this home is protected from surges and ready for hassle-free EV charging.
 Kitchen Solvers of Grayslake
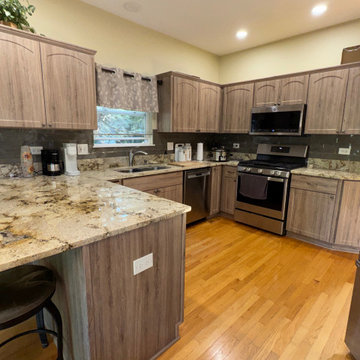
Our clients loved the look of natural wood but felt their honey oak cabinets were starting to feel a bit dated. They weren’t ready for a full remodel, but they knew it was time for an upgrade—and cabinet refacing was the perfect solution! The layout still worked well, but the wall cabinets above the refrigerator needed to be raised to fit a new, taller appliance. The cabinet doors above the fridge couldn’t open fully due to interference from the refrigerator hinge brackets—definitely not ideal. We refaced the cabinets with a Palamino wood tone in a transitional full-overlay style, bringing warmth and a clean, updated look while keeping the wood aesthetic they loved. We also elevated the functionality and style with new solid wood drawers, a rollout drawer next to the oven, elegant brushed pewter hardware with a mix of knobs and pulls and crown molding added where none existed before for a finished, polished look. The homeowners were thrilled and told us, “Everything looks perfect.”
 THE Remodel Group
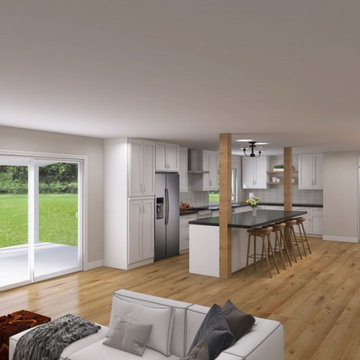
Built in the 1970s by a hardworking family patriarch, this Portland-area ranch home had been the backdrop for generations of memories. When the homeowners inherited the property from their grandparents, they saw an opportunity to honor its history while creating a modern sanctuary for their growing family. Through a thoughtful whole-home renovation, this once dark and compartmentalized ranch was transformed into a bright, open, and welcoming home designed for the next generation.
With a toddler at home and another child on the way, the family's goal was to create spaces that felt connected, functional, and built to last. The heart of the renovation centered on opening the home's main living areas, replacing disconnected rooms with a spacious open-concept kitchen and living room designed for gathering and everyday life. Enlarged windows flood the interior with natural light, while carefully selected finishes bring warmth, durability, and timeless appeal.
The kitchen became the focal point of the transformation. Stock cabinetry was elevated through custom details including floating wood shelves and stained wood-wrapped columns that add warmth and character. At the center, a striking quartz island serves as both a gathering place and a clever structural solution, seamlessly incorporating support elements required for the newly opened floor plan.
Creating this open-concept layout required significant structural modifications, including the removal of six walls, three of them load-bearing. Engineered beams were recessed into the ceiling to maintain clean sightlines, while new footings were carefully installed within the crawlspace to support the redistributed loads. Additional improvements included relocating the furnace to eliminate a major circulation obstacle and installing a new garage access door that required modifications to the existing foundation.
Throughout the project, thoughtful planning helped maximize both budget and performance. Luxury vinyl plank flooring provides the look of hardwood while standing up to children and large pets, while stain-resistant carpeting offers comfort in the bedrooms. Existing window locations were retained and enlarged to increase natural light without the expense of major structural changes. Even the structural columns required for the new beams were integrated into the island design, transforming a necessity into an architectural feature.
Completed two weeks ahead of schedule, this Portland metro ranch remodel demonstrates how thoughtful design-build remodeling can preserve a home's heritage while adapting it for modern family living. Through strategic planning, creative problem-solving, and quality craftsmanship, a beloved family home was transformed into a bright, functional retreat ready to create decades of new memories.
 Kitchen Solvers of Spring Hill
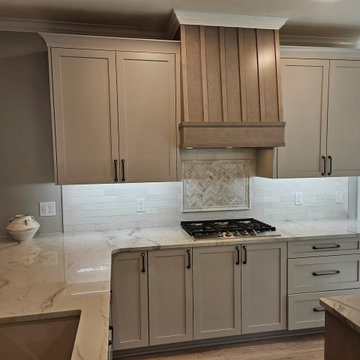
We started working with these clients over a year ago and after several other projects were completed, they were ready to upgrade the kitchen to match what they had created with the rest of the house. Though we didn’t change the layout much we improved upon every aspect of it. From removing the massive shallow pantries for a more functional one with roll-out trays, and better utilized island with drawers and a pull-out trash, removed the bar top, added a dry bar for better use of the eating area and their beloved coffee, shifted all the base cabinets to maximize every square inch of space, and a custom build hood with a removable front panel! What was once dull and boring is not warm and welcoming with luxurious touches!
 Kitchen Solvers of Spring Hill
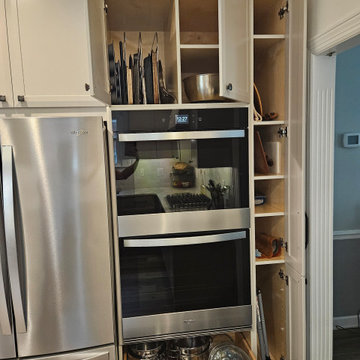
This project was more of an overhaul for this family with replacing all the floors in the first level which made all the difference in the whole feel of their home. They were so ready to create the kitchen of their dreams after not being able to have more than 1 person working in the kitchen area thinking they would have to blow out several walls to make it feel more spacious. With some crazy hairbrained ideas from her mom, Andy was able to use his engineering brain and skills to modify the walls and a closet from the next room to build that hidden walk-in pantry. Marty guided them through the door and color selection, helped select flooring, and assisted in finding and loving the perfect countertops. The partnership through the design process ensured every square inch was planned for and utilized in the best possible way.
 Kitchen Solvers of South Bend
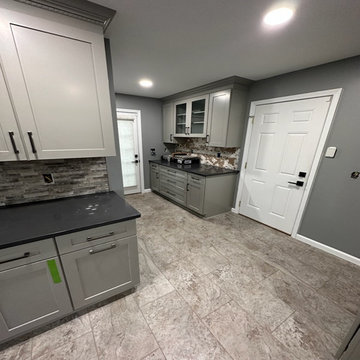
For this kitchen remodeling project, the homeowners were looking to give their kitchen a more modern and unique look. We started this remodel by tearing out the old cabinets and countertops to get the space ready. We then installed all new cabinets done in our Catalina door in a pebble gray color. For the countertop, they went with the Cambria Fieldstone quartz countertop. For the island they went with cabinets in a Slate color, while the countertop was done in an Ella quartz countertop. To finish this remodel, we installed a new luxury vinyl plank floor in slate gray. Now this is truly a show stopping kitchen.
 Kitchen Solvers of Grayslake
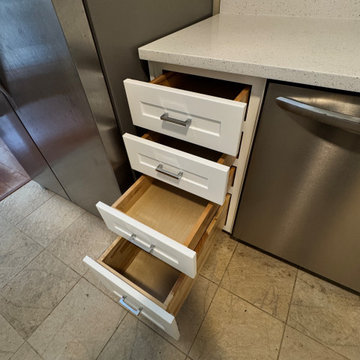
This Grayslake homeowner was ready for a kitchen update that felt fresh, functional, and timeless—without the need for a full tear-out. Using a hybrid approach that combined cabinet refacing with new cabinetry, we transformed the space into a beautiful transitional kitchen that blends modern simplicity with classic appeal.
The kitchen features a clean Shaker door style in a stunning Nordic SuperMatte finish, paired with Sparkling White quartz countertops for a bright, sophisticated look. To improve both the layout and functionality, we removed an existing pantry cabinet and added new upper and lower cabinets, creating valuable countertop workspace near the range.
Functionality was just as important as style. We installed all-new solid wood, dovetail drawers with heavy-duty undermount glides, providing smoother operation, better organization, and long-lasting durability.
The result is a kitchen that looks completely transformed, functions better every day, and reflects the homeowner's style—all without the cost and disruption of a full remodel.
 Kitchen Solvers of Spring Hill
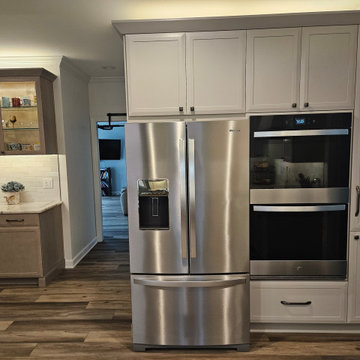
This project was more of an overhaul for this family with replacing all the floors in the first level which made all the difference in the whole feel of their home. They were so ready to create the kitchen of their dreams after not being able to have more than 1 person working in the kitchen area thinking they would have to blow out several walls to make it feel more spacious. With some crazy hairbrained ideas from her mom, Andy was able to use his engineering brain and skills to modify the walls and a closet from the next room to build that hidden walk-in pantry. Marty guided them through the door and color selection, helped select flooring, and assisted in finding and loving the perfect countertops. The partnership through the design process ensured every square inch was planned for and utilized in the best possible way.
 Tile Doctor Ltd
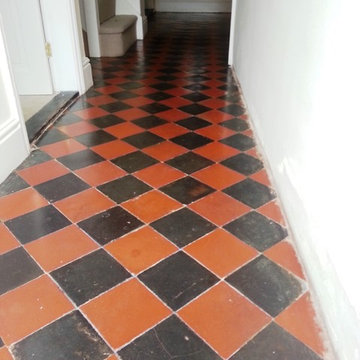
Details below of a restorative clean and seal that I recently completed on a Quarry tiled hallway at a house in the small village of Riseley, North Bedfordshire.
The floor was a mix of fantastic black and red tiles; however, it had lost its character after a long period without professional maintenance. My client commissioned me to strip off the old sealer from the floor and replace it, but not before providing a thorough clean, including tackling some adhesive staining and inherent grout haze.
The first task involved mixing our high alkaline cleaner, known as Tile Doctor Pro-Clean, with water to form a strong solution. The solution was applied to the tiled floor and left to dwell for a short period. This dwelling time allows for the Pro-Clean to seep into the stone to get underneath the ingrained dirt and lift it out. Pro-Clean also contains stripping properties, and thus helped to break down the old (and now ineffectual) sealer.
After completing this initial clean I rinsed the floor using a standard mop and bucket method. With the old sealer removed, it became evident that there was also plaster residue marking the tiles, as well as inherent grout haze on the surface of the tile probably from the original installation. To tack these problems I used Tile Doctor Grout Clean-Up, which is an acid-based cleaner that dissolves the adhesive and the grout. Being an acid you have to be careful and ensure the floor is rinsed thoroughly after use and if you’re considering using this product yourself read the label and make sure you use the right protective equipment.
After the floor was thoroughly rinsed with water it was dried as much as possible using a wet vacuum which literally sucks the water off the floor. The floor was then left to dry for four days, with the help of several air movers. By the time I returned to the house, the floor was completely dry and ready to take the seal.
I opted to use a combination of sealers, including one coat of our colour enhancing, impregnating sealer, known as Colour Grow, followed by three coats of Tile Doctor Seal & Go to provide a truly robust and aesthetically pleasing surface seal.
The photographs demonstrate the finished results better than words can and I think you will agree the floor is quite transformed.
Andrew Evans
Bedfordshire Tile Doctor
34