
Search results for "Problem solvers ready" in Home Design Ideas
 Sheedy Watts Design
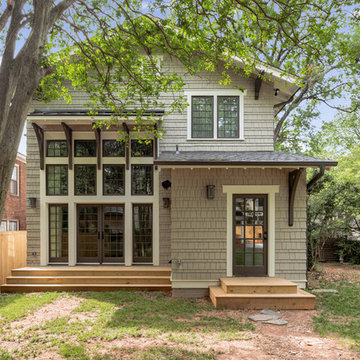
Ready to start a family, the owners began this project with the hope of correcting problems from previous renovations, while looking to gain an open kitchen, upstairs bedrooms and a carport with storage.
The recipe for fixing low ceilings and a dead-end kitchen, low ceilings was a two-story addition to the rear that features a double-height ceiling, great room, open staircase and a small mudroom at the back.
Interior finishes were selected to compliment the home’s original feel while exterior elements like cedar shingles, brackets and a tall window wall create an inviting facade for the family’s entrance and connects the interior with views to the backyard.
Photo credit: Joe Purvis
 Premier Design-Build-Remodel
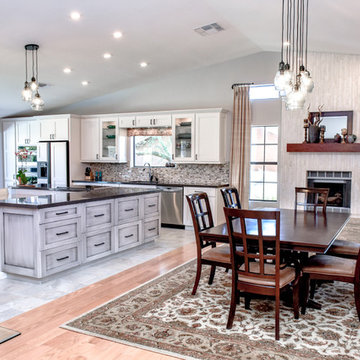
Just completed this Beauty in Fountain Hills! This loving couple is living in a beautiful house at the top of a hill, with a beautiful view. The only problem was that you couldn’t see the view....click below to read more and see full pictures of this remodel.
Contact us today to create your dream remodel! Our designers are ready to meet with you to really listen to your vision.
https://premierkitchenandbath.com/fountainhillsbeauty
#Omega #Amerock #ArizonaTile #Ferguson #DynastyCabinets #OysterPaint #SilestoneQuartz #CustomKitchenRemodel #PremierKitchenandBath #LauraCaseyDesigner #FountainHillsBeauty #Cosentino
Photo Credit: Alicia Villarreal
 TVL Creative Ltd.
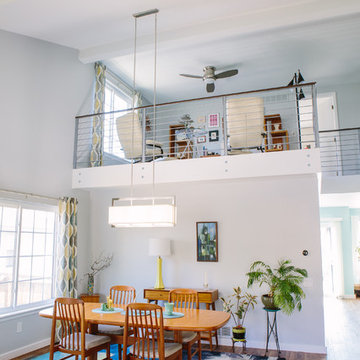
We were excited to take on this full home remodel with our Arvada clients! They have been living in their home for years, and were ready to delve into some major construction to make their home a perfect fit. This home had a lot of its original 1970s features, and we were able to work together to make updates throughout their home to make it fit their more modern tastes. We started by lowering their raised living room to make it level with the rest of their first floor; this not only removed a major tripping hazard, but also gave them a lot more flexibility when it came to placing furniture. To make their newly leveled first floor feel more cohesive we also replaced their mixed flooring with a gorgeous engineered wood flooring throughout the whole first floor. But the second floor wasn’t left out, we also updated their carpet with a subtle patterned grey beauty that tied in with the colors we utilized on the first floor. New taller baseboards throughout their entire home also helped to unify the spaces and brought the update full circle. One of the most dramatic changes we made was to take down all of the original wood railings and replace them custom steel railings. Our goal was to design a staircase that felt lighter and created less of a visual barrier between spaces. We painted the existing stringer a crisp white, and to balance out the cool steel finish, we opted for a wooden handrail. We also replaced the original carpet wrapped steps with dark wooden steps that coordinate with the finish of the handrail. Lighting has a major impact on how we feel about the space we’re in, and we took on this home’s lighting problems head on. By adding recessed lighting to the family room, and replacing all of the light fixtures on the first floor we were able to create more even lighting throughout their home as well as add in a few fun accents in the dining room and stairwell. To update the fireplace in the family room we replaced the original mantel with a dark solid wood beam to clean up the lines of the fireplace. We also replaced the original mirrored gold doors with a more contemporary dark steel finished to help them blend in better. The clients also wanted to tackle their powder room, and already had a beautiful new vanity selected, so we were able to design the rest of the space around it. Our favorite touch was the new accent tile installed from floor to ceiling behind the vanity adding a touch of texture and a clear focal point to the space. Little changes like replacing all of their door hardware, removing the popcorn ceiling, painting the walls, and updating the wet bar by painting the cabinets and installing a new quartz counter went a long way towards making this home a perfect fit for our clients.
Find the right local pro for your project
 Premier Design-Build-Remodel
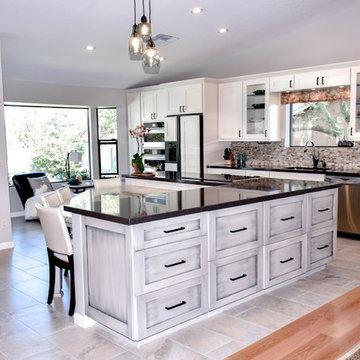
Just completed this Beauty in Fountain Hills! This loving couple is living in a beautiful house at the top of a hill, with a beautiful view. The only problem was that you couldn’t see the view....click below to read more and see full pictures of this remodel.
Contact us today to create your dream remodel! Our designers are ready to meet with you to really listen to your vision.
https://premierkitchenandbath.com/fountainhillsbeauty
#Omega #Amerock #ArizonaTile #Ferguson #DynastyCabinets #OysterPaint #SilestoneQuartz #CustomKitchenRemodel #PremierKitchenandBath #LauraCaseyDesigner #FountainHillsBeauty #Cosentino
Photo Credit: Alicia Villarreal
 Kitchen Solvers of the Gulf Coast
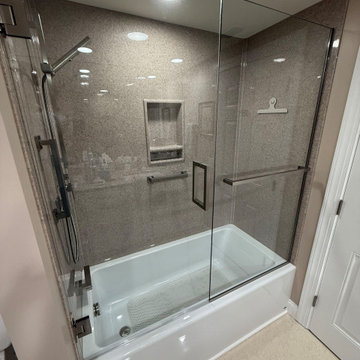
This customer was ready for a bathroom refresh, and we were excited to help them bring their vision to life. They chose to keep things simple yet elegant with a vanity reface, new Onyx countertop with integrated sinks, and a new tub and shower. For the shower, we installed the Onyx panel system in the same Henna color as the countertop, creating a warm, cohesive look throughout the space.
To complement the rich Henna tones, the homeowners painted the walls a darker shade, which beautifully highlighted the Cashmere finish of the vanity. They also had a great time selecting the towel bars and accessories to add their personal touch.
Another happy customer, and another bathroom transformed!
 Kitchen Solvers of Sandy Springs
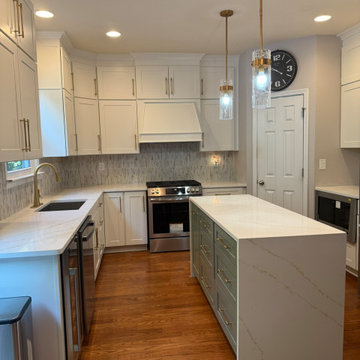
Our clients were ready to give their kitchen a fresh, updated look, so we began by removing the existing cabinets, countertops, and backsplash. They chose to install all-new cabinetry throughout the space, featuring Shell-colored perimeter cabinets paired with a beautiful Sage-colored island for added contrast and character.
To complete the transformation, we installed Calacatta Golden Bianca quartz countertops, including a stunning waterfall edge on the island, and finished the design with an elegant Eterna Calacatta 5x10 backsplash. The result is a bright, sophisticated kitchen that blends timeless style with modern functionality.
 Florida Green Construction Inc.
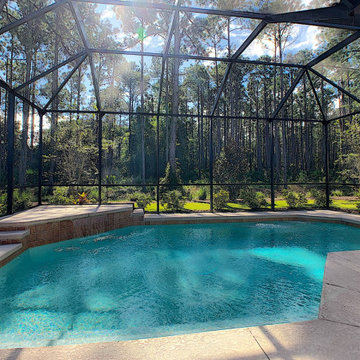
LUXURY BUILDER’S MODEL HOME FOR SALE
Save approx. $30,000 or more over 10 years in this Green home. Plus, continued savings over the lifetime of your home.
GRAND AWARD AND GRAND REALTORS CHOICE AWARD FROM THE PARADE OF HOMES 2017
ESTIMATED HOMEOWNERS’ MONTHLY EXPENSES TO LIVE IN THIS GREEN HOME.
Your monthly utility bills for electricity and water are about $ 150 per month. Homeowners’ insurance about $ 60 per month. Total of all your required payments are approximately $ 210 per month in this home.
You will live without financial problems in this elegant, economical and healthy to live in luxury home, in a certified Green City Palm Coast with a comfortable climate and a clean environment.
If you are not ready to move, we provide full-service property management for you.
 Kitchen Solvers of Miami
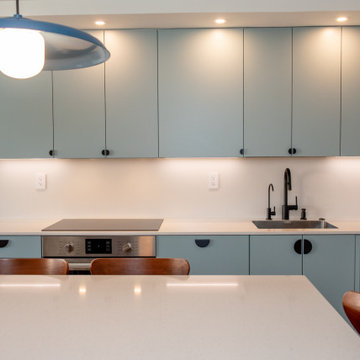
This was an interesting kitchen remodel as we opened the walls and remove the soffit to make the space taller at the same height of the rest of the apartment. We installed new custom cabinets from Bellmont Cabinets 1900 series. The cabinets by the stove were done in the Seaside door style in Aqua while the rest of the cabinets were done in the Porta door in Mocaccino-Matte. We next installed a new Quartz COMPAC countertop and backsplash in Luna for the kitchen while the countertop for the island was done in Moon. We placed a cable lamp on top of the island so that we didn’t have to keep the soffit. All appliances are panel ready flush installed. We also installed a tall blind corner pullout, a dish drying rack inside a cabinet and a special closet to conceal washer/dryer with sensor lights inside. To finish the new look we installed black Matte faucets and black half moon handles and pulls.
 Kitchen Solvers of North Raleigh
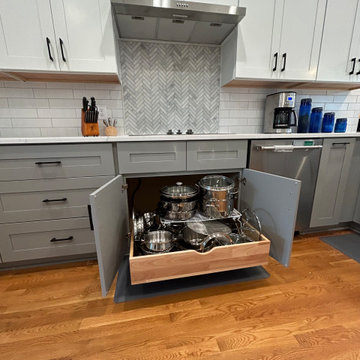
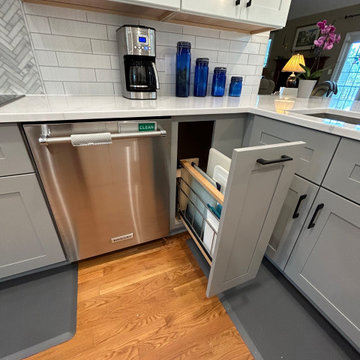
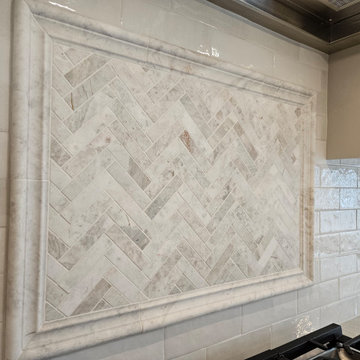
For this kitchen remodeling project, the homeowner wanted to change the look of their kitchen while also adding more storage space. We got busy tearing out the existing cabinets, countertops and backsplash to get the space ready for the new cabinets. They went with a shaker door for the entire kitchen. For the perimeter and wall cabinets they went with a polar white color, while the peninsula and base cabinets were done in a pebble gray color. For the backsplash, they decided to go with a linear white subway tile for the perimeter walls and a white herringbone for the stove/vent area. To pull the new look together, they went with the Sterling quartz countertop. To finish this kitchen transformation, we added several new storage solution items like a tray divider, a mixer, trash can, and pantry pullouts. Now these homeowners have the kitchen they have been dreaming of.
 Kitchen Solvers of Spring Hill
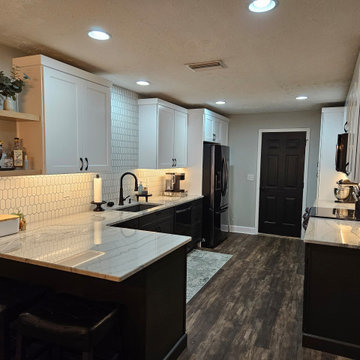
This lovely young engaged couple who love to entertain had had enough of the older, non-functional, DIY painted Formica countertop kitchen and were ready to have their kitchen match the rest of their beautifully decorated home. Wanting more bang for their buck and a showstopper countertop they made smart choices with the Catalina door so they could splurge on the amazing quartzite that matched their color choices perfectly which led to the perfect tile falling into place. To make the kitchen really pop, they did the upper cabinets in a white color, while the lowers were done in a slate color. The handy homeowners decided to install a new Tranquility in rustic reclaimed oak floor themselves. With tearing out the closet pantry, adding two pantry cabinets, roll-out trays, pushing the peninsula out, moving the fridge, and adding just the right storage solutions they now have the perfect space for entertaining. Not to mention adding the perfect décor!
 Kitchen Solvers of Spring Hill
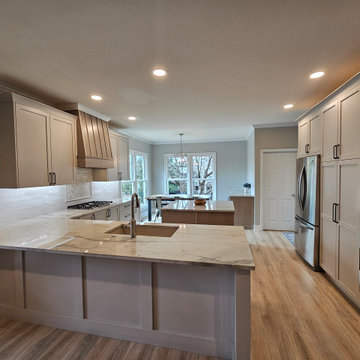
We started working with these clients over a year ago and after several other projects were completed, they were ready to upgrade the kitchen to match what they had created with the rest of the house. Though we didn’t change the layout much we improved upon every aspect of it. From removing the massive shallow pantries for a more functional one with roll-out trays, and better utilized island with drawers and a pull-out trash, removed the bar top, added a dry bar for better use of the eating area and their beloved coffee, shifted all the base cabinets to maximize every square inch of space, and a custom build hood with a removable front panel! What was once dull and boring is not warm and welcoming with luxurious touches!
 Kitchen Solvers of Grayslake
Our homeowner wanted a fresh, modern update—and we delivered! She had previously painted her kitchen cabinets in Snow White, and we matched the color perfectly for her brand-new doors and drawer fronts. Her old external hinges and traditional shaker style were ready for a glow-up, so we introduced her to the Slim Shaker door style—clean lines with just the right amount of detail. She instantly fell in love. We also upgraded her kitchen with soft-close hinges for a quieter, more refined feel - she couldn’t wait to try them out! And best of all? We completed this entire redooring project in just one day.
 Kitchen Solvers of Spring Hill
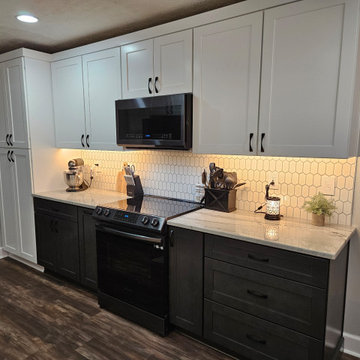
This lovely young engaged couple who love to entertain had had enough of the older, non-functional, DIY painted Formica countertop kitchen and were ready to have their kitchen match the rest of their beautifully decorated home. Wanting more bang for their buck and a showstopper countertop they made smart choices with the Catalina door so they could splurge on the amazing quartzite that matched their color choices perfectly which led to the perfect tile falling into place. To make the kitchen really pop, they did the upper cabinets in a white color, while the lowers were done in a slate color. The handy homeowners decided to install a new Tranquility in rustic reclaimed oak floor themselves. With tearing out the closet pantry, adding two pantry cabinets, roll-out trays, pushing the peninsula out, moving the fridge, and adding just the right storage solutions they now have the perfect space for entertaining. Not to mention adding the perfect décor!
 Florida Green Construction Inc.
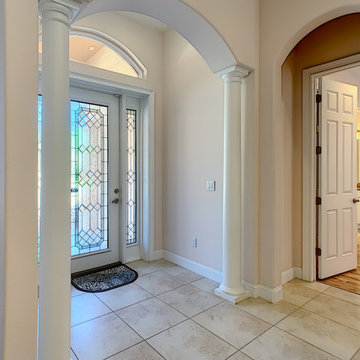
LUXURY BUILDER’S MODEL HOME FOR SALE
Save approx. $30,000 or more over 10 years in this Green home. Plus, continued savings over the lifetime of your home.
GRAND AWARD AND GRAND REALTORS CHOICE AWARD FROM THE PARADE OF HOMES 2017
ESTIMATED HOMEOWNERS’ MONTHLY EXPENSES TO LIVE IN THIS GREEN HOME.
Your monthly utility bills for electricity and water are about $ 150 per month. Homeowners’ insurance about $ 60 per month. Total of all your required payments are approximately $ 210 per month in this home.
You will live without financial problems in this elegant, economical and healthy to live in luxury home, in a certified Green City Palm Coast with a comfortable climate and a clean environment.
If you are not ready to move, we provide full-service property management for you.
 Kitchen Solvers of North Raleigh
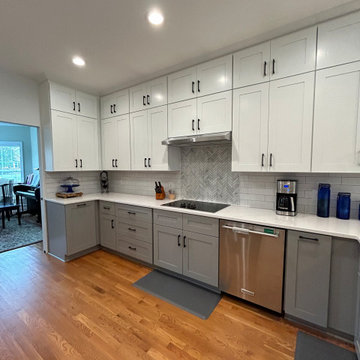
For this kitchen remodeling project, the homeowner wanted to change the look of their kitchen while also adding more storage space. We got busy tearing out the existing cabinets, countertops and backsplash to get the space ready for the new cabinets. They went with a shaker door for the entire kitchen. For the perimeter and wall cabinets they went with a polar white color, while the peninsula and base cabinets were done in a pebble gray color. For the backsplash, they decided to go with a linear white subway tile for the perimeter walls and a white herringbone for the stove/vent area. To pull the new look together, they went with the Sterling quartz countertop. To finish this kitchen transformation, we added several new storage solution items like a tray divider, a mixer, trash can, and pantry pullouts. Now these homeowners have the kitchen they have been dreaming of.
 Kitchen Solvers of Rochester
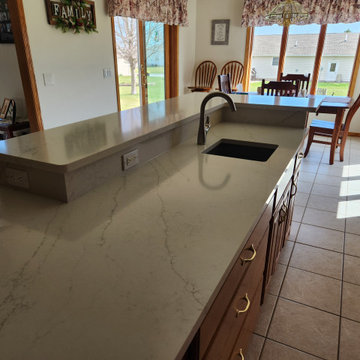
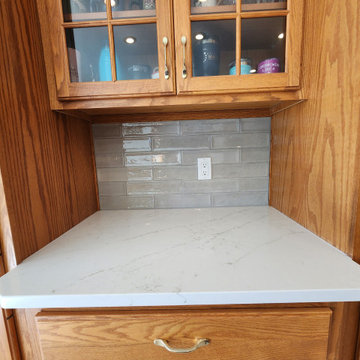
Our clients contacted us to help them update their kitchen. They wanted to first update the countertops, while also adding a backsplash and pullout drawers to their existing pantries. Some of their existing drawers were falling apart and they wanted to update those to soft closed drawer boxes as well. There was also an old appliance garage that they no longer used and wanted to know what we could do to remove that. We proposed to remove the existing cabinet and cut the appliance garage down. This really opened up the space for them, which they loved. We were now ready to install a new Calacatta Lucia quartz countertop and a Raku silver glossy tile backsplash. We also replaced the main and prep sink with new concrete undermount sinks. To finish this transformation, we installed all new dovetailed wood drawer boxes with full-extension undermount soft-close glides in all their existing drawers and the two pantries. Now our homeowners finally have the kitchen of their dreams!
 Kitchen Solvers of North Raleigh
For this kitchen remodeling project, the homeowner wanted to change the look of their kitchen while also adding more storage space. We got busy tearing out the existing cabinets, countertops and backsplash to get the space ready for the new cabinets. They went with a shaker door for the entire kitchen. For the perimeter and wall cabinets they went with a polar white color, while the peninsula and base cabinets were done in a pebble gray color. For the backsplash, they decided to go with a linear white subway tile for the perimeter walls and a white herringbone for the stove/vent area. To pull the new look together, they went with the Sterling quartz countertop. To finish this kitchen transformation, we added several new storage solution items like a tray divider, a mixer, trash can, and pantry pullouts. Now these homeowners have the kitchen they have been dreaming of.
 Kitchen Solvers of Rochester
Our clients contacted us to help them update their kitchen. They wanted to first update the countertops, while also adding a backsplash and pullout drawers to their existing pantries. Some of their existing drawers were falling apart and they wanted to update those to soft closed drawer boxes as well. There was also an old appliance garage that they no longer used and wanted to know what we could do to remove that. We proposed to remove the existing cabinet and cut the appliance garage down. This really opened up the space for them, which they loved. We were now ready to install a new Calacatta Lucia quartz countertop and a Raku silver glossy tile backsplash. We also replaced the main and prep sink with new concrete undermount sinks. To finish this transformation, we installed all new dovetailed wood drawer boxes with full-extension undermount soft-close glides in all their existing drawers and the two pantries. Now our homeowners finally have the kitchen of their dreams!
 Kitchen Solvers of Spring Hill
We started working with these clients over a year ago and after several other projects were completed, they were ready to upgrade the kitchen to match what they had created with the rest of the house. Though we didn’t change the layout much we improved upon every aspect of it. From removing the massive shallow pantries for a more functional one with roll-out trays, and better utilized island with drawers and a pull-out trash, removed the bar top, added a dry bar for better use of the eating area and their beloved coffee, shifted all the base cabinets to maximize every square inch of space, and a custom build hood with a removable front panel! What was once dull and boring is not warm and welcoming with luxurious touches!
 Tile Doctor Ltd
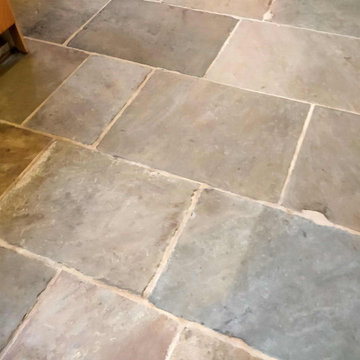
The owner of this period cottage in the old market town of Tadcaster near Leeds, had what was once a beautiful Yorkshire stone floor in the kitchen. It has been a long time since it had been given a proper clean so over the years and with the Kitchen being a high traffic area the whole floor including the grout had darkened and he now wanted it refurbished in time for Christmas.
I visited the property to assess what needed to be done and could see straight away that any protective sealer that was once on the floor had long since worn off. In fact, it was so consistently dirty with years of built-up grease and dirt I had to wonder if one had ever been applied.
I explained what the floor needed was a really deep intensive clean and then a sealer applied to make it easy to keep clean. The problem with most tile and stone is its porosity and if left unprotected dirt easily becomes lodged into its pores making cleaning a struggle.
To prove the difference that can be achieved and to allow me to work out a process on which I could base an accurate quote I ran a test clean on part of the kitchen floor. The test clean went very well, the difference was remarkable, and the cleaned section really stood out. Pleased with the potential of a clean floor they accepted my quote, and we pencilled a date in the diary.
I returned on the appointed date and began by removing the kickboards from under the kitchen units to protect them from splashing. Next, I set about spaying the floor with a strong dilution of Tile Doctor Pro-Clean, this is a purpose made tile and grout cleaner that eats into the grease and dirt so it can be removed. This product works best if you leave it for ten minutes before scrubbing in using a heavy-duty machine fitted with a heavy-duty brush. The soil released from the floor was then extracted using a wet vacuum.
The Pro-Clean did a good job on the grout however it was clear something stronger was required to really get the stone clean, so I stepped up a gear and applied Tile Doctor Remove and Go using the same process as before. This is a really good product for removing deeply ingrained grease and dirt.
The final step of the cleaning process was to give the stone and acid wash using Tile Doctor Grout Clean-Up to remove old grout haze and other mineral deposits; additionally, being an acidic product, it counters the alkaline cleaning products used earlier neutralising the pH level of the floor and leaving it ready for sealing.
Before sealing I like to discuss the different products available and the finishes they can provide. In this case my clients’ main concerns were that they wanted the stone to look natural and easy to maintain going forward.
With this in mind, Tile Doctor Seal & Go Extra was chosen, it’s a modern acrylic-based sealer that brings out the natural colours in the stone and gives a very slight smooth finish. The protection it provides will prevent dirt becoming ingrained int the pores of the stone and ensure the floor is easier to maintain. Several coats were applied, until we achieved the required finish.
The deep cleaning process and fresh sealer transformed the stone floor bringing out its original beauty and my customer couldn’t believe the difference in the floor and was highly delighted.
For aftercare I gave the client a bottle of Tile Doctor Neutral Cleaner, this product is pH neutral so it will clean the floor but won’t damage the sealer. Often people use household cleaners for cleaning tiled floors, but due to the strong chemicals they contain, they can do more harm than good by slowly stripping away the protective sealer and taking the floor back to square one. Tile Doctor Neutral Tile Cleaner is reasonably priced, and the concentrated formula means a small amount goes a long way so it’s well worth using.
This was a pleasurable job for me as it was good to see the floor transform from dull and lifeless to clean and showing the natural colour and beauty of the York stone, and always lovely to have another satisfied client.
Simon Testa
North East Yorkshire Tile Doctor
37