
Search results for "Sealing" in Home Design Ideas

 SabaRehman Abdulrehman
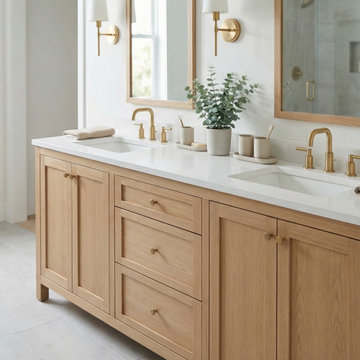
Morning routines shouldn’t involve a traffic jam at the sink. The 2025 Houzz Bathroom Trends Study found that 65 percent of U.S. renovators now choose a double-sink vanity to skip the wait. Designers agree: Titan Builders dubbed 2025 “the year of bigger, storage-packed double vanities,” forecasting dual-basin setups in family, guest, and even powder baths. As KBIS 2025 launches land, prototypes for 2026 layer in spa-grade wood, built-in outlets, and planet-friendly finishes. In this guide, we rank six standout models and show you how to size, install, and enjoy a clutter-free, two-sink future.
Methodology and selection criteria
A well-planned double-sink vanity keeps busy morning routines calm and clutter-free.
Before we crowned any winners, we mapped the entire 2024–2026 double-sink (dual-basin) market. That meant parsing KBIS exhibitor releases, scraping bestseller lists from Home Depot, Lowe’s, and Wayfair, and reviewing designer short lists in trade magazines. The sweep produced 110 candidate vanities, giving us visibility into every style, price tier, and material in play.
We then scored each model against six weighted factors that continue to matter long after installers leave:
- Build quality – 25 percent.Solid hardwood frames, dovetail drawers, and furniture-grade plywood backs, never particleboard in disguise.
- Design versatility – 20 percent.Lines and finishes that suit modern, classic, or farmhouse baths without dating quickly.
- Sustainability – 15 percent.FSC-certified wood, CARB 2 compliance, and low-VOC finishes for healthier air.
- Storage efficiency – 15 percent.Deep drawers, tilt-outs, or power cubbies that corral countertop clutter.
- Value for money – 15 percent.Fair street price for the materials, stone tops, sinks, and soft-close hardware included.
- Brand reputation and warranty – 10 percent.Manufacturers with responsive support and at least a one-year parts guarantee.
- Footprint: 72 W × 22 D × 36 H in. (183 × 56 × 91 cm)
- Crated weight: 506 lb / 230 kg
- Street price: about $2,575 with marble top and basins, Q4 2025
- Footprint: 48 W × 22 D in. (122 × 56 cm)
- Height: 34.8 in. (88 cm) with backsplash
- Sliding barn door plus 3 drawers
- Pre-drilled 8-in. faucet spacing, sinks included
- Footprint: 60 W × 21 D × 34 H in. (152 × 53 × 86 cm)
- Integrated power: 4 AC + 2 USB, UL-listed
- Crated weight: 300 lb / 136 kg
- Street price: about $2,349 at Home Depot, Q4 2025
- Footprint: 72 W × 22 D in. (183 × 56 cm)
- Height: 34 in. (86 cm) plus 4 in. backsplash
- Counter: 1 in. Carrara marble, apron-front sinks included
- Hardware: oil-rubbed bronze, soft-close doors and drawers
- Footprint: 60 W × 22 D × 34 H in. (152 × 56 × 86 cm)
- Construction: solid poplar and plywood, waterfall quartz top
- Integrated slim power bank, soft-close doors and drawers
- Target price: just under $2,300 with top and basins
Find the right local pro for your project
 LeMaster Architects
New construction, completed in 2013
Photograph by Geoff Captain Studios
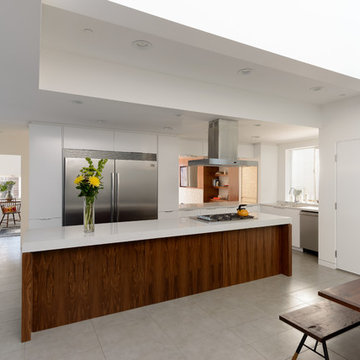
Trendy eat-in kitchen photo in Los Angeles with flat-panel cabinets, white cabinets and stainless steel appliances
Trendy eat-in kitchen photo in Los Angeles with flat-panel cabinets, white cabinets and stainless steel appliances
 Tile Doctor Ltd
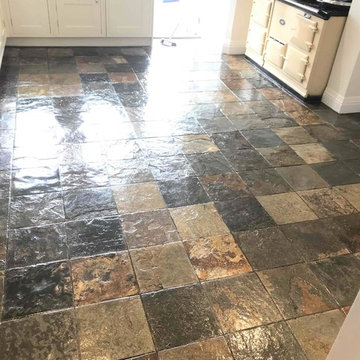
I recently completed the renovation of a Multi-Coloured Slate tiled kitchen floor in Sutton Coldfield. I was actually at the property before Christmas to survey the floor and quote for the work however the owners had planned to have a new kitchen installed in the new year, so we decided it was best for me to wait until after the installation to complete the work.
The slate was in good condition but like any stone floor you do need to maintain the sealer to prevent dirt becoming ingrained in the stone. Sealer do wear off overtime especially in the high foot traffic areas such as Kitchens and within a few years the tiles become dull and difficult to clean effectively.
The kitchen was installed on schedule and I got the call to arrange a visit to deep clean and reseal the floor which would take to two days, one to clean and one to seal.
To begin the restoration, I soaked the slate in a strong dilution of Tile Doctor Pro-Clean and left it to soak in for about ten minutes re-applying extra solution where it dried. Pro-Clean is a powerful tile cleaner that will strip old sealers when applied in concentrated form. I agitated the product using a black pad fitted to a rotary buffing machine. I paid particular attention to the grout which the customer had trouble keeping clean. The rotary pad struggles to reach into the recesses of the grout lines so I also made sure to scrub the solution into the grout with a grout brush.
Once I was satisfied that the Slate and the Grout was clean and clear of old sealers, I gave the whole floor a thorough rinse with water using a wet vacuum to extract the soil and get the floor as dry as possible. The floor was then left to dry off fully overnight.
Returning to the property the next day, I ran some quick damp tests to check for any excess moisture that might have prevented me from sealing the floor. We will always do this as excess moisture can affect the sealer curing.
The customer was very happy with the clean and the floor was dry, so we discussed sealer options to find out their preference for Matt or Satin finish. With the decision made to go with a Satin finish I began the application of the Tile Doctor Seal and Go which enhances the look of the stone with an aesthetically pleasing low-sheen finish, as well as providing on-going protection against ingrained dirt and staining.
A total of four coats of Seal and Go were needed to seal the Slate tiles and as you can see from the photos the sealer really put the life back into the floor.
Trevor Preece
Staffordshire Tile Doctor

 Bristol County Sealing Company
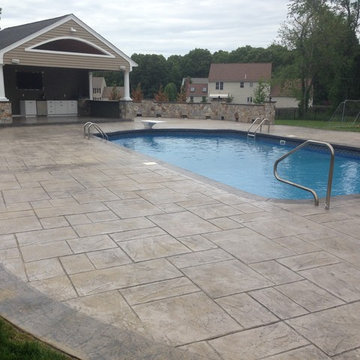
Large elegant backyard stamped concrete and rectangular pool house photo in Providence

Sponsored
Delaware, OH

Buckeye Basements, Inc.
Central Ohio's Basement Finishing ExpertsBest Of Houzz '13-'21
 Universal Appliance and Kitchen Center
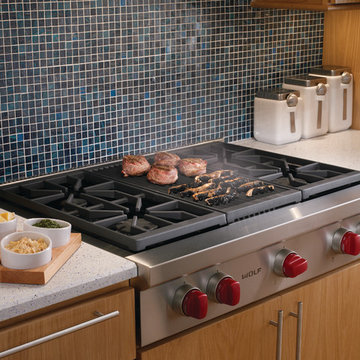
Wolf 36" Sealed Burner Rangetop, Four Burners, Charbroiler, Dual-Stacked Sealed Surface Burners, Stainless Steel, Island Trim, Red Knobs, SRT364C
Inspiration for a contemporary kitchen remodel in Los Angeles
Inspiration for a contemporary kitchen remodel in Los Angeles
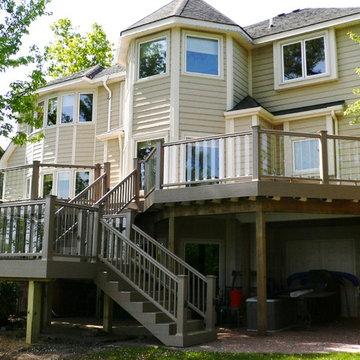
 Ogne Remodeling & Roofing
Seal It Green Xtreme Composite Sealer
Seal It Green Composite Deck Clean
Link for Composite Sealer: http://sealitgreen.com/cid-18-1/xtreme-composite-sealants.html
Link for Composite Deck Clean: http://sealitgreen.com/pid-21/composite-deck-clean.html


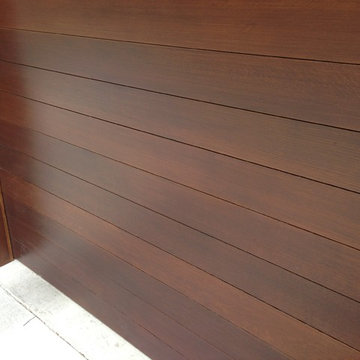
 Cowart Door Systems
Clean lines are essential elements in contemporary or modern home design.
So is a clean garage.
Look at the intersection of the quarter sawn white oak garage door & jamb. Imagine how different it would look with standard garage door perimeter seal.
Call today to discuss how we create this detail and also seal the door.
 WC Design Center
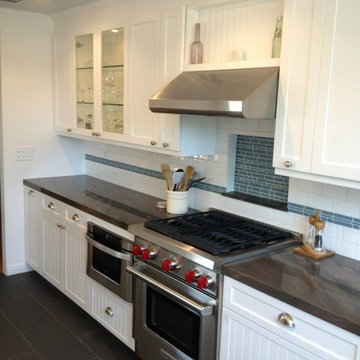
With this kitchen we wanted to keep it light, bright and beachy. So we used a beadboard cabinet on the bottom but left a simple shaker on top to keep from becoming overwhelming. We added a lot of glass features to make it look large and open. We installed a large bay window to supply even more outdoor light and last but not least used a gorgeous ocean looking granite to really tie in that beachy feeling.
 We Make It Our Home
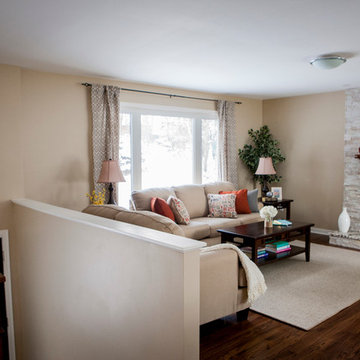
The wall between the living room and the staircase was partially removed to create a half a wall opening up the space.
The fireplace was updated with floor-to-ceiling natural stone tiles.
The floor is original to the home and is white oak. We resurfaced the floor with with a mixture of the DuraSeal® Coffee brown and the Spice brown.
Wall Color: shaker beige HC-45 Paint - Benjamin Moore & Co.
Floor stain: Oak wood with the mixture of DuraSeal spice brown stain and DuraSeal coffee brown stain
Window trims and baseboards: cloud white 967 Paint - Benjamin Moore & Co
Fireplace granite: bianco antico granite
Floor to ceiling natural stone mosaic tile around fireplace: ErthCOVERINGS Cream Quartzite 40F.
 ARTO
ARTOUp Close & Personal
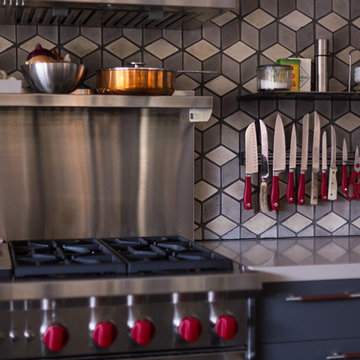
Example of a large 1950s galley kitchen design in Los Angeles with an undermount sink, flat-panel cabinets, gray cabinets, multicolored backsplash, stainless steel appliances and an island
Example of a large 1950s galley kitchen design in Los Angeles with an undermount sink, flat-panel cabinets, gray cabinets, multicolored backsplash, stainless steel appliances and an island

 a Blade of Grass
Pull through chip seal driveway with cobble apron and edging.
Elegant exterior home photo in Boston
Elegant exterior home photo in Boston
 Living with Lolo
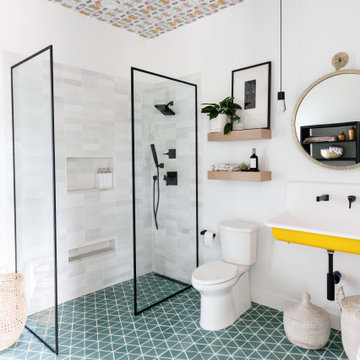
Bathroom in Fairway Drive | Room Type: Whole House Furnishing and Remodel-4 bed, 4 bath, 4293 square feet.
Project Name:
Fairway Drive |
Key Feature:
A full-scale renovation focused on transforming the bathrooms and kitchen while creating a cohesive, modern space designed for the entire family to enjoy.
Challenge:
The guest bathroom tile had not been properly sealed, which led to water staining over time.
Solution:
We coordinated directly with the vendor to source replacement tile and brought in a trusted subcontractor to ensure proper installation and sealing, preventing future issues and restoring the integrity of the space.
Materials:
Furniture: Ethnicraft, Four Hands, Nuevo Living |
Art: Leftbank |
Drapery: Kravet |
Ferguson- Bath hardware and plumbing |
Budget:
$200K–$350K |
Timeline:
Completed July 2021
 Tile Doctor Ltd
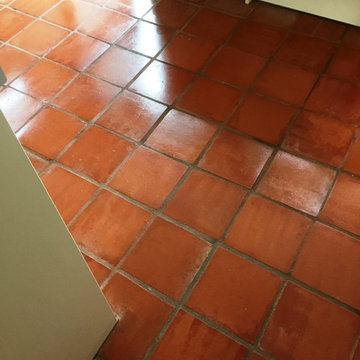
Newly built properties are not without their problems and often take a while to resolve all the snagging which occasionally extends to resolving problems with newly laid tiled floors. At this new property in the village of Malvern, and overlooked by the Malvern hills, the builders had left the Terracotta tiled kitchen floor covered in grout smears (also known as Grout Haze) following installation. They had also neglected to seal the tiles, which was actually quite fortunate in this case as they would have sealed in the grout haze, making it more difficult to remove.
Naturally, the property owner wanted the problem to be resolved as soon as possible, and for me to make the tiles easy to keep clean in future, which can be achieved by sealing the tile.
Before starting work, I made sure to fully protect any exposed woodwork with a plastic sheet covering to protect them from potential damage. I then proceeded to give the floor a thorough clean, using Tile Doctor Remove and Go to clean the floor and eradicate some stains that had been left behind as a result of the building work.
Next, I paid special attention to the grout, where the very visible problem of grout haze had arisen. To neutralise these smears I used Tile Doctor Grout Clean Up, a concentrated phosphoric acid cleaner that can also remove alkaline mineral deposits and efflorescence. Grout Clean Up is only to be used on acid resistant stone, as sensitive stone can suffer from irreparable etching if it comes into contact with the product.
Once completely clean and free of grout smears the floor was thoroughly rinsed with water to remove any trace of product and then dried as much as possible with a wet vacuum, afterwards an air mover was installed to speed up the drying process.
Later that afternoon the floor was dry and I was able to apply a sealer. To do this I opted to use several coats of Tile Doctor Seal and Go Extra, a topical, fully breathable sealer that works really well on Terracotta.
The sealer builds up a layer of protection on the surface of the tiles, protecting against ingrained dirt and stains. Seal and Go Extra also provides a high quality sheen finish which really did well to enhance the look of the Terracotta.
The property owner was exceptionally pleased with the results, and to have this problem dealt with quickly and efficiently, additionally the sealer will ensure the Kitchen floor is easy to keep clean in the future.
 Tile Doctor Ltd
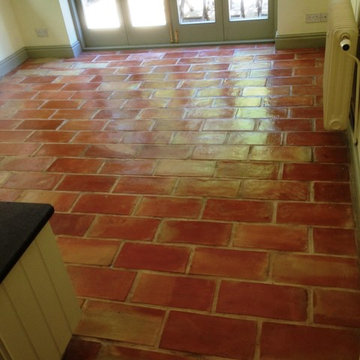
This is an interesting Terracotta brick tiled floor installed in a house in the village of Alderly Edge. The Terracotta tiles were made in a brick shape which was a popular design found in rural buildings in the 19th century. Although the floor was in good condition the sealer was starting to wear off and being clay Terracotta are porous and trap dirt if not sealed. You can see this in the before photograph below where you can see how the grout and Terracotta has darkened with ingrained dirt.
To get the Terracotta tiles clean and free of any remaining sealer I soaked tiles in a strong dilution of Tile Doctor Pro-Clean and left it to dwell for twenty minutes, Pro-Clean is an alkaline product and so safe to use on tiled floors. Then using a large 17inch black scrubbing pad fitted to a rotary machine and a stiff grout brush proceeded to work the cleaning solution into the tile and grout. The now dirty cleaning solution was removed using a wet vacuum and the floor rinsed down with hot water. Some stubborn areas were spot treated using the same process and once happy with the overall condition of the floor the tiles were thoroughly rinsed three times using hot water to remove any trace of cleaning product prior to sealing and then left to dry overnight.
I returned the next day to seal the floor testing it first with a damp meter to make sure it had dried. I then started to seal the tiles and with Terracotta being a very porous material it took eight coats of sealer to do the job. I used Tile Doctor Seal and Go which is a topical sealer that gives Terracotta a subtle gloss finish, it’s also water based so it doesn’t leave a smell as it dries.
 Tile Doctor Ltd
I was contacted about a Georgian property in the Kent village of Leeds , to see if I could do anything to improve a Travertine tiled floor. The use of Travertine was extensive and had been installed throughout the ground floor including the kitchen, dining room, utility and bathroom WC. Travertine is probably my favourite stone, but it is acid sensitive and attracts dirt easily, due to its ‘holey’ composition.
Initially we discussed the floor over the phone where I got to know about the issues they were experiencing, and I detailed the renovation process I normally use to restore it including the products and timelines. Naturally they wanted to me to provide a quote for the work however its tricky to do that accurately without seeing the floor, so I arranged a date to pop over.
Upon arriving I could see the tiles and the wide grout joints had extensive, ingrained dirt indicating the previous sealer had long since worn away. This is a common issue with stone floors, and to re-assure myself and the client it could be resolved I cleaned a small area in the utility room with pleasing results!
This test clean helped me to understand which products and methods would work best on the floor and later that day I emailed over a detailed quote for the renovation. Happy with the quote I received a reply the same day asking when I could start.
My colleague and I arrived on the agreed date and work started with adding protection to all areas that required it. We use a lot of water during the cleaning process and some materials such as MDF can become damaged with water ingress, so it makes sense to do this.
To get the floor clean, a coarse Carbide Brush fitted to a rotary machine was run over the Travertine tiles to scrub in a strong solution of Tile Doctor Pro-Clean. This process generates a lot of slurry as the dirt was washed out of the stone and grout which is extracted with a wet vacuum as we progressed.
Next it was on hands and knees with more Tile Doctor Pro-Clean and handheld brushes run over stubborn areas and along the grout lines to take them from 80% up to 100%.
Happy with the results, the next step was to renovate the stone using a series of diamond encrusted burnishing pads. Using only water for lubrication this process starts with the application of a coarse 400-grit burnishing pad attached to the floor buffer. This produces a lot of slurry which again was removed with a wet vacuum.
This left the Travertine clean, but the pores of the stone had been opened giving the floor a matt finish and more absorbent than it was originally. To further refine the appearance of the stone the next two burnishing pads were applied which are 800 and 1500-grit. These pads polish the stone and close the pores, restoring the natural sheen in the process. After each pad was applied the slurry was rinsed off the floor with water and extracted with the wet vacuum. Once complete the floor was left to dry off fully overnight.
I arrived the next day and took several moisture readings from the floor to check that it had dried off sufficiently overnight. The results were good, so work moved onto sealing the Travertine with two coats of Tile Doctor Ultra Seal which is a natural look impregnating sealer. It works by soaking into the stone, occupying the pores and thereby preventing dirt from becoming ingrained there. This ensures dirt remains on the surface where it is easily cleaned away.
The final step in the floor’s renovation was to apply the last of the diamond polishing pads which is a very fine 3000-grit. This pad further improves the polished appearance of the stone resulting in a satisfying sheen.
The work made a massive difference to the floor, and I received an email the next day from one of the owners who was really pleased with the transformation:
”Floors look brilliant. Very pleased.”
For the care and maintenance of polished sealed floors I recommend the use of Tile Doctor’s Stone Soap which is a gentle but effective cleaning product that won’t impact the sealer and contains a patina enhancer. When it comes to sealed floors my mantra is:
“If you look after the sealer, the sealer will look after the floor!”
Graham Davis
North Kent Tile Doctor
20