Search results for "Segment" in Home Design Ideas

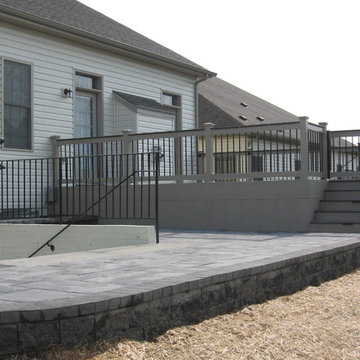
An attractive way to have a sport court in your backyard using interlocking pavers and segmental retaining walls.
Traditional exterior home idea in Kansas City

Well designed landscapes can improve spaces, create new usable areas, and correct drainage problems. On this project, we built a segmented block retaining wall on one side of the house, and a stacked stone wall retaining wall on the other. The addition of stone steppers, plantings and gravel completed this project.

This hall table is made from African Mahogany. The top is gilded with silver leaf, and then a patina was applied with sulfur potash to add various contrasting colors and an aged look to the piece. The silver leaf is sealed with several coats of polyurethane to protect it.
The outer rim of the top comprises of segmented pieces of mahogany. Since it is not a perfect circle but rather an oval shape, each segment, from the center point of the table to the edge, was cut at different lengths and angles to achieve the oval shape.
To continue the semi-ellipse theme, the fronts of the legs are shaped as a semi-ellipse as well and then taper to a smaller oval foot. The legs were hand shaped with a spokeshave. To attach the legs to the top, I scribed the curve of the apron and the top curve to the back of the legs and pegged them in place with dowels from behind.
The hall table Stands 29” tall, 48” wide, and 18” deep. (sizes are approximate)
Find the right local pro for your project

Segment arch, double door set with full lites and textured glass. Operable glass panels that open and close for fresh air and security. Traditional and stunning.

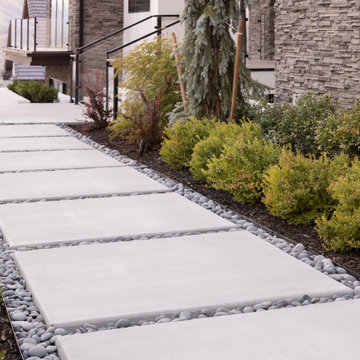
Designed by Lauren Bloom. A modern landscape design with destination seating areas, porcelain paver paths and segmented concrete.
Design ideas for a large modern backyard landscaping in Denver.

Segmental retaining wall and fresh Sod
Inspiration for a mid-sized modern partial sun backyard retaining wall landscape in Los Angeles for spring.

Segmental walls located in Darnestown MD.
Example of a classic home design design in DC Metro

When you choose brick, the design options are endless. With a covered entrance crowned by a segmental arch and a front wall topped with a rowlock accent band, this brick home makes a stunning first impression.

Commercial-grade 24V Soft Strip provides high levels of light with 85+ CRI LEDs in 2400K Amber White (AW), 2700K Very Warm White (VWW), or 3097K Warm White (WW) color temperature. Consumes 2.5 watts per foot with 268 lumens per foot or 61 lumens per watt (including power supply). 50,000 hour average lamp life. The .50 inch wide flexible copper strip, with an optically clear protective coating is sold in 1 foot segments up to 40 feet. Includes easy plug in connectors on each end and 6 foot power feed cable. Custom length smaller segments are available in 2.4 inch increments, sold separately. Use plug in flexible connectors for making turns and custom configurations. System can be powered with a TEB-60L-24V power supply up to 24 feet, dimmable with a low voltage electronic dimmer (recommended Lutron Diva DVELV-300P, Lutron Skylark SELV-300P, or Lutron Maestro MAELV-600), sold separately. Can also be powered by a higher wattage PSB 92 watt or 192 watt power supply up to 40 feet, dimmable with a recommended Lightolier Sunrise SR1200ZTUNV 0-10 volt dimmer, sold separately. Self adhering SS2C mounts to most smooth finished surfaces with industrial strength 3M tape provided on back of strip. Some unfinished surfaces may require screw in mounting clips, sold separately. Includes flexible aluminum heat sink to extend LED life. Fixture includes a 5 year warranty.

Segmental concrete retaining walls are used with concrete ledge stone coping material to create the steps. This is another place to enjoy the view of the lake.

This beautiful 1881 Alameda Victorian cottage, wonderfully embodying the Transitional Gothic-Eastlake era, had most of its original features intact. Our clients, one of whom is a painter, wanted to preserve the beauty of the historic home while modernizing its flow and function.
From several small rooms, we created a bright, open artist’s studio. We dug out the basement for a large workshop, extending a new run of stair in keeping with the existing original staircase. While keeping the bones of the house intact, we combined small spaces into large rooms, closed off doorways that were in awkward places, removed unused chimneys, changed the circulation through the house for ease and good sightlines, and made new high doorways that work gracefully with the eleven foot high ceilings. We removed inconsistent picture railings to give wall space for the clients’ art collection and to enhance the height of the rooms. From a poorly laid out kitchen and adjunct utility rooms, we made a large kitchen and family room with nine-foot-high glass doors to a new large deck. A tall wood screen at one end of the deck, fire pit, and seating give the sense of an outdoor room, overlooking the owners’ intensively planted garden. A previous mismatched addition at the side of the house was removed and a cozy outdoor living space made where morning light is received. The original house was segmented into small spaces; the new open design lends itself to the clients’ lifestyle of entertaining groups of people, working from home, and enjoying indoor-outdoor living.
Photography by Kurt Manley.
https://saikleyarchitects.com/portfolio/artists-victorian/

THE SETUP
Sam’s client had lived in her downtown townhome home for less than a year when she decided to remodel the spacious second level. This open area consisted of three sections: a TV and fireplace zone, a sparsely furnished dining area, and a dominant central kitchen. The kitchen featured a long back wall with three segmented sections and a massive island housing the cooktop. She found the kitchen’s functionality lacking and its presence overwhelming – it dominated the entire floor, regardless of where you stood.
Design objectives:
- Reconfigure key kitchen elements (sink, cooktop, oven) while minimizing the kitchen’s visual impact
- Optimize the kitchen’s back wall, eliminating existing dead space
- Create a purposeful, well-defined dining area
- Establish a distinct, comfortable living area
- Reuse existing appliances and flooring
- Maintain an overall modern design aesthetic
THE REMODEL
Design challenges to be solved:
- Redesign the island to reduce its overwhelming presence
- Create a comfortable, dedicated living room within the available space
- Establish a distinct, inviting dining area within spatial constraints
- Enhance kitchen functionality and style without dominating the entire floor
THE RENEWED SPACE
Design solutions:
- Sam created raised end caps for the island. This separated the kitchen from adjacent living and dining areas while focusing the kitchen’s functionality. The new sink location offers ample workspace, allowing the cook to interact with guests seated at the island. The redesigned island also provides additional storage.
- For the living area, Sam opted for a functional-yet-minimalist approach. Large-format tile creates a natural stone look for the fireplace and TV wall. The recessed TV and extended fireplace shelf maintain a sleek profile. - Artistic wallpaper adds depth and texture, while the intentional lack of extensive shelving keeps the space open and distinct.
- Sam transformed the dining area’s blank wall into a feature, adding a unique dry bar with counter space, open shelves, cabinet storage and a beverage fridge. - - - Wallpaper behind and above the bar contributes to the area’s personality. A mirror adds depth while pendant lights add style and visual interest.
Relocating the cooktop to the back wall facilitates hidden ventilation, reducing visual clutter. Sam balanced transitional and modern elements for a contemporary yet comfortable feel. The digital control panel on the convection cooktop maintains a sleek look, while the wall oven is now at an easy-to-use height. ----- Mirrored base cabinet fronts and a paneled fridge prevent cabinetry monotony.
The redesign has delighted Sam’s client, achieving her main goal of creating a more inviting and visually appealing space. Each section now has its own visual personality and functionality while harmonizing within a monochromatic palette. The entire floor offers wow-factor pop upon first glance, with each area maintaining its distinct character while contributing to a cohesive, modern aesthetic.

Additional pullout storage was custom designed under the stairs allowing for pantry, brooms and other utility items. When closed, the doors create a finished panelled effect, keeping the stair sophisticated and the storage hidden.
Photos: Dave Remple

The fire pit and patio are on a central axis from the kitchen and take advantage of an existing planting bed which was added on to previously.
Mid-sized elegant backyard concrete paver patio photo in Milwaukee with a fire pit and no cover

 
Download our free ebook, Creating the Ideal Kitchen. DOWNLOAD NOW
 
Lakefront property in the northwest suburbs of Chicago is hard to come by, so when we were hired by this young family with exactly that, we were immediately inspired by not just the unusually large footprint of this 1950’s colonial revival but also the lovely views of the manmade lake it was sited on. The large 5-bedroom home was solidly stuck in the 1980’s, but we saw tons of potential. We started out by updating the existing staircase with a fresh coat of paint and adding new herringbone slate to the entry hall.
The powder room off the entryway also got a refresh - new flooring, new cabinets and fixtures. We ran the new slate right through into this space for some consistency. A fun wallpaper and shiplap trim add a welcoming feel and set the tone for the home.
Next, we tackled the kitchen. Located away from the rest of the first floor, the kitchen felt a little isolated, so we immediately began planning for how to better connect it to the rest of the first floor. We landed on removing the wall between the kitchen and dining room and designed a modified galley style space with separate cooking and clean up zones. The cooking zone consists of the refrigerator, prep sink and cooktop, along with a nice long run of prep space at the island. The cleanup side of the kitchen consists of the main sink and dishwasher. Both areas are situated so that the user can view the lake during prep work and cleanup!
One of the home’s main puzzles was how to incorporate the mudroom and area in front of the patio doors at the back of the house. We already had a breakfast table area, so the space by the patio doors was a bit of a no man’s land. We decided to separate the kitchen proper from what became the new mudroom with a large set of barn doors. That way you can quickly hide any mudroom messes but have easy access to the light coming in through the patio doors as well as the outdoor grilling station. We also love the impact the barn doors add to the overall space.
The homeowners’ first words to us were “it’s time to ditch the brown,” so we did! We chose a lovely blue pallet that reflects the home’s location on the lake which is also vibrant yet easy on the eye. Countertops are white quartz, and the natural oak floor works well with the other honey accents. The breakfast table was given a refresh with new chairs, chandelier and window treatments that frame the gorgeous views of the lake out the back.
We coordinated the slate mudroom flooring with that used in the home’s main entrance for a consistent feel. The storage area consists of open and closed storage to allow for some clutter control as needed.
Next on our “to do” list was revamping the dated brown bar area in the neighboring dining room. We eliminated the clutter by adding some closed cabinets and did some easy updates to help the space feel more current. One snag we ran into here was the discovery of a beam above the existing open shelving that had to be modified with a smaller structural beam to allow for our new design to work. This was an unexpected surprise, but in the end we think it was well worth it!
We kept the colors here a bit more muted to blend with the homeowner’s existing furnishings. Open shelving and polished nickel hardware add some simple detail to the new entertainment zone which also looks out onto the lake!
Next we tackled the upstairs starting with the homeowner’s son’s bath. The bath originally had both a tub shower and a separate shower, so we decided to swap out the shower for a new laundry area. This freed up some space downstairs in what used to be the mudroom/laundry room and is much more convenient for daily laundry needs.
We continued the blue palette here with navy cabinetry and the navy tile in the shower. Porcelain floor tile and chrome fixtures keep maintenance to a minimum while matte black mirrors and lighting add some depth the design. A low maintenance runner adds some warmth underfoot and ties the whole space together.
We added a pocket door to the bathroom to minimize interference with the door swings. The left door of the laundry closet is on a 180 degree hinge to allow for easy full access to the machines. Next we tackled the master bath which is an en suite arrangement. The original was typical of the 1980’s with the vanity outside of the bathroom, situated near the master closet. And the brown theme continued here with multiple shades of brown.
Our first move was to segment off the bath and the closet from the master bedroom. We created a short hall from the bedroom to the bathroom with his and hers walk-in closets on the left and right as well as a separate toilet closet outside of the main bathroom for privacy and flexibility.
The original bathroom had a giant soaking tub with steps (dangerous!) as well as a small shower that did not work well for our homeowner who is 6’3”. With other bathtubs in the home, they decided to eliminate the tub and create an oversized shower which takes up the space where the old tub was located. The double vanity is on the opposite wall and a bench is located under the window for morning conversations and a place to set a couple of towels.
The pallet in here is light and airy with a mix of blond wood, creamy porcelain and marble tile, and brass accents. A simple roman shade adds some texture and it’s top-down mechanism allows for light and privacy.
This large whole house remodel gave our homeowners not only the ability to maximize the potential of their home but also created a lovely new frame from which to view their fabulous lake views.
Designed by: Susan Klimala, CKD, CBD
Photography by: Michael Kaskel
For more information on kitchen and bath design ideas go to: www.kitchenstudio-ge.com
20