
Search results for "Slight adjustment" in Home Design Ideas
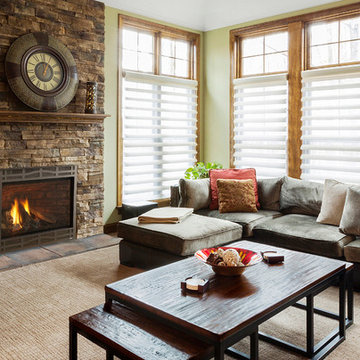
 Fireside Hearth & Home
Starting at $2,279
Heatilator has expanded the Novus platform, integrating contemporary styling and advanced technology into the Novus nXt gas fireplace. A 69% AFUE rating, 5-step flame height adjustment and smart technology deliver ultimate convenience for this stunning fireplace.
33" or 36" viewing area
Brick interior enhances flame and glowing embers
Standard fan kit helps distribute the warmth
Make it your own with multiple fronts and finishes
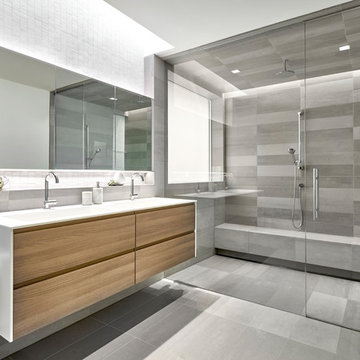
Large trendy master gray tile and porcelain tile porcelain tile and gray floor bathroom photo in Chicago with flat-panel cabinets, light wood cabinets, solid surface countertops and an integrated sink
 Esslinger Design Company
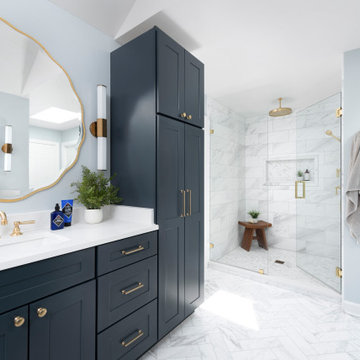
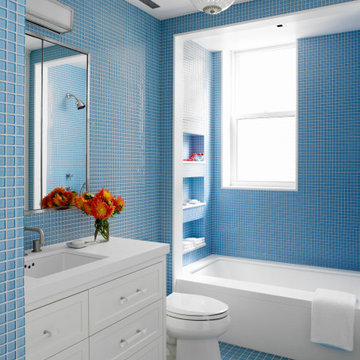
Example of a large transitional master white tile and marble tile marble floor, white floor, single-sink and vaulted ceiling bathroom design in Chicago with shaker cabinets, blue cabinets, blue walls, an undermount sink, quartz countertops, a hinged shower door, white countertops, a niche and a built-in vanity
Find the right local pro for your project
 KC Drafting & Design
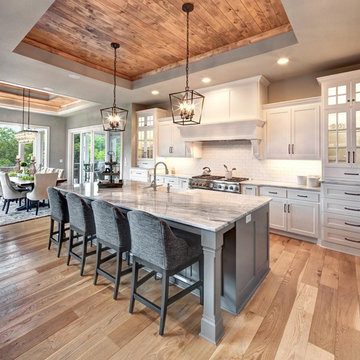
Example of a classic light wood floor and beige floor eat-in kitchen design in Kansas City with a farmhouse sink, white cabinets, white backsplash, subway tile backsplash, stainless steel appliances, an island, gray countertops and shaker cabinets
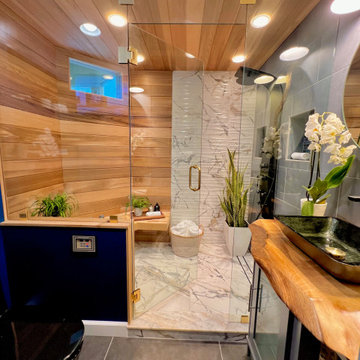
 Change Your Bathroom©
This transformation started with a builder grade bathroom and was expanded into a sauna wet room. With cedar walls and ceiling and a custom cedar bench, the sauna heats the space for a relaxing dry heat experience. The goal of this space was to create a sauna in the secondary bathroom and be as efficient as possible with the space. This bathroom transformed from a standard secondary bathroom to a ergonomic spa without impacting the functionality of the bedroom.
This project was super fun, we were working inside of a guest bedroom, to create a functional, yet expansive bathroom. We started with a standard bathroom layout and by building out into the large guest bedroom that was used as an office, we were able to create enough square footage in the bathroom without detracting from the bedroom aesthetics or function. We worked with the client on her specific requests and put all of the materials into a 3D design to visualize the new space.
Houzz Write Up: https://www.houzz.com/magazine/bathroom-of-the-week-stylish-spa-retreat-with-a-real-sauna-stsetivw-vs~168139419
The layout of the bathroom needed to change to incorporate the larger wet room/sauna. By expanding the room slightly it gave us the needed space to relocate the toilet, the vanity and the entrance to the bathroom allowing for the wet room to have the full length of the new space.
This bathroom includes a cedar sauna room that is incorporated inside of the shower, the custom cedar bench follows the curvature of the room's new layout and a window was added to allow the natural sunlight to come in from the bedroom. The aromatic properties of the cedar are delightful whether it's being used with the dry sauna heat and also when the shower is steaming the space. In the shower are matching porcelain, marble-look tiles, with architectural texture on the shower walls contrasting with the warm, smooth cedar boards. Also, by increasing the depth of the toilet wall, we were able to create useful towel storage without detracting from the room significantly.
This entire project and client was a joy to work with.

Sponsored
Columbus, OH

Structural Remodeling
Franklin County's Heavy Timber Specialists | Best of Houzz 2020!

 IQnewswire
The End of the Ultra-Slim Wedding Suit
For several years, men’s formalwear was dominated by narrow lapels, short jackets and trousers cut close to the leg. The style created a sharp outline, but it often left little room for sitting, dancing or eating comfortably. Current tailoring is moving towards a more balanced shape, with cleaner shoulders, a defined waist and trousers that follow the leg without gripping it.This change does not mean that wedding suits have become oversized. The newer approach sits between skinny and loose. It keeps the structure expected of formal clothing while allowing the cloth to hang properly. For grooms, that balance is useful during a day that may involve a ceremony, photographs, dinner and several hours on the dance floor.
Look For Shape Rather Than Tightness
A well-fitted suit should create a clear outline without relying on tension. Collections of Marc Darcy suits include tailored three-piece designs, checks and textured fabrics that suit the current preference for visible structure and considered proportions.
The jacket should sit close enough to define the waist, but the front button should fasten without pulling the cloth into an X-shaped crease. At the shoulders, the seam should finish close to the natural shoulder point. Extra width can make the jacket look borrowed, while a shoulder that is too narrow may cause the upper sleeve to collapse.
Fit should be assessed while moving as well as standing. Reach forward, sit down and raise both arms. A tailored jacket will never feel like casual sportswear, but it should allow the groom to carry out ordinary movements without sharp restriction across the back or chest.
Give The Jacket Enough Length
Very short suit jackets became common alongside skinny trousers, but they can disrupt the proportions of a three-piece outfit. If the jacket finishes too high, the waistcoat may appear longer than the outer layer and the trousers may look as though they begin too low.
A more traditional jacket length usually covers most of the seat and divides the body more evenly. This can make the legs appear longer without shortening the jacket excessively. The correct length depends on height and body proportions, so two men wearing the same chest size may still need different jacket lengths.
View the suit from the back and side rather than relying on a front-facing mirror. The vents should lie flat, and the hem should not lift away from the body. A side photograph can reveal an unbalanced jacket more clearly than the changing-room mirror.
Choose Trousers That Fall Cleanly
The move away from very tight tailoring is most noticeable in suit trousers. A modern tailored leg can still be neat at the ankle, but it should provide enough room through the seat and thigh for the fabric to fall without horizontal lines.
Trouser pockets offer a useful fit check. If they pull open while standing, the waist or hips may be too tight. The fly should lie flat, and the waistband should remain in place without depending on an overtightened belt. Higher-rise trousers can work particularly well with a waistcoat because they reduce the chance of shirt fabric appearing between the two pieces.
The hem should make gentle contact with the shoe rather than gathering heavily around it. A short hem can work with narrow trousers but taking it too far may make the suit look dated once the current cropped style moves on. A slight break is easier to wear with different formal shoes and tends to look balanced in full-length wedding photographs.
Let The Waistcoat Support the Silhouette
A waistcoat adds structure through the centre of the outfit, but only when it fits correctly. It should lie flat against the shirt and cover the trouser waistband. Tightening the back strap cannot correct a waistcoat that is the wrong size or too short.
Current three-piece styling often places greater emphasis on the waistcoat. Double-breasted designs, contrasting fabrics and wider openings can distinguish the groom without requiring a brightly coloured jacket. When the groom removes the jacket later, the waistcoat keeps the outfit looking complete.
Allow room for a full meal and several hours of wear. A waistcoat that feels acceptably close during a brief fitting may become uncomfortable at dinner. Sit down with every button fastened and check whether the lower edge presses into the waist or causes the front to bow.
Use Stronger Lapels Carefully
Wider notch and peak lapels are returning after years of extremely narrow designs. A broader lapel can frame the shirt and tie, balance the shoulders and give the jacket a more formal character. Peak lapels create a particularly strong line on double-breasted jackets and evening suits.
The lapel width should still suit the wearer. A very broad lapel can overwhelm a smaller frame, while an extremely narrow one may look out of proportion on a broad chest. The shirt collar, tie width and lapel should relate to one another without matching exactly.
A wider lapel also leaves less need for decorative extras. A simple buttonhole flower or plain pocket square may be enough. Large lapel pins can crowd the upper part of the jacket, especially when the cloth already contains a check.
Avoid Buying According to the Size Label Alone
The same labelled size can fit differently across designs because cut, fabric and construction affect the garment. Begin with accurate chest, waist, inside-leg and approximate jacket-length measurements. Compare those figures with the retailer’s size information rather than ordering the size worn in another brand without checking.
If the jacket fits at the shoulders but needs slight shaping through the waist, a tailor can often make the adjustment. Sleeves and trouser hems are also commonly altered. Major changes to the shoulder line or jacket length are more difficult and may not be economical.
Do not choose the smallest size that can be fastened. A suit that looks tight in the fitting room is unlikely to become more comfortable during a long wedding day. Cloth should skim the body and return to a clean position after movement.
Balance a checked suit with simple styling
Texture and checks remain popular in wedding tailoring, particularly for country houses, converted barns and traditional venues. These fabrics already add depth to the outfit, so the cut should remain controlled and the accessories relatively quiet.
A plain white, pale blue or cream shirt gives a checked suit a clear foundation. Choose a tie from one of the secondary colours in the cloth rather than introducing another strong pattern. A white pocket square works when the suit contains several shades and does not need further decoration.
Shoes should support the proportions of the trousers. A very slim shoe may appear too small beneath a fuller hem, while a heavy casual sole can pull attention away from the tailoring. Oxfords, Derbies and refined brogues usually provide enough visual weight without looking bulky.
Coordinate the wedding party without forcing one fit
Matching groomsmen suits can become difficult when every member of the party has a different build. Insisting on an identical close fit may leave some men comfortable and others visibly restricted. A better approach is to keep the cloth, colour and main design consistent while adjusting jacket and trouser sizes for each person.
The groom can stand apart through a waistcoat, lapel shape or accessory rather than wearing a suit cut much tighter than everyone else. This creates a connection across the group without treating one silhouette as suitable for every body.
Arrange fittings early enough to identify size and alteration issues. Group orders should be checked well before the wedding, particularly when trousers need hemming or jackets require sleeve adjustments. Each person should try the complete outfit with the intended shirt and shoes.
Judge the suit by the whole day
A wedding fitting often lasts less than half an hour, while the suit may be worn for twelve hours or more. Comfort should therefore be tested under realistic conditions. Sit for several minutes, walk upstairs and check the waistband after moving around.
Pay attention to the parts that cannot be seen clearly in a mirror. The collar should remain close to the shirt at the back of the neck. Jacket vents should not pull apart, and the trouser seat should follow the body without sagging or strain.
The current move towards balanced tailoring gives grooms more room to choose clothes that look formal without feeling restrictive. Clean shoulders, a shaped jacket and trousers with a natural fall will outlast extreme proportions. A suit that allows the groom to stand, sit and celebrate comfortably is also more likely to look composed in photographs taken throughout the day.
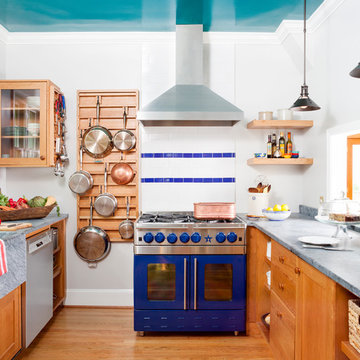
 CG Allan Interior Architecture + Design LLC
Inspiration for a transitional medium tone wood floor and orange floor kitchen remodel in DC Metro with a farmhouse sink, medium tone wood cabinets, concrete countertops, multicolored backsplash, colored appliances and no island
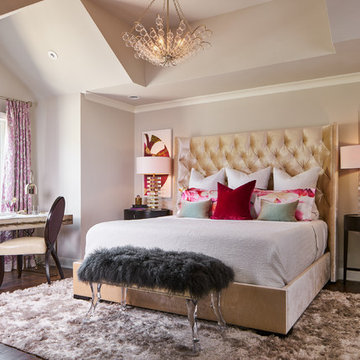
 Wesley-Wayne Interiors, LLC
No master suite has more personality than this luxurious bedroom. Take a break from the ordinary with this lustrous, oversized tufted velvet headboard with slightly curved sides, custom bedding and oval-shaped nightstands. Soft neutrals throughout blend seamlessly with the intensity of fuchsia and pink hues. We added whimsical touches like a faux bois writing desk and a chandelier reminiscent of bubbling champagne, all centered around a plush shag rug that is the base of this marvelous feminine haven.
Design by: Wesley-Wayne Interiors
Photo by: Stephen Karlisch
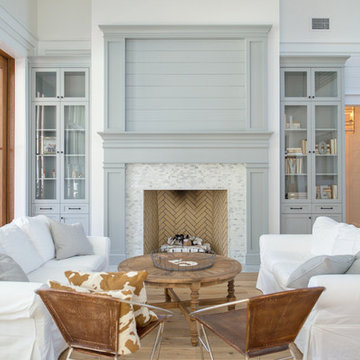
 Buffalo Lumber Company Inc.
 Kelly: “It just transformed the whole house into something more casual, more farmhouse, more lived in and comfortable.”
************************************************************************* Standard fireplace surrounded by Carrera Marble Tile and accented with Grey painted wood paneling, hearth and trim.
*************************************************************************
Buffalo Lumber specializes in Custom Milled, Factory Finished Wood Siding and Paneling. We ONLY do real wood.
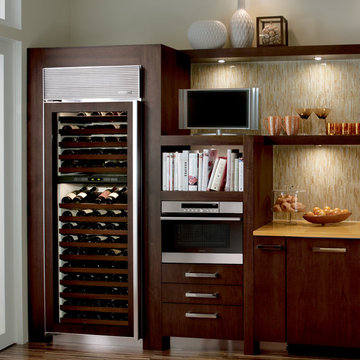
 Universal Appliance and Kitchen Center
Wolf 24" E Series Transitional Convection Steam Oven Stainless Steel | CSO24TE
Available at Universal Appliance and Kitchen Center | uakc.com
Easy-access water tank:
The oven’s large water tank provides 90 minutes of continuous steam cooking. Thoughtfully designed, it can be refilled when needed without opening the oven door and interrupting the cooking process.
Largest interior capacity:
More than 25 percent larger than similar units, large enough to roast a 15-pound turkey, Wolf’s steam oven lets you prepare larger items and even multiple dishes at once.
Design flexibility:
Install the unit flush with cabinetry to seamlessly integrate it into your kitchen design. And since the unit isn’t plumbed, it can be installed anywhere without requiring special water lines.
10 cooking modes:
Precisely control heat, steam and airflow for the best results with any dish with 10 cooking modes: Steam, Reheat, Auto Steam Bake, Convection, Convection Humid, Convection Steam, Gourmet, Slow Roast, Recipes, and Keep Warm.
Steam mode:
Steam mode heats with steam and hot air, achieving a temperature range from 85°F-210°F. From vegetables, poultry and fish to grains, beans, pasta and egg dishes, gentle steam heat is ideal for capturing nutrition, color and flavor.
Reheat mode:
Reheat mode uses steam and hot air to rehydrate food gently. Using convection and the right amount of moisture, Reheat mode warms one to four pans of food evenly and without drying with a temperature range from 210°F to 300°F.
Auto Steam Bake mode:
By heating with steam first, then using convection heat to finish, bagels, breads, buns, rolls and pastries acquire a tender interior and a natural shine without the need for brushing with an egg wash. Auto Steam Bake mode temperatures range from 210°F to 445°F.
Convection mode:
A fan circulates hot air from a heating element at the back of the oven to distribute heat evenly around food for consistent results and browning. Convection mode temperatures range from 85°F to 445°F.
Convection Humid mode:
In Convection Humid mode, a heating element at the back of the oven produces heat and oven ventilation is sealed so that moisture produced during cooking remains in the oven. Convection Humid temperatures range from 85°F to 445°F.
Convection Steam mode:
Use Convection Steam for any foods you want to be tender inside and roasted or crisped outside. Convection steam mode temperatures range from 85°F to 445°F.
Gourmet mode:
Gourmet mode uses a climate sensor to adjust time, temperature and humidity for ideal results with no guesswork.
Slow Roast mode:
Slow Roast mode is an ultimate convenience. Insert the probe into your prepared meat, select a slow roast setting for the dish you're preparing, tell the oven what time you want it done, and come home to a perfectly cooked meal.
Recipes mode:
Use Recipes mode and the collection of built-in recipes to harness the power of the oven's many different cooking modes to easily cook entire meals from appetizers and entrees to desserts.
Keep Warm mode:
The combination of convection and steam heat preserves food’s taste, texture, looks and quality so every bite is as delicious as if it were fresh from the oven. Keep multiple dinner plates warm at once, making staggered meal times more convenient.
Temperature probe:
The temperature probe alerts you when your dish has reached the desired temperature, eliminating guesswork when preparing roasts and other meats.
Multiple pans and rack positions:
Two included pans can be placed in any of four rack positions. Both pans are stainles steel – one solid, and the other with a perforated bottom that is particularly well-suited for dishes prepared in Steam mode.
Delayed start:
What time would you like your dish to be ready? Simply program in a time. The oven turns on at the right moment and adjusts the cooking process so the food is ready to serve precisely when you want it.
Technical Features:
Shipping Weight (lbs): 80
Electrical Requirements: 220/240V, 60Hz, 20 amp dedicated circuit
Dimensions: 23 1/2”W x 17 7/8”H x 21 1/2”D
Star-K Kosher certified as Sabbath and holiday-compliant
 Clean Design
Donna Dotan Photography Inc.
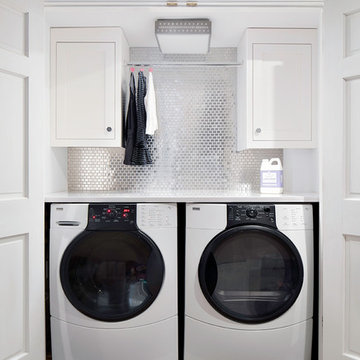
Example of a transitional single-wall laundry closet design in New York with white cabinets, white walls, a side-by-side washer/dryer and white countertops
Example of a transitional single-wall laundry closet design in New York with white cabinets, white walls, a side-by-side washer/dryer and white countertops
 ArchiPlicity, LLC
Katherine Jackson Architectural Photography
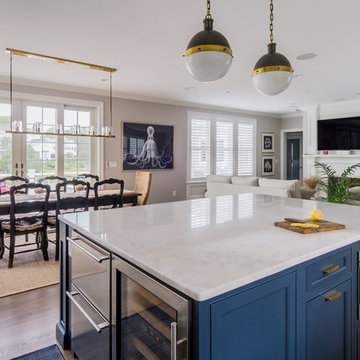
Kitchen - transitional kitchen idea in Boston
Kitchen - transitional kitchen idea in Boston

 TKS Design Group
Download our free ebook, Creating the Ideal Kitchen. DOWNLOAD NOW
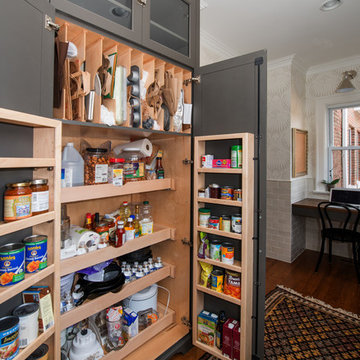
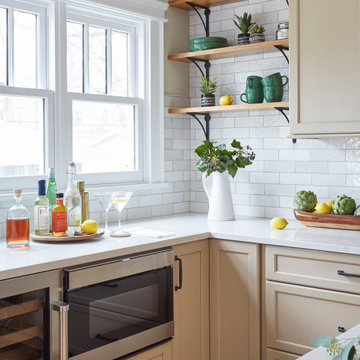
The homeowners came to us looking to update the kitchen in their historic 1897 home. The home had gone through an extensive renovation several years earlier that added a master bedroom suite and updates to the front façade. The kitchen however was not part of that update and a prior 1990’s update had left much to be desired. The client is an avid cook, and it was just not very functional for the family.
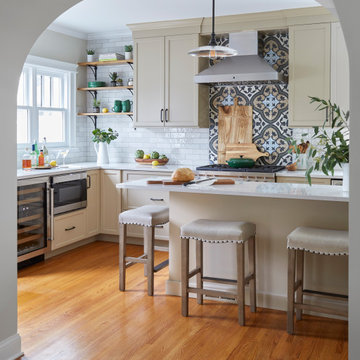
The original kitchen was very choppy and included a large eat in area that took up more than its fair share of the space. On the wish list was a place where the family could comfortably congregate, that was easy and to cook in, that feels lived in and in check with the rest of the home’s décor. They also wanted a space that was not cluttered and dark – a happy, light and airy room. A small powder room off the space also needed some attention so we set out to include that in the remodel as well.
See that arch in the neighboring dining room? The homeowner really wanted to make the opening to the dining room an arch to match, so we incorporated that into the design.
Another unfortunate eyesore was the state of the ceiling and soffits. Turns out it was just a series of shortcuts from the prior renovation, and we were surprised and delighted that we were easily able to flatten out almost the entire ceiling with a couple of little reworks.
Other changes we made were to add new windows that were appropriate to the new design, which included moving the sink window over slightly to give the work zone more breathing room. We also adjusted the height of the windows in what was previously the eat-in area that were too low for a countertop to work. We tried to keep an old island in the plan since it was a well-loved vintage find, but the tradeoff for the function of the new island was not worth it in the end. We hope the old found a new home, perhaps as a potting table.
Designed by: Susan Klimala, CKD, CBD
Photography by: Michael Kaskel
For more information on kitchen and bath design ideas go to: www.kitchenstudio-ge.com
 TKS Design Group
Download our free ebook, Creating the Ideal Kitchen. DOWNLOAD NOW
The homeowners came to us looking to update the kitchen in their historic 1897 home. The home had gone through an extensive renovation several years earlier that added a master bedroom suite and updates to the front façade. The kitchen however was not part of that update and a prior 1990’s update had left much to be desired. The client is an avid cook, and it was just not very functional for the family.
The original kitchen was very choppy and included a large eat in area that took up more than its fair share of the space. On the wish list was a place where the family could comfortably congregate, that was easy and to cook in, that feels lived in and in check with the rest of the home’s décor. They also wanted a space that was not cluttered and dark – a happy, light and airy room. A small powder room off the space also needed some attention so we set out to include that in the remodel as well.
See that arch in the neighboring dining room? The homeowner really wanted to make the opening to the dining room an arch to match, so we incorporated that into the design.
Another unfortunate eyesore was the state of the ceiling and soffits. Turns out it was just a series of shortcuts from the prior renovation, and we were surprised and delighted that we were easily able to flatten out almost the entire ceiling with a couple of little reworks.
Other changes we made were to add new windows that were appropriate to the new design, which included moving the sink window over slightly to give the work zone more breathing room. We also adjusted the height of the windows in what was previously the eat-in area that were too low for a countertop to work. We tried to keep an old island in the plan since it was a well-loved vintage find, but the tradeoff for the function of the new island was not worth it in the end. We hope the old found a new home, perhaps as a potting table.
Designed by: Susan Klimala, CKD, CBD
Photography by: Michael Kaskel
For more information on kitchen and bath design ideas go to: www.kitchenstudio-ge.com
 TKS Design Group
Download our free ebook, Creating the Ideal Kitchen. DOWNLOAD NOW
The homeowners came to us looking to update the kitchen in their historic 1897 home. The home had gone through an extensive renovation several years earlier that added a master bedroom suite and updates to the front façade. The kitchen however was not part of that update and a prior 1990’s update had left much to be desired. The client is an avid cook, and it was just not very functional for the family.
The original kitchen was very choppy and included a large eat in area that took up more than its fair share of the space. On the wish list was a place where the family could comfortably congregate, that was easy and to cook in, that feels lived in and in check with the rest of the home’s décor. They also wanted a space that was not cluttered and dark – a happy, light and airy room. A small powder room off the space also needed some attention so we set out to include that in the remodel as well.
See that arch in the neighboring dining room? The homeowner really wanted to make the opening to the dining room an arch to match, so we incorporated that into the design.
Another unfortunate eyesore was the state of the ceiling and soffits. Turns out it was just a series of shortcuts from the prior renovation, and we were surprised and delighted that we were easily able to flatten out almost the entire ceiling with a couple of little reworks.
Other changes we made were to add new windows that were appropriate to the new design, which included moving the sink window over slightly to give the work zone more breathing room. We also adjusted the height of the windows in what was previously the eat-in area that were too low for a countertop to work. We tried to keep an old island in the plan since it was a well-loved vintage find, but the tradeoff for the function of the new island was not worth it in the end. We hope the old found a new home, perhaps as a potting table.
Designed by: Susan Klimala, CKD, CBD
Photography by: Michael Kaskel
For more information on kitchen and bath design ideas go to: www.kitchenstudio-ge.com

 M.J. Whelan Construction
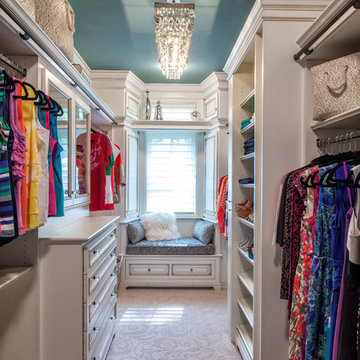
This incredible closet is custom in every way. It was designed to meet the specific needs and desires of our client. The cabinetry was slightly distressed, glazed and load with extensive detail. The rolling ladder moves around entire closet for upper storage. Several pull out and slide out shelves, scarf racks, hanger racks and custom storage accessories were included in the design. A custom dresser with upper glass cabinets along with built-in hamper are also included. It wouldn't be complete without a vertical, tilted shoe rack. Ceiling painted in a rich robin’s egg blue with sparkle additive sets this closet apart from any other. The custom upholstered storage bench with pillows at the end of the room and crystal chandelier finishes this room beautifully. Photo Credit - Hall Of Portraits
 TKS Design Group
Download our free ebook, Creating the Ideal Kitchen. DOWNLOAD NOW
The homeowners came to us looking to update the kitchen in their historic 1897 home. The home had gone through an extensive renovation several years earlier that added a master bedroom suite and updates to the front façade. The kitchen however was not part of that update and a prior 1990’s update had left much to be desired. The client is an avid cook, and it was just not very functional for the family.
The original kitchen was very choppy and included a large eat in area that took up more than its fair share of the space. On the wish list was a place where the family could comfortably congregate, that was easy and to cook in, that feels lived in and in check with the rest of the home’s décor. They also wanted a space that was not cluttered and dark – a happy, light and airy room. A small powder room off the space also needed some attention so we set out to include that in the remodel as well.
See that arch in the neighboring dining room? The homeowner really wanted to make the opening to the dining room an arch to match, so we incorporated that into the design.
Another unfortunate eyesore was the state of the ceiling and soffits. Turns out it was just a series of shortcuts from the prior renovation, and we were surprised and delighted that we were easily able to flatten out almost the entire ceiling with a couple of little reworks.
Other changes we made were to add new windows that were appropriate to the new design, which included moving the sink window over slightly to give the work zone more breathing room. We also adjusted the height of the windows in what was previously the eat-in area that were too low for a countertop to work. We tried to keep an old island in the plan since it was a well-loved vintage find, but the tradeoff for the function of the new island was not worth it in the end. We hope the old found a new home, perhaps as a potting table.
Designed by: Susan Klimala, CKD, CBD
Photography by: Michael Kaskel
For more information on kitchen and bath design ideas go to: www.kitchenstudio-ge.com
1