
Search results for "Tackles" in Home Design Ideas
 Pinnacle Design & Remodeling
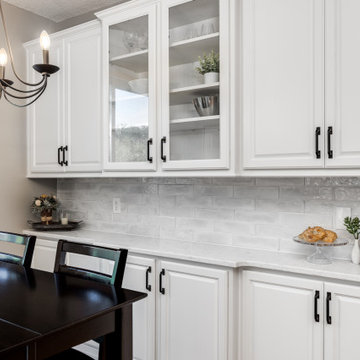
When I came to stage and photoshoot the space my clients let the photographer know there wasn't a room in the whole house PID didn't do something in. When I asked why they originally contacted me they reminded me it was for a cracked tile in their owner's suite bathroom. We all had a good laugh.
Tschida Construction tackled the construction end and helped remodel three bathrooms, stair railing update, kitchen update, laundry room remodel with Custom cabinets from Pro Design, and new paint and lights throughout.
Their house no longer feels straight out of 1995 and has them so proud of their new spaces.
That is such a good feeling as an Interior Designer and Remodeler to know you made a difference in how someone feels about the place they call home.
 Revealing Redesign
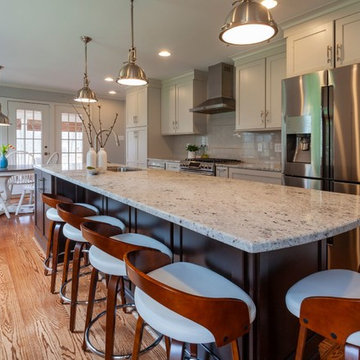
This kitchen & family room is a part of a whole house renovation we tackled starting in 2016, slowly and intentionally recreating each space in the house so it could be an updated, lovely space that FELT LIKE HOME to my clients.
After rethinking the space, opening it up to the adjacent family room & dining room, creating flow and connection through the whole first floor, and reconfiguring the kitchen layout, it works SO much better for modern family living.
Lots to be happy about in here! A new LARGE island perfect for food prep and entertaining, gorgeous new cabinets, lighting, appliances, countertops, tile work…
And a beautiful new eating area, allowing for cozy family dinners.
We finished the space with bright, colorful accents to give a pop to the neutral colors of the walls and upholstered pieces. The accessories, which have a modern and eclectic feel, blend the traditional items, such as their beautiful rug, with more contemporary pieces like the original art that they love.
It is wonderful to see how much the spaces have changed, and know that my clients will enjoy spending time together here as a family, throughout the seasons, for many years to come! :)
 Signature Custom Homes
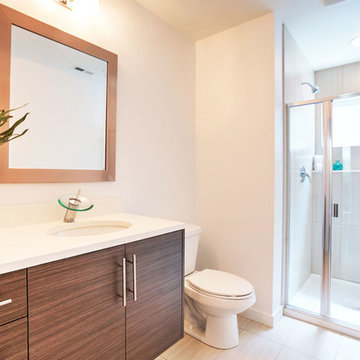
This three home project in Seattle was a creative challenge we were excited to tackle. The lot sizes were long and narrow, so we decided to create a compact contemporary space. Our design team chose light solid surface elements and a dark flooring for a warmer mix.
Photographer: Layne Freedle
Find the right local pro for your project
 Green Bay Remodeling Inc.
When challenges arise, Green Bay Remodeling delivers solutions! This client called us ‘problem solvers’ after we transformed their space with precision and creativity. Watch how we tackled obstacles to create a home that exceeds expectations.
 Kitchen Solvers of Spring Hill
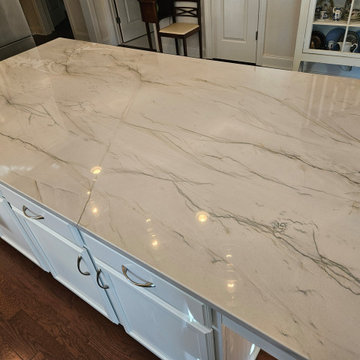
These homeowners didn’t feel the need for a whole remodel and liked the color of their cabinets but really wanted a few upgrades… and then ended up doing a little more once we showed them how we can improve efficiency and storage in their kitchen!
Their biggest issue is having a microwave over their stove since they tend to an elderly parent and that the exhaust is not vented outside. Andy figured out the perfect solution to vent out their new matching range hood and since they never liked their countertops or backsplash, they added that to the mix. With standard cabinet that have deep or half shelves it is hard to maximize storage and accessibility so Marty suggested roll-out trays in 3 cabinets, a pull-out trash so they don’t have to walk around the one at the end of their island, a blind corner pull-out so they don’t have to get down on their hands and knees to access things, and then their favorite… hinge out spice rack! Let’s be honest, it’s EVERYONE’s favorite!
Needless to say, we more than solved this kitchen for these homeowners. Where is the microwave now? Well, he is a handy guy so he decided to tackle a simple cabinet modification and is installing it himself in a base cabinet!
 Pacific Garden Design
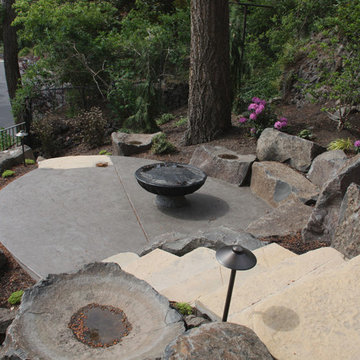
After remodeling their 1905 Craftsman house, the homeowners were ready to tackle the yard. The front was easily spruced up with a new walkway and plantings, but the steep, wooded backyard was a much bigger challenge. Rebuilding a failing retaining wall was the first step to creating access to the previously overgrown space. Concrete patios with natural stone steps provide space for a hot tub and fire pit, completely transforming the dangerous eyesore.
 Tile Doctor Ltd
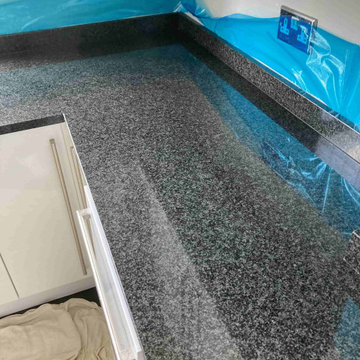
Although expensive Granite makes the most beautiful and practical stone worktop you can install in your kitchen. It gives real wow factor to a room and this kitchen in Folkestone was no different. Normally granite needs little maintenance however Folkestone has very hard water (often referred to as limescale) containing high levels of calcium and over time the calcium in the water gets deposited on nearby surfaces. According to the Affinity Water website the water in Folkestone contains 287.5 mg of calcium per litre which is classed as hard.
The owner of the property contacted us explaining that due to this problem the build-up of calcium deposits had overtaken her sink and countertop to a degree that she couldn`t deal with it through normal cleaning and a restoration was required. There are several household products on the market that can remove limescale however you need to be very careful when using these on natural stone as they use acids to break down the calcium and this can etch stone making the problem worse (always read the label). I went and had a look at the problem and gave her a quote for resolving the problem, which she was happy to accept.
Before starting the renovation, I protected the floor with dust sheets and the walls with a blue film that is easy to remove. Then to tackle the limescale I carefully went over each part of the Granite counter using a set of six-inch Tile Doctor Burnishing pads applying them in sequence from coarse to extra fine. To give extra cleaning power the coarser pads were applied with Tile Doctor Oxy-Gel which is an alkaline cleaning gel. The pads were fitted to a hand buffer and the soil generated by the abrasive pads was rinsed off between pads with water. For the finer detail such as the groves in the granite draining board, I used diamond encrusted handheld burnishing blocks of various grits. With the combination of diamond tooling and lots of elbow grease the job took around five hours to complete and the granite now has the polished look it deserves.
The granite worksurface does not require an actual sealer to be applied. However, maintenance is the key to keeping the stone in great condition so for aftercare I left the owner with a bottle of Tile Doctor Stone Patina Spray. This product is designed for cleaning stone worktops and contains a special ingredient that maintains the lustre. This should ensure the Limescale becomes manageable and can be cleaned more easily.
I made a striking difference to the appearance of the Granite Worktop and the owner was over the moon with the result.
Michael Conlon
South Kent Tile Doctor
 Jordan Design Build Group
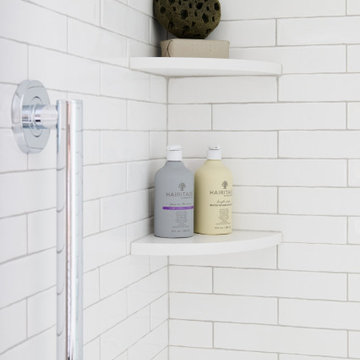
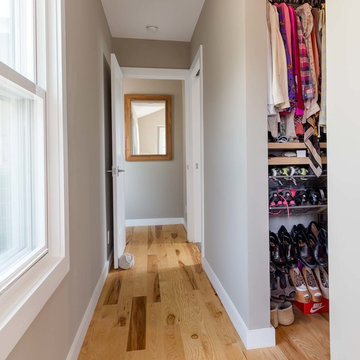
When our clients purchased their Fairfax Station home at the beginning of the pandemic, the main living areas had already been updated. However, three bathrooms were still stuck in the1980s. We tackled the upstairs primary and hall bathrooms first to ensure our clients had a working bathroom while construction was underway. Once the upstairs renovations were completed, we moved on to the main level guest bathroom.
Guest bathroom:
The home’s main level bathroom serves as both powder room and guest bathroom with 2 separate entrances. The in-swing door from the guest bedroom made the already narrow bathroom feel even more cramped. By installing a pocket door at the guest bedroom, we immediately improved the flow and usability of the space. The shower was upgraded with handcrafted white subway tile and contrasting grout, creating a clean, tailored look that elevates the room. Thoughtful details—like discreet grab bars and a handheld shower on a slide bar—make the space adaptable and comfortable for guests of all ages. A marble mosaic floor sets a refined backdrop for the freestanding black vanity, while the cross-bar handles offer a nod to the past on these modern-day fixtures.
 Custom Design & Construction
The homeowners had just purchased this home in El Segundo and they had remodeled the kitchen and one of the bathrooms on their own. However, they had more work to do. They felt that the rest of the project was too big and complex to tackle on their own and so they retained us to take over where they left off. The main focus of the project was to create a master suite and take advantage of the rather large backyard as an extension of their home. They were looking to create a more fluid indoor outdoor space.
When adding the new master suite leaving the ceilings vaulted along with French doors give the space a feeling of openness. The window seat was originally designed as an architectural feature for the exterior but turned out to be a benefit to the interior! They wanted a spa feel for their master bathroom utilizing organic finishes. Since the plan is that this will be their forever home a curbless shower was an important feature to them. The glass barn door on the shower makes the space feel larger and allows for the travertine shower tile to show through. Floating shelves and vanity allow the space to feel larger while the natural tones of the porcelain tile floor are calming. The his and hers vessel sinks make the space functional for two people to use it at once. The walk-in closet is open while the master bathroom has a white pocket door for privacy.
Since a new master suite was added to the home we converted the existing master bedroom into a family room. Adding French Doors to the family room opened up the floorplan to the outdoors while increasing the amount of natural light in this room. The closet that was previously in the bedroom was converted to built in cabinetry and floating shelves in the family room. The French doors in the master suite and family room now both open to the same deck space.
The homes new open floor plan called for a kitchen island to bring the kitchen and dining / great room together. The island is a 3” countertop vs the standard inch and a half. This design feature gives the island a chunky look. It was important that the island look like it was always a part of the kitchen. Lastly, we added a skylight in the corner of the kitchen as it felt dark once we closed off the side door that was there previously.
Repurposing rooms and opening the floor plan led to creating a laundry closet out of an old coat closet (and borrowing a small space from the new family room).
The floors become an integral part of tying together an open floor plan like this. The home still had original oak floors and the homeowners wanted to maintain that character. We laced in new planks and refinished it all to bring the project together.
To add curb appeal we removed the carport which was blocking a lot of natural light from the outside of the house. We also re-stuccoed the home and added exterior trim.
 Cordeiro Construction, Inc
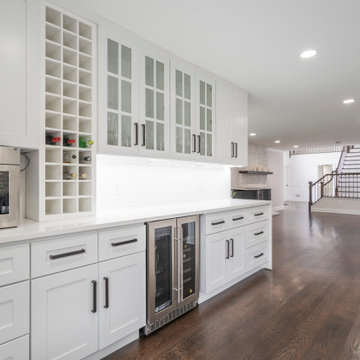
In our Malvern project, we tackled flooring issues by installing new red oak hardwood floors in the kitchen to address water damage and refinishing the entire first floor, excluding the kitchen area. We also repainted the baseboards and shoe molding for a polished look. The kitchen underwent a significant transformation, with the removal of lower cabinets, relocation of the stove, and installation of new white shaker cabinets and handles. Existing countertops, sink, faucet, and stove were seamlessly reinstalled, and a new Bosch 800 series dishwasher was added. This comprehensive update ensured a refreshed and functional kitchen space for our client.
 Tom Brzoskwinia
One of the most popular hardwood floor finishing which offers Tom & Peter Flooring is provided by WOCA. If you’ve decided that you want a natural looking wooden floor that is lacquer-free, then the likelihood is that you’ve chosen oil as your way of protecting your wood and making your floor look great at the same time. WOCA for wood flooring comes in various forms and is a great way of making sure that your wood is protected, but at the same time looks natural. A highly popular as well as effective way of treating wood floors, oils effectively penetrate into the wood and in some cases harden into the surface of the floor to stop damage and to maintain the wood in its optimum condition.
WOCA Oil finish hardwood flooring has taken the United States market by in 2014 and shows no signs of slowing down in 2016 and now. Here are some of the most common questions we have regarding this type of finish which we will I’m to answer in today’s my blog:
Is oil finish as durable as traditional factory urethane finishes with aluminum oxide?
When it comes to durability, oil finish flooring tackles the issue with a completely different method. The penetrating oil serves as protection from moisture and wear while allowing the user to feel the wood grains in their bare feet. If compared directly to factory finished aluminum oxide finish, the oil finish flooring will not perform as well to abrasion and impact. However, the beauty of this finish is the fact that it will camouflage any scratches which will inevitably accumulate over time.
Will this finish evaporate over time and will this be harmful for indoor air quality?
Another concern for oil finished floors its effect on indoor air quality. For on-site applications, some varieties suggest several coats which typically require the residents to be out of the home due to mild odors. However, there are factory finished UV-cured or single coat applications which lessen the downtime. Despite the odors produced during the drying process, oil finish floors rank amongst the lowest for VOC (volatile organic compound) emissions. Certain brands even boast true zero VOC. This fact alone makes oil finished floors one of the best options for green building solutions.
“WOCA products are certified by independent laboratories, the German Institute for Biological Building Materials, and are in accordance with DIN–Norm 53–160. WOCA WoodCare Denmark products meet or exceed the most stringent U.S. standards for volatile organic compounds.” –WOCA Oil Finish Manufacture
Does this type of finish require additional maintenance which I am not familiar with?
For weekly cleaning, oiled floors use a special cleaner which contains an oil and soap mixture. After a period of 12-18 months some oil may evaporate causing the wood grains to appear dry. An additional layer of oil can be reapplied to keep the floor looking fresh. Although oil finished floors require more involvement in periodic maintenance in high traffic areas, this maintenance can be done much easier than the equivalent of an onsite sand and refinish.
WOCA Master Color Oil contains pigment, which provides a single-step hardwood floor staining process. Laying down the stain and the finish in one step.
This product comes 14 different colors, from Black to Extra White, and you can mix them freely to create various color palettes that will meet the demands of any job.
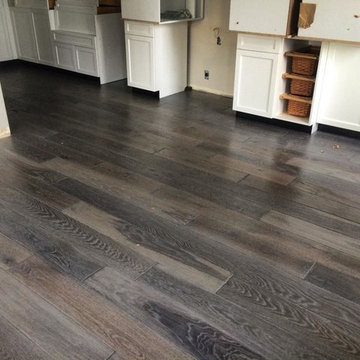
Below are some pictures of the finished job…
 TVL Creative Ltd.
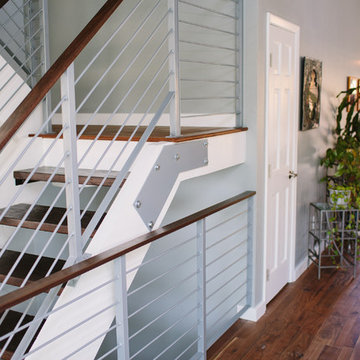
We were excited to take on this full home remodel with our Arvada clients! They have been living in their home for years, and were ready to delve into some major construction to make their home a perfect fit. This home had a lot of its original 1970s features, and we were able to work together to make updates throughout their home to make it fit their more modern tastes. We started by lowering their raised living room to make it level with the rest of their first floor; this not only removed a major tripping hazard, but also gave them a lot more flexibility when it came to placing furniture. To make their newly leveled first floor feel more cohesive we also replaced their mixed flooring with a gorgeous engineered wood flooring throughout the whole first floor. But the second floor wasn’t left out, we also updated their carpet with a subtle patterned grey beauty that tied in with the colors we utilized on the first floor. New taller baseboards throughout their entire home also helped to unify the spaces and brought the update full circle. One of the most dramatic changes we made was to take down all of the original wood railings and replace them custom steel railings. Our goal was to design a staircase that felt lighter and created less of a visual barrier between spaces. We painted the existing stringer a crisp white, and to balance out the cool steel finish, we opted for a wooden handrail. We also replaced the original carpet wrapped steps with dark wooden steps that coordinate with the finish of the handrail. Lighting has a major impact on how we feel about the space we’re in, and we took on this home’s lighting problems head on. By adding recessed lighting to the family room, and replacing all of the light fixtures on the first floor we were able to create more even lighting throughout their home as well as add in a few fun accents in the dining room and stairwell. To update the fireplace in the family room we replaced the original mantel with a dark solid wood beam to clean up the lines of the fireplace. We also replaced the original mirrored gold doors with a more contemporary dark steel finished to help them blend in better. The clients also wanted to tackle their powder room, and already had a beautiful new vanity selected, so we were able to design the rest of the space around it. Our favorite touch was the new accent tile installed from floor to ceiling behind the vanity adding a touch of texture and a clear focal point to the space. Little changes like replacing all of their door hardware, removing the popcorn ceiling, painting the walls, and updating the wet bar by painting the cabinets and installing a new quartz counter went a long way towards making this home a perfect fit for our clients
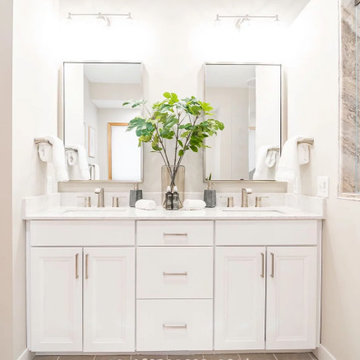 Pinnacle Design & Remodeling
A referral from Facebook Group, these clients were on a timeline to get into their newly purchased home that needed a whole lot of updating!
We first tackled their flooring and stair railing, so they could move in.
We then got to work on their owner's suite bathroom, which had a lot of unused space and outdated finishes.
A few of the things we changed: we turned a built in tub to a freestanding, changed the orientation of the shower and made it larger, and swamped out a built in vanity for a freestanding furniture vanity.
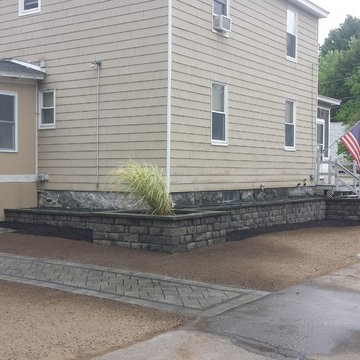
 Landtech Landscaping
Although there is dirt now, this project will be tackled in stages. Our next phase will include extensive low maintenance plantings to add seasonal color to the area.

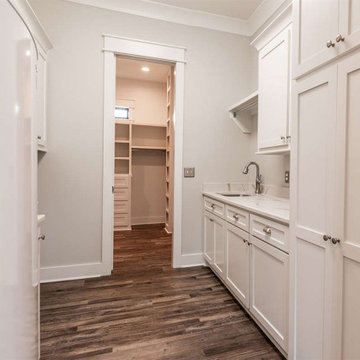
 America's Best House Plans
The laundry room is spacious with a sink for tackling tough stains and also includes a broom closet, more storage room, and space for a second freezer.
 J Design Group - Interior Designers Miami - Modern
A TOUCHDOWN BY DESIGN
Interior design by Jennifer Corredor, J Design Group, Coral Gables, Florida
Text by Christine Davis
Photography by Daniel Newcomb, Palm Beach Gardens, FL
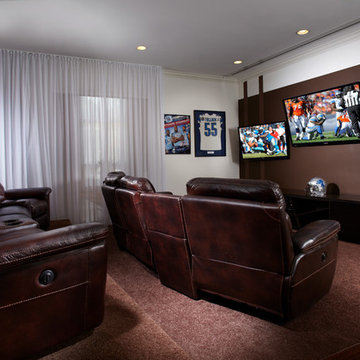
What did Detroit Lions linebacker, Stephen Tulloch, do when he needed a decorator for his new Miami 10,000-square-foot home? He tackled the situation by hiring interior designer Jennifer Corredor. Never defensive, he let her have run of the field. “He’d say, ‘Jen, do your thing,’” she says. And she did it well.
The first order of the day was to get a lay of the land and a feel for what he wanted. For his primary residence, Tulloch chose a home in Pinecrest, Florida. — a great family neighborhood known for its schools and ample lot sizes. “His lot is huge,” Corredor says. “He could practice his game there if he wanted.”
A laidback feeling permeates the suburban village, where mostly Mediterranean homes intermix with a few modern styles. With views toward the pool and a landscaped yard, Tulloch’s 10,000-square-foot home touches on both, a Mediterranean exterior with chic contemporary interiors.
Step inside, where high ceilings and a sculptural stairway with oak treads and linear spindles immediately capture the eye. “Knowing he was more inclined toward an uncluttered look, and taking into consideration his age and lifestyle, I naturally took the path of choosing more modern furnishings,” the designer says.
In the dining room, Tulloch specifically asked for a round table and Corredor found “Xilos Simplice” by Maxalto, a table that seats six to eight and has a Lazy Susan.
And just past the stairway, two armless chairs from Calligaris and a semi-round sofa shape the living room. In keeping with Tulloch’s desire for a simple no-fuss lifestyle, leather is often used for upholstery. “He preferred wipe-able areas,” she says. “Nearly everything in the living room is clad in leather.”
An architecturally striking, oak-coffered ceiling warms the family room, while Saturnia marble flooring grounds the space in cool comfort. “Since it’s just off the kitchen, this relaxed space provides the perfect place for family and friends to congregate — somewhere to hang out,” Corredor says. The deep-seated sofa wrapped in tan leather and Minotti armchairs in white join a pair of linen-clad ottomans for ample seating.
With eight bedrooms in the home, there was “plenty of space to repurpose,” Corredor says. “Five are used for sleeping quarters, but the others have been converted into a billiard room, a home office and the memorabilia room.” On the first floor, the billiard room is set for fun and entertainment with doors that open to the pool area.
The memorabilia room presented quite a challenge. Undaunted, Corredor delved into a seemingly never-ending collection of mementos to create a tribute to Tulloch’s career. “His team colors are blue and white, so we used those colors in this space,” she says.
In a nod to Tulloch’s career on and off the field, his home office displays awards, recognition plaques and photos from his foundation. A Copenhagen desk, Herman Miller chair and leather-topped credenza further an aura of masculinity.
All about relaxation, the master bedroom would not be complete without its own sitting area for viewing sports updates or late-night movies. Here, lounge chairs recline to create the perfect spot for Tulloch to put his feet up and watch TV. “He wanted it to be really comfortable,” Corredor says
A total redo was required in the master bath, where the now 12-foot-long shower is a far cry from those in a locker room. “This bath is more like a launching pad to get you going in the morning,” Corredor says.
“All in all, it’s a fun, warm and beautiful environment,” the designer says. “I wanted to create something unique, that would make my client proud and happy.” In Tulloch’s world, that’s a touchdown.
Your friendly Interior design firm in Miami at your service.
Contemporary - Modern Interior designs.
Top Interior Design Firm in Miami – Coral Gables.
Office,
Offices,
Kitchen,
Kitchens,
Bedroom,
Bedrooms,
Bed,
Queen bed,
King Bed,
Single bed,
House Interior Designer,
House Interior Designers,
Home Interior Designer,
Home Interior Designers,
Residential Interior Designer,
Residential Interior Designers,
Modern Interior Designers,
Miami Beach Designers,
Best Miami Interior Designers,
Miami Beach Interiors,
Luxurious Design in Miami,
Top designers,
Deco Miami,
Luxury interiors,
Miami modern,
Interior Designer Miami,
Contemporary Interior Designers,
Coco Plum Interior Designers,
Miami Interior Designer,
Sunny Isles Interior Designers,
Pinecrest Interior Designers,
Interior Designers Miami,
J Design Group interiors,
South Florida designers,
Best Miami Designers,
Miami interiors,
Miami décor,
Miami Beach Luxury Interiors,
Miami Interior Design,
Miami Interior Design Firms,
Beach front,
Top Interior Designers,
top décor,
Top Miami Decorators,
Miami luxury condos,
Top Miami Interior Decorators,
Top Miami Interior Designers,
Modern Designers in Miami,
modern interiors,
Modern,
Pent house design,
white interiors,
Miami, South Miami, Miami Beach, South Beach, Williams Island, Sunny Isles, Surfside, Fisher Island, Aventura, Brickell, Brickell Key, Key Biscayne, Coral Gables, CocoPlum, Coconut Grove, Pinecrest, Miami Design District, Golden Beach, Downtown Miami, Miami Interior Designers, Miami Interior Designer, Interior Designers Miami, Modern Interior Designers, Modern Interior Designer, Modern interior decorators, Contemporary Interior Designers, Interior decorators, Interior decorator, Interior designer, Interior designers, Luxury, modern, best, unique, real estate, decor
J Design Group – Miami Interior Design Firm – Modern – Contemporary
Contact us: (305) 444-4611
http://www.JDesignGroup.com
 Cordeiro Construction, Inc
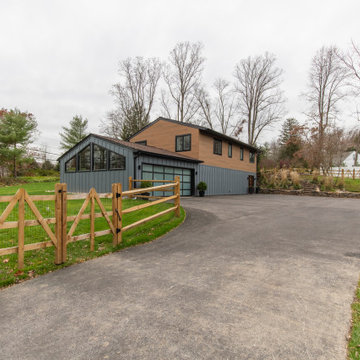
This project in Blue Bell involved a thorough renovation, including plumbing upgrades in multiple bathrooms and the addition of a tiki bar in the existing garage. We facilitated various plumbing installations, such as running gas pipes and adding an exterior faucet. Within the garage, we transformed spaces into a movie room, a powder room, and a tiki bar, complete with custom features like shelving and a gas fireplace. We also tackled flooring, doors, trim, and windows throughout the property, ensuring a cohesive aesthetic. Bathroom renovations included custom glass shower doors and unique design elements like cedar accents. Exterior improvements, such as door replacements and deck construction, were also part of our scope. Throughout the project, we adhered to building codes, completed necessary insulation and fireblocking, and applied paint according to the owner's preferences.
 Phoenix Home Remodeling
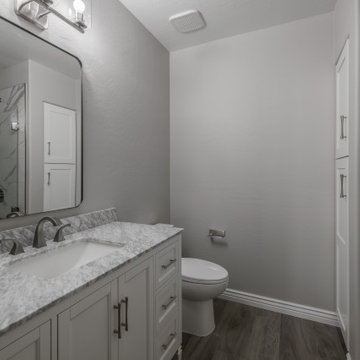
After the success of their master bathroom renovation, Mila and Rodney reached out to us once again, this time to tackle their guest bathroom.
During the planning and design phase, we worked closely with them to understand their needs for a family-friendly yet stylish space. We started by assessing the current layout, functionality issues, and their vision.
We began by removing the outdated vanity, cabinets, countertops, and lighting, then installed a new 82” cabinet with two sinks and paired with Maxwell 8" brushed nickel faucets for a modern, timeless look.
Kengston brushed nickel mirrors were hung vertically, with Kawoti 3-light vanity lights installed above, centered for optimal brightness.
The shower and bathtub area were gutted, removing the old tub. A new 30" white Wyndham Grayley bathtub with brushed nickel trim was installed, along with Themar Statuario V Matte 12x24" tiles on the shower wall.
To further elevate the design, we added a large recessed shower niche, tiled with a coordinating Statuario V Matte 2x2 Hex tile. Finally, sliding glass doors were installed, creating a more open and accessible shower area.
Mila & Rodney now have a refreshed guest bathroom that blends style, functionality, and durability—creating a space they will enjoy for years to come.
 AGM Home Store, LLC
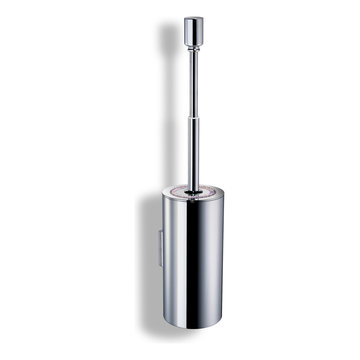
If you are looking for a designer, decorative, and high-end toilet brush holder set, you happen to be at the right place. You will want to show off your toilet brush holder in your guest bathroom or master bathroom once that you see the quality and amazing designs we offer. It’s good to have a specialty toilet brush on hand to tackle that dirty work to clean toilets. However, that does not mean they cannot serve a design purpose as well. While a toilet brush holder may not seem like that big of a deal hiding in the corner, you’d be surprised at how quickly little accessories like this can make, or break your bathroom look decorated. That's why we offer a line of chrome toilet brushes, gold toilet brushes, stainless steel toilet brush holders, brass toilet brush, white porcelain toilet brushes, ceramic toilet brush holder, glass toilet brushes, and toilet brushes with Swarovski Crystals: so that you are not shy to put it out on the bathroom floor. If you have a small guest bathroom and do not have space for a floor standing toilet bowl brush, you are lucky to be at our online store. We also offer wall mounted toilet brush holders that you can hang from your wall. Here at AGM Home Store you can find the perfect toilet brush holder and cleaner brush that matches your bathroom’s color scheme and style.
42