
Search results for "Address issues" in Home Design Ideas
 Tibma Design Build
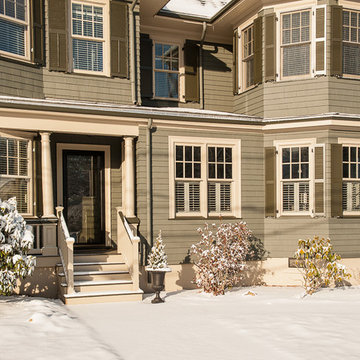
To the right of the front door there was once an open porch, which we incorporated into the new family room area
"I have never been as pleased with the final result of a remodel as I am with the work that Dan and his team did on my home. The work was well thought out and of superior craftsmanship. Dan consistently kept me apprised of job status, budget progression, issues encountered and options to address those issues. My job was particularly challenging because I was out of town and not available as much as I would have liked to have been, but Dan handled this very well. "
 Irene Designs
Home Remodeling Project Overview
This extensive home remodeling project transformed a dated and inefficient layout into a functional, open, and aesthetically cohesive living space. The original layout had several challenges:
• A kitchen with limited storage, no cabinets on the window side, a sink facing the wall, and a range crammed into the corner. The pantry closet was too deep and impractical.
• A living room that couldn’t accommodate furniture without interfering with traffic flow.
• A front foyer with wasted space.
• A claustrophobic hallway toilet room without a sink, located near the laundry room.
The Remodeling Concept
The scope of this project extended well beyond the kitchen. We proposed several layout options to address issues in all adjacent spaces, ultimately implementing a plan that:
• Removed two walls and moved doorways.
• Replaced the kitchen window.
• Converted the hallway toilet room into a storage space.
• Installed pocket doors to separate the laundry hallway from the living room.
Kitchen Transformation
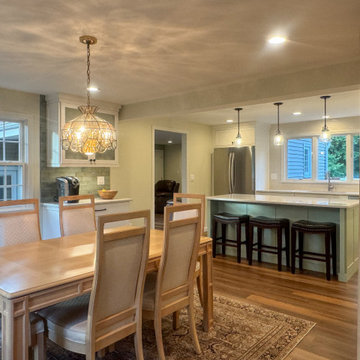
• Open Concept: By removing the wall between the kitchen and dining room, the two spaces became a seamless open area.
• New Layout: Cabinets were relocated to the window side for more storage and natural light. A central island with storage and seating was added, and a coffee bar was installed in the dining room.
• Updated Pantry: The deep pantry closet was converted into a pullout pantry with a cabinet front for better accessibility.
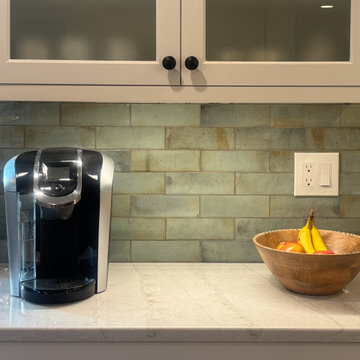
• Design Details: Off-white kitchen cabinets pair beautifully with a light green island. Warm white quartz counters and an artisan tile backsplash complete the look.
Dining Room
• Expanded Space: Most of the wall separating the dining room and foyer was removed, creating a more spacious area while still accommodating all furniture thanks to careful measurements.
Living Room Improvements
• Optimized Layout: Moving doorways and installing pocket doors allowed for better furniture placement, including a sofa that doesn’t interfere with traffic flow.
• Fireplace Upgrade: The brick fireplace was updated with a three-dimensional staggered stone veneer in a color matching the kitchen cabinets, creating a cohesive look. A TV was installed above the fireplace at a comfortable viewing angle.
Additional Updates
• New Flooring: All remodeled rooms now feature updated flooring.
• Ceilings: Popcorn ceilings were replaced with smooth, flat finishes, complemented by recessed lighting.
• Walls: Fresh paint throughout the space, with an accent wall in the living room matching the light green of the kitchen island.
• Lighting: Stylish sconces were added for a touch of elegance.
The Result
The homeowners are thrilled with the transformation, marveling at how their once cramped and inefficient home now feels spacious, functional, and beautifully cohesive. They can’t believe their house could ever look like this!
 Irene Designs
Home Remodeling Project Overview
This extensive home remodeling project transformed a dated and inefficient layout into a functional, open, and aesthetically cohesive living space. The original layout had several challenges:
• A kitchen with limited storage, no cabinets on the window side, a sink facing the wall, and a range crammed into the corner. The pantry closet was too deep and impractical.
• A living room that couldn’t accommodate furniture without interfering with traffic flow.
• A front foyer with wasted space.
• A claustrophobic hallway toilet room without a sink, located near the laundry room.
The Remodeling Concept
The scope of this project extended well beyond the kitchen. We proposed several layout options to address issues in all adjacent spaces, ultimately implementing a plan that:
• Removed two walls and moved doorways.
• Replaced the kitchen window.
• Converted the hallway toilet room into a storage space.
• Installed pocket doors to separate the laundry hallway from the living room.
Kitchen Transformation
• Open Concept: By removing the wall between the kitchen and dining room, the two spaces became a seamless open area.
• New Layout: Cabinets were relocated to the window side for more storage and natural light. A central island with storage and seating was added, and a coffee bar was installed in the dining room.
• Updated Pantry: The deep pantry closet was converted into a pullout pantry with a cabinet front for better accessibility.
• Design Details: Off-white kitchen cabinets pair beautifully with a light green island. Warm white quartz counters and an artisan tile backsplash complete the look.
Dining Room
• Expanded Space: Most of the wall separating the dining room and foyer was removed, creating a more spacious area while still accommodating all furniture thanks to careful measurements.
Living Room Improvements
• Optimized Layout: Moving doorways and installing pocket doors allowed for better furniture placement, including a sofa that doesn’t interfere with traffic flow.
• Fireplace Upgrade: The brick fireplace was updated with a three-dimensional staggered stone veneer in a color matching the kitchen cabinets, creating a cohesive look. A TV was installed above the fireplace at a comfortable viewing angle.
Additional Updates
• New Flooring: All remodeled rooms now feature updated flooring.
• Ceilings: Popcorn ceilings were replaced with smooth, flat finishes, complemented by recessed lighting.
• Walls: Fresh paint throughout the space, with an accent wall in the living room matching the light green of the kitchen island.
• Lighting: Stylish sconces were added for a touch of elegance.
The Result
The homeowners are thrilled with the transformation, marveling at how their once cramped and inefficient home now feels spacious, functional, and beautifully cohesive. They can’t believe their house could ever look like this!
Find the right local pro for your project

 kmjee
kmjeePepper plants are a delightful addition to any garden, offering a vibrant burst of color and spice to your culinary creations. However, even experienced gardeners can encounter challenges when growing pepper plants. In this blog, we'll explore some common issues you might face and provide practical solutions to help your pepper plants thrive.
1. Slow or Stunted Growth
Issue: Slow or stunted growth in pepper plants can be discouraging, but there are specific steps you can take to address this issue effectively.
Solution:
a. Soil Health:
- Well-Draining Soil: Ensure your pepper plants are in well-draining soil to prevent waterlogged roots, which can inhibit growth.
- Organic Matter: Incorporate plenty of organic matter, such as compost or well-rotted manure, into the soil to improve its texture and nutrient content.
- pH Level: Test the soil pH and adjust it to the ideal range between 6.0 and 6.8 using lime or sulfur as needed.
b. Fertilization:
- Balanced Fertilizer: Use a balanced, slow-release fertilizer designed for vegetables to provide essential nutrients steadily throughout the growing season.
- Compost: Amend the soil with compost to enhance nutrient availability and soil structure. This can promote healthier growth.
c. Watering:
- Consistent Moisture: Maintain consistent soil moisture levels by watering your pepper plants regularly but avoid waterlogging. Aim for 1-2 inches of water per week, adjusting based on your local climate and weather conditions.
- Mulching: Apply mulch around the base of the plants to retain soil moisture and regulate temperature.
2. Yellowing Leaves
Issue: Yellowing leaves can be a sign of various underlying problems, but addressing them promptly can restore the vibrancy of your pepper plants.
Solution:
a. Nutrient Deficiencies:
- Balanced Fertilization: Use a well-balanced fertilizer that includes micronutrients to address nutrient deficiencies.
- Specific Nutrients: If you suspect a particular deficiency, such as magnesium, iron, or nitrogen, apply the appropriate nutrient supplement following package instructions.
b. Pest and Disease Control:
- Pest Inspection: Regularly inspect the leaves and stems for common pests like aphids and mites. Remove affected leaves and treat with organic pesticides if necessary.
- Disease Management: Look out for signs of diseases like bacterial leaf spot or fungal issues. Apply organic fungicides or bactericides as recommended.
3. Blossom Drop
Issue: When pepper plants drop their blossoms prematurely, it can hinder fruit development and lead to disappointment.
Solution:
a. Temperature Control:
- Stable Temperatures: Ensure your pepper plants are exposed to consistent temperatures between 70°F and 80°F (21°C to 27°C) during flowering. Avoid sudden temperature fluctuations by providing shelter or using row covers.
b. Pollination:
- Assist with Pollination: If growing peppers indoors or in a greenhouse, help with pollination by gently shaking the plants or using a small brush to transfer pollen between flowers. Outdoor pepper plants are usually pollinated by insects.
4. Wilting Plants
Issue: Wilting or drooping pepper plants can be a sign of various problems, but proper care can revive them.
Solution:
a. Watering:
- Consistent Moisture: Adjust your watering routine to keep the soil consistently moist but not waterlogged. Water early in the day to prevent fungal issues.
- Drainage: Ensure proper soil drainage by amending the soil or using raised beds to prevent waterlogged roots.
b. Pest Control:
- Pest Inspection: Examine the undersides of leaves for signs of pests like aphids, spider mites, or whiteflies. Treat infestations promptly with biological insecticides.
5. Curling Leaves
Issue: Curling or misshapen leaves indicate stress in pepper plants, which can be caused by various factors.
Solution:
a. Environmental Stress:
- Stable Conditions: Ensure your pepper plants are in an environment with stable humidity, temperature, and adequate air circulation. Avoid sudden changes in conditions.
- Proper Ventilation: Adequate air circulation can reduce humidity and prevent fungal issues.
b. Pest and Disease Management:
- Pest Inspection: Regularly inspect your plants for pests and diseases, addressing them promptly with organic remedies as needed.
6. Sunscald
Issue: Sunscald can lead to discolored, leathery patches on pepper fruits when exposed to intense sunlight.
Solution:
a. Shade Cloth:
- Sun Protection: Shield your pepper plants from harsh sunlight during the hottest part of the day using shade cloth or by planting them where they receive some filtered sunlight.
b. Pruning:
- Fruit Shading: Prune excess foliage to allow better fruit shading, reducing the risk of sunscald. Ensure that there's a balance between foliage and fruit.
7. Pepper Plant Pests and Diseases
Issue: Aphids, mites, whiteflies, and various diseases can affect pepper plants, but you can manage them effectively.
Solution:
a. Regular Inspection:
- Vigilant Monitoring: Regularly inspect your pepper plants for signs of pests or diseases, paying close attention to the undersides of leaves and stems.
b. Organic Remedies:
- Pest Control: Use organic remedies like neem oil, insecticidal soap, or diatomaceous earth for pest control.
- Disease Management: Apply organic fungicides or bactericides as recommended to manage diseases like powdery mildew or bacterial spot.
While growing pepper plants can present various challenges, these common issues are manageable with the right knowledge and care. Regular monitoring, proper soil preparation, and timely intervention can help you enjoy a bountiful harvest of vibrant, spicy peppers. Remember that gardening is a learning experience, and each challenge you face is an opportunity to improve your skills and enjoy the rewards of homegrown peppers in your favorite dishes.
 Design Set Match
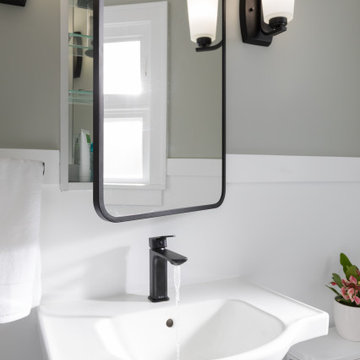
This remodel addressed issues including peeling vinyl flooring, outdated fixtures, and safety hazards due to deferred maintenance.
Challenges included: sourcing budget-sensitive materials with a high-end feel; slip-resistant hexagon floor tiles; a new pedestal sink; a water-saving toilet; and a larger medicine cabinet, while correcting code violations.
Universal Design created an open floor plan, low-maintenance finishes, zero-threshold entries into the bathroom and shower, in addition to highly-contrasting materials, grab bars with blocking, accessible towel bars for user convenience, and dimmable lighting with anti-glare trim.
We combined modern materials for a noir style and universal functionality for our aging-in-place clients and their forever home.
 Murphy Bros. Design | Build | Remodel
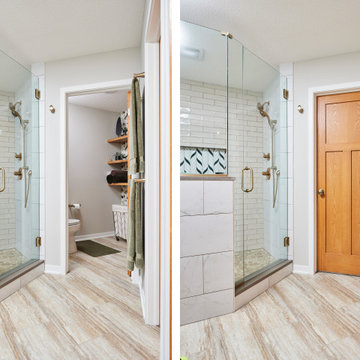
Homes 25 years or older often have minor mold issues to complicate whatever functionality and outdated issues need addressing. That was certainly the case in this Eagan master suite remodel that screamed “Tear me apart and put me back together so I work!”
So that’s what we did. After addressing the mold issues we shortened the vanity footprint, added that space to an enlarged low-threshold shower with a bench seat, and moved a lot of the storage needs to new cabinets in an adjacent properly enclosed water closet with a door. The tile work was extensive and really made a statement of luxury. New warm LVP flooring finished the aesthetic and livability upgrades.
The challenge in working with existing materials, such as oak doors, in a space that is going to change dramatically, is finding ways to incorporate them with the right balance. So, we replaced all the doors and floating shelves with an upgraded oak in the same tone, which worked in harmony with the taupes and grays we chose for the rest of the bathroom space.
As the homeowner put it, "I'm grateful for Murphy Brothers as a whole, for the work that they did to help make what I thought was my vision even better."
 Georgia Outdoor Services
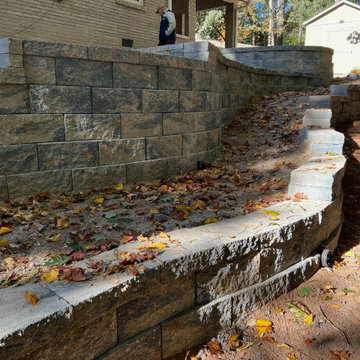
The backyard in this Dunwoody, GA residence presented several challenges, including failing cinder block walls, unsafe steps, and an aging deck. These issues rendered the space largely unusable and created drainage problems, limiting both safety and functionality for the homeowners. Our team addressed these issues by removing all existing structures and undertaking a comprehensive rebuild. This involved regrading the area for proper drainage, constructing new retaining walls, and installing integrated steps for safe access throughout the yard. Multiple paver patios were also installed to create defined entertaining areas. The outcome is a safe and highly functional outdoor living space in Dunwoody. The new retaining walls provide essential structural support, the drainage system manages stormwater effectively, and the integrated patios and walkways offer inviting areas for recreation and access.
 Senergy360, LLC.
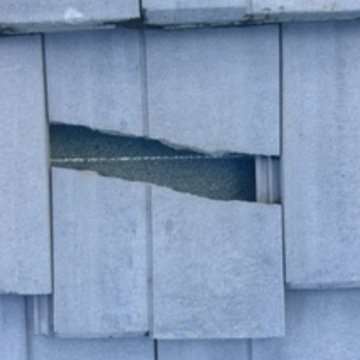
At Senergy360, we specialize in thorough roof inspections, focusing on damaged or broken tiles that can compromise your home's structural integrity. Our expert team examines every aspect of your roofing system to identify potential issues before they escalate into major problems.
To maintain a healthy home environment and prevent mold growth, regular roof maintenance is essential. Even small cracks or damaged areas can allow moisture infiltration, leading to serious issues like toxic mold development, compromised indoor air quality, and reduced energy efficiency. We recommend comprehensive inspections to identify and address these issues early.
Our commitment to healthy home construction extends beyond roof inspections. We understand that a truly healthy home requires proper ventilation, moisture control, and the use of non-toxic building materials. Our expertise helps homeowners create living spaces that promote wellness through:
Smart moisture management systems
Proper attic ventilation design
High-quality, sustainable building materials
Energy-efficient construction methods
Professional drainage solutions
By addressing these crucial elements during construction or renovation, we help create homes that protect your investment and support your family's health and well-being.
 Georgia Outdoor Services
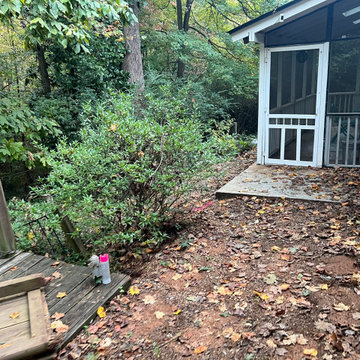
The backyard in this Dunwoody, GA residence presented several challenges, including failing cinder block walls, unsafe steps, and an aging deck. These issues rendered the space largely unusable and created drainage problems, limiting both safety and functionality for the homeowners. Our team addressed these issues by removing all existing structures and undertaking a comprehensive rebuild. This involved regrading the area for proper drainage, constructing new retaining walls, and installing integrated steps for safe access throughout the yard. Multiple paver patios were also installed to create defined entertaining areas. The outcome is a safe and highly functional outdoor living space in Dunwoody. The new retaining walls provide essential structural support, the drainage system manages stormwater effectively, and the integrated patios and walkways offer inviting areas for recreation and access.
 Bethesda Garden Design llc
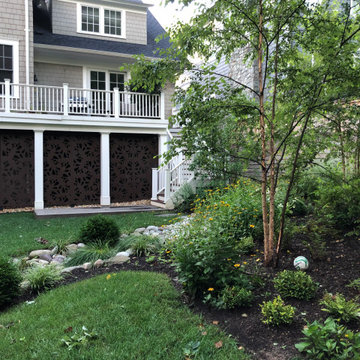
Newly constructed home with severe water issues. Using a rain garden, along with a swale made of river rocks along the side of the house and through the back garden into a rain garden. Use of water loving plant in the design help to address issues.
 Design Set Match
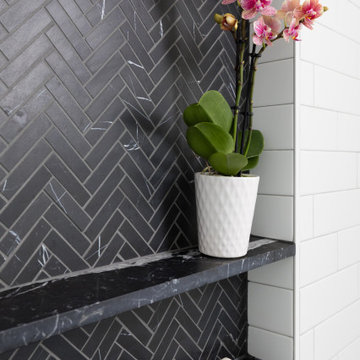
This remodel addressed issues including peeling vinyl flooring, outdated fixtures, and safety hazards due to deferred maintenance.
Challenges included: sourcing budget-sensitive materials with a high-end feel; slip-resistant hexagon floor tiles; a new pedestal sink; a water-saving toilet; and a larger medicine cabinet, while correcting code violations.
Universal Design created an open floor plan, low-maintenance finishes, zero-threshold entries into the bathroom and shower, in addition to highly-contrasting materials, grab bars with blocking, accessible towel bars for user convenience, and dimmable lighting with anti-glare trim.
We combined modern materials for a noir style and universal functionality for our aging-in-place clients and their forever home.
 Christian Williams
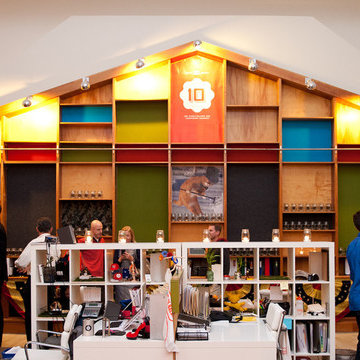
Addressing sound issues was a concern in a space as large as this. In order to combat the problem, I wrapped sound dampening materials in bold fabrics to address the issue as well as make a dramatic statement.
Christian Williams
 Ashton Renovations
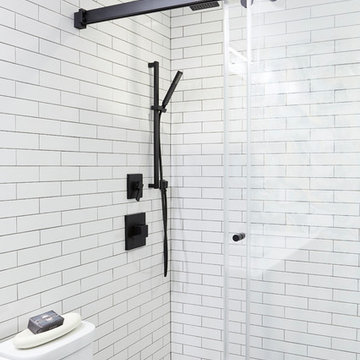
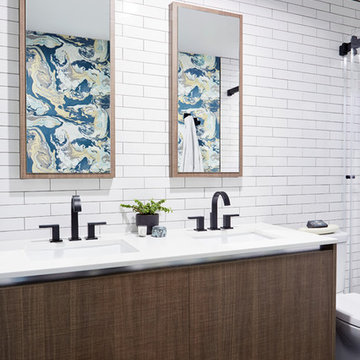
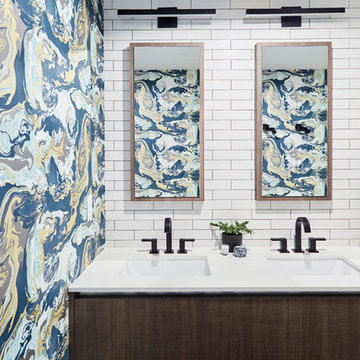
The original ensuite bathroom in this condominium required renovations to replace problematic Kitec plumbing. The layout in the space remained the same, but improvements were made to address certain design challenges with lighting, automation, and space. The aim was to create a modern bathroom design with textured wood features, and the feel of metallic black accents.
A number of prominent changes were made to improve the use of space. The original entry, a left-handed door swinging into the bathroom, was replaced. It interfered with the vanity clear floor space. It also made the use of the bathroom difficult when two users were present. It was changed to a soft closing pocket door. To avoid losing space it was installed by creating a wall cavity on the outside of the bathroom. This door also included frosted glass panels to allow natural light into the space. Double sliding glass shower doors were also installed to address access issues to the shower valve.
Storage improvements included the installation of dual inset medicine cabinets, and pull out drawers within the wall hung vanity. The depth of the medicine cabinets were extended outwards, and this nice detail was finished with a textured wood finish. The addition of the wall hung vanity also created the feeling of more space beneath the units and allowed for under cabinet lighting.
Lighting and automation improvements included the addition of HUE LED lighting. This was done by installing two shower pot lights, a 6” main potlight, and under cabinet lighting. These are all controlled by the Philips Hue App that programs routines, scenes, and other settings.
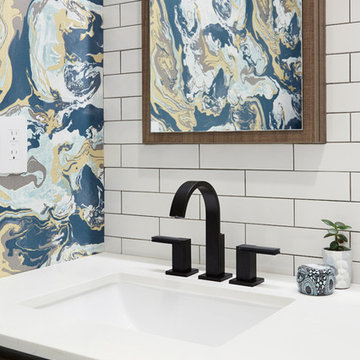
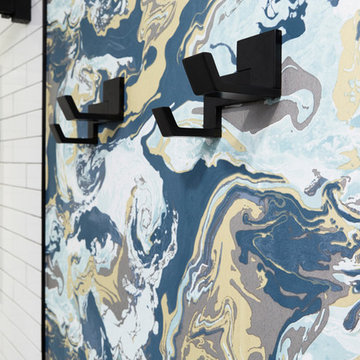
Some of the other highlights of this modern bathroom include dark grout, which contrasts nicely with the elongated white tile, a thermostatic shower system, herringbone textured porcelain floor tile, and a Schluter Kerdi waterproofing shower system. This bathroom is made most unique though with the choice of wallpaper, which can be described as modern luxury, a graphic take on agate stone patterns with metallic embellishments.
 D-Trac Construction Inc.
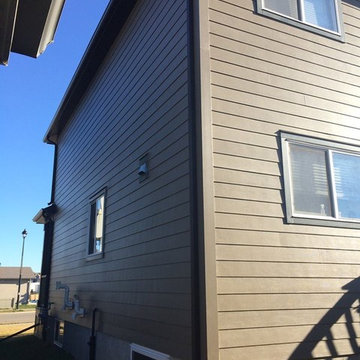
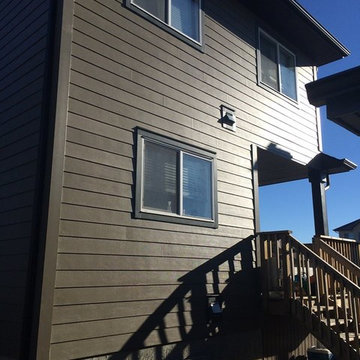
D-Trac Construction was contracted to address install issues from a previous contractor related to the workmanship and install of the exterior hardie board package. Because of the issues, the local county would not pass building permit inspection due to non-compliance with the Alberta Building Code and the Safety Codes Act.
Issues and corrective actions included:
1. Aluminum J and corner trim does not allow for the plank to be sealed (caulked at termination).
Corrective Action: Install 5/4" Smart Trim and color match caulk at all terminations.
2. Flashing detail on primary head flashings are cut and bent, creating point of entry on each end dam at the back side of drip.
Corrective Action: Install new primary head flashings using the fold method to create end dam.
3: Incorrect stagger on plank install, Not enough distance between butt joints on stagger, no slip plates at butt joints.
Corrective Action: Install new plank using a either a 24" or 32" stagger pattern, with aluminum slip plates behind all butt joints.
4: Many terminations through plank siding have no trim block, not sealed correctly.
Corrective Action: Install 5/4" trim blocks to allow plank to be sealed(caulked to termination.
At the end of the project, a final inspection was completed and the local county passed the building permit inspection.
 D-Trac Construction Inc.
D-Trac Construction was contracted to address install issues from a previous contractor related to the workmanship and install of the exterior hardie board package. Because of the issues, the local county would not pass building permit inspection due to non-compliance with the Alberta Building Code and the Safety Codes Act.
Issues and corrective actions included:
1. Aluminum J and corner trim does not allow for the plank to be sealed (caulked at termination).
Corrective Action: Install 5/4" Smart Trim and color match caulk at all terminations.
2. Flashing detail on primary head flashings are cut and bent, creating point of entry on each end dam at the back side of drip.
Corrective Action: Install new primary head flashings using the fold method to create end dam.
3: Incorrect stagger on plank install, Not enough distance between butt joints on stagger, no slip plates at butt joints.
Corrective Action: Install new plank using a either a 24" or 32" stagger pattern, with aluminum slip plates behind all butt joints.
4: Many terminations through plank siding have no trim block, not sealed correctly.
Corrective Action: Install 5/4" trim blocks to allow plank to be sealed(caulked to termination.
At the end of the project, a final inspection was completed and the local county passed the building permit inspection.
 Tile Doctor Ltd
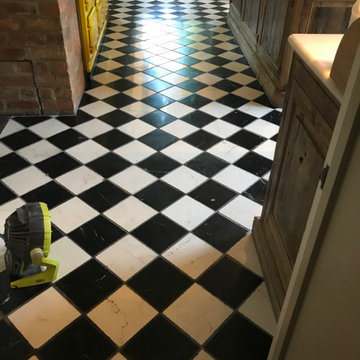
The tiles shown in the photographs below are classic distressed Black and White Italian Marble installed in the kitchen of a property in Bamber Bridge which is South of Preston. Some of the tiles had an issue with loose grout which I suspect was due to the suspended wooden floor and a small amount of movement had resulted in the grout cracking.
Ideally more support would be needed under the floor to prevent this, in the meantime however I recommended removing the grout and replacing with a flexible grout product that could cope with the movement. The tiles also needed a clean, polish and reseal so it made sense to address the issue with the grout as part of the work.
Working as a two-man team we started by cleaning the floor with a set of diamond burnishing pads starting with a coarse 400-grit, followed by 800 and 1500 grit. Water was used to lubricate the process and the floor was rinsed with water between pads with the fine slurry generated by the process extracted using a wet vacuum. These pads remove ingrained dirt and then slowly refine the appearance of the Marble building up its polished appearance in the process.
The next step was to rake out all the grout which as discussed was compromised and needed replacing. We had to be very careful when removing the grout due to the electric heating mat under the floor, any damage to that would require ripping the floor up. With the old grout removed and the floor cleaned the floor was then grouted using Mapei Ultra-colour which is a flexible and fully waterproof grout more than suitable for this situation.
Between us we managed to pack a lot into day one which was tough, however with the hardest tasks out of the way day two should be a lot easier.
Day two started with an initial clean making sure to remove any excess grout smeared on the surface that can affect the look of the tile if not removed. This was followed by the application of the last of the set of burnishing pads which is a 3,000-grit pad that really brings up the polish on the marble. You only need a small amount of water sprayed onto the floor when applying this last pad so by late morning the floor was dry and ready for sealing. The customer wanted a better sheen appearance than they previously had, fortunately we find the Diamond burnishing pads do this well, they also tighten up the pores of the stone as well which means less sealer is needed.
The floor was then sealed with Tile Doctor Colour Grow which is an impregnating sealer that improves colour and soaks into the stone occupying the pores and thereby preventing dirt from becoming ingrained. Once complete the floor looked great and the client was very happy.
Sealers and Polish do wear down with use over time so before leaving I discussed our annual maintenance plan option which will ensure the appearance of the Marble floor always looks good. The plan involves returning once a year to further polish the floor with a high-grade burnishing pad and to add more sealer if required. We also discussed the use of Tile Doctor Stone Soap for regular cleaning, it is a pH neutral cleaner which is ideal for stone floors like Marble which are acid sensitive.
Russell Taylor
Lancashire Tile Doctor
 Ashton Renovations
The original ensuite bathroom in this condominium required renovations to replace problematic Kitec plumbing. The layout in the space remained the same, but improvements were made to address certain design challenges with lighting, automation, and space. The aim was to create a modern bathroom design with textured wood features, and the feel of metallic black accents.
A number of prominent changes were made to improve the use of space. The original entry, a left-handed door swinging into the bathroom, was replaced. It interfered with the vanity clear floor space. It also made the use of the bathroom difficult when two users were present. It was changed to a soft closing pocket door. To avoid losing space it was installed by creating a wall cavity on the outside of the bathroom. This door also included frosted glass panels to allow natural light into the space. Double sliding glass shower doors were also installed to address access issues to the shower valve.
Storage improvements included the installation of dual inset medicine cabinets, and pull out drawers within the wall hung vanity. The depth of the medicine cabinets were extended outwards, and this nice detail was finished with a textured wood finish. The addition of the wall hung vanity also created the feeling of more space beneath the units and allowed for under cabinet lighting.
Lighting and automation improvements included the addition of HUE LED lighting. This was done by installing two shower pot lights, a 6” main potlight, and under cabinet lighting. These are all controlled by the Philips Hue App that programs routines, scenes, and other settings.
Some of the other highlights of this modern bathroom include dark grout, which contrasts nicely with the elongated white tile, a thermostatic shower system, herringbone textured porcelain floor tile, and a Schluter Kerdi waterproofing shower system. This bathroom is made most unique though with the choice of wallpaper, which can be described as modern luxury, a graphic take on agate stone patterns with metallic embellishments.
 Ashton Renovations
The original ensuite bathroom in this condominium required renovations to replace problematic Kitec plumbing. The layout in the space remained the same, but improvements were made to address certain design challenges with lighting, automation, and space. The aim was to create a modern bathroom design with textured wood features, and the feel of metallic black accents.
A number of prominent changes were made to improve the use of space. The original entry, a left-handed door swinging into the bathroom, was replaced. It interfered with the vanity clear floor space. It also made the use of the bathroom difficult when two users were present. It was changed to a soft closing pocket door. To avoid losing space it was installed by creating a wall cavity on the outside of the bathroom. This door also included frosted glass panels to allow natural light into the space. Double sliding glass shower doors were also installed to address access issues to the shower valve.
Storage improvements included the installation of dual inset medicine cabinets, and pull out drawers within the wall hung vanity. The depth of the medicine cabinets were extended outwards, and this nice detail was finished with a textured wood finish. The addition of the wall hung vanity also created the feeling of more space beneath the units and allowed for under cabinet lighting.
Lighting and automation improvements included the addition of HUE LED lighting. This was done by installing two shower pot lights, a 6” main potlight, and under cabinet lighting. These are all controlled by the Philips Hue App that programs routines, scenes, and other settings.
Some of the other highlights of this modern bathroom include dark grout, which contrasts nicely with the elongated white tile, a thermostatic shower system, herringbone textured porcelain floor tile, and a Schluter Kerdi waterproofing shower system. This bathroom is made most unique though with the choice of wallpaper, which can be described as modern luxury, a graphic take on agate stone patterns with metallic embellishments.
 Ashton Renovations
The original ensuite bathroom in this condominium required renovations to replace problematic Kitec plumbing. The layout in the space remained the same, but improvements were made to address certain design challenges with lighting, automation, and space. The aim was to create a modern bathroom design with textured wood features, and the feel of metallic black accents.
A number of prominent changes were made to improve the use of space. The original entry, a left-handed door swinging into the bathroom, was replaced. It interfered with the vanity clear floor space. It also made the use of the bathroom difficult when two users were present. It was changed to a soft closing pocket door. To avoid losing space it was installed by creating a wall cavity on the outside of the bathroom. This door also included frosted glass panels to allow natural light into the space. Double sliding glass shower doors were also installed to address access issues to the shower valve.
Storage improvements included the installation of dual inset medicine cabinets, and pull out drawers within the wall hung vanity. The depth of the medicine cabinets were extended outwards, and this nice detail was finished with a textured wood finish. The addition of the wall hung vanity also created the feeling of more space beneath the units and allowed for under cabinet lighting.
Lighting and automation improvements included the addition of HUE LED lighting. This was done by installing two shower pot lights, a 6” main potlight, and under cabinet lighting. These are all controlled by the Philips Hue App that programs routines, scenes, and other settings.
Some of the other highlights of this modern bathroom include dark grout, which contrasts nicely with the elongated white tile, a thermostatic shower system, herringbone textured porcelain floor tile, and a Schluter Kerdi waterproofing shower system. This bathroom is made most unique though with the choice of wallpaper, which can be described as modern luxury, a graphic take on agate stone patterns with metallic embellishments.
 Ashton Renovations
The original ensuite bathroom in this condominium required renovations to replace problematic Kitec plumbing. The layout in the space remained the same, but improvements were made to address certain design challenges with lighting, automation, and space. The aim was to create a modern bathroom design with textured wood features, and the feel of metallic black accents.
A number of prominent changes were made to improve the use of space. The original entry, a left-handed door swinging into the bathroom, was replaced. It interfered with the vanity clear floor space. It also made the use of the bathroom difficult when two users were present. It was changed to a soft closing pocket door. To avoid losing space it was installed by creating a wall cavity on the outside of the bathroom. This door also included frosted glass panels to allow natural light into the space. Double sliding glass shower doors were also installed to address access issues to the shower valve.
Storage improvements included the installation of dual inset medicine cabinets, and pull out drawers within the wall hung vanity. The depth of the medicine cabinets were extended outwards, and this nice detail was finished with a textured wood finish. The addition of the wall hung vanity also created the feeling of more space beneath the units and allowed for under cabinet lighting.
Lighting and automation improvements included the addition of HUE LED lighting. This was done by installing two shower pot lights, a 6” main potlight, and under cabinet lighting. These are all controlled by the Philips Hue App that programs routines, scenes, and other settings.
Some of the other highlights of this modern bathroom include dark grout, which contrasts nicely with the elongated white tile, a thermostatic shower system, herringbone textured porcelain floor tile, and a Schluter Kerdi waterproofing shower system. This bathroom is made most unique though with the choice of wallpaper, which can be described as modern luxury, a graphic take on agate stone patterns with metallic embellishments.
8