
Search results for "Been" in Home Design Ideas
 Sabrina Alfin Interiors
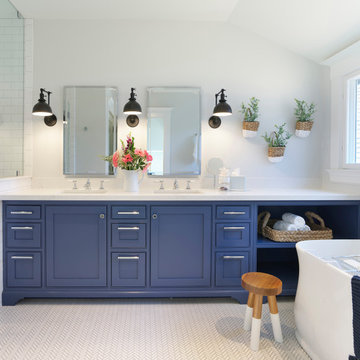
Newly constructed double vanity bath with separate soaking tub and shower for two teenage sisters. Subway tile, herringbone tile, porcelain handle lever faucets, and schoolhouse style light fixtures give a vintage twist to a contemporary bath.

Find the right local pro for your project
 Gast Architects
Aaron Leitz
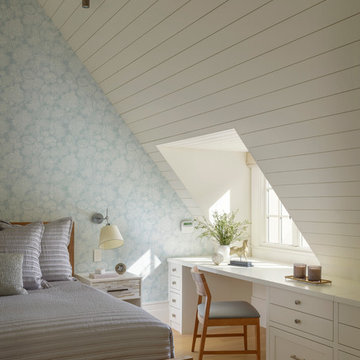
Bedroom - transitional guest light wood floor bedroom idea in San Francisco with blue walls
Bedroom - transitional guest light wood floor bedroom idea in San Francisco with blue walls
 TKS Design Group
Free ebook, CREATING THE IDEAL KITCHEN
Download now → http://bit.ly/idealkitchen
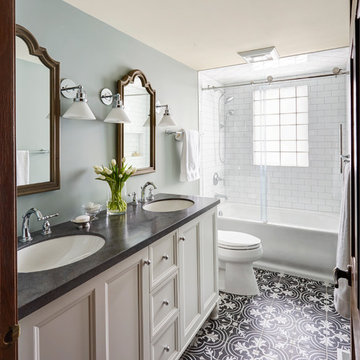
The hall bath for this client started out a little dated with its 1970’s color scheme and general wear and tear, but check out the transformation!
The floor is really the focal point here, it kind of works the same way wallpaper would, but -- it’s on the floor. I love this graphic tile, patterned after Moroccan encaustic, or cement tile, but this one is actually porcelain at a very affordable price point and much easier to install than cement tile.
Once we had homeowner buy-in on the floor choice, the rest of the space came together pretty easily – we are calling it “transitional, Moroccan, industrial.” Key elements are the traditional vanity, Moroccan shaped mirrors and flooring, and plumbing fixtures, coupled with industrial choices -- glass block window, a counter top that looks like cement but that is actually very functional Corian, sliding glass shower door, and simple glass light fixtures.
The final space is bright, functional and stylish. Quite a transformation, don’t you think?
Designed by: Susan Klimala, CKD, CBD
Photography by: Mike Kaskel
For more information on kitchen and bath design ideas go to: www.kitchenstudio-ge.com
 Adrienne DeRosa
Adrienne DeRosa © 2014 Houzz Inc.
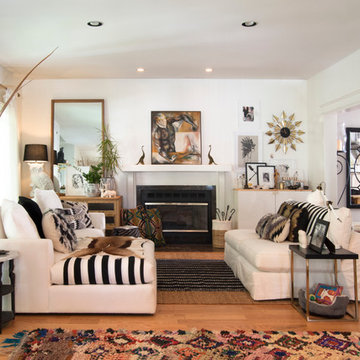
The recently redecorated living space defines a new direction for the first floor of Raymond's and Jennifer's home. Although Jennifer has always redesigned the look of their rooms every 4-5 years, this time around comes with a different perspective. "Now that [the kids] are all moved out and it is just my husband and I, I finally have had the ability to have fun with the house," Jennifer explains. "I have always redecorated every couple years, but this time has been my favorite. I can finally get rid of the clutter and stuff and find chic, fun pieces I know won't get a ball thrown through them."
Wall color: Alabaster White, Duration by Sherwin Williams; sofas: Arhaus
Photo: Adrienne DeRosa © 2014 Houzz
 O’Hara Interiors
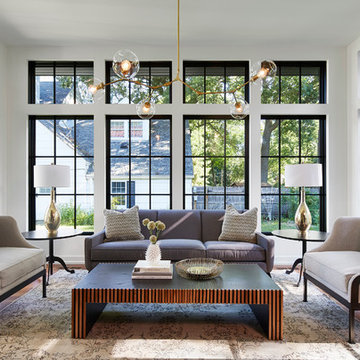
Martha O'Hara Interiors, Furnishings & Photo Styling | Detail Design + Build, Builder | Charlie & Co. Design, Architect | Corey Gaffer, Photography | Please Note: All “related,” “similar,” and “sponsored” products tagged or listed by Houzz are not actual products pictured. They have not been approved by Martha O’Hara Interiors nor any of the professionals credited. For information about our work, please contact design@oharainteriors.com.
Sponsored
Columbus, OH

Wannemacher Interiors
Customized Award-Winning Interior Design Solutions in Franklin Cnty OH
 Kayron Brewer, CMKBD / Studio K B
Drew Rice, Red Pants Studio
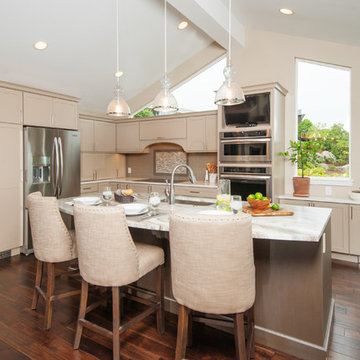
Inspiration for a transitional l-shaped medium tone wood floor and brown floor open concept kitchen remodel in Seattle with shaker cabinets, beige cabinets, beige backsplash, stainless steel appliances, an undermount sink, quartzite countertops, subway tile backsplash and an island
Inspiration for a transitional l-shaped medium tone wood floor and brown floor open concept kitchen remodel in Seattle with shaker cabinets, beige cabinets, beige backsplash, stainless steel appliances, an undermount sink, quartzite countertops, subway tile backsplash and an island
 VanderHorn Architects
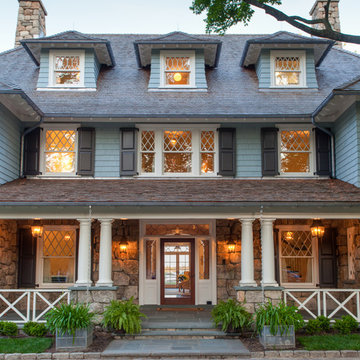
Reminiscent of a 1910 Shingle Style, this new stone and cedar shake home welcomes guests through a classic doorway framing a view of the Long Island Sound beyond. Paired Tuscan columns add formality to the graceful front porch.
 Lovejoy Interiors
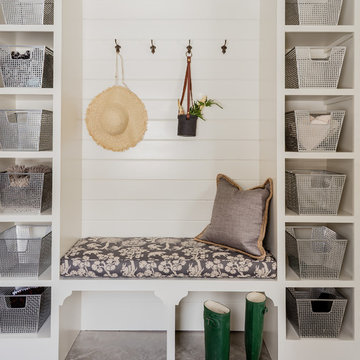
Example of a beach style concrete floor and gray floor mudroom design in Boston with white walls
 Significant Homes LLC
Douglas VanderHorn Architects
From grand estates, to exquisite country homes, to whole house renovations, the quality and attention to detail of a "Significant Homes" custom home is immediately apparent. Full time on-site supervision, a dedicated office staff and hand picked professional craftsmen are the team that take you from groundbreaking to occupancy. Every "Significant Homes" project represents 45 years of luxury homebuilding experience, and a commitment to quality widely recognized by architects, the press and, most of all....thoroughly satisfied homeowners. Our projects have been published in Architectural Digest 6 times along with many other publications and books. Though the lion share of our work has been in Fairfield and Westchester counties, we have built homes in Palm Beach, Aspen, Maine, Nantucket and Long Island.

 William Hoffman Architect
4 Steps to Achieving a Rewarding Cost Effective Home Renovation
1 Home Renovation an Introduction
A home renovation due to changes in family needs and space requirements can be a challenging, but also a rewarding experience. As a homeowner, gathering and coordinating resources and possibly help from professional consultants are required. Once the construction phase has started, patience, endurance and commitment to follow through are necessary. Despite the challenges, the rewards of a well-planned and successfully completed project are meaningful, adding aesthetic and economic value, also providing the opportunity to personalize a home, encompassing the function, comfort and aesthetics to accommodate individual taste and lifestyle.
A renovation of an existing home is a viable alternative to moving or building a new home, assuming that a home is structurally sound, the expenditure to enlarge or improve can be a cost effective alternative. A home possessing charm, style, historical significance, established landscaping or an exceptional location could be a significant motivation to consider purchasing another home with the intent to renovate.
The complexity of a project could be relatively simple, changing the use of a room, consolidating two rooms into one, or opening up a room to the outdoors. It could also be a more involved task requiring planning, design and construction documents to build a second floor addition, the addition of a new wing or completely gutting the interior. Some projects could be completed in a weekend’s work or more complex projects, using a “Master Plan”, a plan which provides overall guidance; a renovation can be accomplished all at once or divided into manageable projects over a period of time. With the home evolving gradually allowing the renovation to be planned, timed and tailored to meet individual needs and circumstances.
The due diligence phase should precede the decision to renovate whether it’s an existing home or a home that is purchased with the intent to renovate. The due diligence phase will reveal the factors affecting the nature and scope of the project or if a renovation makes sense.
Every renovation project is unique relative to personal requirements, architectural style & construction type. This guide will be helpful in developing an understanding of the preliminary groundwork required to realize a successful project. If properly planned, a home renovation project can be a positive and rewarding experience resulting in a comfortable, practical and an attractive living environment.
The first step of the planning process is documenting the goals and long-range plans referred to as the “Project Program”. This will dictate the nature, scope and feasibility of the project. Providing a guide to achieving defined goals, the timing or phasing of the project and budget required to achieve the desired end result.
2 Documenting Existing Conditions
Once the “Project Program”, has been established, the next step is to determine what there is to work with. This requires documenting the home’s floor plan and site elements which includes drawing an “as built” floor & site plan consisting of the existing exterior walls, interior rooms, doors, windows, etc. and surrounding site elements, landscape and other significant exterior features. Additionally understanding and noting on the “as built” plan, the structural, mechanical and electrical systems as necessary. Gathering the “existing condition” information defines what there is to work with, creating the framework from which to facilitate and organize the decision making process and develop effective “project program” solutions.
3 Evaluating Existing Conditions
The goals and long-range plans have been established, and the existing floor plan and site elements have been documented. Before developing design solutions, the next step is to evaluate existing conditions. The evaluation includes: a detailed analysis of the structural, mechanical and electrical systems, determining the condition of the house, noting functional and aesthetic deficiencies. At the same time recognizing the home’s strengths, assets and evaluating its relationship to its site. The remaining parameters will be defined by the local jurisdiction’s zoning regulations, these regulations will define the “envelope”, within which the proposed project will be required to fit:
•required front, side & rear yard setbacks
•maximum allowable lot coverage & height
The previous three steps have provided the necessary foundation to start the design phase. The goals and long range plans have been established, existing conditions have been documented and the evaluation of what there is to work with are now in place. This will provide the framework from which to facilitate and organize design solutions. The consolidation of this information is manifested in the development of the “Master Plan” which will become the road map by which sound decision-making can be made as a home renovation evolves. Keeping the project, on a linear path, avoiding redundancies and back tracking, on time, within budget, concluding with a well crafted finished product. After all the “up front” research and documentation has been completed, the design phase of the project can now precede, with the creation of diagrammatic design drawings. Organizing interior spaces, taking into account the external elements, prevailing breezes, solar orientation, view, existing outdoor features, etc. Through the development of schematic sketches themes will emerge followed by design development drawings. Wise planning and renovation decisions can save money and time at the same time provide a well crafted finished project. The “Master Plan” provides a strategic path in the planning and decision making process leading to a successful and rewarding home renovation, which will add value and considerable enjoyment, for many years, living in a newly renovated home.
By virtue of having gone through these steps, frustrations sometimes encountered during a home renovation will be minimized, allowing the renovation to be a gratifying and rewarding experience. Being aware of the process allows one to become an “Educated Client,” which is worth quite a bit more than one might realize. The uneducated client may not realize the benefit of going through the planning, evaluation and documentation groundwork. He will only realize its benefits after having completed a prior renovation project. This rational approach keeps the design process on a direct path to achieving prescribed goals.
4 Exploring Design Solutions & Developing a Master Plan
The previous three steps have provided the necessary foundation to start the design phase. The goals and long range plans have been established, existing conditions have been documented and the evaluation of what there is to work with are now in place. This will provide the framework from which to facilitate and organize design solutions. The consolidation of this information is manifested in the development of the “Master Plan” which will become the road map by which sound decision-making can be made as a home renovation evolves. Keeping the project, on a linear path, avoiding redundancies and back tracking, on time, within budget, concluding with a well crafted finished product.
By virtue of having gone through these steps, frustrations sometimes encountered during a home renovation will be minimized, allowing the renovation to be a gratifying and rewarding experience. Being aware of the process allows one to become an “Educated Client,” which is worth quite a bit more than one might realize. The uneducated client may not realize the benefit of going through the planning, evaluation and documentation groundwork. He will only realize its benefits after having completed a prior renovation project. This rational approach keeps the design process on a direct path to achieving prescribed goals.
After all the “up front” research and documentation has been completed, the design phase of the project can now precede, with the creation of diagrammatic design drawings. Organizing interior spaces, taking into account the external elements, prevailing breezes, solar orientation, view, existing outdoor features, etc. Through the development of schematic sketches themes will emerge followed by design development drawings. Wise planning and renovation decisions can save money and time at the same time provide a well crafted finished project. The “Master Plan” provides a strategic path in the planning and decision making process leading to a successful and rewarding home renovation, which will add value and considerable enjoyment, for many years, living in a newly renovated home.
 John McClain Design
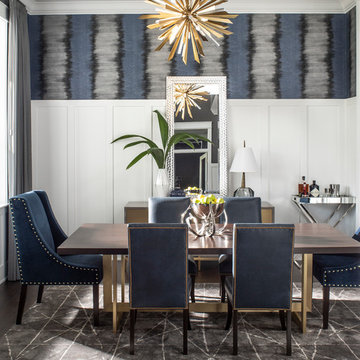
A dining room with impact! This is the first room one sees when entering this home, so impact was important. Blue flamestitch wallcovering above a 7 feet high wainscoting blends with leather side chairs and blue velvet captain's chairs. The custom dining table is walnut with a brass base. Anchoring the area is a modern patterned gray area rug and a brass and glass sputnik light fixture crowns the tray ceiling.
Photo: Stephen Allen
 Lindye Galloway Interiors
Chad Mellon Photographer
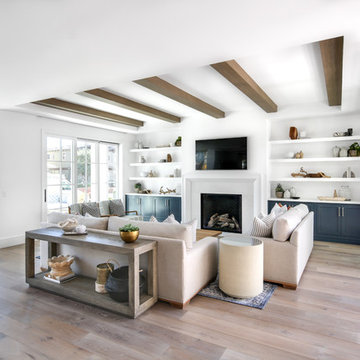
Living room - large modern open concept medium tone wood floor and brown floor living room idea in Orange County with white walls, a standard fireplace, a wall-mounted tv and a tile fireplace
Living room - large modern open concept medium tone wood floor and brown floor living room idea in Orange County with white walls, a standard fireplace, a wall-mounted tv and a tile fireplace
 Margot Hartford Photography
Photo: Margot Hartford © 2017 Houzz
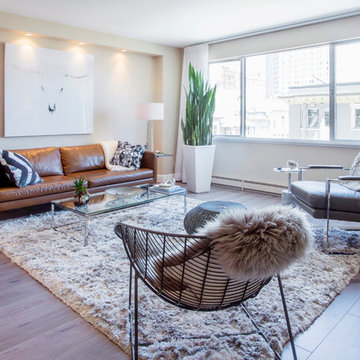
Living room - contemporary living room idea in San Francisco
Living room - contemporary living room idea in San Francisco
 Joni Spear Interior Design
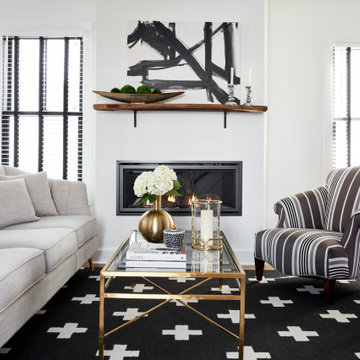
Open concept living room in an 1890's historical home. A linear gas fireplace surrounded by comfortable, yet elegant lounge seating makes for a cozy space to read or have a cocktail. The original space consisted of 3 small rooms and is now one continuous space.
 Woodwright Custom Builders LLC
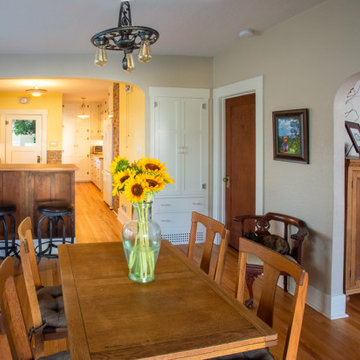
Looking south, post remodel, what had been a bank of cabinets is now the main path through the kitchen. The stove (not visible) has been relocated to the north with its back against the new bar. The face of bar is made from salvaged fir sliding door panels that had been stored in the home's basement from its original construction. The fir floor of the kitchen has been removed and replaced with oak to match the dining room and living room. The fir was salvaged for use as the countertop of the bar and pantry. The original exhaust fan was removed and replaced with a Zephyr island exhaust with built-in LED lights (not visible) above the stove. The faux wood countertop and backsplash have been replaced with "Absolute Black" granite with a honed finish and Daltile 3" x 6" bright white subway tile. Combination power/led light strips were installed under the cabinets. An antique enamel topped cabinet (not visible) serves as a moveable island/landing spot and work surface. The center panels of the upper row of cabinets have been replaced with "mistlite" obscure glass. All of the cabinet pulls have been replaced with Van Dyke Restorers brushed silver "bow" handles. The hinges on the under-counter cabinets are new House of Antique Hardware 2-1/2" half-surface hinges to match the original ornamental butt hinges. The shape of the arched wall between the kitchen and dining room matches the wall between the dining room and living room. Two vintage light fixtures have been installed. Closest to the camera is a 100-year-old wrought iron chandelier Annette found through Etsy. In the kitchen, a farmhouse style overhead fixture of roughly the same age was acquired from Northend Lampworks. Brick on the exterior wall of the pantry and chimney has been exposed. The new dining room closet is based on the design of the former hall closet that was sacrificed as a space for the fridge. The hardware (glass pulls) of the original closet were salvaged for use on the new closet. The original hinges were used to outfit new cabinets on the east wall of the kitchen. The hinges for the new closet are replicas of Half Surface hinges from House of Antique Hardware. The bottom grill was custom made by Gem State Metal from a pattern we created in Photoshop. The grill preserves the function of the cold air return that was consumed by the closet when the north wall of the kitchen shifted 17" into the dining room. The space beneath the closet is lined with black foamcore for visual contrast. The top drawer of the closet is outfitted with a powerstrip plugged into an outlet built into the wall behind the drawer. The power strip is used to charge mobile devices such as iphones and tablets, out of sight. Since the closet is only 14" deep, hooks were installed instead of a coatrod.
 Jennifer Connell Design
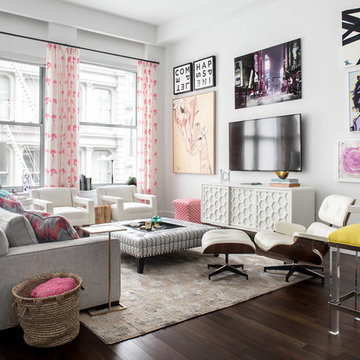
For the art, I chose that was graphic and bold. There's a youthful feeling with original art and the arrangement creates a focal point for the room while balancing the large screen TV. Lucite, soft edges and texture dominate while the layout is well thought out for the creature comforts of everyday living.
Even though space was limited, I was still able to include comfortable seating for pre-theatre or dinner gatherings. Count them…the sofa holds 3, 2 Ottomans, the 3 lucite bright yellow bar stools, the lounge chair, 2 side chairs, the upholstered chair by the waterfall desk and if you add the 4 chairs for the dining area, you're at 16, and this doesn’t count the custom coffee table with upholstered seating!
 Chris Jovanelly Interior Design
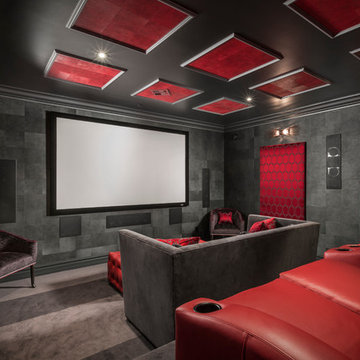
Contemporary Charcoal and Gray Home Theater designed by Chris Jovanelly. Elitis vinyl wallcovering on walls and ceiling. Jim Thompson fabric on upholstered panels. Red leather theater seating by Stanford. Velvet sofa by Kravet, Rolling chairs by Kravet, Fabric by Harlequin, contrast welt vinyl by Kravet. Tufted red leather ottoman is custom. Red leather is custom. Carpet design is two colors of gray cut to stripes of varying widths
Photography by Jason Roehner

18