
Search results for "Cleaning process" in Home Design Ideas
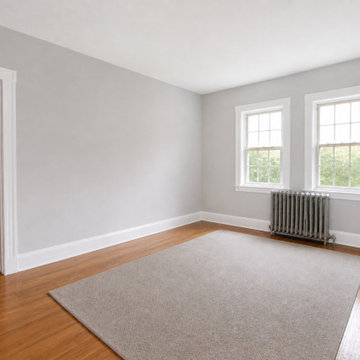
 Maverick City Builders
This whole home interior painting and trim upgrade project in Lancaster highlights how a professionally executed finish can completely transform the look, feel, and flow of an entire living space. The project began with a dated interior featuring worn paint, visible wall imperfections, and aging trim that no longer reflected a clean, modern aesthetic. While the home’s structure remained solid, the overall appearance felt dull and lacked the brightness, consistency, and refinement homeowners are looking for today.
Our team began with a comprehensive preparation process across the entire home, which is one of the most critical steps in achieving a high-quality and long-lasting paint finish. Every surface was carefully cleaned, patched, and sanded to create a smooth and uniform base. All floors, fixtures, and furnishings were fully protected using professional-grade coverings, and trim lines throughout the home were precisely taped to ensure sharp, clean edges. This level of preparation not only enhances the final appearance but also ensures durability and consistency from room to room.
As the project progressed, premium-quality paints were applied using a combination of rolling and precision cutting techniques to achieve a smooth, even finish across all wall and ceiling surfaces. The selected color palette focused on modern, neutral tones designed to maximize natural light and create a cohesive, open feel throughout the home. At the same time, all trim, baseboards, and interior details were upgraded with a crisp white finish, adding contrast, depth, and a polished look that ties every space together.
During the final stages, detailed touch-ups and trim refinements were completed in every room to achieve a flawless, professional-grade result. Each edge, corner, and transition was carefully inspected and perfected, ensuring consistency and craftsmanship at every level. The transformation is especially noticeable when comparing the before and after, as the home evolves from a worn, outdated environment into a bright, modern, and refreshed living space.
Once completed, the home was staged to highlight its full potential and demonstrate how a whole home painting upgrade can dramatically improve both aesthetics and functionality. The final result is a clean, cohesive, and welcoming interior that feels updated, spacious, and move-in ready.
Projects like this showcase the value of expert craftsmanship and attention to detail in full-home interior renovations. Whether you are preparing your property for sale or looking to modernize your living space, a whole home interior painting and trim upgrade remains one of the most effective ways to increase both visual appeal and overall property value in Lancaster, MA and surrounding areas.
Our team started with a detailed preparation process, which is one of the most critical steps in achieving a high-quality paint finish. All surfaces were carefully cleaned, patched, and sanded to ensure a smooth and even base. Floors and furniture were fully protected using professional-grade coverings, and trim areas were precisely taped to guarantee clean, sharp lines. This level of preparation ensures that the final result is not only visually appealing but also long-lasting.
As the painting phase progressed, high-quality paints were applied using a combination of rolling and cutting techniques to create a consistent, smooth finish across all wall surfaces. The color selection focused on modern, neutral tones that enhance natural light and create a more open, inviting atmosphere. At the same time, the trim and baseboards were upgraded with a crisp, clean white finish, adding contrast and definition throughout the space.
During the final stages, detailed touch-ups and trim work were completed to achieve a flawless result. Every corner, edge, and transition was carefully inspected and refined, ensuring a professional-grade finish that stands out. The transformation is most noticeable when comparing the before and after stages, where the room evolves from a dated and worn environment into a bright, modern living area.
The completed space was then staged to showcase its full potential, demonstrating how a simple upgrade like interior painting and trim work can dramatically improve both aesthetics and functionality. The result is a clean, polished, and welcoming environment that feels refreshed and ready for everyday living.
Projects like this demonstrate the impact of expert craftsmanship and attention to detail in interior renovations. Whether you are preparing your home for sale or simply looking to update your living space, professional painting and trim upgrades offer one of the most effective ways to enhance your home’s value and appearance.

 Tile Doctor Ltd
We received a request to renovate Victorian tiled hallway floor at a house in the London borough of Harlesden NW10. My client had modernised the heating system and this unfortunately required a section of the tiled flooring to be dug up so new pipework could be laid.
After speaking on the phone, I arranged an initial visit to the property so I could properly assess the work required and provide a price for restoring the floor. During my visit I could see there was another section of missing tiles at one of the door thresholds which would need attention. Except for the missing sections of floor I could see that the tiles themselves were in good condition for their age and would respond well to a deep clean and fresh seal.
I was confident on being able to source matching replacements for the missing tiles and reassured my client that we would be able not only repair the floor but also renovate it to a good standard. I gave them a price to do the restoration which they were happy to accept, and the work was booked.
After some research I managed to source replacement tiles from the Vintage Floor Tile Company in Kent; Victorian tiles are still popular so there a few companies that keep stock so we can usually find a match.
With the replacements in hand, work started by removing the cement and loose material from the missing sections of flooring and backfilling with self-levelling compound to bring the exposed base up to the right level for tiling.
The tiles were then cut to shape as required to match the existing patten and fixed into place with a quick setting adhesive and then grouted.
The floor was left to overnight to allow the adhesive to harden fully, and I returned the next day to deep clean the whole floor. To give the tiles are deep clean a strong dilution of Tile Doctor Remove and Go was sprayed onto the floor and left to soak in for ten minutes. It was then scrubbed into the floor using a rotary machine fitted with a with a black pad. This action lifted the dirt out of the tiles and the resulting slurry was removed with the wet vacuum.
It turned out that the pores of the tiles were holding a lot of dirt, so the process was repeated until I was satisfied. Due to the age of the property, there was no damp-proof membrane installed so I do try to minimise the amount of water I use in this process as there is always a chance of exacerbating any latent efflorescence issues.
Efflorescence occurs where moisture rises through the tile bringing with it salts from underneath the floor as it evaporates on the surface. This can lead to unsightly white marks appearing on the tile. To counteract this potential problem the cleaning was followed by an acid wash using Tile Doctor Acid Gel applied with a 100 then 200-grit pad, before finishing on a 400-grit burnishing pad. The floor was again rinsed with water after the application of each pad to remove the slurry and extracted with a wet vacuum.
Once I was satisfied the floor was as clean as possible, we left site and the area was left to dry over the weekend ready for application of a new sealer.
I returned on the Monday and started by taking a few moisture readings to check the floor was dry. The floor was in an acceptable range, so I applied the first of 4 coats of sealer. For this floor I chose Tile Doctor Seal and Go Extra which is specially formulated product that provides stain resistance with a hard wearing low-sheen finish.
This product is also breathable which is an important feature for old floors, anything that blocks moisture from rising through the tile will cause it to become trapped underneath where it will pool and eventually reach out to the walls and result in rising damp.
Once complete the floor looked brand new and I’m pleased to say with the deep clean and a fresh sealer applied it was impossible to tell the difference between the original and repaired sections of flooring.
For the aftercare of sealed Victorian tiled floors, I recommend Tile Doctor Neutral Cleaner, it’s a mild day to day cleaner with a neutral pH that won’t damage the sealer. Many of the tile cleaning products you find in supermarkets are simply too strong.
Andrew Newstead
North London Tile Doctor
 Tile Doctor Ltd
This detailed Victorian tiled hallway at a property in Camden was overdue some much-needed repair and maintenance. The owners of the property appreciated that original period features like this add a lot of value to a property and asked me to visit the property to quote for renovating it. The property was in a terrace of similar properties most of which appeared to have retained their Victorian character.
I inspected the floor and found there were a couple of loose, cracked, worn and broken tiles that needed to be replaced. In addition, the floor tiles needed a deep clean and then seal to bring back the wow factor. I was confident we could renovate the floor but at that point unsure if we would be able to find exact match replacements for the damaged tiles. Fortunately, Victorian tiles are still in demand and I knew of several companies I could check with so I was confident they could be found.
We discussed how long the work would take and assuming I could source the replacements agreed a price for the full restoration of the floor. After doing some research I managed to find suitable replacements with a company called Original Style and the work was scheduled for the following month.
Firstly, we prepared all areas with protective tapes to threshold edges and skirting.
This was followed by spaying the tiles with a strong dilution of Tile Doctor Remove & Go which is product designed to remove old sealers and coatings. After about ten minutes the tiles were scrubbed with black scrubbing pads and scrubbing brushes. Fresh water was used to rinse the floor and the slurry was extracted using a wet vacuum.
The floor was inspected and then a second clean carried out, this time using Tile Doctor Pro-Clean which is a Tile and Grout cleaning agent. The same process of application was used and after rinsing and extracting the dirt the tiles were given a steam clean. This ensured all the dirt was lifted out of the pores of the tile and the floor was now as clean as it possible could be.
The next step was the remove the loose and cracked tiles using the reclaimed tiles we had sourced earlier. Some cuts were necessary to get the replacements to match the originals but overall the plan worked. A quick drying adhesive was used to secure the tiles so we could apply the grout shortly after. The whole floor was then re-grouted and cleaned off to ensure a good match. The floor was left to dry off overnight, and you could already see it was now looking considerably improved.
Returning the next morning we checked the floor was dry using a moisture meter, this is important as to apply a sealer to damp tiles will lead to a patchy experience. All was well so we were ready to apply the sealer.
To start a single base coat of Tile Doctor Colour Grow sealer was applied to the floor and left to dry. This sealer is an impregnator that protects from within by occupying the pores in the clay tile improving colour in the process. This sealer does leave a matt finish however and the client wanted a subtle shine so one dry it was followed by four coats of Tile Doctor Seal & Go. The combination of the two sealers works really well to add long lasting protection to the tiles and provide the desired finish to the floor.
The floor was much improved, and the client was delighted. The detailed pattern and colours were now much more prominent, and the hallway looked much more inviting for both the owner and their guests. For the aftercare of Victorian tiles, I recommended the use of Tile Doctor Neutral Cleaner which is pH neutral and won’t prematurely erode the life of the sealer.
Nigel Voyce
North London Tile Doctor
Find the right local pro for your project
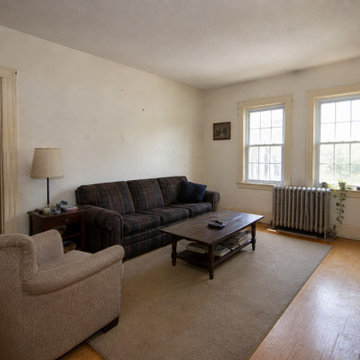 Maverick City Builders
This whole home interior painting and trim upgrade project in Lancaster highlights how a professionally executed finish can completely transform the look, feel, and flow of an entire living space. The project began with a dated interior featuring worn paint, visible wall imperfections, and aging trim that no longer reflected a clean, modern aesthetic. While the home’s structure remained solid, the overall appearance felt dull and lacked the brightness, consistency, and refinement homeowners are looking for today.
Our team began with a comprehensive preparation process across the entire home, which is one of the most critical steps in achieving a high-quality and long-lasting paint finish. Every surface was carefully cleaned, patched, and sanded to create a smooth and uniform base. All floors, fixtures, and furnishings were fully protected using professional-grade coverings, and trim lines throughout the home were precisely taped to ensure sharp, clean edges. This level of preparation not only enhances the final appearance but also ensures durability and consistency from room to room.
As the project progressed, premium-quality paints were applied using a combination of rolling and precision cutting techniques to achieve a smooth, even finish across all wall and ceiling surfaces. The selected color palette focused on modern, neutral tones designed to maximize natural light and create a cohesive, open feel throughout the home. At the same time, all trim, baseboards, and interior details were upgraded with a crisp white finish, adding contrast, depth, and a polished look that ties every space together.
During the final stages, detailed touch-ups and trim refinements were completed in every room to achieve a flawless, professional-grade result. Each edge, corner, and transition was carefully inspected and perfected, ensuring consistency and craftsmanship at every level. The transformation is especially noticeable when comparing the before and after, as the home evolves from a worn, outdated environment into a bright, modern, and refreshed living space.
Once completed, the home was staged to highlight its full potential and demonstrate how a whole home painting upgrade can dramatically improve both aesthetics and functionality. The final result is a clean, cohesive, and welcoming interior that feels updated, spacious, and move-in ready.
Projects like this showcase the value of expert craftsmanship and attention to detail in full-home interior renovations. Whether you are preparing your property for sale or looking to modernize your living space, a whole home interior painting and trim upgrade remains one of the most effective ways to increase both visual appeal and overall property value in Lancaster, MA and surrounding areas.
Our team started with a detailed preparation process, which is one of the most critical steps in achieving a high-quality paint finish. All surfaces were carefully cleaned, patched, and sanded to ensure a smooth and even base. Floors and furniture were fully protected using professional-grade coverings, and trim areas were precisely taped to guarantee clean, sharp lines. This level of preparation ensures that the final result is not only visually appealing but also long-lasting.
As the painting phase progressed, high-quality paints were applied using a combination of rolling and cutting techniques to create a consistent, smooth finish across all wall surfaces. The color selection focused on modern, neutral tones that enhance natural light and create a more open, inviting atmosphere. At the same time, the trim and baseboards were upgraded with a crisp, clean white finish, adding contrast and definition throughout the space.
During the final stages, detailed touch-ups and trim work were completed to achieve a flawless result. Every corner, edge, and transition was carefully inspected and refined, ensuring a professional-grade finish that stands out. The transformation is most noticeable when comparing the before and after stages, where the room evolves from a dated and worn environment into a bright, modern living area.
The completed space was then staged to showcase its full potential, demonstrating how a simple upgrade like interior painting and trim work can dramatically improve both aesthetics and functionality. The result is a clean, polished, and welcoming environment that feels refreshed and ready for everyday living.
Projects like this demonstrate the impact of expert craftsmanship and attention to detail in interior renovations. Whether you are preparing your home for sale or simply looking to update your living space, professional painting and trim upgrades offer one of the most effective ways to enhance your home’s value and appearance.
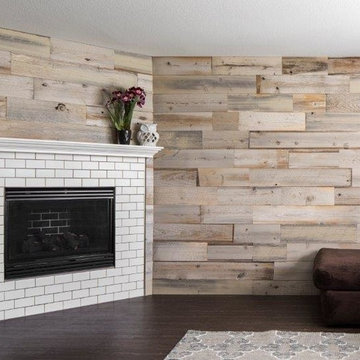
 Peterman Lumber
Reclaimed Wood Accent Wall
Color: Sea Breeze Grey Tonal
Seabreeze actually started out as a white fence - during cleaning process the paint starts to change to a cool gray color. Has beautiful variations of white to grays still showing glimpses of the cedar underneath.
Peterman Lumber is the leading distributor of Interior Panels and Hardwood in the South West. Contact us to learn more about finding on trend & reliable materials for your renovation & design needs.
Photo Credit:
Poppa's Barn is located at Karmichaels Cabinetry
29160 Goetz Rd., Menifee, CA 92587
www.poppasbarn.com
Family owned and operated.
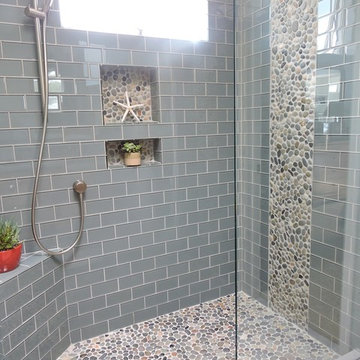

 Trinity Design
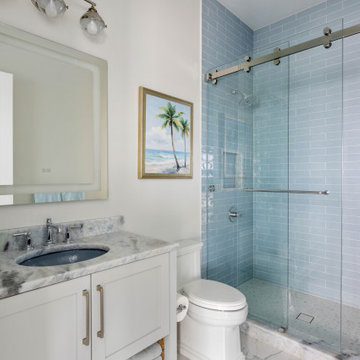
Example of a beach style blue tile mosaic tile floor, multicolored floor and single-sink bathroom design in Tampa with recessed-panel cabinets, white cabinets, white walls, an undermount sink, gray countertops, a niche and a built-in vanity


 Tile Doctor Ltd
The pictures showed are of an Encaustic Cement tiled floor that had been installed in the bathroom of a property in Twickenham. At the time the tiles were installed, they did not seal them and had since accumulated dirt, especially in the grout lines.
Encaustic cement tiles have become extremely popular in the last few years with many beautiful artistic often geometric patterns available to choose from. The very nature of the cement-based tile however does make it slightly porous, and if left unsealed dirt will become ingrained in the tile making it difficult to remove and keep clean. Like grout they do therefore need to be sealed in order to keep them looking at their best for longer.
Now we normally recommend using diamond encrusted burnishing pads when renovating Encaustic Cement tiles however in this case the face of the tiles were not too bad and it was really the grout that needed the most attention. So, to cut the cost for customer, I advised a straightforward alkaline scrub clean and seal.
To clean the tile and grout I sprayed the floor with a strong dilution of Tile Doctor Pro-Clean and left it to soak into the dirt for ten minutes. Space in the bathroom was quite tight so instead of using a mechanical floor scrubber I scrubbed the tile and grout by hand working the alkaline cleaning solution into the pores to release the grout in dirt.
After scrubbing the floor was rinsed with a little water and the soil removed with a wet vacuum. Afterwards the floor was inspected, and any stubborn areas retreated with repeat of the process. After a final rinse, the floor was dried as much as possible with the wet vacuum.
Fortunately, the weather has been amazing of late and so it did not take long for the floor to dry, being a small space and a little encouragement from a heat gun always helps. Removing excess moisture before sealing is essential as even a small amount can cloud the sealer resulting in an uneven appearance.
Once satisfied that the floor was dry, I proceeded to seal it by applying a couple two coats of Tile Doctor Colour Grow across the Encaustic tile and grout. As an impregnating sealer Colour Grow penetrates the pores of the cement occupying the space and thus prevent any dirt from becoming ingrained there. Colour Grow’s colour intensifying properties also helped to deepen the black colour of the tile enhancing the contrast between the tiles and grout.
Now the floor has been properly sealed it will be far easier for the customer to keep them clean in future. For maximum longevity of the sealer I recommend maintenance cleaning with Tile Doctor Neutral Cleaner. Don’t be tempted to use supermarket cleaning products without reading the label first, many are simply too strong for cleaning sealed surfaces and will strip off the sealer prematurely leaving the tiles unprotected.
Jonathan Oldham
South Middlesex Tile Doctor
 Dancer Concrete Design
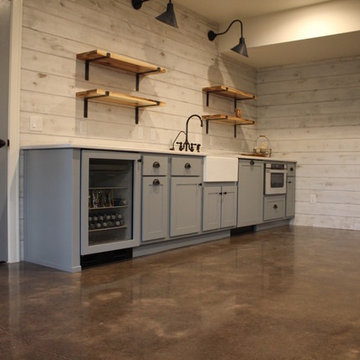
This client came to us looking for a space that would allow their children a place to hang out while still feeling at home. The versatility of finished concrete flooring works well to adapt to a variety of home styles, and works seamlessly with this Craftsman-style home. We worked with the client to decide that a darker reactive stain would really make the space feel warm, inviting, and comfortable. The look and feel of the floor with this stain selection would be similar to the pictures they provided of the look they were targeting when we started the selection process. The clients really embraced the existing cracks in the concrete, and thought they exhibited the character of the house – and we agree.
When our team works on residential projects, it is imperative that we keep everything as clean and mess-free as possible for the client. For this reason, our first step was to apply RAM Board throughout the house where our equipment would be traveling. Tape and 24″ plastic were also applied to the walls of the basement to protect them. The original floor was rather new concrete with some cracks. Our team started by filling the cracks with a patching product. The grinding process then began, concrete reactive stain was applied in the color Wenge Wood, and then the floor was sealed with our two step concrete densification and stain-guard process. The 5 step polishing process was finished by bringing the floor to a 800-grit level. We were excited to see how the space came together after the rest of construction, which was overseen by the contractor Arbor Homes, was complete. View the gallery below to take a look!
 Dancer Concrete Design
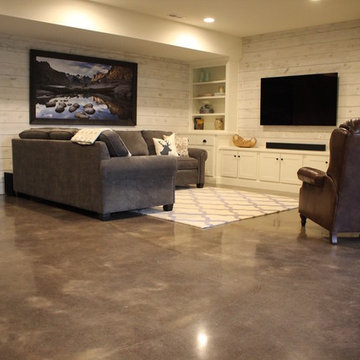
This client came to us looking for a space that would allow their children a place to hang out while still feeling at home. The versatility of finished concrete flooring works well to adapt to a variety of home styles, and works seamlessly with this Craftsman-style home. We worked with the client to decide that a darker reactive stain would really make the space feel warm, inviting, and comfortable. The look and feel of the floor with this stain selection would be similar to the pictures they provided of the look they were targeting when we started the selection process. The clients really embraced the existing cracks in the concrete, and thought they exhibited the character of the house – and we agree.
When our team works on residential projects, it is imperative that we keep everything as clean and mess-free as possible for the client. For this reason, our first step was to apply RAM Board throughout the house where our equipment would be traveling. Tape and 24″ plastic were also applied to the walls of the basement to protect them. The original floor was rather new concrete with some cracks. Our team started by filling the cracks with a patching product. The grinding process then began, concrete reactive stain was applied in the color Wenge Wood, and then the floor was sealed with our two step concrete densification and stain-guard process. The 5 step polishing process was finished by bringing the floor to a 800-grit level. We were excited to see how the space came together after the rest of construction, which was overseen by the contractor Arbor Homes, was complete. View the gallery below to take a look!
 Peterman Lumber
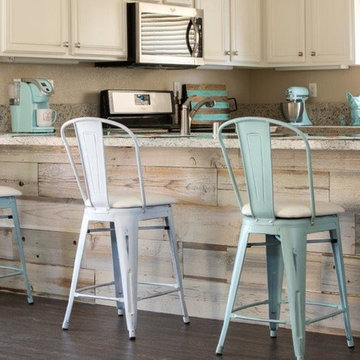
Reclaimed wood Toe Kick
Color: Sea Breeze Grey Tonal
Seabreeze actually started out as a white fence - during cleaning process the paint starts to change to a cool gray color. Has beautiful variations of white to grays still showing glimpses of the cedar underneath.
Peterman Lumber is the leading distributor of Interior Panels and Hardwood in the South West. Contact us to learn more about finding on trend & reliable materials for your renovation & design needs.
Photo Credit:
Poppa's Barn is located at Karmichaels Cabinetry
29160 Goetz Rd., Menifee, CA 92587
www.poppasbarn.com
Family owned and operated.

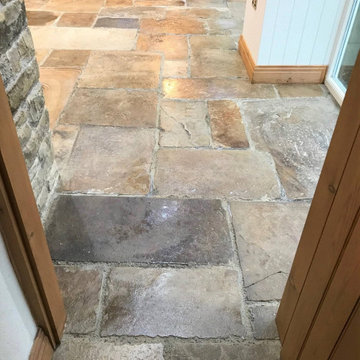 Tile Doctor Ltd
We had been to maintain this Sandstone floor about two years previously at a property in the pretty area of Windermere in the English Lake District. The client had run out of our Tile Doctor Neutral Tile Cleaner that we left after completing the job and had started using a standard cleaner instead (a well-known ecological cleaner). Unfortunately, this product has a 5% non-ionic surfactant in its chemical structure, which will strip a coat of stone sealer off the surface within 6 months, once that topcoat has been removed the sealed surface is only 50% as strong as it should be.
Readers of this article should be aware that even washing up liquid which is a degreaser will strip sealers although it will take many months of regular use before you will start to notice an issue. Stronger bleach-based cleaning products such as Flash and Domestos will cause instant damage to stone sealer which will often go an off-white colour as a result. So, the importance of using the right cleaner is imperative. Having used our services on this floor previously he client knew what to expect and was happy to go ahead with our quote.
My first task would be to clean the floor and completely remove what was left of the old sealer to ensure the floor would have a consistent appearance. On this occasion I used a strong 1:3 dilution of Tile Doctor Pro-Clean worked into the floor with a Black buffing pad fitted to a rotary buffing machine. The Sandstone floor was then rinsed with water, scrubbed again and then the waste extracted using a wet vacuum.
This was followed with acid rinse using a 1:5 dilution of Tile Doctor Grout Clean-Up, this is a Phosphoric Acid (not a Brick Acid). After being scrubbed into the tile it was rinsed off the floor as before using water and the wet vacuum. This process further cleans the stone and neutralises the floor after the use of the strong alkaline Pro-Clean used earlier.
Before leaving for the day I gave the floor one final rinse with water and then dried the floor as much as possible with the wet vacuum. The floor was now clean and free of sealer and left to fully dry off overnight.
I came back the following morning and started by testing the floor with the moisture meter. I always do this as I know from experience how important it is to ensure the floor is dry before applying a sealer.
Happy the Sandstone was dry I then proceed to apply the first of what would be four coats of sealer. For this I used Tile Doctor Seal and Go which leaves a nice low sheen finish. This product is specially formulated blend of acrylic polymers that provides will protect the floor from ingrained dirt and staining; it will make the floor easy to clean and has the added advantage of being water based so it doesn’t leave a solvent smell as it dries.
The client was left another complimentary bottle of Tile Doctor Neutral cleaner and hopefully the seal will last a long longer the 2nd time around. The client was pleased the floor had been restored and vowed to use nothing but Tile Doctor products on it in the future.
Heidi Taylor
South Cumbria Tile Doctor

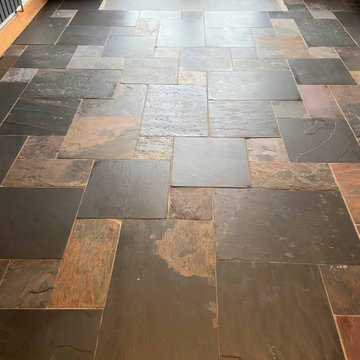 Tile Doctor Ltd
The pictures below are of Chinese Slate floor in the Kitchen of a property in the small village of Clifton just south of Penrith. We often get asked what the difference is between Rough and Semi Riven Slate, and this floor was a mixture of both.
If you look closely at the pictures and check out the darker parts of the floor you will see these smoother Semi Riven Slate, whereas the light copper-coloured parts of the floor were of the rougher textured variety. It’s not that unusual for stone to be mixed in this fashion as it can be supplied from different quarries in order to achieve a particular look.
The blend of different slates makes little difference when it comes to cleaning as the process is essentially the same. I would advise though if you intend to clean the floor using a mop then you should opt for Semi Riven Slate as Rough Slate can shred your mops and make it harder to maintain. We tend to use industrial floor buffing machines which work well on both surfaces so are less effected.
There was a bit of wax on this floor so to remove this Tile Doctor Wax Away was applied. The product was left to stand for fifteen minutes before being scrubbed into the stone, rinsed and then the soil extracted with a wet vacuum.
We then finished the cleaning with an Acid Rinse which involves scrubbing the Slate with Tile Doctor Grout Clean-up. This not only works well at cleaning up the stone and grout but also neutralises the alkaline pH left over from using Wax Away. I am very wary of the pH level of the floor as it could have an impact on the new sealer, giving the floor an acid rinse before sealing also ensures a better bond with the sealer.
Naturally, you can’t leave a strong product like Grout Clean-up on the Stone for long as it could etch the surface so once done the floor was thoroughly rinsed with water and extracted again with a wet vacuum. A mop and bucket and lots of sponges won’t do the job on a large area like this.
Once we finished the clean, we left it to dry off overnight and came back the next day to apply the sealer. We were originally going to apply a satin finish sealer, but the client had a big dog with sharp claws which could of scratched and marked the sealer so decided against it. I advised the client to use an Impregnating sealer called Tile Doctor Colour Grow, which lifts the natural colours in the stone, but is not a topical shiny sealer as the seal soaks into the Slate and leaves a a nice matt finish instead. Only two coats of sealer were needed, and the floor looked like new again.
My client was very happy with the difference in the appearance of the stone and how much cleaner the grout was, so much so they the following feedback for us, which is always appreciated.
“Totally impressed with the team they couldn’t have been more professional and even left me with some cleaner. My horrible 12 year old slate tiles look fabulous”
As usual we left a free bottle of Tile Doctor Neutral Tile Cleaner for aftercare, it’s very important not to undo all that hard work by using a product which will damage the seal, using a pH neutral cleaner will keep the seal looking sharp and fresh for years to come.
Heidi Taylor
North Cumbria Tile Doctor
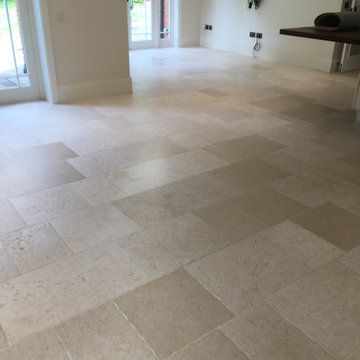 Tile Doctor Ltd
Our client had inherited this Travertine floor when purchasing in a lovely street in Walton-On-Thames, close by was the River Thames which runs all the way into London. The new owners were unhappy with the floor in that it did not look very clean, and they were keen to get this rectified. I arranged a site visit to survey the floor and see what could be done to restore its appearance.
The floor itself was in good physical condition, however, it was apparent from the level of dirt ingrained in the stone that it had not been maintained very well by the previous owner. I carried out a small test clean which came out well and they could see straight away what the floor should look really like! They were happy with my renovation quote and we agreed a mutually convenient time where I could work in relation to the COVID guidelines.
The Travertine floor was scrubbed using a mixture of Tile Doctor Pro Clean and Remove and Go. These are heavy duty cleaning products designed for use on tile and stone can be combined to form a powerful cleaning/stripping solution which is left to dwell on the floor surface. After a short while the solution was worked into the stone using a rotary machine fitted with a black scrubbing pad.
This cleaning recipe works extremely well breaking down dirt, stains, and grease in the stone. Following a machine scrub and a more manual hand scrub of the grout lines, we then pressure rinsed the soil away and then it was extracted using an industrial wet vacuum. In a couple of areas, it was necessary to repeat the process to ensure it was completely clean. Once we were satisfied that the stone was fresh and clean, the floor was left to dry off overnight, so it would be ready for sealing the following day.
After drying overnight, the floor was checked with a damp meter to make sure it was dry. Once reassured I started with the application of the fresh sealer to the floor using Tile Doctor Colour Grow Sealer which is a colour enhancing sealer that works from within by soaking into the pores of the stone. Several coats were applied allowing each one to dry before applying the next. This sealer does not provide a glossy finish, just a nice natural sheen. This brought back the contrast and natural colours in the stone, whilst adding protection to stone for many years to come.
The client was very happy with the work we carried out, the floor had come up much better than they had expected, and it really made a difference to the lovely kitchen space. The floor looked like new. I recommended the regular use of Tile Doctor Stone Soap for future cleaning which will keep the floor in great condition and ensure the longevity of the newly applied sealant.
Jonathan Oldham
South Middlesex Tile Doctor
 Dancer Concrete Design
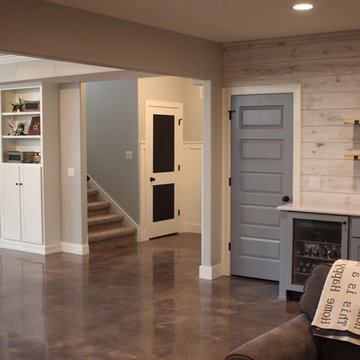
This client came to us looking for a space that would allow their children a place to hang out while still feeling at home. The versatility of finished concrete flooring works well to adapt to a variety of home styles, and works seamlessly with this Craftsman-style home. We worked with the client to decide that a darker reactive stain would really make the space feel warm, inviting, and comfortable. The look and feel of the floor with this stain selection would be similar to the pictures they provided of the look they were targeting when we started the selection process. The clients really embraced the existing cracks in the concrete, and thought they exhibited the character of the house – and we agree.
When our team works on residential projects, it is imperative that we keep everything as clean and mess-free as possible for the client. For this reason, our first step was to apply RAM Board throughout the house where our equipment would be traveling. Tape and 24″ plastic were also applied to the walls of the basement to protect them. The original floor was rather new concrete with some cracks. Our team started by filling the cracks with a patching product. The grinding process then began, concrete reactive stain was applied in the color Wenge Wood, and then the floor was sealed with our two step concrete densification and stain-guard process. The 5 step polishing process was finished by bringing the floor to a 800-grit level. We were excited to see how the space came together after the rest of construction, which was overseen by the contractor Arbor Homes, was complete. View the gallery below to take a look!
 DEKORA Home Staging & Design
 http://www.provokestudios.com/
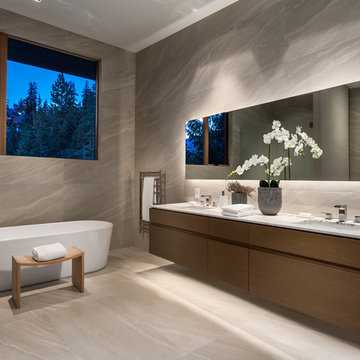
Inspiration for a contemporary gray tile freestanding bathtub remodel in Vancouver with an undermount sink, flat-panel cabinets and dark wood cabinets
Inspiration for a contemporary gray tile freestanding bathtub remodel in Vancouver with an undermount sink, flat-panel cabinets and dark wood cabinets


 Advance Design Studio, Ltd.
After six years of living in their Huntley IL home, Chris and Meghan were tired of their dark, dingy, outdated kitchen and it was finally time for a long-anticipated change. “The kitchen is the place where we live, it’s where we do everything,” Meghan said. “It was important that it be a space where we wanted to be.” Meghan loves cooking and enjoys including their girls in healthy meal prepping, this led them to want a brighter, more enjoyable kitchen with increased functionality and improved storage.
For Chris especially, the laundry room was an entirely dysfunctional eyesore. “We had a washer and a dryer, but it was all kind-of cobbled together!” Chris said. “There were always laundry piles everywhere, we weren’t really sure what we wanted to do in there, but it was time for us to make a change.” The mess of the space was stressful every time they walked in the door from the garage each day. Kids’ backpacks and shoes piled up haphazardly in the makeshift boot-bench closet left the family feeling disorganized and stressed. They needed space for folding clothes and locker cubbies to help keep the family organized.
Having known Christine and Todd in the Huntley community for years, Chris and Meghan were familiar with their work. “We already trusted them personally and having seen their projects for years we knew they did top notch work. After we reviewed the initial round of designs, we knew that hiring them was definitely the right choice,” Meghan and Chris said. Although Chris had done a lot of work in their home himself, the kitchen and laundry room renovation was such a large undertaking that he didn’t want to steal time away from his family to spend what would surely be many long weekends doing the job himself. “That would not have been a wise choice for us,” Chris laughed.
“Our designer, Michelle was very, very, easy to work with; anything we wanted to see or weren’t sure about, she went above and beyond to make this easy for us. She was easy to get hold of and always quick to respond,” the couple said. Michelle pulled ideas that mirrored the couple’s taste and style and was adept at directing the couple to limited choices that didn’t overwhelm them and kept the process moving. “I have a hard time making decisions. Michelle made the decision-making process so easy. I loved how she listened to what I liked and then presented three great options for me to choose from,” Meghan said.
The main objectives for the kitchen were better storage solutions, they wanted the space to reflect their lifestyle and taste, and they wanted it to last for years with low maintenance. One of the first steps in creating a more functional kitchen was relocating the refrigerator, creating an improved workflow for the busy family.
“We didn’t know that we could even move the refrigerator to a new location where it is now, that was something that we never would have thought of,” Chris said. “The new refrigerator location makes the kitchen feel so much bigger. We didn’t add any space, but our whole kitchen with the new design just seems like it’s so much larger than before!” Meghan said.
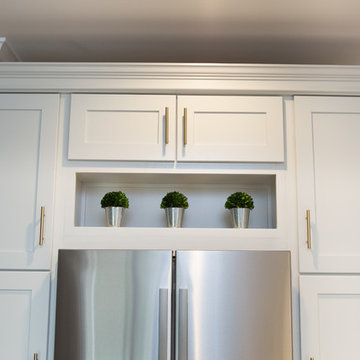
The perimeter mist colored cabinets helped warm and brighten the entire room, while the graphite colored cabinets on the island added contrast. Using this fresh, clean color palette satisfied the couple’s desire for a bright space that was the exact opposite of what they had before. Organization accessories were also added to the cabinets such as a spice drawer tray and roll outs to create hidden convenience.
“I absolutely love the hidden spices – it makes cooking so much more enjoyable!” Chris said. “And all the pull outs, and the double trash bin, who would think you could get so excited about organization!” the couple said in unison.
One thing they hated in their original kitchen was how dark the space felt. Added lighting on the ceiling with the new light fixtures combined with the lighter cabinetry colors throughout solved this problem. “Our new kitchen has this warm, almost cozy feeling that our old kitchen never had, it’s just a space that I love spending my time in now,” Meghan said. The light airy feeling was accentuated with the use of floating white shelves on either side of the decorative range hood. “We have so much cabinetry space, the new design is amazing we actually have more storage space than we will ever need,” Meghan said.
The island was extended to create more work surface and added space for stool seating. “The new island changes how we live. Now the kids can be in the kitchen with us, doing homework, eating breakfast, and the three of us have special dinners there when Chris is working late,” Meghan said.
The Carrara Marmi Quartz countertops were chosen because they are, not only beautiful, but are made from hard-working material that doesn’t require maintenance. The white subway tile backsplash that wraps to the ceiling behind the focal point cooktop range/hood compliments the crisp white countertops perfectly, while brushed brass hardware and light fixtures keep the design fresh and new.
The couple had a few fears at the beginning of the project, as most homeowners do. Their biggest fear was being out of their kitchen and laundry room for an extended time. The crew made it very easy for the family to work in a limited space keeping the washer and dryer hooked up the majority of the time, and also getting appliances working with minimal downtime.
“They above and beyond accommodated us to get us through the process,” Meghan said. “They did a great job making sure we were as comfortable as possible throughout the process,” Chris added.
“Our project manager DJ did a great job. He was very good at updating us on schedule changes, getting guys in as quickly as possible. Everyone that stepped in the house was nice and did great work,” said Chris. They thought Advance’s carpenter was phenomenal and were impressed when he took a conceptual idea from a photograph and worked with designer Michelle to create a one of a kind range/hood that has become the topic of conversation with friends and family who visit the new kitchen. “He was in our house literally every day for several weeks. He was easy to work with and good at what he did,” Meghan and Chris said.
The focal point of the kitchen; a hand-crafted, custom-built ventilation hood was clad with handpicked reclaimed barnwood. Advance Design’s carpenter built the framework and the cladding to create a one-of-a-kind design element that the couple loves.
“I think it was especially fun for him to create something unique from scratch, showcasing his talent in this area,” Meghan said. “I love that my kitchen is not like everyone else’s. I got to pick out the wood on my hood and watch it being built and was able to choose what pieces of wood went where on it. It’s totally unique.”
Red Oak flooring was toothed-in throughout the kitchen and the rest of the first floor anywhere changes were made. Then the whole floor was refinished to tone down the orange undertones in the existing floor stain, ultimately changing the color complexion of the entire first floor. The result is a completely new feeling to the entire home.
Renovating the laundry room was extremely important to Meghan and Chris, but they had trouble visualizing what the possibilities were for the seemingly small space. Michelle produced beautiful 3D illustrations that helped them envision the space in a whole new way.
“I must have told Michelle 100 times that I am a visual person, seeing the designs in 3D made it so easy to make decisions and see what we could really do with our space,” Meghan said.
A dividing wall and doorway were removed between the existing laundry room and hallway formerly containing a coat closet, providing space to design specialized graphite colored cabinetry matching the kitchen island to house custom storage cubbies for each family member. Adding the tall utility cabinetry in the new laundry area helped solve the storage issue, tucking away cleaning supplies, household items, and even the cat got its own cubby.
“I love how everything is now hidden in its own space. I can’t tell you how much I hated coming home and seeing everything sitting around on counters,” Chris said.
Electrical outlets were planned for the inside of utility cabinets, so devices could charge in hidden locations. Stacking the washer and dryer allowed for wider countertop space to provide a folding area and a special space for clothes to hang. “The way I do laundry has been completely transformed! I can actually fold clothes and hang them now right out of the washer and dryer,” Meghan said.
“The end result in the kitchen and the laundry/mud room was an updated light and bright space, with a smarter work flow that better meets the needs of this family,” Michelle said.
“I would totally recommend Advance Design,” Meghan said. “Sometimes I sit and just look at my kitchen and laundry room and think ‘Wow, I can’t believe I get to live here!’ It’s an understatement to say we love our new space.”
 China Marmoglass Co.,Limited
Home > Products
Crystallized Glass,Crystallized stone 6
Crystallized Glass,Crystallized stone,Crystallized glass panel
Marmoglass,Nanoglass,Marmoglass Composite Collectively referred to as Crystallized Glass
Crystallized Glass Application:
1). Interior & external wall cladding
2). Flooring Tile, Stair, Column cladding
3). Basin, Countertop, Table, Bar
4). bath, Kitchen, any tops, round pillar and furniture decoration etc .
Crystal white is a kind of artificial stone . It is made of glass ,which should be burned in the oven for two days under the more than 1000C temperature . It is much different from natural stone from all sides.
1. Natural and soft texture,
2. Varied colors such white, beige, carrara white
3. Good weather resisting property and durability
4. Zero percent of water absorption , not be polluted easily
5. Green environmental building material
6. High-intensity, light weight
7. Bending formation, economical, time saving
8. scratch resistant ,withstand high-heat .
More details about it :
1. There are more than 10 colors of crystallized glass panel products available: Pure white, yellow, silver yellow, silver grey, grey in white, grey spot white, USA grey spot white, yellow in white….
2. Panel thickness: 10-30MM
3. Normal specifications (mm):
1800*3000*18 1200*2400*18 600*600*18 1200*1200*18
1600*2400*18 1800*3000*30 800*800*18 1000*1000*18
Thin tiles:
305*305*12mm, 450*450*12mm
457*457*12mm, 400*400*12mm
600*600*12mm 1200*2400*12mm
4. Material: crystal quartz sand
5. Packaging: Fumigated wooden crates, Bundles,foam
6. Brand name: China Marmoglass / Nanoglass
7. Place of origin: Xiamen, Fujian ,China
8. Model NO.: GS001, SN002, NANO2009, NNAO2011
9. Supply ability: 20000M2/MONTH, 30TON/DAY
10. Delivery time: generally within 10 days, after the order confirmed and the deposit received
11. Arc panel specifications (mm):
Thickness: 18-30mm
Diameter : 30cm-120cm
1.What is crystallized glass stone(Marmoglass SN002 )?
The micro crystal stone is an innovative product designed as a substitute for the rare natural white marble. It is superior to the natural white marble in terms of characteristics, where the micro crystal stone possesses extreme density making it anti-breakage, giving it zero water absorption qualities, and making it resistant to acidic and alkaline substances. at the pace that mankind is consuming the natural resources in today’s world, the micro crystal stone is the ultimate solution, the superior alternative for the external and internal applications. It is certainly a revolutionary product and the finest construction material of the 21st century.
2.Why choose crystallized glass stone(Marmoglass SN002)?
The micro-crystal stone, also known as the micro-crystal glass, Marmoglass, is a new type of high-level decoration material. It is derived from natural inorganic material through a high temperature process, and it possesses excellent characteristics including the followings:
1. High Performance
The micro-crystal stone has even texture and high density, which makes it crush resistant, anti-bending and high resistant resulting its performance being higher than natural stone. It can be used for long period with minimal damage.
2. Acid-proof alkalinity and anti-corrosion
Not only does the micro-crystal stone posses special micro-crystal characteristics, it also has special glass features such as a fine texture, shiny surface and light reflection effect.
3. Fine Texture
We have the flexibility to manufacture any colors as per customer requirements while also making up the defect of color differences, which exists in natural stone. While the product is widely used for interior and interior decoration of star-level hotels, subways, local landmark buildings, airports, and office building etc, it is more suitable for high-level home decoration.
4. Pollution-resistance and easy maintenance
The micro-crystal is a kind of inorganic crystalline material with stable chemical characteristics. Its acid proof alkalinity and anti-corrosion nature are superior to nature stone, specifically its anti-weather characteristics whereby it is unaffected by the wind or sunlight.
5.A wide application range
The water absorption rare of micro-crystal is quite low, close to zero. Several types of dirty pulps and dyed solution have difficulty in penetrating it. Any dirt on the surface is easily cleaned and it is convenient to mankind.
6. Heat-bend reformation
With the heating method, the micro-crystal can be made into various arched profiles and arched slabs. the process is simple and it allows us to save time, cost, material and resources.
7. No radioactive elements
In the process of manufacturing the micro-crystal stone, we have integrated the elimination of all the harmful radioactive elements that are found in natural stone from its components. It is therefore the safest and most environmentally friendly building material in our modern world.
Crystallized glass can be processed into slab, tile, countertop, column and vanity top, wash basin and etc. It is applicable for flooring, interior and exterior wall cladding, stairs and table. Contributed to the character of no color difference, so it is widely used for top grade hotel, business building shopping mall and such great construction.
Physical Parameter
Density
2.70 g/cm
Water Absorption
0.01%
Compressive Strength
126 Mpa
Radioactive
Class A (Suitable for indoor and outdoor)
Size
Slabs
2400/2600/2800/3000 x 1800/1600/1400/1500mm
Cut-to-size Tiles
30 / 40 / 50 / 60 / 80 / 100cm X 30 /40/50 /60/80 /100cm
12"x12", 24"X12", 24"x24" or customized size
Thickness
1.2cm,1.8cm (3/4'), 2.0cm, 2.5cm, 3.0cm,
Finishing
Polished, honed
Usage
Flooring, Walls, Stairs / Steps, Counter tops, Vanity, Paving / Curbstone, Pillar, Column, Border, Skirting, Window Sills
Quality Control
Thickness Tolerance
+- 1mm;
Polishing Grade
above 100 degree
Crack / Spot
EU / US Standard: zero
QC Standard
AQL2.5/4.0 ITS
Certificate
CE, ISO, GB/T19001-2008
Advantage
1. Own factory with stable supply;
2. Factory direct with good price and prompt delivery;
3. Good Management System for good quality;
4. Value-added service.
large glass white artificial stone of Packing
Inner Packing
Cover with foam and plastic film, corner paper board protection
Individual Carton
Individual carton packing with trademark is available upon request
Outer Packing
Plastic tapes in 6 sides, further strengthened with iron sheet in the corner
Shipping Mark
OEM
Port of Loading
Xiamen Port of China
Delivery Lead Time
Normally 10-15 days for one 20’ GP, faster delivery is available upon confirmation
Trade Term
FOB, CFR, CIF, etc.
Loading Info.
Thickness
Qty per pallet
Pallets per 20ft container
QTY per 20ft container
Square Meter per 20ft container
Weight per 20ft container
Big slab size
3000*1200mm
12mm
25pcs
7
175pcs
600-900 m2
21000kgs
3000*1400mm
15mm
20pcs
7
175pcs
500-700 m2
21000kgs
3000*1600mm
20mm
15pcs
7
105pcs
350-500 m2
21000kgs
3200*1600mm
30mm
10pcs
7
70pcs
250-358 m2
21000kgs
Installation Recommendations
Wall Cladding
1.Wall should be leveled and cleaned,
2.Fix the panel on the wall with wire and expansion screw tightly,
3.Fill the space between the panel and the wall with cement mortar of ratio 1:3,
4.Clean the extra mortar and dirt on the surface.
Floor Installation
1.Mark out the baseline of gound level,
2.Mix the mortar with ratio of 1 cement to 4 sand to have semi-day mortar,
3.Lay the mixed mortar in level with a layer of 3-4cm thickness,place the tile over the mortar and adjust the height properly to be leveled,
4.Remove the tile after level adjustment.Put a thin layer of cement powder on the mortar and add water on it to become wet,
5.Put the tile on top and gently knock with rubber hammer until it sealed with the mortar properly. Make sure the tile is leveled and has the same space between each other. Those tiles which are not leveled with others should be removed and repeat the leveling procedure in step 4.Genetally,the space between two tiles should be 2mm for water evaporation and normal expansion.
Daily maintenance of Micro Crystal Stone
1.The laying area of micro crystal stone can only be opened for use or stacking any item on top after at least 24 hours of filling the gap,
2.The ground must be covered with plywood or carpet for protection in case of doing other decoration work after the installation of micro crystal stone floor,
3.In areas like exit and entrance, the surface of micro crystal stone floor should be covered by carpet or plywood to protect it from the damage of abrasion of sand or other hard material.
4.Do not use general floor wax on micro crystal stone,General floor wax is an oil-based wax which is easily stuck to dust.
5.Please use rubber wheels for shopping cart and trolley on micro crystal stone floor, for the hard wheel may scratch and damage the surface,
6.Regular care and maintenance is the key for long lasting of micro crystal stone’s high glossy and reflection.
Important Notice
1.Make sure the ground of laying area is dry and clean before laying mortar. The ratio 1:3(volume ratio) must be strictly followed and no extra water added during the installation progress
2.In the choice of using white cement as the filling material, the strength and quality of the cement must be checked properly.
3.It is not recommended to store micro crystal stone outdoor for long time. It should be covered with rock wool in winter and moved into indoor 2 hours in advance before installation. It also needs to be covered with waterproof cloth when installing during the rainy days outdoor,
4.When using micro crystal stone as ground floor,2mm wild gap must be left between the joints for the benefit of the water vaporization and physical expansion. In the case of large-scale installation, it is recommended to leave an 8mm expansion joint,
5.It is recommended that the area of micro crystal stone to remain-not used-for at least 24 hours and kept 2-3 days before passing or storing items on top.
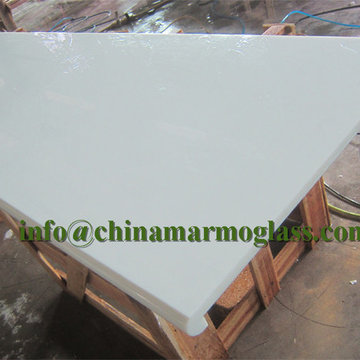
Marmoglass Polished Edge, Shining !
China Marmoglass SN002 Slabs Packing and Ready for ship
We not only make Slabs, we also can make:
- Project Tiles
- Countertop
- Tabletop
- Vanitytop
- Column
Tags: Marmoglass, Crystallized glass panel, nano crystallized glass panel, pore marmoglass, pore crystallized glass panel, Artificial Stone, Hole-Free Micro Crystal Stone, Pure white stone, Crystallized glass tile, Crystal glass tile, pure white artificial white marble, Marmo Glass, Glass Marble, White Marble, Marmoglass, nano marmoglass, no pore marmoglass, non-pore crystallized glass panel, glass marble, white marble, crystal white marble, white stone, white marble tile, Micro-crystal stone, Crystallized glass, Crystallized White Stone, Crystallized White Stone, Micro-crystallized composite tile, Hole-Free Micro Crystal Stone, Micro-crystallized composite tile, White Marble Tiles, pure white marble
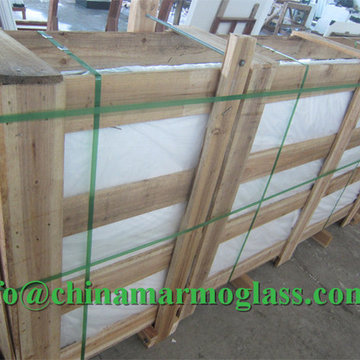
China Marmoglass SN002 Strong Packing Crates
China Marmoglass SN002 and Nanoglass NANO3 Container Loading
Welcome to our product page of China Marmoglass, in which you can find detailed information of Marmoglass. China Marmoglass Co.,Limited offer Crystallized White Marmoglass is good in quality and competitive in price. China Marmoglass Co.,Limited is the manufacturer and supplier of Marmoglass,White Crystallized Glass Panel,Nanoglass. Crystallized Glass Stone,Crystallized Glass Panel,Crystallized Glass Stone Tile,Crystallized Glass Stone Countertop,Marmoglass also known as Nanoglass and White Crystallized Glass,Marmoglass, Crystallized Glasss is the popular materials for interior and exterior applications, including kitchen countertops, bathroom vanities, commercial foyer wall claddings, etc. China Marmoglass Co.,Limited is the Manufacturer and export Crystallized Glass and Crystallized Glass products. Crystallized Glass can be used Interior & external wall cladding, Flooring Tile, Stair, Column cladding, Basin, Countertop, Table, Bar, bath, Kitchen, any tops, round pillar and furniture decoration etc. Super White Nanoglass Slab, You Can Buy Various High Quality Super White Nanoglass Slab Products from Super White Nanoglass Slab Suppliers and Super White Nanoglass Slab Manufacturers at Chinamarmoglass.com
 China Marmoglass Co.,Limited
Home > Products
Crystallized Glass,Crystallized stone 6
Crystallized Glass,Crystallized stone,Crystallized glass panel
Marmoglass,Nanoglass,Marmoglass Composite Collectively referred to as Crystallized Glass
Crystallized Glass Application:
1). Interior & external wall cladding
2). Flooring Tile, Stair, Column cladding
3). Basin, Countertop, Table, Bar
4). bath, Kitchen, any tops, round pillar and furniture decoration etc .
Crystal white is a kind of artificial stone . It is made of glass ,which should be burned in the oven for two days under the more than 1000C temperature . It is much different from natural stone from all sides.
1. Natural and soft texture,
2. Varied colors such white, beige, carrara white
3. Good weather resisting property and durability
4. Zero percent of water absorption , not be polluted easily
5. Green environmental building material
6. High-intensity, light weight
7. Bending formation, economical, time saving
8. scratch resistant ,withstand high-heat .
More details about it :
1. There are more than 10 colors of crystallized glass panel products available: Pure white, yellow, silver yellow, silver grey, grey in white, grey spot white, USA grey spot white, yellow in white….
2. Panel thickness: 10-30MM
3. Normal specifications (mm):
1800*3000*18 1200*2400*18 600*600*18 1200*1200*18
1600*2400*18 1800*3000*30 800*800*18 1000*1000*18
Thin tiles:
305*305*12mm, 450*450*12mm
457*457*12mm, 400*400*12mm
600*600*12mm 1200*2400*12mm
4. Material: crystal quartz sand
5. Packaging: Fumigated wooden crates, Bundles,foam
6. Brand name: China Marmoglass / Nanoglass
7. Place of origin: Xiamen, Fujian ,China
8. Model NO.: GS001, SN002, NANO2009, NNAO2011
9. Supply ability: 20000M2/MONTH, 30TON/DAY
10. Delivery time: generally within 10 days, after the order confirmed and the deposit received
11. Arc panel specifications (mm):
Thickness: 18-30mm
Diameter : 30cm-120cm
1.What is crystallized glass stone(Marmoglass SN002 )?
The micro crystal stone is an innovative product designed as a substitute for the rare natural white marble. It is superior to the natural white marble in terms of characteristics, where the micro crystal stone possesses extreme density making it anti-breakage, giving it zero water absorption qualities, and making it resistant to acidic and alkaline substances. at the pace that mankind is consuming the natural resources in today’s world, the micro crystal stone is the ultimate solution, the superior alternative for the external and internal applications. It is certainly a revolutionary product and the finest construction material of the 21st century.
2.Why choose crystallized glass stone(Marmoglass SN002)?
The micro-crystal stone, also known as the micro-crystal glass, Marmoglass, is a new type of high-level decoration material. It is derived from natural inorganic material through a high temperature process, and it possesses excellent characteristics including the followings:
1. High Performance
The micro-crystal stone has even texture and high density, which makes it crush resistant, anti-bending and high resistant resulting its performance being higher than natural stone. It can be used for long period with minimal damage.
2. Acid-proof alkalinity and anti-corrosion
Not only does the micro-crystal stone posses special micro-crystal characteristics, it also has special glass features such as a fine texture, shiny surface and light reflection effect.
3. Fine Texture
We have the flexibility to manufacture any colors as per customer requirements while also making up the defect of color differences, which exists in natural stone. While the product is widely used for interior and interior decoration of star-level hotels, subways, local landmark buildings, airports, and office building etc, it is more suitable for high-level home decoration.
4. Pollution-resistance and easy maintenance
The micro-crystal is a kind of inorganic crystalline material with stable chemical characteristics. Its acid proof alkalinity and anti-corrosion nature are superior to nature stone, specifically its anti-weather characteristics whereby it is unaffected by the wind or sunlight.
5.A wide application range
The water absorption rare of micro-crystal is quite low, close to zero. Several types of dirty pulps and dyed solution have difficulty in penetrating it. Any dirt on the surface is easily cleaned and it is convenient to mankind.
6. Heat-bend reformation
With the heating method, the micro-crystal can be made into various arched profiles and arched slabs. the process is simple and it allows us to save time, cost, material and resources.
7. No radioactive elements
In the process of manufacturing the micro-crystal stone, we have integrated the elimination of all the harmful radioactive elements that are found in natural stone from its components. It is therefore the safest and most environmentally friendly building material in our modern world.
Crystallized glass can be processed into slab, tile, countertop, column and vanity top, wash basin and etc. It is applicable for flooring, interior and exterior wall cladding, stairs and table. Contributed to the character of no color difference, so it is widely used for top grade hotel, business building shopping mall and such great construction.
Physical Parameter
Density
2.70 g/cm
Water Absorption
0.01%
Compressive Strength
126 Mpa
Radioactive
Class A (Suitable for indoor and outdoor)
Size
Slabs
2400/2600/2800/3000 x 1800/1600/1400/1500mm
Cut-to-size Tiles
30 / 40 / 50 / 60 / 80 / 100cm X 30 /40/50 /60/80 /100cm
12"x12", 24"X12", 24"x24" or customized size
Thickness
1.2cm,1.8cm (3/4'), 2.0cm, 2.5cm, 3.0cm,
Finishing
Polished, honed
Usage
Flooring, Walls, Stairs / Steps, Counter tops, Vanity, Paving / Curbstone, Pillar, Column, Border, Skirting, Window Sills
Quality Control
Thickness Tolerance
+- 1mm;
Polishing Grade
above 100 degree
Crack / Spot
EU / US Standard: zero
QC Standard
AQL2.5/4.0 ITS
Certificate
CE, ISO, GB/T19001-2008
Advantage
1. Own factory with stable supply;
2. Factory direct with good price and prompt delivery;
3. Good Management System for good quality;
4. Value-added service.
large glass white artificial stone of Packing
Inner Packing
Cover with foam and plastic film, corner paper board protection
Individual Carton
Individual carton packing with trademark is available upon request
Outer Packing
Plastic tapes in 6 sides, further strengthened with iron sheet in the corner
Shipping Mark
OEM
Port of Loading
Xiamen Port of China
Delivery Lead Time
Normally 10-15 days for one 20’ GP, faster delivery is available upon confirmation
Trade Term
FOB, CFR, CIF, etc.
Loading Info.
Thickness
Qty per pallet
Pallets per 20ft container
QTY per 20ft container
Square Meter per 20ft container
Weight per 20ft container
Big slab size
3000*1200mm
12mm
25pcs
7
175pcs
600-900 m2
21000kgs
3000*1400mm
15mm
20pcs
7
175pcs
500-700 m2
21000kgs
3000*1600mm
20mm
15pcs
7
105pcs
350-500 m2
21000kgs
3200*1600mm
30mm
10pcs
7
70pcs
250-358 m2
21000kgs
Installation Recommendations
Wall Cladding
1.Wall should be leveled and cleaned,
2.Fix the panel on the wall with wire and expansion screw tightly,
3.Fill the space between the panel and the wall with cement mortar of ratio 1:3,
4.Clean the extra mortar and dirt on the surface.
Floor Installation
1.Mark out the baseline of gound level,
2.Mix the mortar with ratio of 1 cement to 4 sand to have semi-day mortar,
3.Lay the mixed mortar in level with a layer of 3-4cm thickness,place the tile over the mortar and adjust the height properly to be leveled,
4.Remove the tile after level adjustment.Put a thin layer of cement powder on the mortar and add water on it to become wet,
5.Put the tile on top and gently knock with rubber hammer until it sealed with the mortar properly. Make sure the tile is leveled and has the same space between each other. Those tiles which are not leveled with others should be removed and repeat the leveling procedure in step 4.Genetally,the space between two tiles should be 2mm for water evaporation and normal expansion.
Daily maintenance of Micro Crystal Stone
1.The laying area of micro crystal stone can only be opened for use or stacking any item on top after at least 24 hours of filling the gap,
2.The ground must be covered with plywood or carpet for protection in case of doing other decoration work after the installation of micro crystal stone floor,
3.In areas like exit and entrance, the surface of micro crystal stone floor should be covered by carpet or plywood to protect it from the damage of abrasion of sand or other hard material.
4.Do not use general floor wax on micro crystal stone,General floor wax is an oil-based wax which is easily stuck to dust.
5.Please use rubber wheels for shopping cart and trolley on micro crystal stone floor, for the hard wheel may scratch and damage the surface,
6.Regular care and maintenance is the key for long lasting of micro crystal stone’s high glossy and reflection.
Important Notice
1.Make sure the ground of laying area is dry and clean before laying mortar. The ratio 1:3(volume ratio) must be strictly followed and no extra water added during the installation progress
2.In the choice of using white cement as the filling material, the strength and quality of the cement must be checked properly.
3.It is not recommended to store micro crystal stone outdoor for long time. It should be covered with rock wool in winter and moved into indoor 2 hours in advance before installation. It also needs to be covered with waterproof cloth when installing during the rainy days outdoor,
4.When using micro crystal stone as ground floor,2mm wild gap must be left between the joints for the benefit of the water vaporization and physical expansion. In the case of large-scale installation, it is recommended to leave an 8mm expansion joint,
5.It is recommended that the area of micro crystal stone to remain-not used-for at least 24 hours and kept 2-3 days before passing or storing items on top.
Marmoglass Polished Edge, Shining !
China Marmoglass SN002 Slabs Packing and Ready for ship
We not only make Slabs, we also can make:
- Project Tiles
- Countertop
- Tabletop
- Vanitytop
- Column
Tags: Marmoglass, Crystallized glass panel, nano crystallized glass panel, pore marmoglass, pore crystallized glass panel, Artificial Stone, Hole-Free Micro Crystal Stone, Pure white stone, Crystallized glass tile, Crystal glass tile, pure white artificial white marble, Marmo Glass, Glass Marble, White Marble, Marmoglass, nano marmoglass, no pore marmoglass, non-pore crystallized glass panel, glass marble, white marble, crystal white marble, white stone, white marble tile, Micro-crystal stone, Crystallized glass, Crystallized White Stone, Crystallized White Stone, Micro-crystallized composite tile, Hole-Free Micro Crystal Stone, Micro-crystallized composite tile, White Marble Tiles, pure white marble
China Marmoglass SN002 Strong Packing Crates
China Marmoglass SN002 and Nanoglass NANO3 Container Loading
Welcome to our product page of China Marmoglass, in which you can find detailed information of Marmoglass. China Marmoglass Co.,Limited offer Crystallized White Marmoglass is good in quality and competitive in price. China Marmoglass Co.,Limited is the manufacturer and supplier of Marmoglass,White Crystallized Glass Panel,Nanoglass. Crystallized Glass Stone,Crystallized Glass Panel,Crystallized Glass Stone Tile,Crystallized Glass Stone Countertop,Marmoglass also known as Nanoglass and White Crystallized Glass,Marmoglass, Crystallized Glasss is the popular materials for interior and exterior applications, including kitchen countertops, bathroom vanities, commercial foyer wall claddings, etc. China Marmoglass Co.,Limited is the Manufacturer and export Crystallized Glass and Crystallized Glass products. Crystallized Glass can be used Interior & external wall cladding, Flooring Tile, Stair, Column cladding, Basin, Countertop, Table, Bar, bath, Kitchen, any tops, round pillar and furniture decoration etc. Super White Nanoglass Slab, You Can Buy Various High Quality Super White Nanoglass Slab Products from Super White Nanoglass Slab Suppliers and Super White Nanoglass Slab Manufacturers at Chinamarmoglass.com
14