
Search results for "Determines" in Home Design Ideas
 Cuisines Nuenza
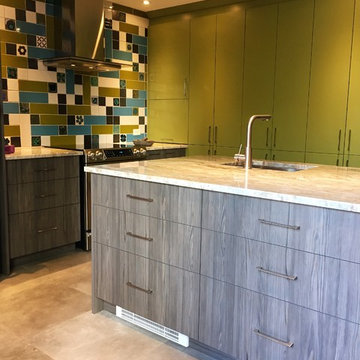
The inspiration for this space comes from beautiful tiles that were collected from around Europe. The were the driving factor which determined the colors of the cabinets, counters and floors. These colorful tiles of greens, blues and whites were matched and dispersed among other simple tiles, and a custom back splash was created. We brought in green cabinets and grounded the whole space with a neutral concrete tile. The counter top, a natural stone called Fantasy Brown brought a whimsical yet subdued feel to the space.
 Lucy Interior Design
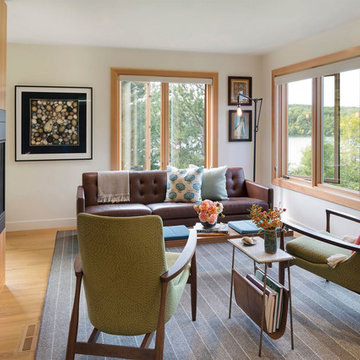
Architect: Sala Architects | Builder: Merdan Custom Builders Inc. | Photography: Spacecrafting
1950s light wood floor living room library photo in Minneapolis with white walls
1950s light wood floor living room library photo in Minneapolis with white walls
 Greensleeves Landscaping
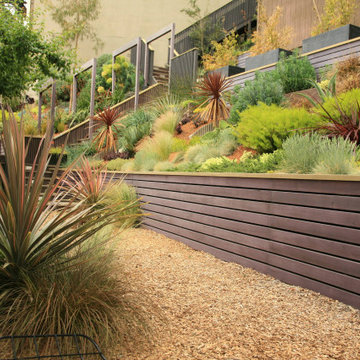
The garden beds are the icing on your cake. With such a huge variety of plant palettes available, consultation is vital. We specialise in drought tolerant plants and gardens which may range from thicker bushier species to more localised succulents and cactus based palettes. Allow our irrigation specialists to determine what, if any, systems may be required before we then design the planting and mulching accordingly. With increasing water costs and state water restrictions this final stage of the design / build is critical.
Find the right local pro for your project
 Marilyn's Dreamscapes L.L.C.
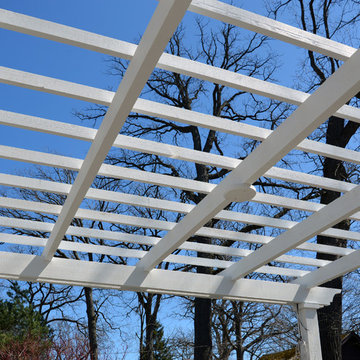
The Pergola can be a decorative structure that creates a "room like" feel to the outdoor environment. The amount of structure built will determine how much shade is desired.
Marilyn Musgjerd
 An Added Touch Design
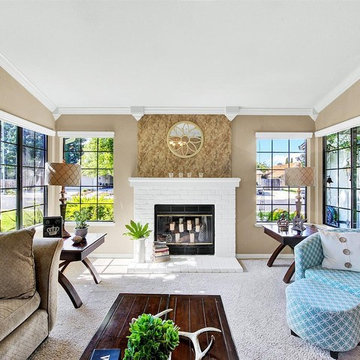
We used the clients existing furniture pieces with added simple decor to create an inviting space. With our help in determining how to declutter and de-personalize the space this home had 4 viewings the first day on the market, as well as an offer by day two!
 The Kitchen Loft
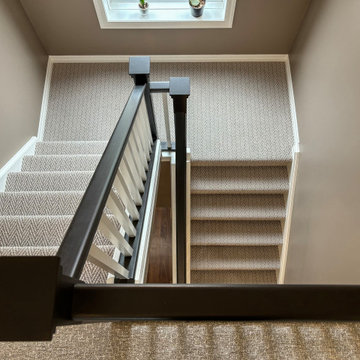
Updated staircase with colour, design, and cohesion. The smallest of changes determines how your house will look as a whole. All of the colours are chosen to pair with the stained walnut flooring.
 An Added Touch Design
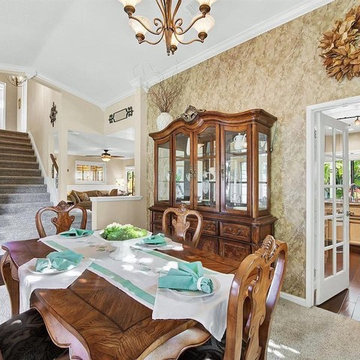
We used the clients existing furniture pieces with added simple decor to create an inviting space. With our help in determining how to declutter and de-personalize the space this home had 4 viewings the first day on the market, as well as an offer by day two!
 The Kitchen Loft
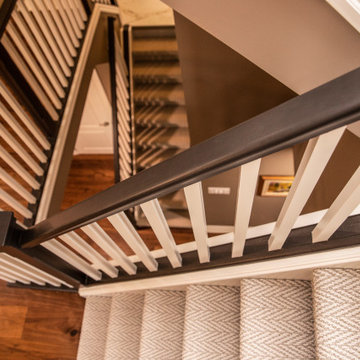
Updated staircase with colour, design, and cohesion. The smallest of changes determines how your house will look as a whole. All of the colours are chosen to pair with the stained walnut flooring.
 West Designs - Full Service K+B Designer/Builder
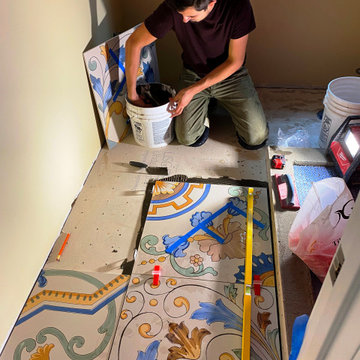
The beautiful large format tile has a random, non-matching pattern. Careful pre-planning was required to determine where each tile was placed beforehand.

 Advance Design Studio, Ltd.
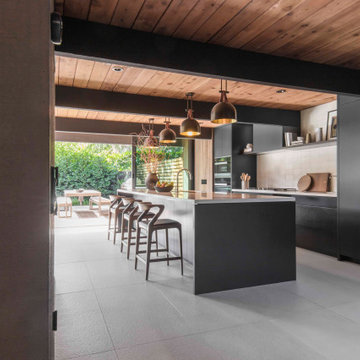
Jennifer and Dan have lived in their Deer Park Illinois home for 15 years, slowly making minor fixes like painting and decorating; but they had a new plan for their kitchen the entire time. An awkwardly placed garage door, and an island cooktop with a terrible downdraft made a full-scale kitchen remodel an absolute must. Jennifer had many ideas in mind and wanted to work with a company that could provide high-end work, while partnering with a designer that would tailor the kitchen to her ideas.
She was intrigued by the phrase “Common Sense Remodeling” in Advance Design’s feature she discovered while perusing an issue of the community’s Quintessential Barrington Magazine. Doing further research on the company’s website, as she looked through project profiles and read about Advance Design’s “Common Sense Remodeling” philosophy, she promptly scheduled an appointment to see if the people and ideas she read about were truly who they said they were. The more she read, the more she knew that the “Common Sense” approach to remodeling they described was exactly the type of company she was looking for.
The partnership was sealed after an initial consultation with Owner Todd Jurs and Project Designer Michelle Lecinski. They displayed a combination of friendliness, professionalism and respect that was unmatched by any of the other companies Jennifer talked to. She knew that with Advance Design, she would be able to retain the vision that she had in mind with high-quality craftsmanship.
“I reached out to Advance Design because of the ‘Common Sense Remodeling’ tagline,” Jennifer said. “That’s what lingered for me”. “Advance Design was the most respectful- of the house and of my design ideas, and the most professional of the handful of companies that looked at my project”.
Soon after the meeting Jennifer began working with Michelle on the project design. They quickly developed chemistry. Jennifer loved how Michelle researched and located every detail that Jennifer wanted for the kitchen. Between the two of them, every concept and idea was worked through and perfected. “Jennifer had definite ideas about what she wanted the new kitchen to look like, she just didn’t know how to bring it all together. We worked together really well to make her ideas into the practical reality necessary for a well-functioning kitchen, with the look and feel that she had envisioned”, says Michelle.
“Michelle was wonderful in using the CAD system she would show me new drawings every time we changed the layout while working through the design,” Jennifer said. “She was a really wonderful partner in execution, she made sure everything happened quickly and easily.”
The finished design drew out elements of Jennifer’s style and personality. The pair call the look “sophisticated farmhouse” to describe the kitchen renovation to family and friends. The result was a beautifully crafted, authentic-feeling space that satisfied Jennifer’s dreams 15 years in the making. The whole project consisted of a kitchen remodel, mudroom upgrade with powder room, and garage entry relocation. “The projects I personally like the best, are the ones that put the client’s dreams on display,” Project Designer Michelle said. “And this is one of those projects.”
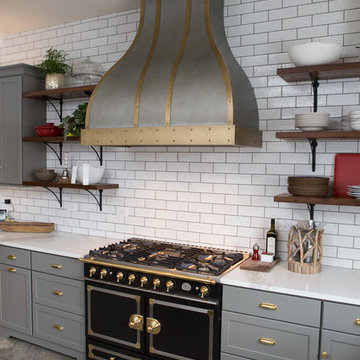
The main focal point of the kitchen is custom zinc and brass ventilation hood with a vintage sheen, which was hand made to order by a small company in Indiana named Vogler Metalworking. “It’s like sculpture, a true work of art”, says Jennifer. Your eye is immediately drawn towards this elegant yet practical hood that eliminated the home’s downdraft problem and added a striking conversation piece at the same time. The carpenters had to use special gloves when transporting and installing it, so they didn’t smudge it with fingerprints. The beautiful hood centers proudly over the stunning black enamel and brass LaCornue Range. “I had a friend who had a LaCornue range and after learning how easy it was to cook perfect meals, I was convinced I wanted to have one”, says Jennifer. This unique, breathtaking combination anchors the entire kitchen and is apparent immediately as you walk into the great room the surrounds the space.
DuraSupreme Crestwood cabinets with a Kendall Panel add function and sophistication. A custom gray paint color paired with a storm blue was developed so that the new kitchen looked like it belonged to the existing space. Unlacquered brass faucets and hardware were important to Jennifer because she wanted the living finishes to age over time. Remarkable brass diamond mesh cabinet door inserts imported from the UK continue to add this one-of-a-kind kitchen renovation; giving it a “you won’t see this everywhere” quality. The use of old railcar flooring for the coffee bar countertop and reclaimed oak for the open shelving gives an authenticity to the space uncommon in kitchens today.
Jennifer and Michelle fell in love with the Limestone Grey Stone while they were investigating unique island countertop ideas. They liked the fact that the limestone as a living finish will age and change over time. Calcutta Miel Quartz countertops made for an excellent pairing around the perimeter, as it’s durable and perfect for cooking preparations. A textured white subway tile backsplash that runs to the ceiling keeps your eye moving towards the open shelving, and to the main focal point of the stunning range hood combination.
“The kitchen functions beautifully, and it’s gorgeous,” beams Jennifer as she gestures with both hands while smiling ear to ear. “The most important thing was I wanted a kitchen that had a wonderful flow, cooked beautiful meals and was a great gathering place for family and friends, and this space does that perfectly! Beauty wise, it turned out exactly how I had envisioned. I felt the function part was the hardest part, and that was nailed”!
Relocating the garage entry to the new mudroom was a huge priority and has finally separated the family’s arriving home functions from their kitchen. Now coats and shoes and bags have their own area for dropping once members arrive home. Matching gray DuraSupreme cabinetry helped create gorgeous, purposeful lockers for the family. A reclaimed vintage sink and custom wall paper were added to the tiny powder room to beautify the once previously only functional space. Advance Design was even able to create a custom space for their dog to sleep while the family is away.
“It was unbelievable that a project of this size was completed in such a short time, and I think that’s because of the large amount of planning and preparation that went into it,” Jennifer marveled, “When we started, we were ready, and everything was prepared”.
When it came to execution, Project Manager Justin Davis and his crew were quick, accessible, and organized. Projects like this kitchen are typically completed in as little as 8-10 weeks. Jennifer’s kitchen however despite the relocation of some challenging HVAC in a soffit and moving of an exterior door was completed remarkably fast in part because the team was working with an existing tile floor that ran throughout the first floor that the client really loved.
“You get to know these people really well because they’re living in your house while you’re living in your house. They were so fast and really good, it didn’t take as long as even planned” reported Jennifer. “I would text Justin and he always responded almost immediately. I got to know all the guys who were working in our house and they were all wonderful people”.
Details in a customized kitchen like this one require skill and care from the people who install it. “All the guys on the job were skilled at what the did. I wanted small details like little feet to look like furniture, that is where their carpentry skill came in to make these all perfect”, said Jennifer. “The tile guys were wonderful. They even let me determine how I wanted the texture with the grout to appear for a salt and pepper look; now that is a very skilled trade person making it custom”.
In Jennifer’s interview, she continued to reference Advance Design’s “Common Sense Remodeling”, so I took a minute to ask her exactly what that phrase meant to her and how it played out in her experience with her project and the Advance Design team. Here is what she said: “I was intrigued about Common Sense Remodeling and in my head that there would be clear costs and prices, great communication between the design team, the execution team and me”, said Jennifer. They did deliver on that, it was so clear about the cost breakdown, what I could expect from everyone who came to my house, and everything that we had ordered. That to me is the Common Sense”!
It’s great to see a client take literally our assertion that a well-planned remodeling project is simply “Common Sense”! She anticipated each step of the way would be clear, concise, and predictable, all the while protecting the outcome due to the careful upfront planning. “Advance Design delivered on their ‘Common Sense Remodeling’ promise,” Jennifer said. “From the design team, to the execution team - everything was straight forward like I imagined. The project turned out exactly how I envisioned, I enjoyed this process and absolutely would recommend Advance Design Studio to anyone.”
 The D. H. Ellison Co.
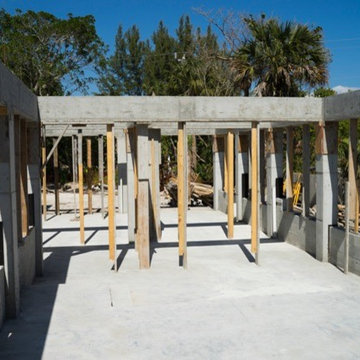
The horizontal beam that sits on top of the concrete piers is set at the requisite height for the lowest structural member of the house. This height is determined by the federal and state regulatory agencies.
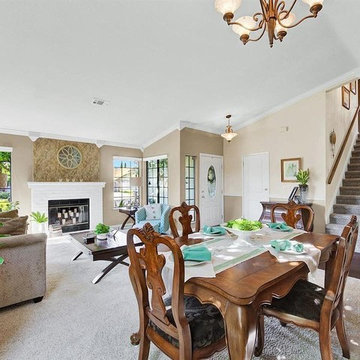 An Added Touch Design
We used the clients existing furniture pieces with added simple decor to create an inviting space. With our help in determining how to declutter and de-personalize the space this home had 4 viewings the first day on the market, as well as an offer by day two!
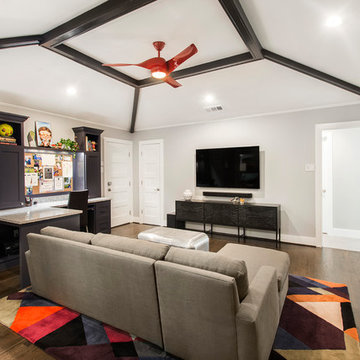
 EURO Design Build
After a comprehensive needs analysis with the client, it was determined that this home desperately needed a multi-purpose room that allowed for family fun, entertaining, crafting, and a fun-loving place for their pets. While primarily serving as a play/study/craft area for two children, the space also needed to accommodate the family's two cats and have enough comfortable seating for the entire family of four to enjoy movie night with their new entertainment system.

 MBG Services
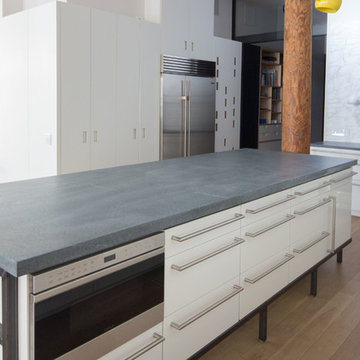
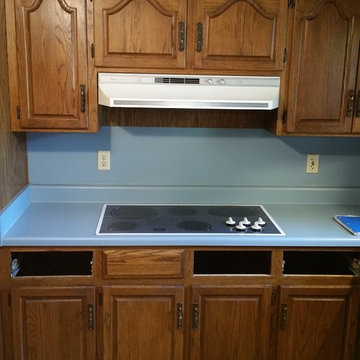
Preparation for the project will deal with determining the exact placement of the center line for the new appliance. This will determine where the face frames, cabinet floor, and other components will be cut. This project had the built in place cabinetry common to older homes. This required that consideration be taken to brace the cabinet floors at the points where there new end panels will be installed. As with any project, very careful planning and layout is vital. Small details not taken into account can add considerable time, expense, and frustration to account for. Here, the run of cabinets will have 3/4 end panels installed on each side of the range opening. Measurements not properly verified will leave you in a situation in which the raw end of the plywood end panel would be visible. The other challenge here is the size difference between the 36" cooktop and the standard 30" common range to replace it. Carefully remove the center stile and make clean square cuts on the rails so the removed material can be utilized when/if needed.
Johnnie McCormick
 Austin Homes and Remodeling
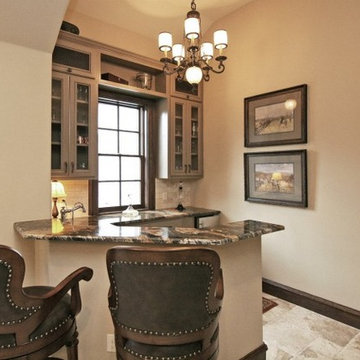
Example of a small classic u-shaped ceramic tile and brown floor wet bar design in Austin with a drop-in sink, glass-front cabinets, brown cabinets, granite countertops, brown backsplash and stone tile backsplash
 Fine Lines Design Inc.
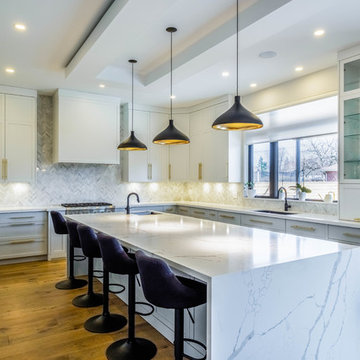
Example of a trendy l-shaped medium tone wood floor kitchen design in Toronto with an undermount sink, glass-front cabinets, white cabinets, gray backsplash, stainless steel appliances, an island and white countertops
 Pierce Lamb Architects
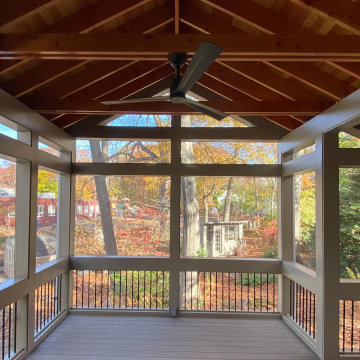
The homeowner is a naturalist and nature-educator, and wanted the screen porch addition to feel like being in the forest. This concept led to finish decisions: wide expanses of screen, wall framing to blend in with the existing house, and a finished ceiling using fir framing and beadboard. The ridge height is 14-ft, a dimension that reflects the various lines of the existing split-level house, and determined heights for transom, railings, and eave details.
 Forest Landscaping
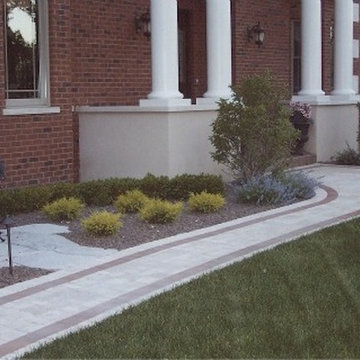
The client asked us to come up with a plan for the landscaping which included determining the overall grade of the property due to some low areas that did not drain well, as well as some other unique conditions. We constructed a landscape that included bringing in fill to set property grade, brick sidewalks, water feature, firepit/seating area and dry creekbed
38