
Search results for "Heavily" in Home Design Ideas

 Native Plant Scapes
Heavily overgrown vegetation including invasive vines had taken over the clients backyard. Some vegetation was over 6ft tall.
Photo of a large drought-tolerant and full sun backyard landscaping in DC Metro for summer.
Photo of a large drought-tolerant and full sun backyard landscaping in DC Metro for summer.
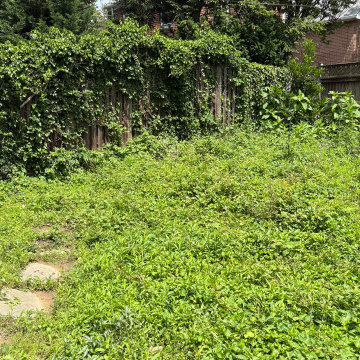 Native Plant Scapes
Heavily overgrown vegetation including invasive vines had taken over the clients backyard. Some vegetation was over 6ft tall.
This is an example of a large drought-tolerant and full sun backyard landscaping in DC Metro for summer.
This is an example of a large drought-tolerant and full sun backyard landscaping in DC Metro for summer.
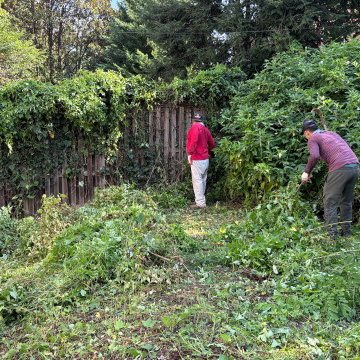 Native Plant Scapes
Heavily overgrown vegetation including invasive vines had taken over the clients backyard. Some vegetation was over 6ft tall.
Design ideas for a large drought-tolerant and full sun backyard landscaping in DC Metro for summer.
Design ideas for a large drought-tolerant and full sun backyard landscaping in DC Metro for summer.
Find the right local pro for your project
 HomeClick
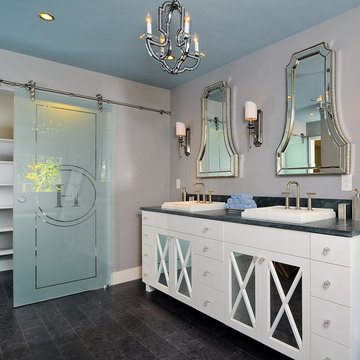
Uttermost Cattaneo Mirror in Heavily Antiqued Silver/Champagne
This light Mirror from the Cattaneo collection by Uttermost will enhance your home with a perfect mix of form and function.
 Tile Doctor Ltd
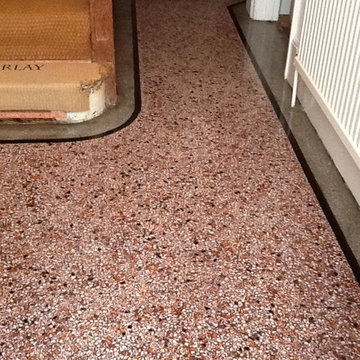
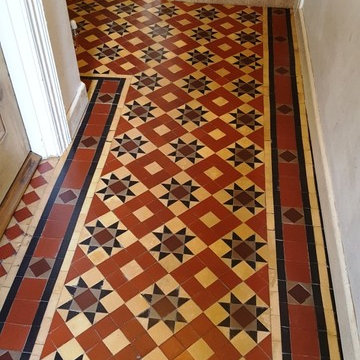
This Terrazzo tiled hallway at a property in Northampton was in a really bad state. It was heavily soiled and suffered from glue marks where the original carpet covering it had been removed. Additionally, there was some damage to the edges of the doorway, and a large crack in the floor running across the width of the hallway.
Terrazzo is an interesting material, originally produced in Italy, that consists mainly of concrete with segments of marble and other stone interspersed and held together with a resin. Since Terrazzo is formed in this way, I explained to the customer that I would fill the crack along the floor and the small holes around the edges with concrete, before then using tile paint to match in the colours as best as possible. This would be the most cost-effective solution, which was ideal since the customer had a limited budget for the repairs.
Before beginning the restoration, I tested a small area using a diamond encrusted burnishing pad, thereby giving the customer an indication of the type of results that could be achieved. With the customer pleased by the results, the job was booked in for the following week.
To begin, Tile Doctor Remove & Go was applied to the floor and was left to dwell for ten minutes to soften the carpet glue and break down any old sealer. This was then scrubbed in to the tiles with a pad fitted to a rotary machine. To remove the remaining residue and marks in the particularly stubborn areas, I used a manual hand scraper. The entire floor was then wet vaxed to soak up the soiled cleaner and leave the area clean for burnishing.
This was followed by the use of Tile Doctor diamond encrusted burnishing pads to polish the tiles, starting with a coarse grit pad, followed by wet vaxing and repeating the process with a medium grit pad and finally the fine grit pad to achieve the desired effect. I then installed a turbo dryer to dry the floor.
I returned to the property once the floor was dry and carried out the repairs which had been discussed earlier with the customer (filling the holes and cracks in the floor with concrete), cleaning off any concrete residue before I finished for the day.
Upon my return to the property the next day, I refined the polish on the floor even further by applying the extra fine grit burnishing pad.
To finish off the three day restoration, I sealed the Terrazzo tiles using two coats of Tile Doctor Colour Grow sealer. As an impregnating sealer, Colour Grow soaks into the pores of the stone, protecting it from ingrained dirt. Colour Grow also contains colour intensifying properties, allowing it to enhance the naturally occurring shades in the stone, and therefore stopping it from appearing dull.
This floor certainly was in a bad state, with damage as well as dirt to deal with, but I’m pleased to say that the work went a long way in transforming its appearance, leaving a very happy customer.
Phil Vissian
Northamptonshire Tile Doctor
 Tile Doctor Ltd
Pontcanna is a popular residential area in the western district of Cardiff, in South East Wales. Known for its rather large houses and spectacular foliage, interestingly enough roughly a quarter of the population are English folk.
I was called down to a property in the area to take a look at a Victorian tiled floor which was in quite poor condition. Along with the typical amount of dirt and muck seen on poorly maintained tiles, there were a number of missing tiles and a fair bit of cement caked on the surface of the floor.
It would require a robust clean, fresh seal, and several repairs to get this floor back into optimum condition.
To begin, I checked for excess moisture problems using a damp meter in various places of the hallway floor and, thankfully, it was showing dry results. Any dampness could have potentially caused problems later on in the restoration process, so it was s good idea to run tests before starting.
Next, I manually scraped as much of the dry paint and cement off the tiles as possible, with no lubrication necessary. I then proceeded to clean the floor with a solution I mixed early, consisting of equal parts Tile Doctor NanoTech HBU and Tile Doctor Pro Clean, rinsing as I went. Both products are designed to tackle heavy soil build-up, with the former uniquely using nano-sized particles (as the product name suggests) to penetrate deep into difficult to reach areas in the tiles in order to lift out ingrained muck.
Following the initial clean, I removed all of the loose tiles and those heavily affected by cement, before retiling as necessary with fresh Victorian tiles, and grouting the whole floor. Of course, these replacement tiles were carefully sourced to ensure consistency, as far as possible, with the original pattern of the floor.
The next day, I went over the whole floor with an application of the acid-based Tile Doctor Grout Clean Up, diluted with a little alkaline Pro Clean to form a cleaning solution. I then used a black pad to scrub the cleaner into the tiles, similarly to the previous day’s cleaning. This was followed by a through rinse with water to neutralise the floor.
It was at this point that I noticed some stubborn cement stains remained so I set about breaking them down using a 60 grade hand held diamond polishing block, and this technique proved successful.
After completing the clean, I left the floor to dry out for roughly 24 hours. Upon my return to the property to seal the tiles, I tested again for moisture. It is recommended to run damp tests before sealing, as excess moisture can cloud the sealer, affecting its performance in the long run.
Fortunately, no dampness was detected and I was proceeded to seal the floor with seven coats of Tile Doctor Seal & Go, which enhances the natural colours in the stone and provides a nice satin gloss appearance, as requested by the customer.
I was extremely pleased with the results of this restoration, as was the customer. The extent of the soil build up and damage was such before the restoration that, after completion, the floor looked like it had been newly laid!
Julian Iancono
South East Wales Tile Doctor
 David R. Lamb, Landscape Architect
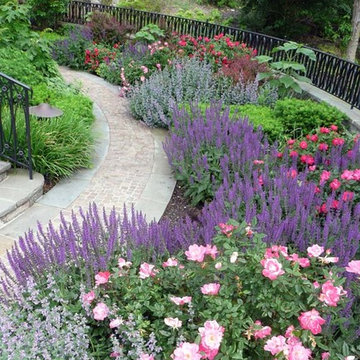
This propery is situated on the south side of Centre Island at the edge of an oak and ash woodlands. orignally, it was three properties having one house and various out buildings. topographically, it more or less continually sloped to the water. Our task was to creat a series of terraces that were to house various functions such as the main house and forecourt, cottage, boat house and utility barns.
The immediate landscape around the main house was largely masonry terraces and flower gardens. The outer landscape was comprised of heavily planted trails and intimate open spaces for the client to preamble through. As the site was largely an oak and ash woods infested with Norway maple and japanese honey suckle we essentially started with tall trees and open ground. Our planting intent was to introduce a variety of understory tree and a heavy shrub and herbaceous layer with an emphisis on planting native material. As a result the feel of the property is one of graciousness with a challenge to explore.
 Strobel Design Build
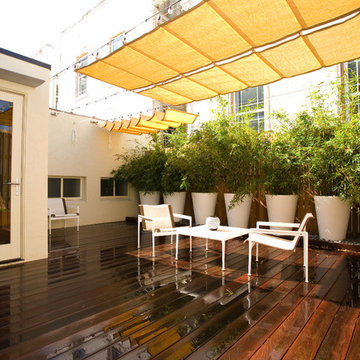
City living can lead to creativity, like this complete remodel that also included a rooftop patio. A NARI Contractor of the Year award winner, this contemporary design relies heavily on straight lines and metallic accents.
 Pleasant Living, LLC
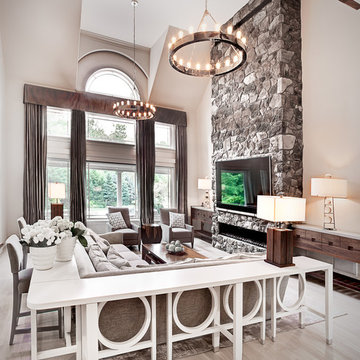
The challenge with this project was to transform a very traditional house into something more modern and suited to the lifestyle of a young couple just starting a new family. We achieved this by lightening the overall color palette with soft grays and neutrals. Then we replaced the traditional dark colored wood and tile flooring with lighter wide plank hardwood and stone floors. Next we redesigned the kitchen into a more workable open plan and used top of the line professional level appliances and light pigmented oil stained oak cabinetry. Finally we painted the heavily carved stained wood moldings and library and den cabinetry with a fresh coat of soft pale light reflecting gloss paint.
Photographer: James Koch

 Centre Sky Architecture Ltd
Mountain Peek is a custom residence located within the Yellowstone Club in Big Sky, Montana. The layout of the home was heavily influenced by the site. Instead of building up vertically the floor plan reaches out horizontally with slight elevations between different spaces. This allowed for beautiful views from every space and also gave us the ability to play with roof heights for each individual space. Natural stone and rustic wood are accented by steal beams and metal work throughout the home.
(photos by Whitney Kamman)
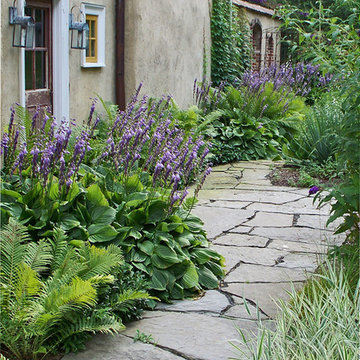
 Dear Garden Associates, Inc.
A rustic walkway of irregular bluestone and a garden space heavily dependant upon texture: the robust foliage of Hosta and the feathery fronds of Ostrich Fern (Matteuccia struthiopteris), contrast well with the delicacy of the Variegated Ribbon Grass (Phalaris arundinacea var. picta) across the path.
A lot of interest can be generated within a small plant palette.
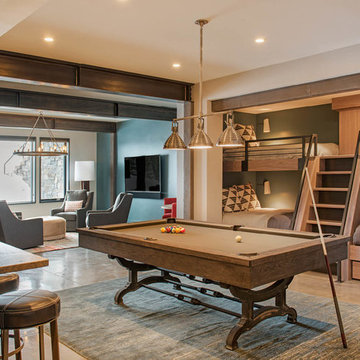 Centre Sky Architecture Ltd
Mountain Peek is a custom residence located within the Yellowstone Club in Big Sky, Montana. The layout of the home was heavily influenced by the site. Instead of building up vertically the floor plan reaches out horizontally with slight elevations between different spaces. This allowed for beautiful views from every space and also gave us the ability to play with roof heights for each individual space. Natural stone and rustic wood are accented by steal beams and metal work throughout the home.
(photos by Whitney Kamman)
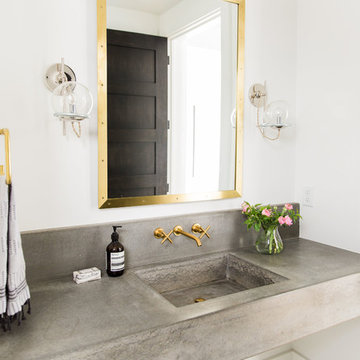
 Studio McGee
Shop the Look, See the Photo Tour here: https://www.studio-mcgee.com/studioblog/2016/4/4/modern-mountain-home-tour
Watch the Webisode: https://www.youtube.com/watch?v=JtwvqrNPjhU
Travis J Photography
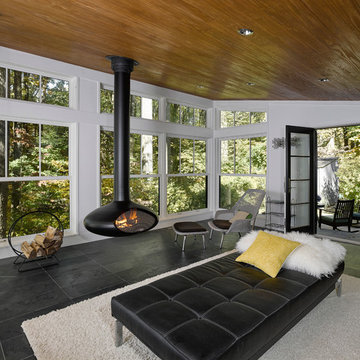
 place architecture:design
Tom Holdsworth Photography
Our clients wanted to create a room that would bring them closer to the outdoors; a room filled with natural lighting; and a venue to spotlight a modern fireplace.
Early in the design process, our clients wanted to replace their existing, outdated, and rundown screen porch, but instead decided to build an all-season sun room. The space was intended as a quiet place to read, relax, and enjoy the view.
The sunroom addition extends from the existing house and is nestled into its heavily wooded surroundings. The roof of the new structure reaches toward the sky, enabling additional light and views.
The floor-to-ceiling magnum double-hung windows with transoms, occupy the rear and side-walls. The original brick, on the fourth wall remains exposed; and provides a perfect complement to the French doors that open to the dining room and create an optimum configuration for cross-ventilation.
To continue the design philosophy for this addition place seamlessly merged natural finishes from the interior to the exterior. The Brazilian black slate, on the sunroom floor, extends to the outdoor terrace; and the stained tongue and groove, installed on the ceiling, continues through to the exterior soffit.
The room's main attraction is the suspended metal fireplace; an authentic wood-burning heat source. Its shape is a modern orb with a commanding presence. Positioned at the center of the room, toward the rear, the orb adds to the majestic interior-exterior experience.
This is the client's third project with place architecture: design. Each endeavor has been a wonderful collaboration to successfully bring this 1960s ranch-house into twenty-first century living.

 Horn & Co. (Previously JHLA)
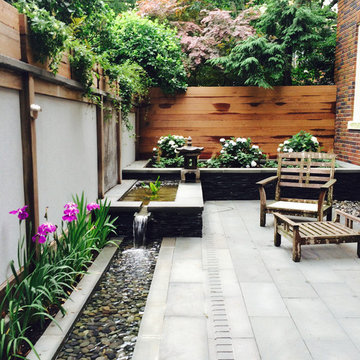
Our clients on this project were inspired by their travels to Asia and wanted to mimic this aesthetic at their DC property. We designed a water feature that effectively masks adjacent traffic noise and maintains a small footprint.
 Amelia Hallsworth Photography
Photo: Amelia Hallsworth © 2015 Houzz
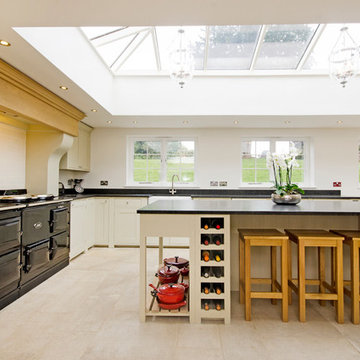
Inspiration for a country l-shaped kitchen remodel in London with a farmhouse sink, shaker cabinets, beige cabinets, white backsplash, subway tile backsplash, black appliances and an island
Inspiration for a country l-shaped kitchen remodel in London with a farmhouse sink, shaker cabinets, beige cabinets, white backsplash, subway tile backsplash, black appliances and an island
 Calista Interiors
Heiser Media
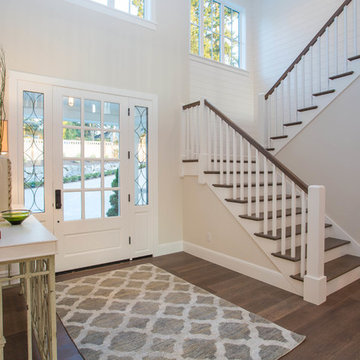
Country dark wood floor foyer photo in Seattle with beige walls and a glass front door
Country dark wood floor foyer photo in Seattle with beige walls and a glass front door

 User
UserSmall trendy dark wood floor and brown floor powder room photo in Denver with a pedestal sink, orange walls and a two-piece toilet

 Beasley & Henley Interior Design
Lori Hamilton Photography
Example of a transitional guest bedroom design in Miami with blue walls
Example of a transitional guest bedroom design in Miami with blue walls
1