
Search results for "Remove lines" in Home Design Ideas

 Betz Pools Limited
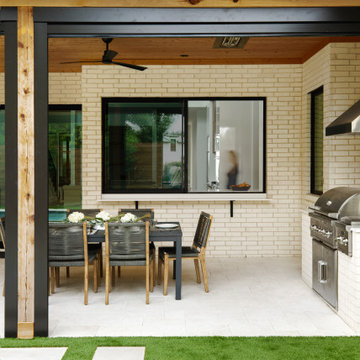
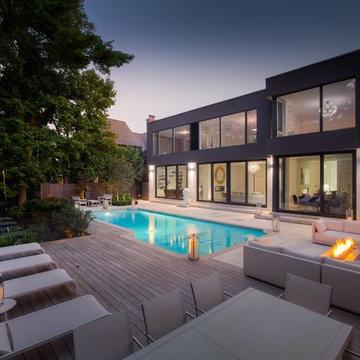
A little used in-ground whirlpool was removed from the area at the end of the pool to make room for an outdoor living room. It features a BBQ station (beside the kitchen walkout) plus a sumptuous lounge area with three sectional sofas. The highlight is a cozy fire feature which adds drama and helps to extend the season.
 Duet Design Group
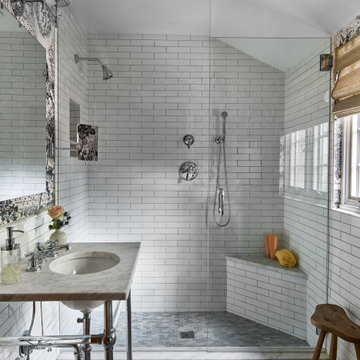
Cranmer’s charming master bath proves that intimate spaces don’t have to compromise on design and character. #intimatebathroom #smallspaces #traditionalbathroom #masterbath
Find the right local pro for your project
 Searl Lamaster Howe Architects
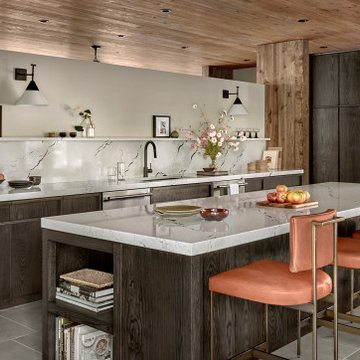
Inspiration for a large country single-wall porcelain tile, gray floor and wood ceiling open concept kitchen remodel in Other with an undermount sink, flat-panel cabinets, dark wood cabinets, quartz countertops, white backsplash, quartz backsplash, stainless steel appliances, an island and white countertops
 The Garden Route Company
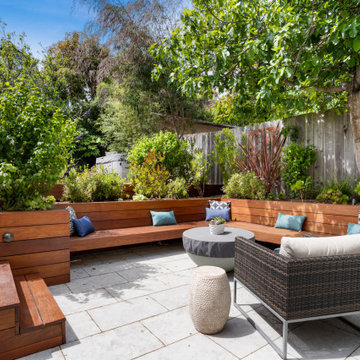
Example of a trendy patio design in San Francisco with a fire pit and no cover
 New England Design & Construction
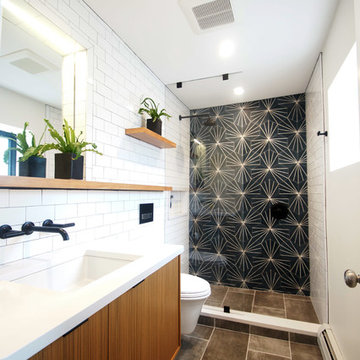
This Brookline remodel took a very compartmentalized floor plan with hallway, separate living room, dining room, kitchen, and 3-season porch, and transformed it into one open living space with cathedral ceilings and lots of light.
photos: Abby Woodman
 Studio Dearborn
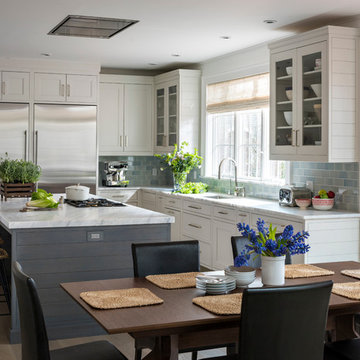
A young family moving from NYC tackled a lightning fast makeover of their new colonial revival home before the arrival of their second child. The kitchen area was quite spacious but needed a facelift and new layout. Painted cabinetry matched to Benjamin Moore’s Light Pewter is balanced by grey glazed rift oak cabinetry on the island. Shiplap paneling on the island and cabinet lend a slightly contemporary edge. White bronze hardware by Schaub & Co. in a contemporary bar shape offer clean lines with some texture in a warm metallic tone.
White Marble countertops in “Alpine Mist” create a harmonious color palette while the pale blue/grey Waterworks backsplash adds a touch of color. Kitchen design and custom cabinetry by Studio Dearborn. Countertops by Rye Marble. Refrigerator, freezer and wine refrigerator--Subzero; Ovens--Wolf. Cooktop--Gaggenau. Ventilation—Best Cirrus Series CC34IQSB. Hardware--Schaub & Company. Sink--Kohler Strive. Sink faucet--Rohl. Tile--Waterworks Architectonics 3x6 in the dust pressed line, Icewater color. Stools--Palacek. Flooring—Sota Floors. Window treatments: www.horizonshades.com in “Northbrook Birch.” Photography Adam Kane Macchia.
Sponsored
Fredericksburg, OH

High Point Cabinets
Columbus' Experienced Custom Cabinet Builder | 4x Best of Houzz Winner
 Nakamoto Forestry
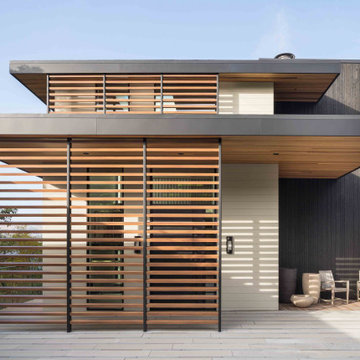
From SinglePoint Design Build: “This project consisted of a full exterior removal and replacement of the siding, windows, doors, and roof. In so, the Architects OXB Studio, re-imagined the look of the home by changing the siding materials, creating privacy for the clients at their front entry, and making the expansive decks more usable. We added some beautiful cedar ceiling cladding on the interior as well as a full home solar with Tesla batteries. The Shou-sugi-ban siding is our favorite detail.
While the modern details were extremely important, waterproofing this home was of upmost importance given its proximity to the San Francisco Bay and the winds in this location. We used top of the line waterproofing professionals, consultants, techniques, and materials throughout this project. This project was also unique because the interior of the home was mostly finished so we had to build scaffolding with shrink wrap plastic around the entire 4 story home prior to pulling off all the exterior finishes.
We are extremely proud of how this project came out!”
 Donna Gilliam Interiors
Photography by Laura Rockett
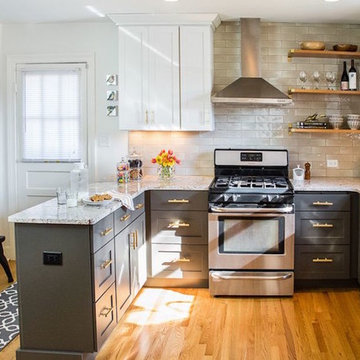
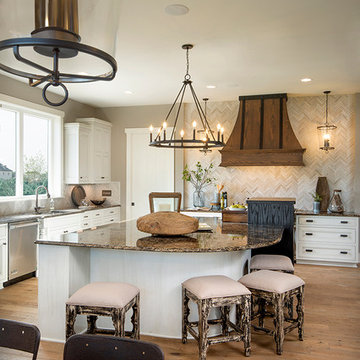
Example of a mid-sized transitional u-shaped medium tone wood floor enclosed kitchen design in Nashville with an undermount sink, shaker cabinets, granite countertops, beige backsplash, subway tile backsplash, stainless steel appliances, a peninsula and black cabinets
Example of a mid-sized transitional u-shaped medium tone wood floor enclosed kitchen design in Nashville with an undermount sink, shaker cabinets, granite countertops, beige backsplash, subway tile backsplash, stainless steel appliances, a peninsula and black cabinets

 The House of Broadloom Ltd.
Inspiration for a transitional medium tone wood floor and brown floor reach-in closet remodel in Toronto with recessed-panel cabinets and medium tone wood cabinets
 Advance Design Studio, Ltd.
The major kitchen renovation of this old country farmhouse was a task of love, one that had been planned for many years by these Barrington seasoned homeowners. After interviewing no less than five companies, the homeowners chose the design team at Advance Design Studio to make the transformation they had long planned for.
“They had an understanding of the right design for the space almost from the instant they walked in the room”, says Sharon Scott of the design team of Nicole Ryan at Todd Jurs at Advance Design Studio. “They were the only designers who laid out ideas in the first meeting at the house that we really loved”, she says. “It was obvious that they understood the house, and understood us - and from then on the decision to hire them literally made itself”.
The original kitchen had a dividing “wall” of cabinetry…that made the rather large space seem very small, and cut off the kitchen from the eating area that has a beautiful garden view completely hidden from the main kitchen. Circulation was poor, leaving family members on top of one another when entertaining family and friends.
The new kitchen design nearly doubles the kitchen size within the original space; opening it up completely and enjoying an expansive island containing a new Kohler Whitehaven Smart Divide farm sink, a dishwasher, and pull out double trash receptacle. The great new gathering space accommodates four pull out stools beckoning grandchildren and friends alike. Removing the range from the island and relocating it to create a dramatic “feature” wall, completely out of the way of guests; it is now crowned with a beautiful completely customized wood hood designed to ventilate much more efficiently than the original island range containing a limited downdraft system.
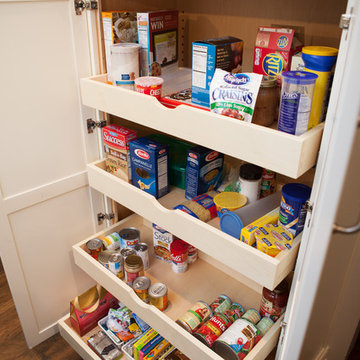
The much more efficient use of the space after removing a pantry closet made way for a fully functional “tall wall” housing a double oven and refrigerator, out of the way of guests. Removing the restrictive cabinetry wall now allowed for an expansive floor to ceiling pantry cabinet with full extension pull out shelving, and an elegant display area complete with a beautiful furniture detailed buffet.
Fitting perfectly into the farmhouse charm of the old estate, Medallion Silver Lancaster cabinetry was chosen in a soft white Maple Divinity paint finish lining the perimeter. The stunning island hints to this old home’s past with Medallion Gold’s Maple Devonshire style graced with a Carriage Black Heirloom painted finish. The rubbed off black paint finish reveals the soft wood tones beneath, mimicking furniture you’d see in your grandmother’s home that has lovingly been polished for years to reveal a soft, subtly rubbed-off sheen.
Counter tops reverse contrast with perimeter tops of black “Raven” granite possessing a subtle honed finish, and a shift to Quartz Difinity Viareggio - resembling white Carrera marble on the island. A simple herringbone detail completes the decorative range wall, and subtle porcelain subway tiles grace the backsplash throughout.
The design is finished off with crisp Thermador and Bosch stainless steel appliances, and bright brushed cup pull and handle combination hardware. A pull down Kohler Bellaria faucet makes cleanup a breeze, and soft under-cabinet LED lighting throughout makes every work surface shine softly, and highlights the cabinetry display area with grace.
One special detail was created to make the dramatic ceiling transition to a vaulted area above the breakfast nook extra special. A tongue and groove solid wood ceiling was hung above, and a subtle greenish-grey distressed paint finish was hand developed on site by the talented crew, complementing the new kitchen with a completely unique surface that appears as if it’s been there for many, many years. It’s just one standout feature in the amazing new space that is sure to be in every conversation as newcomers enjoy the newest best hangout in this old home renewed!
After 30 years of renovating homes, this now content homeowner sips a cup of tea enjoying her new garden view, and reminisces projects of past – and lastly reports their experience with Advance Design Studio culminating with their amazing new kitchen to be the most enjoyable and satisfying home experience yet.
Designer: Nicole Ryan
Photographer: Joe Nowak

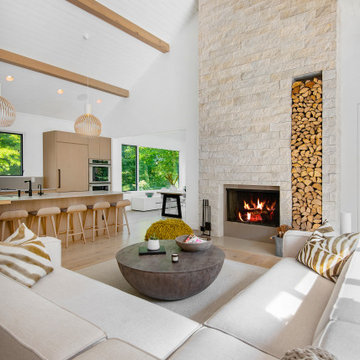
 Linc Thelen Design
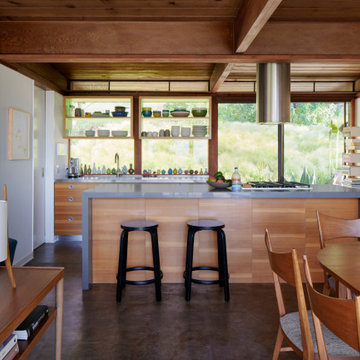
This couple purchased a second home as a respite from city living. Living primarily in downtown Chicago the couple desired a place to connect with nature. The home is located on 80 acres and is situated far back on a wooded lot with a pond, pool and a detached rec room. The home includes four bedrooms and one bunkroom along with five full baths.
The home was stripped down to the studs, a total gut. Linc modified the exterior and created a modern look by removing the balconies on the exterior, removing the roof overhang, adding vertical siding and painting the structure black. The garage was converted into a detached rec room and a new pool was added complete with outdoor shower, concrete pavers, ipe wood wall and a limestone surround.
Living Room Details:
Two-story space open to the kitchen features a cultured cut stone fireplace and wood niche. The niche exposes the existing stone prior to the renovation.
-Large picture windows
-Sofa, Interior Define
-Poof, Luminaire
-Artwork, Linc Thelen (Oil on Canvas)
-Sconces, Lighting NY
-Coffe table, Restoration Hardware
-Rug, Crate and Barrel
-Floor lamp, Restoration Hardware
-Storage beneath the painting, custom by Linc in his shop.
-Side table, Mater
-Lamp, Gantri
-White shiplap ceiling with white oak beams
-Flooring is rough wide plank white oak and distressed

 Eric Trabert & Associates
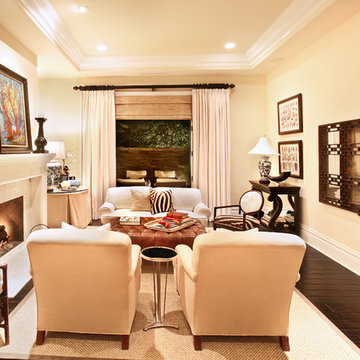
Example of a mid-sized tuscan enclosed dark wood floor living room design in Orange County with beige walls and a standard fireplace

 H2D Architecture + Design
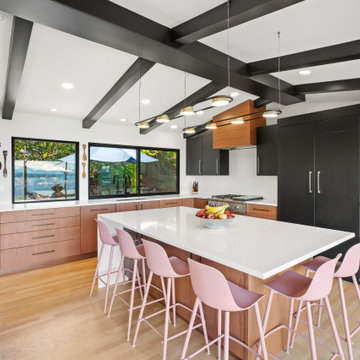
A luxurious and bright midcentury modern kitchen.
Inspiration for a large 1950s l-shaped medium tone wood floor and exposed beam enclosed kitchen remodel in Seattle with an undermount sink, flat-panel cabinets, medium tone wood cabinets, quartz countertops, white backsplash, quartz backsplash, paneled appliances, an island and white countertops
Inspiration for a large 1950s l-shaped medium tone wood floor and exposed beam enclosed kitchen remodel in Seattle with an undermount sink, flat-panel cabinets, medium tone wood cabinets, quartz countertops, white backsplash, quartz backsplash, paneled appliances, an island and white countertops
 Wendy Glaister Interiors
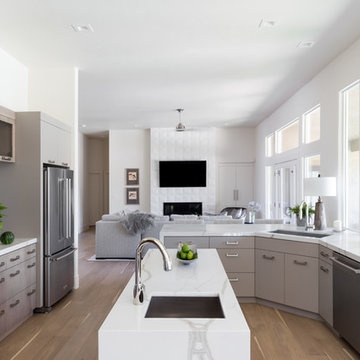
This high contemporary kitchen places an emphasis on the views to the expansive garden beyond. Soft colors and textures make the space approachable.
Eat-in kitchen - large contemporary l-shaped light wood floor and beige floor eat-in kitchen idea in Sacramento with an undermount sink, flat-panel cabinets, gray cabinets, marble countertops, white backsplash, stone slab backsplash, an island and white countertops
Eat-in kitchen - large contemporary l-shaped light wood floor and beige floor eat-in kitchen idea in Sacramento with an undermount sink, flat-panel cabinets, gray cabinets, marble countertops, white backsplash, stone slab backsplash, an island and white countertops

 Joni Spear Interior Design
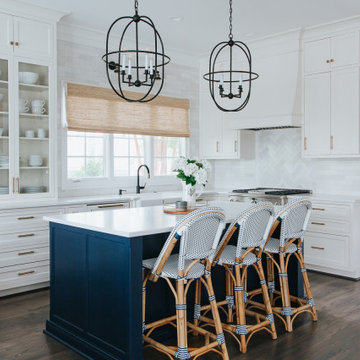
The kitchen island painted in Sherwin Williams, ""Navel", boldly contrasts the stark white perimeter cabinets. By eliminating the formal dining room, we were able to incorporate a pantry and home office.
 Tile Doctor Ltd
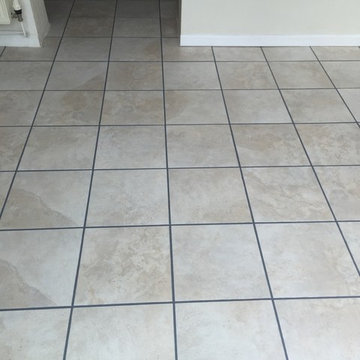
The task of keeping these white Ceramic Kitchen and Conservatory tiles clean was proving very challenging for this customer, who lives in the town of Somerton in Somerset. Somerton is known for its bustling market, which has supposedly been run on a weekly basis since the Middle Ages, and its famous ‘Market Cross’ at the centre of the beautiful marketplace is a popular tourist attraction for visitors to the West Country.
It probably comes as no surprise to anyone that white tiles are often more difficult to keep clean than others. However, in this case, rather than being badly marked or damaged, these Ceramic tiles had become dirty due to the surface being pitted rather than smooth which trapped ground in marks from spills and dirty footprints etc. The pitted rough surface is very characteristic and provides better grip however they do trap dirt are therefore more difficult to keep clean.
The grout had also suffered over the years, losing a lot of its colour in the process so as well as cleaning the tiles we agreed to give the grout a really deep clean and also to colour the grout to make it more uniform.
To clean the tiles, I firstly created a strong diluted of Tile Doctor Pro Clean and applied it liberally across the entire floor, leaving it to dwell and soak into the tile for a short period in order to soften the ingrained dirt. I then used my heavy weight rotary machine fitted with a black scrubbing pad to agitate the solution and break down the muck.
Once satisfied with the condition of the tiles I turned my attention to the grout lines, cleaning them carefully by hand using a stiff tile cleaning brush and the same solution of Pro Clean and water. This provided a deep, penetrating that clean that left the grout lines clean and free from the dirt and grease that had dulled their appearance for so long.
With some great results achieved through the cleaning, I rinsed the whole floor to wash away any leftover Pro-Clean and left it to dry fully overnight.
I returned to the property the next day to check on the floor and after ensuring the floor was completely dry, proceeded to recolour the grout lines using Tile Doctor’s Grout Colourant. Our Grout Colourants are a waterborne epoxy that recolours, seals and rejuvenates existing grout joints and is available in ten different colours ranging from white to dark greys. The scrubbing with Pro-Clean the day before would also ensure the surface of the grout was clean and would make a good surface for the colourant to bond with.
Since in the past the grout lines had undergone a number of repairs, the existing colour was a mix of different greys. It made most sense then that they picked our ‘Natural Grey’ Grout Colourant for me to use. I painted the Colourant on carefully and waited for 30 minutes before removing any excess, leaving the grout lines perfectly covered in a uniform colour.
The difference was really noticeable and the property owner was really happy with the results. As you can see from the photos, the new grey Colourant really made the grout lines stand out against the clean white Ceramic tiles. Another satisfied customer.
Dave Hurst
Somerset Tile Doctor
 Tile Doctor Ltd
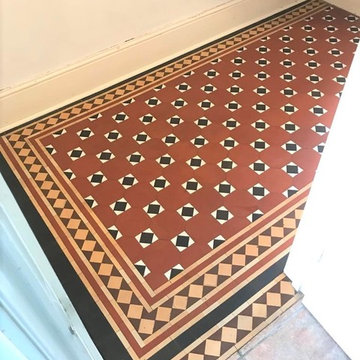
Our client had recently moved to a property in Newport, Gwent and when removing the carpet in the hallway she discovered this beautiful Victorian Tiled floor. The property had numerous period features and realising the value that the floor could add to the property she was keen to have it restored and so contacted Tile Doctor for help.
We popped round to survey the floor and except for a couple of broken tiles it had preserved well under the carpet. It was a shame the previous owner had covered the floor over but I was confident we could source some matching tiles to replace the broken ones and then restore the overall appearance. We gave the client a quote for the work which would take a couple of days. Pleased to hear that the floor could be restored and that it could soon be on show the quote was accepted and a date set to do the work.
We returned later the same month to renovate the floor and started by removing the broken tiles, cleaning out the old grout and adhesive and then relaying matching replacements. There are several specialist suppliers that can supply Victorian tiles so we can usually source reclaimed or reproduction tiles.
Some of the grout lines had dropped so as well as grouting around the replacement tiles more renovation work was needed to ensure the grout was level. We used quick setting products for this work, so I was able to move on to cleaning the floor later that afternoon.
To restore the appearance of the Victorian Tiles I used a strong dilution of Tile Doctor Pro-Clean combined with Tile Doctor Remove and Go which was left to soak in for ten minutes before being scrubbed into the tiles. This created a powerful cleaner/stripper cocktail which gets to work at removing dirt, grime and breaking down old sealers paint splashes.
After extracting the soil using a wet vacuum the floor was inspected. There were a few stubborn areas which were treated to a repeat clean and a wire brush to get the floor as clean as possible.
The floor was rinsed with water to remove any trace of cleaning products and then as much moisture as possible was extracted using a wet vacuum. The floor was left to dry off overnight and we arranged to return the next day to apply a sealer.
The following morning, we checked the floor was dry using a damp meter and this confirmed we were good to apply the sealer. The floor was sealed with Tile Doctor Colour Grow which is an impregnating sealer that protects the floor and enhances the beautiful colours in the tile. Three coats of the sealer were applied allowing each coat to dry before applying the next.
The client was very happy with the result and how beautiful the floor looked as you can see from the picture.
Paul Wales
Monmouthshire Tile Doctor
34