
Search results for "Remove soil" in Home Design Ideas

 CoLab Architecture
Stephen Goodenough
Inspiration for a contemporary exterior home remodel in Christchurch
Inspiration for a contemporary exterior home remodel in Christchurch

 Roland Oehme Landscape Architecture
This is an urban single family home situated on a narrow lot that is about 1/8 of an acre and is only 2 blocks from the Pacific Ocean. I designed a completely new garden and installed everything along with the client’s help. The garden I designed consisted of an ornamental grass garden, a xeriscape garden with decomposed granite mounds, fruit trees and shrubs located throughout, a jungle forest garden, and raised brick vegetable beds in the rear. Previously, there was a wood deck covering almost the entire property that was removed by the owner. We installed root guard around all of the walkways. I installed the raised brick vegetable beds and walkways around the vegetable beds. Many of the plants were chosen to provide food and habitat for pollinators as well. Dozens of fruiting plants were located in the garden. So, it is called the “Garden of Eatin”.
Landscape design and photo by Roland Oehme

 studio M MERGE
Marion Brenner
Inspiration for a contemporary backyard deck remodel in San Francisco with an awning
Inspiration for a contemporary backyard deck remodel in San Francisco with an awning
Find the right local pro for your project


 User
UserPhoto-Caitlin Atkinson
Once the lawn was removed, we were able to bring in mounds of new soil punctuated by gravel pathways leading to benches for visiting and viewing. This bench is one of two that face each other along the approach to the front door..
 Pennsylvania Landscape & Nursery Association
Terren Landscapes http://www.terrenlandscapes.com
2014 PLNA Awards for Landscape Excellence Winner
Category: Residential $30,000-$60,000
Award Level: Silver
Project Description:
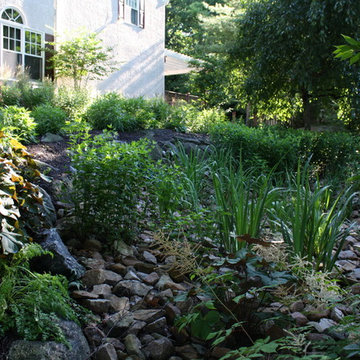
Our company was contracted to do a master plan for the family who was in desperate need of a rear yard renovation. The existing lawn area remained saturated throughout most of the year and the runoff from the neighboring property ran across their back yard, down the side of their property and all the way to the sidewalk in front of their house. The water was so intense that it had begun to cut through the back yard and erode the soil across the sidewalk and into the nearby storm drain.
By identifying these drainage problems and discussing solutions with the homeowner, we were able to design and create the aesthetically pleasing and sustainable solution of a rain garden. The goal was to slow down storm water runoff, and catch pollution and sediment by creating a rain garden that acts as a filter prior to entering the storm drain, while enhancing the aesthetics of the property.
The rain garden created was a shallow depression, 12 - 16" deep that collects rainfall runoff from all downspouts of the home and water collected into perforated pipes underneath the lawn area. The perforated pipe begins at the highest elevation in the yard and ends in the rain garden, the new lowest elevation that has been excavated down to an 8" depth. The perforated pipe captures the runoff water and allows the water to seep slowly back into the
ground as it runs across the property and into the garden. The garden was lined with a geotextile filter fabric to aide in removing contaminants from the water, prevent migration of the stone in to the soil, and minimalize maintenance.
A large variety of plant material was chosen, focusing mainly on native wetland species for their tolerance of our local soil types, moisture conditions and
the habitat they provide for wildlife. The garden was abundant with native wildlife and was a sustainable ecosystem for birds and butterflies upon completion of the project.
After planting, we arranged decorative stone throughout the garden to slow the flow of water and help prevent erosion. The combination of vegetative and stone surfaces provides temporary storage for runoff before the water either evaporates or infiltrates the soil.
The surrounding beds throughout the property were also all amended with compost and replanted with plants that work in harmony with the rain garden. The front, side, and rear yards are a beautiful display of colors that bloom throughout the seasons and the plants throughout the entire property provide food and shelter for native wildlife.
The rear yard that was once a muddy play space for the kids is now a dry lawn space that can be utilized by the family and their neighbors. This multi functional garden has become the focal point of the residence.
Photo Credit:
Terren Landscapes

 Ecology Artisans
Veggie bed border around quartzite flagstone interplanted with Dymondia margaretae to help stabilize flagstones and improve soil water holding capacity.



 BURNETTE BUILDERS
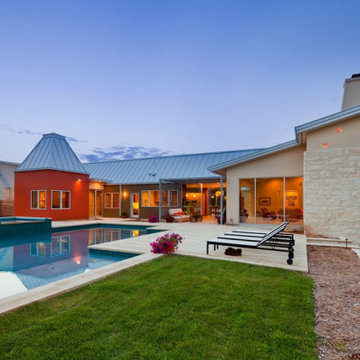
Nestled on a picture-perfect hill country property with a serene creek running through it, this hill country modern family home is a blend of fun and sophistication. The exterior's combination of geometrical shapes and a distinctive color palette is inviting and pleasing to the eye.
As light streams into the living room through walls of floor-to-ceiling windows, it creates a cheerful and bright atmosphere. This unmatched design with exquisite finishes generates a seamless confluence from the interior living spaces to the outside oasis.
One of the unusual characteristics of this home was the expansive soil conditions on site. Removing four feet of soil and replacing it with fill material was an unusual process for us in the Hill Country but a needed process to safeguard this home for many years of enjoyment.
 BURNETTE BUILDERS
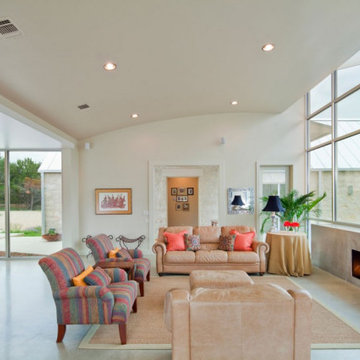
Nestled on a picture-perfect hill country property with a serene creek running through it, this hill country modern family home is a blend of fun and sophistication. The exterior's combination of geometrical shapes and a distinctive color palette is inviting and pleasing to the eye.
As light streams into the living room through walls of floor-to-ceiling windows, it creates a cheerful and bright atmosphere. This unmatched design with exquisite finishes generates a seamless confluence from the interior living spaces to the outside oasis.
One of the unusual characteristics of this home was the expansive soil conditions on site. Removing four feet of soil and replacing it with fill material was an unusual process for us in the Hill Country but a needed process to safeguard this home for many years of enjoyment.


 BURNETTE BUILDERS
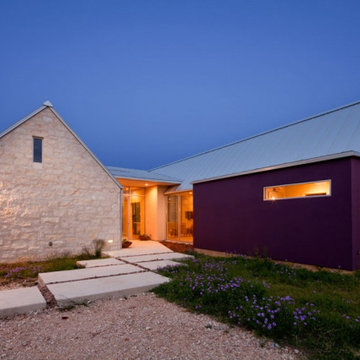
Nestled on a picture-perfect hill country property with a serene creek running through it, this hill country modern family home is a blend of fun and sophistication. The exterior's combination of geometrical shapes and a distinctive color palette is inviting and pleasing to the eye.
As light streams into the living room through walls of floor-to-ceiling windows, it creates a cheerful and bright atmosphere. This unmatched design with exquisite finishes generates a seamless confluence from the interior living spaces to the outside oasis.
One of the unusual characteristics of this home was the expansive soil conditions on site. Removing four feet of soil and replacing it with fill material was an unusual process for us in the Hill Country but a needed process to safeguard this home for many years of enjoyment.



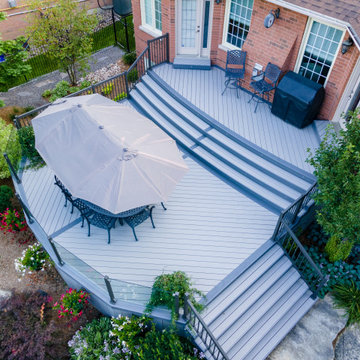
 Betz Pools Limited
Although there was room for equipment to pass beside the house, the owners paid the extra cost for Betz’s limited access conveyor system to remove soil from the excavation. In addition, they paid to have the construction materials carried in by hand just to minimize disruption to their neighbours. Thoughtfulness is still alive.

 BURNETTE BUILDERS
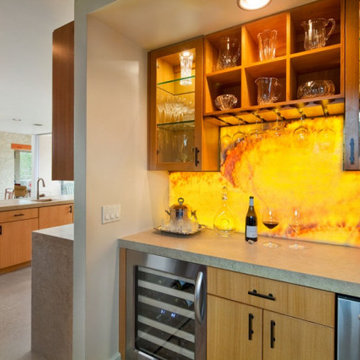
Nestled on a picture-perfect hill country property with a serene creek running through it, this hill country modern family home is a blend of fun and sophistication. The exterior's combination of geometrical shapes and a distinctive color palette is inviting and pleasing to the eye.
As light streams into the living room through walls of floor-to-ceiling windows, it creates a cheerful and bright atmosphere. This unmatched design with exquisite finishes generates a seamless confluence from the interior living spaces to the outside oasis.
One of the unusual characteristics of this home was the expansive soil conditions on site. Removing four feet of soil and replacing it with fill material was an unusual process for us in the Hill Country but a needed process to safeguard this home for many years of enjoyment.
 BURNETTE BUILDERS
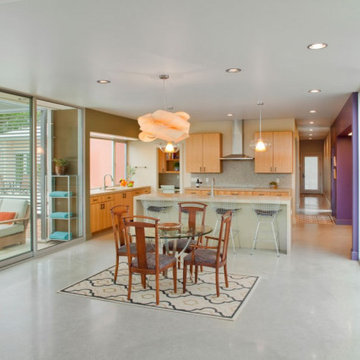
Nestled on a picture-perfect hill country property with a serene creek running through it, this hill country modern family home is a blend of fun and sophistication. The exterior's combination of geometrical shapes and a distinctive color palette is inviting and pleasing to the eye.
As light streams into the living room through walls of floor-to-ceiling windows, it creates a cheerful and bright atmosphere. This unmatched design with exquisite finishes generates a seamless confluence from the interior living spaces to the outside oasis.
One of the unusual characteristics of this home was the expansive soil conditions on site. Removing four feet of soil and replacing it with fill material was an unusual process for us in the Hill Country but a needed process to safeguard this home for many years of enjoyment.

 GMG Architects
All of the original nearly 100 year old windows were restored, fitted with new storms and hardware. Limited repairs of sills and sash were needed in addition to removal of decades of paint. These windows are ready for another 100 year of use and will outlast most of the ‘modern’ replacement window products available today. To illustrate the durability of old growth wood windows, the basement sill were still sound despite being in contact with mulch and soil.

 Randy Angell Designs
This organic modern design is built in an area known for having notable issues with ground movement. After speaking with the developer and reviewing the soil report with our Structural Engineer, we made our recommendations to the client.
Since the budget for a full-blown pier and beam structure with void boxes under the pool was well beyond the comfort level of our client, they elected to have us utilize a float shell construction method.
For this, we over-excavated the hole and placed a 12" layer of gravel beneath the shell of the pool. Drain lines lead from the deepest point under the pool down into a culvert, placed off to the side of the pool. A sump pump removes any excess water from the culvert as it accumulates.
For the shell of the pool, we utilized a double matt of steel and increased the wall thickness to a minimum of 12". This gave added strength to withstand the volatile soil.
The elements of fire, water, wood and stone were very important in creating the organic modern feel of this design. The layered effect along the back wall creates a visual stimulation across the length of the yard, without overwhelming the senses.
Rather than creating walls only of hard materials, we used Ipe wood to create horizontal screen walls of a more organic nature. At either end, the raised wall and the fire feature are finished in a large-scale porcelain tile, with the look of stained concrete.
Custom stainless steel scuppers, made by a local fabricator, create a soothing sound of falling water. The low wall at the center of the project is faced in natural ledgestone, and carries a color palette that set the tone for the entire project.
Behind this wall and in front of one of the Ipe screens are three Desert Steel Giant Agave sculptures. The unique fire feature isn't quite a fire place, nor is it a fire pit. It is a linear fire burner, surrounded by a 4" thick cantilevered Leuder limestone hearth, with a backdrop wall of blue glazed clay tile.
Although the pool was initially planned as a plaster pool, as the project began to take shape, the client elected to go all the way and finish it in a beautiful blue glass mosaic.
Custom fabricated stainless steel cannon jets send a delicate arch of water over this deep blue, and draw attention to the three square wok planters on the far side of the yard.
For the decking on this project, we elected to work with Mother Nature rather than against her. Two and a half inch thick concrete pavers, set on a bed of compacted, decomposed granite allow for movement around the pool that is easily fixed. If an area of deck moves around, we can simply lift the affected areas, re-level with DG bed, and re-set the pavers.

 Brian-Kyles Landscapes of Distinction
Once a heavily wooded area near a ravine, we transformed this lot into a functional and aesthetic landscape with old world charm. Trees were removed that overshadowed the beautiful house, trellises were installed for privacy in the growing development, and over 1,000 yards of soil were trucked in to create varying levels of backyard leading down to the Rocky River.
10