
Search results for "Rinsing" in Home Design Ideas
 Tile Doctor Ltd
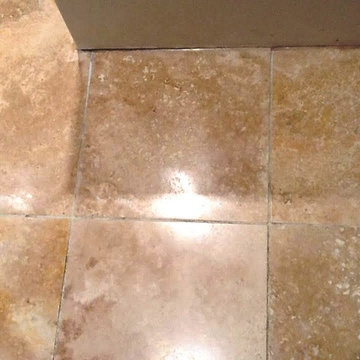
Earlier this month I was in the town of Northampton, to see a client who had reported a problem with her Travertine kitchen tiles. Basically the grout between the tiles was badly stained, to the point of appearing almost black.
The Travertine tiles were also in need of some maintenance, and so I was commissioned to provide a clean, polish and a fresh seal. Travertine is a popular choice for kitchen flooring due to its relatively high durability and distinct features. My task was to get this floor back to looking its best.
My priority was to address the badly stained grout so I cleaned the grout lines by hand using a combination of hand brushes and Tile Doctor Grout Clean-Up. The surface was pre-wet with water, before a solution of Grout-Clean Up and clean water was applied to the surface. The brushes were then used to agitate the solution. Grout Clean-Up contains a mix of concentrated phosphoric acid and cleaner designed to penetrate below the surface of the grout to remove grout stains, smears and mineral deposits.
As you can see from the photos, Grout Clean-Up made an immediate difference to the appearance of the tiles. This product is suitable for use on masonry and acid resistant surfaces. After completing the clean, I gave the floor a thorough rinse to neutralise the floor after cleaning and removed as much of the water as possible using a wet vacuum.
Following this, I paid attention to the tiles themselves, cleaning them to achieve a polished effect by using a system of burnishing pads. Tile Doctor burnishing pads comprise a set of four pads varying in grit type, from Coarse and Medium to Fine and Very Fine. I applied all four pads in turn to the floor, stopping to rinse the floor in between each. The result was a high quality polished finish.
I then left the floor to dry completely overnight, before commencing the seal the next day. My choice of sealing product was Tile Doctor Colour Grow which is a colour intensifying sealer that both enhances the natural appearance of the stone and provides a durable surface seal.
My client was very pleased with the finished product, and left the following comment on the Tile Doctor feedback system: “efficiently done”, yielding “good results”.
Phil Vissian
Northamptonshire Tile Doctor

 Tile Doctor Ltd
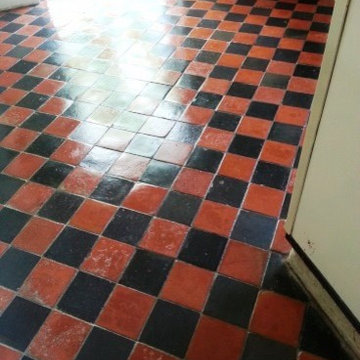
We were asked to restore a beautiful Victorian tiled floor at a house in the small village of Sharnbrook, Bedfordshire. The floor had been badly treated for many years until new occupiers decided to restore it.
The area comprised of a Pantry, Loo, Lobby, Dining room, Kitchen and Conservatory, we had several problems to deal with including some tiles that were loose, some had cement on them and the dining room floor had the remnants of a coir rug stuck to the surface.
Having moved all the furniture we started from the far end pre-treating the coir matted dining room tiles by soaking them in a strong dilution of Tile Doctor Pro-Clean; leaving them to soak in this way would soften up the matting and enabled us to remove the debris more easily with a scrapper by the time we got to the dining room.
We then started on the rest of the floor again using a strong dilution of Tile Doctor Pro-Clean which was left to dwell on the tile for ten minutes before being worked in using a scrubbing pad until any remaining old sealer was stripped off the tile the tiles were clean.
For the tiles which were covered in cement we treated them with an acid rinse using Tile Doctor Grout Clean-Up, being an acid you have to take care and wear appropriate personal protection and not to leave the acid on the tile for too long. It was satisfying however to watch the cement fizz away to reveal the beautiful tile below.
Once everything was stripped and the floor clean we gave the tiles a thorough rinse and extracted as much water from the floor as possible before installing a number of and air movers to speed up the drying process.
Whilst the floor was drying our attention moved onto the replacement of the lose tiles and re-adhering them to the floor. This was a straight forward job using tile adhesive and matching grout and we then left to allow the floor to dry out thoroughly.
We returned seven days later and took more damp readings, these all read ok so we proceeded to seal the floor. First we used a coat of Tile Doctor Colour Grow which is an impregnating sealer the gets into the pores of the tile protecting it from within and also enhancing the colours in the tile in the process; this was then followed with four coats of Tile Doctor Seal and Go to leave a high shine finish as requested by the client.
Find the right local pro for your project
 Tile Doctor Ltd
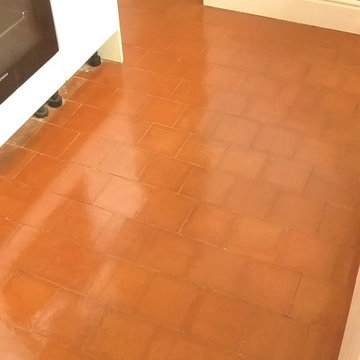
Here’s a job I recently completed in the heartland of the English pottery industry, Stoke-on-Trent. In this particular instance I was commissioned by my client to restore the appearance of the Quarry tiled floor in her kitchen which as you can see from the photo below was far from looking it’s best. Quarry tiles are typically a very hard wearing stone, but in high traffic areas like a kitchen, even this type of tile will require regular maintenance.
My first task, before beginning the restoration, was to remove the kickboards from around the bottom of the kitchen units, to prevent them from being damaged during the process. The next step was to acid wash the tiles using Tile Doctor Grout Clean-Up which was scrubbed into the tiles to remove old grout and plaster that had become stuck to the surface of the tiles at some point in the past. Once this had done its job I rinsed the entire floor with water washing away the excess soiled residue and any trace of acid.
The next step was to give the tiles a good clean using Tile Doctor Pro Clean, which is a high alkaline cleaner suitable for use on a range of natural stone floors. This was left to dwell on the tiles for ten minutes, allowing it time to seep into the stone to get underneath – and lift out – the ingrained dirt. I then agitated the solution with a scrubbing brush to remove the muck from the surface of the tiles. The floor was then given another rinse with water, and this was extracted using a wet vacuum.
I left the floor to dry after cleaning for more than 24 hours, making sure that it would be ready for sealing the next day. Upon my return to the house I checked the floor was dry and then sealed the floor using four coats of Tile Doctor Seal & Go, which provides a robust surface seal and a durable low-sheen finish. The product is suitable for use on internal, unsealed, porous surfaces.
The photographs above bears witness to the massive improvement which has been made to the quarry tiles, which has not only completely transformed the look of the tiles but also the appearance of the kitchen.
Trevor Preece
Staffordshire Tile Doctor
 Tile Doctor Ltd
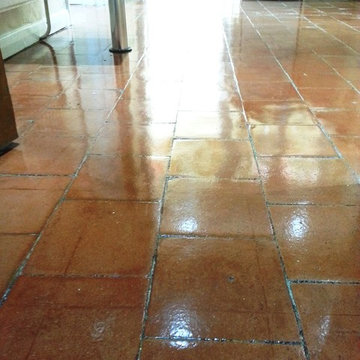
This was an unusual request in that this customer, in the small Bedfordshire village of Cople, had her Kitchen Quarry tiled floor cleaned and sealed six months earlier by another company. The sealer had come off and it soon became evident that after the work had been carried out the client was ill advised as to the correct maintenance of her floor. The cleaning product left by the previous company was totally unsuitable and over the course of six months she had managed in fact to slowly strip the sealer off of the tiles.
I soon realised the problem and advised that the only solution would be to strip any remaining sealer off the floor and re-seal, it’s generally not good practice to apply a different sealer on top of an existing sealer as there can be compatibility issues and the floor may look different in places where there are more layers of seal.
I used a strong dilution of Tile Doctor Pro-Clean to strip any remaining sealer off the tiles and clean them in the process, this involves spreading the solution over the tiles, allow it to dwell and soak in and then scrubbing the solution into the floor using a rotary machine fitted with a black scrubbing pad. The floor was then rinsed with water applied with a mop and bucket and the soiled water extracted using a wet vacuum. One the floor was clean I noticed there was evidence of concrete dust and grout haze on the surface of the tiles from when they were installed so I applied a another Tile Doctor product called Grout Clean-up to remove it, again the floor was thoroughly rinsed with water which was extracted the floor dried using air movers.
Tiled floors need to be dry before sealing and so I left this floor for four days to allow enough time for it to thoroughly dry out before returning to seal it. Choice of sealer for this floor was four coats of Tile Doctor Seal and Go which is a water based sealer so it doesn’t leave a smell and additionally adds a nice subtle shine to the floor. The difference was transformational as the sealer really does bring out the best in the quarry tiles.
Before leaving we have provided the customer a bottle of Tile Doctor Neutral Tile Cleaner which is the correct cleaning agent to maintain a sealed floor. It has a neutral PH formula so it won’t erode the sealer like many of the acidic floor cleaning products you find in the supermarket which are really only meant for use on Vinyl or Ceramic tiles.
Andrew Evans
Bedfordshire Tile Doctor
 Concrete Wave Design
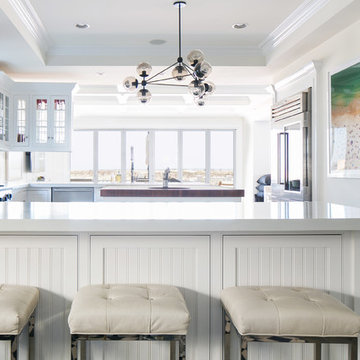
White concrete countertops in Newport Beach, CA. They go perfectly with the full marble backsplash and walnut butcher block island. Everything comes together to give this kitchen a bright and airy feel.
 KCBR Design | Remodel
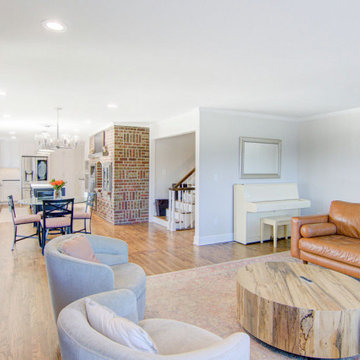
In this Modern Rustic Farmhouse kitchen remodel, discover a perfect blend of modern convenience and timeless charm. The kitchen showcases a captivating combination of a white gloss ceramic tile backsplash with rustic brick accents, creating an inviting atmosphere. Enjoy the convenience of a 45" stainless steel workstation sink equipped with a Pre-Rinse Pull-Down Kitchen Faucet and Instant Hot Water Dispenser, perfect for culinary tasks. Custom cabinets offer ample storage while enhancing the rustic aesthetic. Adjacent to the kitchen, the pantry/laundry/mudroom provides practical amenities including coat hooks, lockers, and cozy bench seating, ensuring organization and comfort. Meanwhile, the bathroom exudes tranquility with serene white gloss ceramic tile shower walls and durable Calabasas Porcelain floor tile, completing the cohesive and welcoming ambiance of this thoughtfully designed space.
 KCBR Design | Remodel
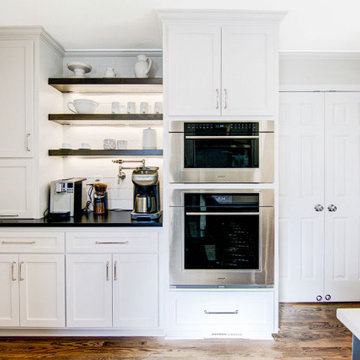
In this Modern Rustic Farmhouse kitchen remodel, discover a perfect blend of modern convenience and timeless charm. The kitchen showcases a captivating combination of a white gloss ceramic tile backsplash with rustic brick accents, creating an inviting atmosphere. Enjoy the convenience of a 45" stainless steel workstation sink equipped with a Pre-Rinse Pull-Down Kitchen Faucet and Instant Hot Water Dispenser, perfect for culinary tasks. Custom cabinets offer ample storage while enhancing the rustic aesthetic. Adjacent to the kitchen, the pantry/laundry/mudroom provides practical amenities including coat hooks, lockers, and cozy bench seating, ensuring organization and comfort. Meanwhile, the bathroom exudes tranquility with serene white gloss ceramic tile shower walls and durable Calabasas Porcelain floor tile, completing the cohesive and welcoming ambiance of this thoughtfully designed space.

 Gerhard's Appliances
Kitchenaid 46 DBA Dishwasher with ProWash Cycle and PrintShield Finish, Front Control - PrintShield Stainless
KitchenAid KDFE104HPS
Features
SatinGlide® Max Rails (Upper Rack) - Creates a smooth, premium feeling when pulling out the upper rack, particularly with heavy loads.
Fold-Down Shelf with Stemware Holders - Provides extra room in the upper rack that's perfect for additional cups, wine glasses, or longer items like utensils and spatulas.
Filter-Based Wash System - Provides exceptional cleaning and drying, with wash arms designed to send just the right water pressure to key areas of the dishwasher.
Sani-Rinse Option - Heats the final rinse water to 155°F, eliminating 99.999% of food soil bacteria.
 Tile Doctor Ltd
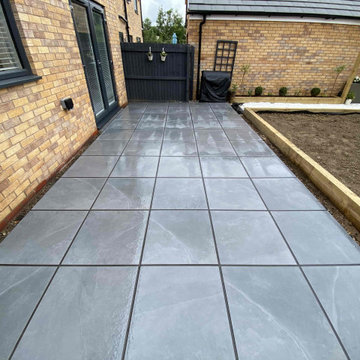
Earlier this summer I was called out to this job in the garden of a house in the city of Ely to inspect a freshly laid porcelain tiled patio with grout haze issues. The builder who had installed the patio hadn’t removed all the grout from the textured surface of the tile before it had dried. This was probably due to the hot weather which reduces drying times and has caught many tilers out. Multiple repeat visits by the builder trying followed who spent countless hours trying to remove the grout haze, unfortunately due to the textured surface of the tile he was unable to remove it and the patio was left looking awful.
Like the builder we are increasingly finding modern grouts, which although more durable, are very difficult to remove. Fortunately belonging to the Tile Doctor network, I had already been made aware of this problem and was able to offer a solution.
I arranged to pay the property a visit to demonstrate a potential solution and quote for resolving the issues. Even though the grout haze was indeed difficult to remove it wasn’t impossible if you know how. The demonstration came out well and relieved that they had finally found a solution to the problem booked me in to get the work carried out.
On my return I started with the application of a strong dilution of Tile Doctor Grout Clean-Up. This product is ideal for removing grout haze or smears as they often referred to; however, being acidic we don’t recommend it for use on every surface so if your using it yourself do check the label first. I left it to soak in for ten minutes before being agitated with a black scrubbing pad fitted to a rotary buffer
The weather was good, so it wasn’t a problem working outside and once all the grout smears were removed, I finished off by giving the whole patio a high-pressure rinse. I use a van mounted rinse/extraction system for this that applies warm water at high pressure onto the patio to dislodge dirt and then extracts the waste into a separate tank in the vehicle. It was an expensive investment but makes light work of jobs like this.
It took around four to five cleans to complete the job, by the late afternoon the grout haze was gone, and the porcelain patio looked completely transformed. It was quite a warm day, so the patio soon dried allowing my client to use it later that day. I should mention that this variety of Porcelain tiles were not the micro porous type and therefore did not need to be sealed.
Relieved the problem was finally resolved and happy with the result my client left the following feedback:
Amazing service, they were able to provide us with a quote and demo before we agreed to work. We are so happy with the results we have as our patio slabs looked ruined to the eye but the Tile Doctor managed to get them looking brand new.
Tom Conlon
Cambridge Tile Doctor
 KCBR Design | Remodel
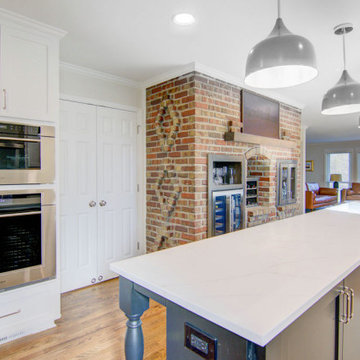
In this Modern Rustic Farmhouse kitchen remodel, discover a perfect blend of modern convenience and timeless charm. The kitchen showcases a captivating combination of a white gloss ceramic tile backsplash with rustic brick accents, creating an inviting atmosphere. Enjoy the convenience of a 45" stainless steel workstation sink equipped with a Pre-Rinse Pull-Down Kitchen Faucet and Instant Hot Water Dispenser, perfect for culinary tasks. Custom cabinets offer ample storage while enhancing the rustic aesthetic. Adjacent to the kitchen, the pantry/laundry/mudroom provides practical amenities including coat hooks, lockers, and cozy bench seating, ensuring organization and comfort. Meanwhile, the bathroom exudes tranquility with serene white gloss ceramic tile shower walls and durable Calabasas Porcelain floor tile, completing the cohesive and welcoming ambiance of this thoughtfully designed space.
 Zuma Development, LLC
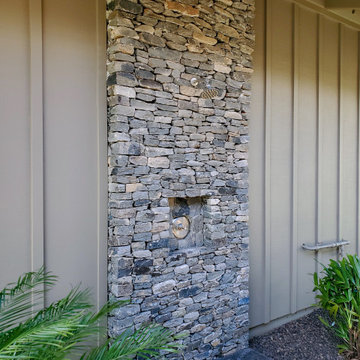
This shower, located just outside of the garage, is a convenient place to rinse off after a day at the beach.
Inspiration for a contemporary exterior home remodel in Hawaii
Inspiration for a contemporary exterior home remodel in Hawaii

 KCBR Design | Remodel
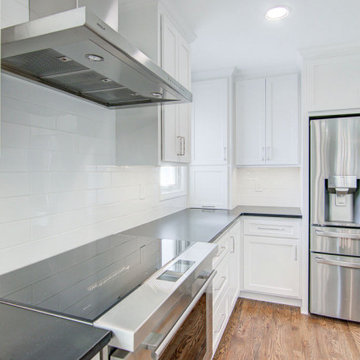
In this Modern Rustic Farmhouse kitchen remodel, discover a perfect blend of modern convenience and timeless charm. The kitchen showcases a captivating combination of a white gloss ceramic tile backsplash with rustic brick accents, creating an inviting atmosphere. Enjoy the convenience of a 45" stainless steel workstation sink equipped with a Pre-Rinse Pull-Down Kitchen Faucet and Instant Hot Water Dispenser, perfect for culinary tasks. Custom cabinets offer ample storage while enhancing the rustic aesthetic. Adjacent to the kitchen, the pantry/laundry/mudroom provides practical amenities including coat hooks, lockers, and cozy bench seating, ensuring organization and comfort. Meanwhile, the bathroom exudes tranquility with serene white gloss ceramic tile shower walls and durable Calabasas Porcelain floor tile, completing the cohesive and welcoming ambiance of this thoughtfully designed space.
 Tile Doctor Ltd
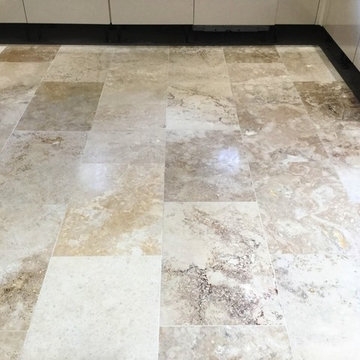
Travertine floor tiles are very appealing and very hardwearing, but without the protection of a sealer to stop dirt becoming ingrained in the pores of the stone their appearance will degrade. Fortunately, this can be remedied as demonstrated in these pictures of a Travertine floor I recently polished at a house in Weston Favell, Northampton.
This owner of the property had called me out as their kitchen floor was looking very sorry for itself and he was concerned that a lot of holes were appearing which was making cleaning the floor difficult as dirt was getting trapped in the holes. I went over and carried out a test clean on two separate tiles in the kitchen and the customer was amazed at how clean they came up and especially the grout.
The kitchen was stunning, but unfortunately the state of the Travertine tiled floor was bringing down its overall appearance. Impressed with the test clean they were keen to get the whole floor renovated so we agreed a price and I scheduled the work in for the following month.
I returned on the agreed data and made a start by protecting the kitchen units by removing the plinths and covering base units and the appliances with a protective film. We then commenced the cleaning process to remove surface dirt by cleaning with Tile Doctor Pro-Clean paying special attention to the grout lines. The holes in the Travertine were filled with a stone resin, mixing it to closely match the colours of the stone.
The resin was allowed to dry before starting to re-polish the Travertine using a set of Tile Doctor Diamond encrusted burnishing pads. These pads are applied individually to each tile in sequence starting with a coarse 400-grit pad before moving onto the 800-grit and finishing with the fine 1500 grit pad. A little water is used to lubricate the process along the way and the floor is rinsed in between each pad with the resulting residue extracted from the floor using a wet vacuum. The process takes some time, but it really brings up the polished appearance of the stone and the results are well worth the effort. After a final rinse the floor was inspected and then left to dry off fully overnight.
When we returned the next day, the floor had dried, and we were able to give the floor a final polish with a very fine 3000-grit burnishing pad applied with a little water sprayed onto the tile. Finally, the floor was then sealed with two coats of Tile Doctor Ultra-Seal which provides excellent protection without changing the colour of the stone to provide a natural look.
The client was over the moon with the outcome and surprised at the improvement. They were left with a floor that would be easy to clean and maintain.
Phil Vissian
Northamptonshire Tile Doctor
 KCBR Design | Remodel
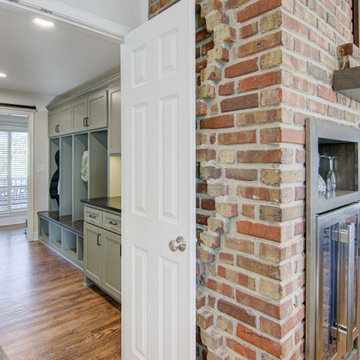
In this Modern Rustic Farmhouse kitchen remodel, discover a perfect blend of modern convenience and timeless charm. The kitchen showcases a captivating combination of a white gloss ceramic tile backsplash with rustic brick accents, creating an inviting atmosphere. Enjoy the convenience of a 45" stainless steel workstation sink equipped with a Pre-Rinse Pull-Down Kitchen Faucet and Instant Hot Water Dispenser, perfect for culinary tasks. Custom cabinets offer ample storage while enhancing the rustic aesthetic. Adjacent to the kitchen, the pantry/laundry/mudroom provides practical amenities including coat hooks, lockers, and cozy bench seating, ensuring organization and comfort. Meanwhile, the bathroom exudes tranquility with serene white gloss ceramic tile shower walls and durable Calabasas Porcelain floor tile, completing the cohesive and welcoming ambiance of this thoughtfully designed space.
 KCBR Design | Remodel
In this Modern Rustic Farmhouse kitchen remodel, discover a perfect blend of modern convenience and timeless charm. The kitchen showcases a captivating combination of a white gloss ceramic tile backsplash with rustic brick accents, creating an inviting atmosphere. Enjoy the convenience of a 45" stainless steel workstation sink equipped with a Pre-Rinse Pull-Down Kitchen Faucet and Instant Hot Water Dispenser, perfect for culinary tasks. Custom cabinets offer ample storage while enhancing the rustic aesthetic. Adjacent to the kitchen, the pantry/laundry/mudroom provides practical amenities including coat hooks, lockers, and cozy bench seating, ensuring organization and comfort. Meanwhile, the bathroom exudes tranquility with serene white gloss ceramic tile shower walls and durable Calabasas Porcelain floor tile, completing the cohesive and welcoming ambiance of this thoughtfully designed space.
 Tile Doctor Ltd
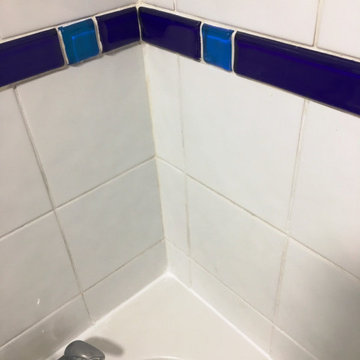
A family living in Guildford were in touch recently about restoring the appearance of their Ceramic tiled shower and bathroom. They were about to put the property up for sale and were concerned the grubby grout might put off potential buyers. First impressions do count so renovating a bathroom or kitchen before selling is a really good idea and will help you achieve a better price.
In this case the Ceramic tiles were dirty and black with mould in places which looked unhygienic and uninviting. Additionally, the mastic sealant between the tile and bath was tired and worn to the extent that water could end up leaking behind the seal. After visiting the property, they were pleased to hear I could help and happily accepted our quote which was based around a days work and some materials.
Firstly, I cleaned the grout using a Tile Doctor product called Duo Clean which is designed to tackle dirty grout and mould. I sprayed the product along all the grout lines and left it to soak in for about fifteen minutes. Once ready I brushed them with a firm wire brush then rinsed off with water. Next, I cleaned the tiles using a strong dilution of Tile Doctor Pro-Clean which was decanted into a spray bottle and sprayed onto the wall tiles. After ten minutes I then used a handheld buffing machine fitted with a small white buffing pad to shift the dirt and buff up the white tiles. After rinsing the slurry off with water you could see a marked improvement.
I hand dried the tile and grout with a cloth and then set about stripping out the old white mastic sealer with a sharp knife. This took some time, as you have to be careful not to scratch the bath or the tile.
By this time the grout had dried off fully and I was able to see if more work was required. To achieve a uniform colour throughout. Mould and some cleaning products can discolour grout permanently and, in this case, there was some grout staining I was unable to remove. We had discussed this possibility earlier and how it would be best resolved using a white grout colourant. So, I carefully applied Tile Doctor Grout Colour which is painted on with a small brush with any excess wiped off the tile before it can set. This resulted in a uniform white grout throughout and really gave the whole bathroom a lift.
With the cleaning process completed I applied a new white mastic between the bath and tile and along the verticals. This is done with the bath filled with water and then left for 24 hours to allow the silicone to fully cure.
After the grout colour had dried, I applied an aerosol Tile and Grout sealer over the whole surface and then lightly polished off any excess with a clean cloth. This does two things; one it adds a further layer of protection to the new grout colour and to the surface of the tiles. Secondly Ceramic tiles are non-porous, but bacterial dirt can still get a grip on the surface, with the sealer in place you will find water quickly runs off without getting a chance to get a hold.
Sealers do wear off, so I recommended re-applying it every year. I had plenty left over and gave it to the customer when I finished using it. For regular cleaning of tiled shower areas, I recommend they use Tile Doctor Aqua-Pro this will neutralise any acid build-up caused by acidic shampoos etc.
West Surrey Tile Doctor
Rupert Mcleod
 Tile Doctor Ltd
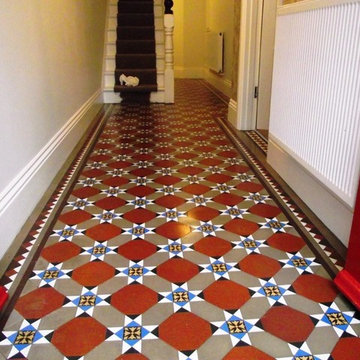
These Victorian hallway tiles were cleaned at a residence in the historic town of Bideford. As you can see from the photograph below the tiles were dull and had lost their vitality due to ingrained dirt, clearly it had been some time since they were given a good deep clean.
Cleaning a Victorian Floor
The first job was to protect the skirting with tape and then vacuum to remove any loose debris and grit. The next step was to cover the entire floor with a strong dilution of Tile Doctor Remove and Go which is a powerful cleaning and coating remover that is safe to use on tile and stone. It was left to dwell on the floor for twenty minutes so it could soak into the tile and make the job of removing any remaining sealer and ingrained dirt easier.
The solution was scrubbed into the tile using a black scrubbing pad fitted to a rotary machine and then the soiled cleaning solution rinsed off using a wet vacuum. This process was repeated a number of times until I was satisfied with the condition of the floor and followed with a final rinse with clean water to remove any trace of cleaning product. The water was extracted with the wet vacuum to get the floor as dry as possible before leaving for the day.
Sealing a Victorian Floor Sealing
The tiles were left to dry for 24 hours and I came back to seal the tiles using eight to nine coats of Tile Doctor Seal and Go which is an ideal sealer for Victorian Tiles as it leaves a nice sheen and provides excellent stain protection.
I think you will agree the hallway floor came up really well and now been given a new lease of life.
 Tile Doctor Ltd
This job was for a repeat client in Toft near Cambridge who had aa stunning large hallway that was tiled in beautiful pale Limestone. My client had asked me back to work on the floor having previously completed the deep clean and seal of a Terracotta floor previously.
The Limestone tiling in the entrance hall had years of some type of topical sealer applied to it. This caused the stone to look slightly discoloured and from certain lights showed up hundreds of scratches and smudges embedded in the seal. I’ve tried to capture this problem in the photographs on this page, but it was very difficult.
A topical sealer sits on the surface of the tile where it is vulnerable to scratching, hallways are generally high traffic areas and so more likely to see this sort of problem. Ideally an impregnating sealer should have been applied, impregnators work by occupying the pores in the stone thus preventing soiling from becoming ingrained in the stone.
Before starting we protected the woodwork against splashing with blue film, I don’t usually make a great deal of mess, but you can never be too careful when working in someone’s property especially one as beautiful as this.
To strip off the old sealer I began by applying a strong dilution of Tile Doctor Remove and Go to the Limestone tiles. I split the floor into sections and used a 400-grit diamond burnishing pad to work the Tile Doctor Remove and Go into the tiles. The floor was then rinsed off using our high-pressure cleaning system that applies pressurised hot water to the floor whilst simultaneously extracting the soil with its built-in vacuum. The system is quite heavy, so it is built into my van, and I run a large flexible hose to a spinner tool that does the cleaning. It is an expensive tool, but it saves a lot of time and leaves the floor fairly dry afterwards.
The 400-grit pad had released a lot of the sealer but there were quite a few layers to get through, so I changed the burnishing pad to a coarse 200-grit pad and repeated the process. After another rinse and extract I would see it had the desired effect and I was able to carry on building up the finish on the Limestone by apply the 400-grit followed by the 800, 1500 grit pads. It was a large floor and so this took up much of the day so once complete I left for the day so it could dry off overnight.
The next day I finished the polishing process with the application of a 3000-grit burnishing pad which is applied with a little water sprayed onto the tile and really brings up the polish on the stone. This process has the added advantage of leaving the floor dry so not long afterwards I was able to move on to sealing.
For this floor two coats of Tile Doctor Ultra-Seal were applied, it is an impregnating sealer that won’t alter the colour of the tiles leaving a natural look.
My client was much happier with the new finish and has asked for another quotation on some more Terracotta flooring that needs attention. For aftercare I recommend using Tile Doctor stone soap, it’s a special formula that builds on the patina which will help maintain the polished appearance of the Limestone.
Tom Conlon
Cambridge Tile Doctor
23