
Search results for "Rinsing" in Home Design Ideas

 Tile Doctor Ltd
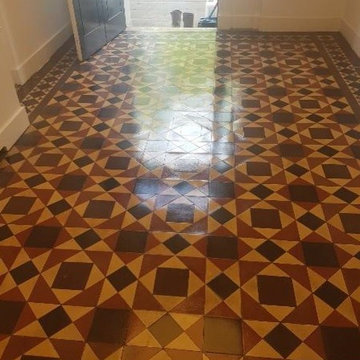
I thought I would share this case history of a Yellow and Black Victorian Tiled floor that we worked on at a large house in Lancaster last year. It’s a great example of the typical problems we face with old Victorian floors, especially around door thresholds where the transition between the different foundation invariable cause problems.
I didn’t know the full history of the floor, but it was now in quite a state and recent renovation work had left the floor unstable with loose and cracked tiles. The tiles needed to be removed and then the damaged subfloor carefully scraped out and replaced. Once that was done the floor would need relaying and then cleaned and sealed so everything would blend in.
After visiting the property and providing a quotation we were given the go ahead and agreed a date to do the work.
We returned on the agreed date and set about carefully removing the loose and cracked Victorian tiles and put them aside for later use. Some would need replacing however this would not present a problem and they are still widely available, and I have several contacts I can turn to for this.
Once this was done and the subfloor exposed and cleaned up, I used self-levelling cement to bring the floor level up and in-line with the existing. This now needed to set hard, so the rest of the day was spent cleaning up the tiles we removed earlier with Tile Doctor Grout Clean-up and Pro-clean. Our goal is to reuse as many of the original tiles as possible to preserve the heritage of the floor.
The next day with the new subfloor set it was ready for tiling. This involves laying out the tiles first without adhesive carefully cutting and fitting new tiles as needed to maintain the overall pattern of the floor. Once I was happy the tiles were moved to a board and then fitted with fresh adhesive.
I came back on day three with the aim of cleaning the floor so it could be sealed however whilst inspecting my new tiling I was disappointed to discover some were not as level as I had hoped. I had noticed the replacement tiles were not the same thickness as the originals the previous day but I had worked around this by using different levels of adhesive, clearly this plan was not as effective as I had hoped for.
To counter this problem, I used a set of 50-Grit, 100-grit and then 200-grit diamond pads in sequence to mill the floor flat and remove the lippage between them. This is done with water to lubricate the process and a weighted floor buffer. The pads generate a lot of slurry and so you need to rinse this off with more water and extract all the soil after each pad.
I followed this up with various Diamond burnishing pads of increasingly finer grits across the whole floor until we achieved a consistent finish and had the added benefit of getting the whole floor clean. More water is used to rinse the tiles after burnishing and the soil extracted with a wet vacuum as before. Once done and inspected the floor was left to dry off overnight.
Tile Doctor Colour Grow was applied to enhance the appearance of the tiles and protect them going forward. This product copes well with damp which can always be a problem with old floors like this one with no damp proof membrane present.
The floor looked amazing when finished and our attention to detail had really paid off, in fact you simply could not tell we had done any tiling work or replaced any tiles. For aftercare I recommend the use of Tile Doctor Neutral Cleaner which is designed for the regular cleaning of sealed tiles.
Russell Taylor
Lancashire Tile Doctor
 Tile Doctor Ltd
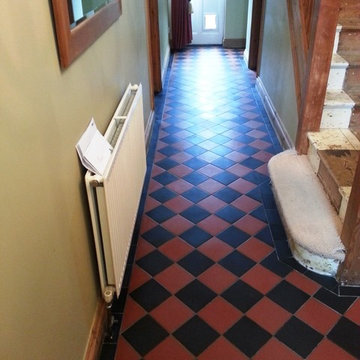
Here are the details of a job I recently completed in the town of Biggleswade, which lies on the River Ivel in Bedfordshire. My client had a fantastic red and black Victorian tiled floor with a topical seal. However, she also had a new addition to the family in the form of a new puppy and, as I’m sure most of you reading will know, puppies can be very messy and additionally urine contains Uric acid which can eat away at sealers. Therefore, my client asked me to strip off the old topical seal, before replacing with an impregnating sealer better suited to protect the tiles against an untrained puppy.
My client had been replenishing the topical seal for many years, but after discussing this decided that Tile Doctor Colour Grow, an impregnating and colour enhancing sealer, would be better suited.
My first task was, of course, to remove the old topical sealer. I did this using a strong dilution of Tile Doctor Pro-Clean, which is a high alkaline cleaner that when used in a concentrated form can remove sealers. The alkaline helps to break down the sealer while also lifting out any ingrained dirt suffered by the stone. The solution was left to dwell for approximately twenty minutes before being scrubbing it into the tiles using a rotary machine fitted with a scrubbing pad.
Nonetheless, after giving the tiles a rinse, I discovered evidence of an old impregnating sealer in the tiles that was also need to be removed before resealing. To do this I applied Tile Doctor Remove & Go which is a powerful, dedicated coatings remover which did the job although the use of a steamer and several scrubbing brushes helped with the task.
After completing the stripping, I still felt that I could improve the appearance of the tiles further, so I ran over the tiles with a small six inch Tile Doctor Diamond encrusted burnishing pad fitted to a hand-held buffer to finish the cleaning process.
After completely the stripping process, I gave the entire floor a rinse and left it to dry for several days. Upon my return I sealed the tiles using two coats of Tile Doctor Colour Grow. This is an impregnating, colour enhancing sealer that really brought out the shades of red and black in these Victorian tiles. Along with Victorian tiles, Colour Grow is also suitable for use of Flagstone, Limestone, Quarry, Sandstone and Marble tiles, amongst others.
I think you will agree the floor looks transformed with the new sealer applied.
Andrew Evans
Bedfordshire Tile Doctor
 KCBR Design | Remodel
In this Modern Rustic Farmhouse kitchen remodel, discover a perfect blend of modern convenience and timeless charm. The kitchen showcases a captivating combination of a white gloss ceramic tile backsplash with rustic brick accents, creating an inviting atmosphere. Enjoy the convenience of a 45" stainless steel workstation sink equipped with a Pre-Rinse Pull-Down Kitchen Faucet and Instant Hot Water Dispenser, perfect for culinary tasks. Custom cabinets offer ample storage while enhancing the rustic aesthetic. Adjacent to the kitchen, the pantry/laundry/mudroom provides practical amenities including coat hooks, lockers, and cozy bench seating, ensuring organization and comfort. Meanwhile, the bathroom exudes tranquility with serene white gloss ceramic tile shower walls and durable Calabasas Porcelain floor tile, completing the cohesive and welcoming ambiance of this thoughtfully designed space.
Find the right local pro for your project
 Tile Doctor Ltd
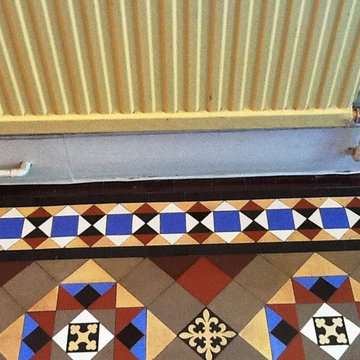
This customer from Bedford, the county town of one of England’s smallest counties Bedfordshire, called me out because they have bought a house and, upon lifting the glued down carpet, had discovered a beautiful Victorian tiled floor. They decided to call me in to see if this original feature could be restored to its former glory having already tried household products to remove the glue and clean the tiles with limited success.
We often find customers who discover old tiles under carpet or linoleum struggle with the standard cleaning products available in supermarket which are only designed for everyday cleaning. The products Tile Doctor sells are far stronger; naturally however to achieve the best results it also helps if you have the right equipment, knowledge and experience and that where we come in.
I popped round to take a look at the floor and having tackled quite a few of these restorations before was confident we could restore the floor so a quote was given and the work was booked in for the next week.
My first course of action was to vacuum the floor to remove any loose debris. This gave me a better picture of the condition of the floor overall, and so I could assess how best to proceed. I opted for our tried and trusted method of applying a diluted solution of Tile Doctor Pro-Clean, which is a very reliable high alkaline cleaner suitable for all types of natural stone and tile. The solution was applied with a pump-up sprayer and left to dwell for 20 minutes to seep into the pores of the tile.
Next, I worked the solution into the tiles using a black scrubbing pad fitted to a rotary machine and hand brushes. The resulting cleaning slurry was then rinsed off – and I found that this had removed most of the glue and surface dirt. There were a few stubborn deposits of glue remaining, but I was able to remove them by using hand brushes and scrapers in combination with Tile Doctor Remove and Go, which is as its name suggest can remove most things including old sealers, epoxy grout haze, urethane coatings, synthetic finishes, adhesives and event paint.
Even after this there were still some patches of glue, so I decided to spray the whole floor with Remove and Go and worked it into the stubborn areas with brushes. I left it to dwell for 15 minutes and then rinsed the floor with a wet pick-up extraction machine. This did the job and the floor was left fresh and clean, ready to be sealed once it had dried.
The floor was left to dry for several days, which is typically necessary for old tiled floors that don’t have a damp proof membrane installed. The customer wanted the floor to look traditional and therefore requested a matt finish. This was achieved by applying two coats of Tile Doctor Colour Grow, which is also breathable thereby allowing any damp to evaporate as gases through the sealer, without affecting the finish.
As I previously mentioned, floors of this age can sometimes have damp issues, so this sealer is ideal for these older floors. Colour Grow is an impregnating sealer, meaning it penetrates the pores of the stone to fill them and prevent trapped dirt. It also intensifies the colours in the tiles to really bring them to life.
The customer was shocked and amazed by the great results as she thought nothing could be done to restore such an old floor. Before leaving the property, I gave her some maintenance instructions to help her keep the floor looking its best in the future. Another satisfied customer!
David Vissian
Bedfordshire Tile Doctor
 Tile Doctor Ltd
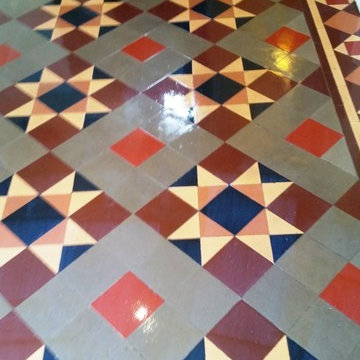
This extremely dirty and dull Victorian tiled hallway floor was at a house in Westcliffe on Sea near Southend. The tiles were well overdue for a deep clean and having worked on many of these types of floors before I was confident we could do the job.
Any sealer that was originally present had worn off years earlier so I went straight in with a strong solution of Tile Doctor Pro-Clean diluted 1:1 with water. This was applied to the floor and left to soak in for ten minutes before being worked into the tiles with a black scrubbing pad fitted to a rotary buffing machine.
The soiled cleaning solution was then removed using a wet vacuum and the floor was rinsed. The process was then repeated a few times to ensure all the ingrained dirt had been removed and we also tackled a few paint splashes that became evident. The floor was given a final and thorough rinse with water to ensure all trace of cleaning products had been removed and dried as much as possible using a wet vacuum.
The Victorian tiles were left to dry out for two days before we returned and the floor checked for dampness using a damp meter. Everything checked out OK so we proceeded to seal the tiles using numerous coats of Tile Doctor Seal and Go which is our recommended sealer for Victorian tiles as it gives a nice low sheen effect that enhances their appearance as well as protecting them from future staining.
Nick Murphy
South Essex Tile Doctor
 Willowbrook Homes Inc.
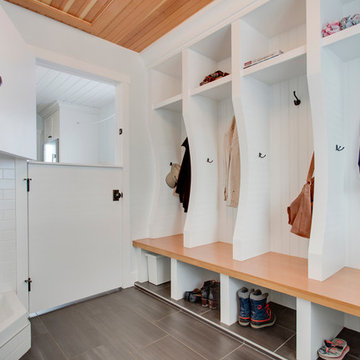
Inspiration for a mid-sized farmhouse porcelain tile entryway remodel in Calgary with white walls and a white front door

 All Surface Restoration
Quickly restores outdoor weathered and heavily greyed wood surfaces. Deck Cleaner & Brightener will remove grey wood fiber, stains, tannin bleeding, water stains, mildew, mold and discoloured surface fiber from decks, fences, wood siding and log homes. Use to restore wood to its natural color and prepare for re-coating.
Coverage: 100 - 200 sq.ft per gallon
Features & Benefits:
Water-based formula
Removes gray wood fiber, water stains, mildew and mold
Rejuvenates wood by removing deteriorated fibers
Safe on treated lumber and exotic wood
Safe for use around surrounding vegetation if pre-wetted prior to application
Benefits:
Contains no bleach
Water rinse clean-up
Biodegradable
Easy to use
Available in 5 gallon size with concentrated formula
For Use On:
Wood decks
Fences
Railings
Siding
Log homes
Cedar shakes
Gazebos
APPLICATION TIPS:
Deck Cleaner & Brightener is for outdoor weathered wood surfaces using a low pressure pump sprayer.
Some dilution with water for lightly grayed wood is possible.
Heavily weathered wood surfaces may look fibrous after rinsing. Wood rich in tannin may darken during restoration. If this occurs, Deck Brightener can be used to re-brighten wood. Order Deck Cleaner & Brightener shipped via UPS Ground to all 48 U.S. States except Alaska & Hawaii at: www.surfacerestoration.com/shop
 Tile Doctor Ltd
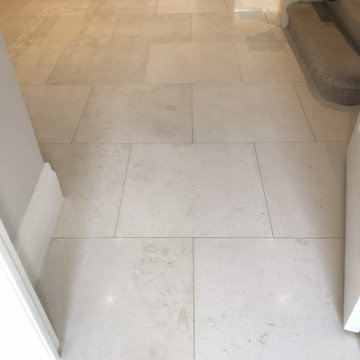
This client from Highgate in North London, N6 contacted us about their large honed Limestone tiled floor that was installed throughout the ground floor. It had been laid seven years prior and was now grubby and in need of a deep clean and seal including the grout which had turned black with dirt.
I visited the property to survey and assess what was required and provided the owner with a quotation for the renovation. The hallway pictured was in the worst condition, it was a busy house with young children and dogs and over the years the sealer had worn down leaving it vulnerable to ingrained dirt. Without a sealer to protect the stone it had become heavily soiled and lost its original polished appearance.
Happy with the quote we scheduled a date for the work to go ahead. The quote included deep cleaning and burnishing the stone to bring back the polish, grout cleaning and re-sealing the Limestone to protect it.
We arrived on the first day and prepared the area by taping up the skirting and woodwork to protect them from potential splashing. Next step was to burnish the floor using a set of Tile Doctor Diamond Burnishing Pads, specifically the 400, 800 and 1500 grit pads fitted to a rotary machine, these were used in sequence running each pad over the tiles several times with water to lubricate the process. The water turns into a fine slurry as pores in the stone are opened and the dirt is released, the slurry is rinsed off with more water and extracted using an industrial wet vacuum after each pad. The finer 800 and 1500-grit pads slowly close the pores and refine the appearance of the stone building up the polish in the process.
A strong dilution of Tile Doctor Pro-Clean was then applied to the grout lines, leaving it for a short while to soak in and then hand scrubbing with a grout brush. The dirty cleaning solution and were then removed from the floor with the wet vacuum.
This process was repeated across the different sections of the Limestone floor until I was satisfied with its appearance. Before leaving for the day, I rinsed the floor again using a buffing machine fitted with a brush fitted to give it a final clean. The floor was dried as much as possible using the wet vacuum and then allowed it to dry off fully overnight.
The following day the final 3000-grit pad in the four-pad set was applied to the floor to bring up the polish even further. The pad is applied dry with only a little water sprayed onto the tile. We call this process a “Spray Burnish” and as well as leaving the floor nice and dry ready for sealing it adds a nice subtle shine to the stone.
The floor was then sealed with two coats of Tile Doctor Colour Grow sealer. This is a colour intensifying impregnating sealer that works by occupying the pores in the stone so dirt cannot become ingrained there. It will provide durable protection and make the floor much easier to keep clean. It worked well on the pale Limestone and beautifully enhanced the colour and features in stone. Once complete the floor looked brand new again.
I left a complimentary bottle of Tile Doctor Stone Soap with the client and gave them some information about how best to maintain the floor. This product is pH neutral and cleans whilst maintaining the patina on the stone helping to keep the floor in great condition.
The client was delighted with the result and left us a great review.
“Andrew is excellent and gets on with the job and we got a fantastic result. Highly recommend. By Aaron S, Highgate, 15 March 2021”
Andrew Newstead
North London Tile Doctor
 Tile Doctor Ltd
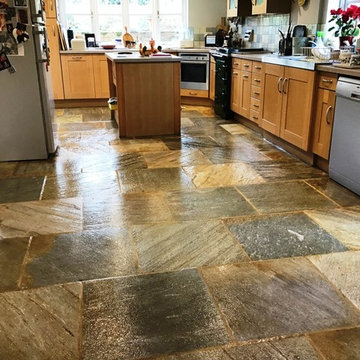
I recently visited a customer living in the village of Ravensthorpe, just outside Northampton to rejuvenate a 15-year-old multi coloured Chinese riven slate floor that needed a deep professional clean. Slate is a hard-wearing tile used for flooring high traffic areas but does need sealing to bring out its best features. In this case the sealer had long since worn off and dirt had become ingrained in the stone making it difficult to clean effectively.
We discussed the client’s requirements and the cleaning process I planned to follow to rejuvenate the floor. I had to check on availability, so I e-mailed over a quote and some dates later that day. They were happy with my proposal and agreed for the work to be done whilst the customers were on holiday.
My first task was to test a small area to determine which products would give the best results. In this case, I decided to start with a strong dilution of Tile Doctor Remove and Go which is a strong alkaline cleaner/coatings remover that’s safe to use on Tile and Stone. I spread this solution across a section of the floor and left it to seep into the pores of the stone and lift out the ingrained dirt.
After allowing the solution adequate time to dwell, I scrubbed the slate with a carbon brush fitted to a rotary machine to gradually reveal the fantastic natural colours of the Slate hidden beneath the dirt. Happy with my choice of cleaning product I repeated this process in sections until it had been carried out throughout the entire area. Following this, I rinsed the entire floor several times with clean water, before soaking up the resulting soiled residue with a wet vacuum.
The next part of the cleaning process entailed paying attention to the grout lines which were scrubbed using Tile Doctor Grout Clean-Up. The resulting residue was promptly extracted with the wet vacuum and I finished by giving the whole floor a rinse with Tile Doctor pH Neutral Tile Cleaner. This is a day to day tile cleaning product which is recommended for stone floors, many supermarket tile cleaning products are only suitable for ceramic tiles due to their acidic formula and can damage a floor over years of use so you should always read the label. However, I always leave my clients with a complimentary bottle of a suitable Tile Doctor product to maintain their floors.
The floor was left to dry off overnight and I returned on the second day to seal the floor. Before starting I checked the floor was dry using a damp meter which confirmed the Slate was dry and ready to seal. The floor must be completely dry before sealing as any excess moisture has the potential to the damage the performance of the sealer. Since my client had specifically requested a silk finish, I opted to use Tile Doctor Seal and Go which dries to leave a lovely subtle sheen that really enhances the look of the stone. Five coats were applied to ensure a good hard-wearing protection.
My client was very pleased with the results, particularly as they hadn’t realised how much colour it had lost over the years and left the following feedback on our website.
”I despaired of having a clean-looking floor again. Phil Vissian assured me that intensive deep cleaning and resealing could restore our fifteen year old, subtly coloured, Chinese riven slate kitchen floor. He has done a fantastic job. Looks like new, and I shall book Phil for an annual professional clean, so that it never gets as bad again.” Sally M, Northampton
Phil Vissian
Northamptonshire Tile Doctor
 Tile Doctor Ltd
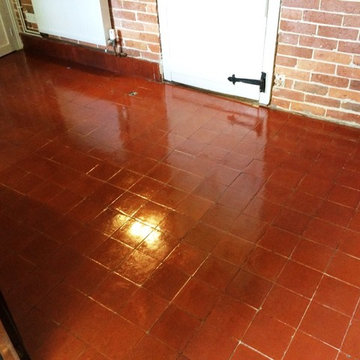
Let me start by saying this was by far the hardest job I’ve ever done and as you read on you will soon realise why. The customer called me out to quote on a Quarry tiled floor at a house in Danehill that was covered in concrete screed. She said it had always been there and she’s lived there for years always meaning to get it bought back to a state that she could live with. Undaunted by the state of the floor (see photo below) we agreed a price and fixed a date to do the work.
For the next two days I spent all my time pouring neat Tile Doctor Grout Clean-up onto small areas and working it in with a metal scraper and wire brush. Once removed the resultant muck was rinsed and extracted using a wet vacuum, laborious work as you can imagine although I was kept entertained by playing the occasional game of fetch with a very keen Collie dog who seemed fascinated by the bloke sitting on his floor all day. After two days of this my hands were throbbing but I could see red quarry tile emerging. The final two hours on the second day were spent making good any areas under the washing machine and fridge and giving the floor a thorough rinse to remove any trace of cleaning product.
The floor dried off overnight and I came back the third day to seal the tiles making sure that my canine companion had been sent next door first. To seal the floor I used six coats of Tile Doctor Seal and Go which really brought back the colour in the floor and gave it an amazingly shiny surface.
Once sealed the floors transformation was complete and when the customer returned from work she was utterly speechless. I’d turned what looked like a building site into a stunning tiled floor.
 KCBR Design | Remodel
In this Modern Rustic Farmhouse kitchen remodel, discover a perfect blend of modern convenience and timeless charm. The kitchen showcases a captivating combination of a white gloss ceramic tile backsplash with rustic brick accents, creating an inviting atmosphere. Enjoy the convenience of a 45" stainless steel workstation sink equipped with a Pre-Rinse Pull-Down Kitchen Faucet and Instant Hot Water Dispenser, perfect for culinary tasks. Custom cabinets offer ample storage while enhancing the rustic aesthetic. Adjacent to the kitchen, the pantry/laundry/mudroom provides practical amenities including coat hooks, lockers, and cozy bench seating, ensuring organization and comfort. Meanwhile, the bathroom exudes tranquility with serene white gloss ceramic tile shower walls and durable Calabasas Porcelain floor tile, completing the cohesive and welcoming ambiance of this thoughtfully designed space.
 Tile Doctor Ltd
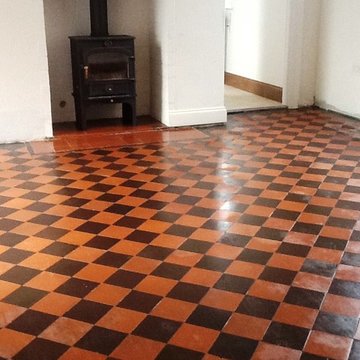
A customer called me out to take a look at restoring the Red and Black Victorian Quarry tiles floor they had discovered under linoleum In the kitchen of their house in the town of Rushden.
I carried out a patch test to see which products would have the best results and although most of the old sealants had worn of over time there was still glue from the lino and patches of sealer that would have to be dealt with. A quote was given and accepted and the work was booked in to the customer’s convenience.
After vacuuming and mopping the floor I decided my best course of action would be to spray Tile Doctor Remove and Go to 25% of the area, this was then scrubbed in by machine using a black stripping pad. This area was then rinsed off with an extraction machine and the process repeated over the rest of the floor. I then inspected the floor and noticed a few shiny patches where the sealant hadn’t been fully removed so I then tackled these stubborn areas by hand with a second application of Remove & Go. A final rinse to the whole floor was given to make sure no trace of cleaning product remained before sealing.
As much water as possible was removed using the extraction machine and a dehumidifier installed and left for seven days to assist the drying process.
On my return I confirmed the floor had dried thoroughly by taking took damp meter readings in different parts of the floor. All was well and so I proceeded to seal the tiles using multiple coats of Tile Doctor Seal and Go which matched the customers’ requirements of gloss finish.
As the pictures show there was a vast improvement in the floor and the customer was very pleased with the results. They were also given information on maintenance of this type of floor to keep it looking its best for years to come.
 Tile Doctor Ltd
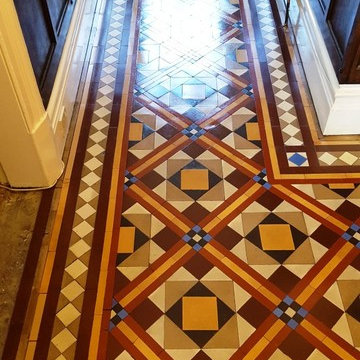
The colourful and diverse geometric patterns of a Victorian tiled floor can give a property a regal, elegant and timeless feel, making it a popular choice even in the 21st century. However, as time passes without regular care and maintenance, Victorian tiles can quickly lose their colour and appear deadened by the buildup of dirt and dust over several months (and sometimes years).
This property owner in Hebden a very small village in North Yorkshire of less than 300 people, had this common problem. Her Victorian tiled hallway had not been adequately maintained and was now more difficult to keep clean than ever. To add to the problem, most of the tiles along the edges were either broken, cracked, or filled with holes, probably I suspect from the installation of carpet grippers at some point in the past.
At this point, the property owner turned to Tile Doctor to see what could be done.
Before beginning a deep clean of the entire length of the hallway, it was first necessary to source and install replacement tiles for those that had been broken and damaged. I also relaid any that were loose.
When finished, I left the tiles to set and returned the next day to start the clean. My choice of cleaner in this situation was Tile Doctor Pro Clean, which was scrubbed into the floor with a special pad fitted to a rotary machine to break down ingrained dirt and stains. Pro Clean does this very effectively on all types of tile, including natural stone and of course Victorian tiles.
The floor was then rinsed with water and the soiled cleaning solution extracted from the floor using a vet vacuum. Stubborn areas were re-treated with more Pro Clean, and when I was satisfied with the condition of the tiles the floor was given a final but thorough rinse to remove any trace of cleaning product.
The floor was then left to dry completely overnight to ensure all excess moisture had disappeared, leaving it fresh to be sealed. I returned in the morning for a third day of work to seal the Victorian tiles with four coats of Tile Doctor Seal and Go, a topical sealer which provides a rich satin finish to really add depth to the colours in the tile while protecting it against dirt and stains.
The customer was delighted with the restoration and couldn’t quite believe the huge improvement in the appearance of the tiles, especially in regards to the enhancement in the different colours. Another satisfied customer!
Nigel Stoker
North West Yorkshire Tile Doctor
 Tile Doctor Ltd
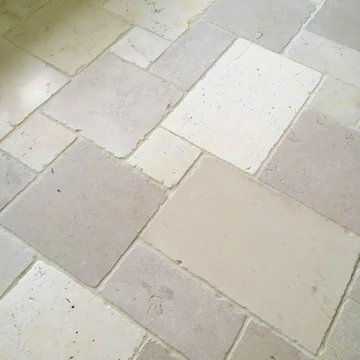
This Limestone tiled floor had been installed in the kitchen of a property in Teddington three years before and due to the use of the wrong cleaning product was now stripped of its protective sealer. Limestone like any natural stone is porous and without a sealer in place dirt becomes trapped in the stone making it very difficult to keep clean. The property was close to Bushy Park situated in South West London on the North bank of the Thames which is only about seven miles from my base in Shepperton.
I discovered all of this after visiting the property to quote for deep cleaning and resealing the floor. It turns out they have been using Flash multi-surface & floor cleaner which has an acidic pH of 10.3, compare this to Tile Doctor Remove and Go which we use to strip sealers off floors and has a pH of 12. Needless to say, this was not the right product to use and the old sealer had been completely stripped off the floor and probably within the first few months.
On top of this our customer had 3 children and a dog running in and out of the garden and was therefore transferring quite a lot of dirt into the stone. After surveying the floor, I discussed the renovation process with the customer which would take two days and include a deep clean of the Limestone followed by the application of a sealer to ensure it did not hold onto the dirt. They were after a sheen finish for the floor and were keen to have natural brown and cream variations in the stone highlighted. We agreed a price for the work and booked a date for the work to start.
To start with, we machine scrubbed the floor with Tile Doctor Pro-Clean to break down the dirt and release it from the stone. We find the best process is to spray the Pro-Clean onto the floor first and then leave to dwell for ten minutes before scrubbing. It’s not long before the cleaning solution turns dark with the dirt released from the pores of the stone and this soil is then rinsed with water and vacuumed off the floor with a low-pressure hard floor cleaning machine.
Following the cleaning, we honed the Limestone using a sequence of 800, 1500 and finally 3000-grit Tile Doctor Burnishing Pads. The pads are applied with water to lubricate and the slurry generated is rinsed off the floor as before. This burnishing process brings up the natural sheen of the stone and tightens up its pores prior to sealing. I left the floor overnight to allow it to dry out.
The next day I returned to the property and checked the floor for moisture using a damp meter. The readings were fine, so I proceeded with the application of the sealer for which I used two coats of Tile Doctor Colour Grow. This is an impregnating sealer that enhances the colours and contrast on the stone while protecting it against future soiling and spillages. It gave a lovely sheen finish to the floor as requested by the customer.
As you can see from the pictures the process made a huge difference to the floor which now looks lighter and brighter, certainly the customer was more than happy. Before leaving I recommended, they should clean the floor using Tile Doctor Stone Soap, this is a pH neutral product that will ensure the seal does not get broken down like it previously had using the household cleaners. It is gentle enough to use every day if you wish is designed to help maintain the patina of the burnished stone.
Jonathan Oldham
South Middlesex Tile Doctor
 KCBR Design | Remodel
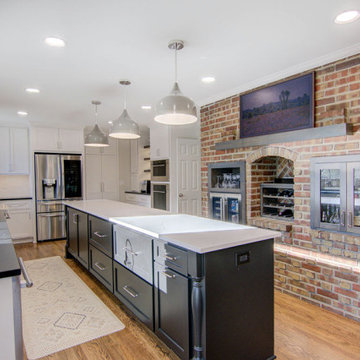
In this Modern Rustic Farmhouse kitchen remodel, discover a perfect blend of modern convenience and timeless charm. The kitchen showcases a captivating combination of a white gloss ceramic tile backsplash with rustic brick accents, creating an inviting atmosphere. Enjoy the convenience of a 45" stainless steel workstation sink equipped with a Pre-Rinse Pull-Down Kitchen Faucet and Instant Hot Water Dispenser, perfect for culinary tasks. Custom cabinets offer ample storage while enhancing the rustic aesthetic. Adjacent to the kitchen, the pantry/laundry/mudroom provides practical amenities including coat hooks, lockers, and cozy bench seating, ensuring organization and comfort. Meanwhile, the bathroom exudes tranquility with serene white gloss ceramic tile shower walls and durable Calabasas Porcelain floor tile, completing the cohesive and welcoming ambiance of this thoughtfully designed space.
 Tile Doctor Ltd
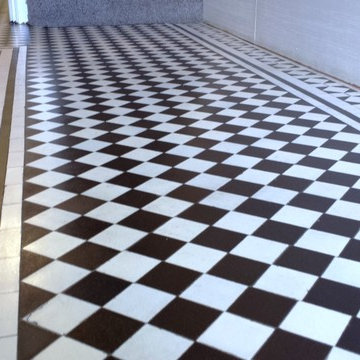
Sometimes you survey a job and you know that if you get the chance to restore it the results will be totally fantastic! This was the case with this Victorian black & white chequer tiled floor in the hallway of a large terraced Victorian house in Cardiff which dated back to around 1900 and was now looking well past its best, I know this because my family used to live in the house opposite. It was a well laid floor with no readings of dampness; I believe it’s imperative you check a floor for dampness before starting so you know what the baseline damp level is and which sealers will work with the floor.
My first action was to hoover the floor and then scrape as much debris off the surface as possible, and then as always I mixed 50/50 Tile Doctor HBU (Heavy Build-Up) remover with Pro-Clean and on this occasion because I wanted the white tiles to become really white I added the same amount of Tile Doctor Grout Clean-Up. This special recipe created a very formidable and strong cleaning solution which is what the job called for. I swept it over the whole floor letting it soak in for about ten minutes and then worked it into the floor using a scrubbing machine fitted with a coarse black pad adding more of the solution to the floor where it was drying out as I went.
The next step was to rinse the floor twice with water and extract the now filthy cleaning solution using a wet vacuum. At this point I inspected the tiles and I could see there were still a few stubborn areas with spots of paint and glue which I addressed with a decorators steam plate together with a scraper and hand held scrubbing pad.
I was now happy that the floor was clean and ready to be sealed, before sealing though it’s important to remove any trace of cleaning solution as it may contaminate the sealer so I gave the floor a thorough rinse and extracted as much of the water as possible to reduce drying times.
I left the floor to dry for 48hrs before coming back to seal the tiles taking a reader on my damp meter first to establish they had indeed dried out. To seal the floor I used eight coats of Tile Doctor Seal & Go which really works well on Victorian tiles and in this case made the whites really stand out.
The customer wanted this floor to look good because they were selling the property and were due to have an open day. The clean tiles really gave the house the wow factor and period features are so desirable these days so I don’t think it will take long to sell.
 KCBR Design | Remodel
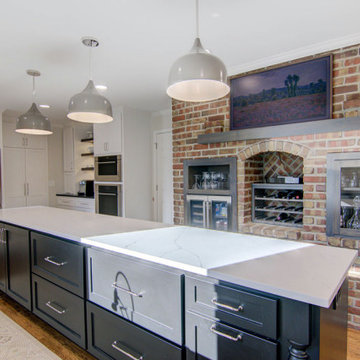
In this Modern Rustic Farmhouse kitchen remodel, discover a perfect blend of modern convenience and timeless charm. The kitchen showcases a captivating combination of a white gloss ceramic tile backsplash with rustic brick accents, creating an inviting atmosphere. Enjoy the convenience of a 45" stainless steel workstation sink equipped with a Pre-Rinse Pull-Down Kitchen Faucet and Instant Hot Water Dispenser, perfect for culinary tasks. Custom cabinets offer ample storage while enhancing the rustic aesthetic. Adjacent to the kitchen, the pantry/laundry/mudroom provides practical amenities including coat hooks, lockers, and cozy bench seating, ensuring organization and comfort. Meanwhile, the bathroom exudes tranquility with serene white gloss ceramic tile shower walls and durable Calabasas Porcelain floor tile, completing the cohesive and welcoming ambiance of this thoughtfully designed space.
 Tile Doctor Ltd
This detailed Victorian tiled hallway at a property in Camden was overdue some much-needed repair and maintenance. The owners of the property appreciated that original period features like this add a lot of value to a property and asked me to visit the property to quote for renovating it. The property was in a terrace of similar properties most of which appeared to have retained their Victorian character.
I inspected the floor and found there were a couple of loose, cracked, worn and broken tiles that needed to be replaced. In addition, the floor tiles needed a deep clean and then seal to bring back the wow factor. I was confident we could renovate the floor but at that point unsure if we would be able to find exact match replacements for the damaged tiles. Fortunately, Victorian tiles are still in demand and I knew of several companies I could check with so I was confident they could be found.
We discussed how long the work would take and assuming I could source the replacements agreed a price for the full restoration of the floor. After doing some research I managed to find suitable replacements with a company called Original Style and the work was scheduled for the following month.
Firstly, we prepared all areas with protective tapes to threshold edges and skirting.
This was followed by spaying the tiles with a strong dilution of Tile Doctor Remove & Go which is product designed to remove old sealers and coatings. After about ten minutes the tiles were scrubbed with black scrubbing pads and scrubbing brushes. Fresh water was used to rinse the floor and the slurry was extracted using a wet vacuum.
The floor was inspected and then a second clean carried out, this time using Tile Doctor Pro-Clean which is a Tile and Grout cleaning agent. The same process of application was used and after rinsing and extracting the dirt the tiles were given a steam clean. This ensured all the dirt was lifted out of the pores of the tile and the floor was now as clean as it possible could be.
The next step was the remove the loose and cracked tiles using the reclaimed tiles we had sourced earlier. Some cuts were necessary to get the replacements to match the originals but overall the plan worked. A quick drying adhesive was used to secure the tiles so we could apply the grout shortly after. The whole floor was then re-grouted and cleaned off to ensure a good match. The floor was left to dry off overnight, and you could already see it was now looking considerably improved.
Returning the next morning we checked the floor was dry using a moisture meter, this is important as to apply a sealer to damp tiles will lead to a patchy experience. All was well so we were ready to apply the sealer.
To start a single base coat of Tile Doctor Colour Grow sealer was applied to the floor and left to dry. This sealer is an impregnator that protects from within by occupying the pores in the clay tile improving colour in the process. This sealer does leave a matt finish however and the client wanted a subtle shine so one dry it was followed by four coats of Tile Doctor Seal & Go. The combination of the two sealers works really well to add long lasting protection to the tiles and provide the desired finish to the floor.
The floor was much improved, and the client was delighted. The detailed pattern and colours were now much more prominent, and the hallway looked much more inviting for both the owner and their guests. For the aftercare of Victorian tiles, I recommended the use of Tile Doctor Neutral Cleaner which is pH neutral and won’t prematurely erode the life of the sealer.
Nigel Voyce
North London Tile Doctor
 Tile Doctor Ltd
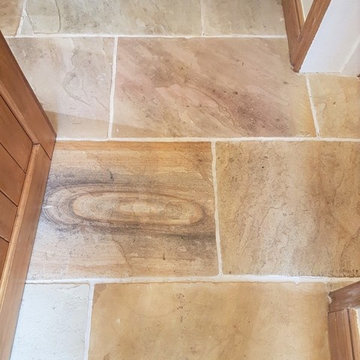
The pictures below are of a multi coloured sandstone floor installed at a property in East Keswick which is a village approximately halfway between Harrogate and Leeds. (Not to be confused with the more famous Keswick in the Lake District)
The stone floor had not been cleaned professionally for ten years and although the grout looked clean It was clear that any sealer that was once present had long since worn off leaving the stone unprotected. The result was dirt had become deeply ingrained in the Sandstone leading causing the stone to darken and hide its true beauty and rich colouring. The client had tried lots of different products to clean the floor but had not had any luck.
I visited the property and carried out a few successful patch tests resulting in the floor becoming much cleaner. They were happy to go ahead with my quote and we arranged a time to return and complete the work.
I prepared the area before starting, taping up the skirting boards and doors to protect them from the splashing that can happen during the intensive cleaning process.
To get the sandstone clean I applied a medium dilution of Tile Doctor Pro-Clean to the floor and allowed it to soak in for ten minutes. The solution was then worked into the Sandstone using a rotary floor machine fitted with a black scrubbing pad. More Pro-Clean was applied with a hand-held scrubbing brush to get deep into the grout lines and to reach into the corners.
Once done the floor was rinsed with water and the soil extracted with a wet vacuum. The floor was inspected, and the process repeated until I was satisfied that the stone and grout had released all the trapped dirt. After a final rinse, the wet vacuum was used to get as much moisture out of the stone as possible and then the floor left to dry out fully overnight.
Returning the following morning, I first checked that the floor was dry using a damp meter. The sealer won’t cure if there is any moisture in the stone and I’ve been known to reschedule sealing a floor if the readings are too high. On this occasion I was satisfied that the floor was within acceptable levels, so I was ready to seal the floor.
I used three coats of Tile Doctor Colour Grow to seal the floor, this is an impregnating sealer which intensifies natural colours whilst providing durable protection against stains, an essential feature in an area such as a hallway which is subject to constant foot traffic.
As you can see from the photos the transformation was quite impressive, the floor became much lighter and almost unrecognisable, the natural colours of the stone were now visible, and the floor looked beautiful. The client was very happy with the end result and has said they would not hesitate to recommend me to others.
Nigel Stoker
North West Yorkshire Tile Doctor
 Tile Doctor Ltd
These are photos of a Victorian tiled floor we renovated at the new Scottish head office of the Peoples Postcode Lottery in the centre of Edinburgh City where the building was going through a multi million pound refurbishment. Edinburgh has a lot of Georgian and Victorian architecture, much of which is listed and as a result many still have original Victorian tiled flooring.
I’ve not really looked at the Postcode Lottery until now but put simply you give the lottery £10 a month and your postcode is your winning ticket number, there are prize draws every day and if your postcode comes up every one in the system with that postcode wins; they also give 31% to charity which is impressive.
You can see from the photograph that the floor was in good physical condition but was looking tired and dull. This is not unusual for Victorian tiles as once the sealer wears down dirt can penetrate into the pores of the tile causing it to lose its appearance.
On the first day we set about stripping the floor of what remained of the old sealant using a strong dilution of Tile Doctor Pro-Clean which is an industrial strength alkaline tile and grout cleaning product that is safe to use on Tile and Stone. The product is applied to the floor, left to soak in for ten minutes and the scrubbed into the tile using a black scrubbing pad fitted to a rotary bonnet machine. The floor was then rinsed and the now soiled cleaning solution extracted using a wet vacuum.
The process was repeated several times until we were happy the floor was clean and free of sealer and then given a final rinse with water. Before leaving for the day the floor was dried as much as possible using the wet vacuum to extract as much moisture as possible.
On the second day our first task was to check the floor with a damp meter in several places to ensure the tiles had dried off overnight. All was well and we began the process of sealing the floor with a Tile Doctor Seal and Go. This is a topical sealer which provides a high-quality low-sheen finish and protection against ingrained dirt and stains.
Victorian tiles are quite porous and five coats were needed to fully seal the floor. This took some time to complete as you have to wait until the first coat is dry before applying the next however it was well worth the effort as the floor looked fantastic afterwards.
Thomas Wilson
Edinburgh Tile Doctor
24