
Search results for "Sufferers" in Home Design Ideas
 Lincoln Lighthill Architect
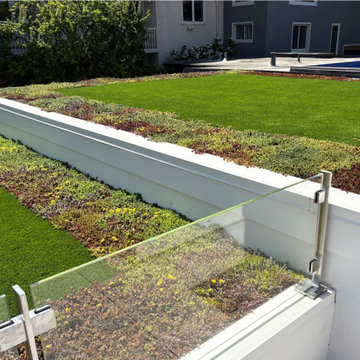
What does a roof deck look like when every part of the roof, even areas deemed uninhabitable and structurally weak, is utilized and optimized?
This large midcentury home on the edge of Presidio National Park in San Francisco had an incredible location and views. But the original roof deck suffered from poor design detailing that had rendered it a leaking, deteriorating mess. Even worse, the previous owner had covered three roof areas surrounding the deck with river stones, structurally overloading the building and endangering its occupants.
We removed the river stones and everything else down to the framing. An expertly detailed drainage and waterproofing system underlies everything above. The deck and access stairs are surfaced with durable and refined porcelain pavers. The guardrail is made from custom stainless steel supports with clear, low-iron, laminated glass spanning between for an unobstructed view. Heated seats make watching the chilly fog roll in through the gate comfy.
Planting and greenery surround the deck. The type varies depending on structural conditions- a deep planter sits on top of a structural wall, sedums in shallow soil occupy the strong edges of the surrounding rooftops, and faux grass turf fills out the middle in areas that can’t support the weight of wet soil.
 The Renowned Group
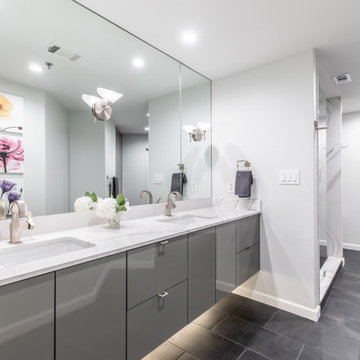
 The original Master bath suffered a tiny shower and a tub that was never used. It was very dark and cavernous and needed some softness to oppose angled walls. The tub was removed to make a larger, more accessible shower. The desired style was modern but not severe. We installed Cambria Britannica quartz slab with large veining and soft flowing movement on all the shower walls. A dark floor grounds the space. A combination of light walls, and sleek floating cabinets, creates an overall softness in this Modern Masterpiece.
 TraceyJordan Collection
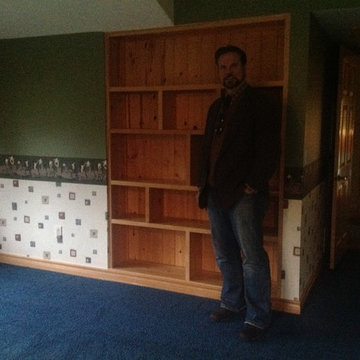
The original bunk room featured bright blue carpet, green blue and red wallpaper coupled with maple trim. Contrasted with the existing country cabinets in the kitchen, log home features in the living / dining area and the Tuscan bathroom off the foyer ... to say the house suffered from an identity crisis is an understatement.
We decided to re-imagine this space and create a fun yet functional bunk room that compliments the rustic industrial design throughout the rest of the property.
Photo Credit: TraceJordan Properties
Find the right local pro for your project
 StudioLAB
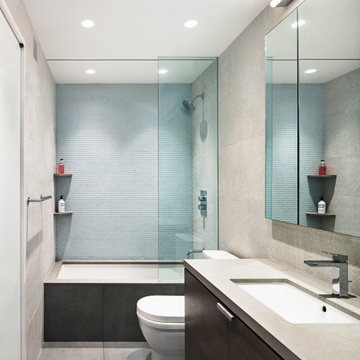
Close to Lincoln Center Plaza, two existing apartments were combined into a single custom tailored 4-bedroom residence. Characteristic with other buildings from the same post-war era, the existing apartments suffered greatly from a low, monotonous ceiling slab. To break up the ceiling, floating planes containing low-profile LED recessed lighting were incorporated throughout. Grey-washed birch veneer millwork is seen as you enter into the new foyer space. A blackened steel inlaid panel serves as a datum that continues throughout the apartment, wrapping the entry unit and extending around the corner to then transform into a floating bookshelf. The unit not only divides the entry area from the Living room, but also serves its utilitarian purpose on the foyer side as coat and storage closets, and then an entertaining function on the opposing side with a TV niche and custom liquor bar. Whitewashed rift and quartered white oak floors were used to brighten the space. In the kitchen, marble counters extend up the wall and onto the ceiling marking the separation of the kitchen/dining area from the living room/entry area. The kid’s room contains a custom curved desk area built beneath the bay windows to take advantage of the views. In the master bedroom, the blackened steel inlay reappears inset into the wardrobe wall unit.
 The Renowned Group
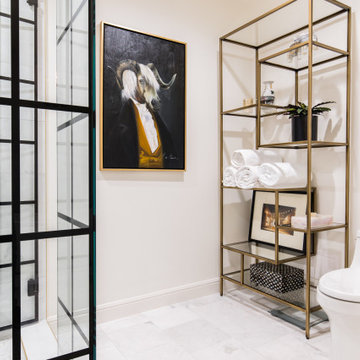
The Master Bath needed some updates as it suffered from an out of date, extra large tub, a very small shower and only one sink. Keeping with the Mood, a new larger vanity was added in a beautiful dark green with two sinks and ample drawer space, finished with gold framed mirrors and two glamorous gold leaf sconces. Taking in a small linen closet allowed for more room at the shower which is enclosed by a dramatic black framed door. Also, the old tub was replaced with a new alluring freestanding tub surrounded by beautiful marble tiles in a large format that sits under a deco glam chandelier. All warmed by the use of gold fixtures and hardware.
 DANE AUSTIN INTERIOR DESIGN Boston & Cambridge
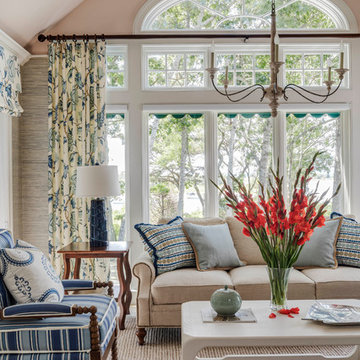
When this 6,000-square-foot vacation home suffered water damage in its family room, the homeowners decided it was time to update the interiors at large. They wanted an elegant, sophisticated, and comfortable style that served their lives but also required a design that would preserve and enhance various existing details.
To begin, we focused on the timeless and most interesting aspects of the existing design. Details such as Spanish tile floors in the entry and kitchen were kept, as were the dining room's spirited marine-blue combed walls, which were refinished to add even more depth. A beloved lacquered linen coffee table was also incorporated into the great room's updated design.
To modernize the interior, we looked to the home's gorgeous water views, bringing in colors and textures that related to sand, sea, and sky. In the great room, for example, textured wall coverings, nubby linen, woven chairs, and a custom mosaic backsplash all refer to the natural colors and textures just outside. Likewise, a rose garden outside the master bedroom and study informed color selections there. We updated lighting and plumbing fixtures and added a mix of antique and new furnishings.
In the great room, seating and tables were specified to fit multiple configurations – the sofa can be moved to a window bay to maximize summer views, for example, but can easily be moved by the fireplace during chillier months.
Project designed by Boston interior design Dane Austin Design. Dane serves Boston, Cambridge, Hingham, Cohasset, Newton, Weston, Lexington, Concord, Dover, Andover, Gloucester, as well as surrounding areas.
For more about Dane Austin Design, click here: https://daneaustindesign.com/
To learn more about this project, click here:
https://daneaustindesign.com/oyster-harbors-estate
 Lamont Bros. Design & Construction
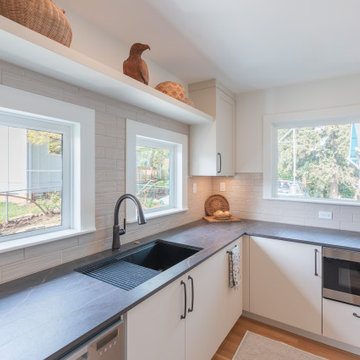
After years of suffering through a poorly designed kitchen that didn’t meet her needs, our client made the difficult decision to re-remodel her kitchen. Now that the kitchen is complete, she's happier than ever in her new kitchen. What used to be a space that was intimidating and difficult to use has become a place designed specifically for her needs, where every appliance and shelf is within comfortable reach and the design is tailored exactly to her personal style.
 AP HomesLLC
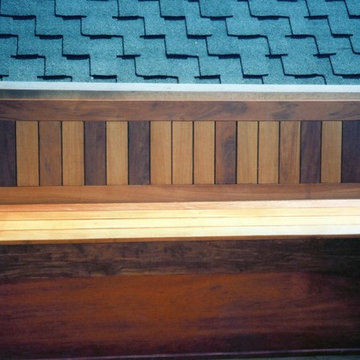
bench seating resting on roof structure. deck area suffered extensive dry rot damage to structure . repair included adding a pony wall doubling as a seating area. built ipe back and seat as sleeper system to cover Gaco weatherproof covering material
 Listino Painting Company
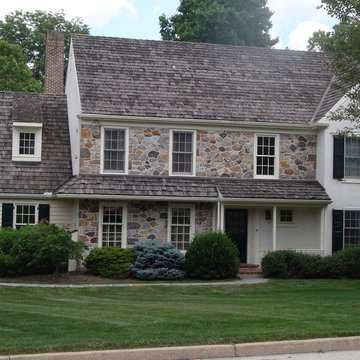
Complete exterior painting project on the stucco, wood trim, windows, and doors.
We replaced much on the right hand porch, and three windows which suffered wood rot.

 MD Seamless
This is half-round gutter. This is a beautiful style available with either internal hangers or external hanger hangers as shown in the photo. This gutter looks great on every home! It is a more expensive product and it usually suffers from over'splash due to the curve of the gutter.
 G. Christianson Construction, Inc.
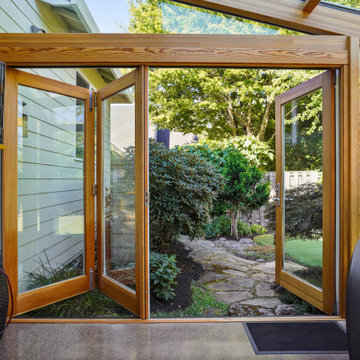
We recently completed a spectacularly beautiful sunroom for Richard and Cynthia. We worked previously with Cynthia on her business and because of our relationship, she felt comfortable asking us to build their Corvallis sunroom. The inspiration for this project came from the desire to have the ambiance of an outdoor hot tub, but without Corvallis’ cold wet weather. The sunroom adds a warm, bright 325 square feet just outside their kitchen and living room. This is the perfect addition if you are suffering from Corvallis’ cloud cover. The vibrant hues of the stained and finished Douglas fir glulam beams complement the beauty of the outdoors. These beams support the glass roof. In addition, the sunroom includes two operable skylights, a nine foot wide bifold door, a full glass roof system and full glass walls. Westview Sunrooms (the manufacturer) has a number of other beautiful ideas on their site: http://www.westviewproducts.com/pictures.html We would love the opportunity to build for you.
 Tile Doctor Ltd
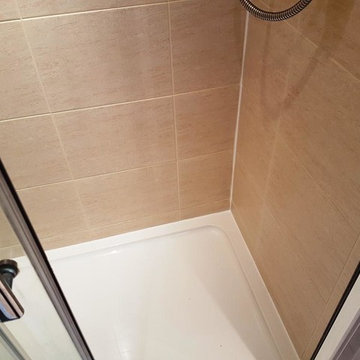
This is a great example of the difference we can make to a Shower Cubicle which suffer from a build up of soap scum, mould and staining from the dyes in shampoos and soaps etc.
This particular cubicle was installed at a property in the city of Edinburgh. The walls were Ceramic tiles which are ideal for shower areas as the glaze makes them completely water proof. However with grout being cementitious it does attract dirt and this shower was no different.
Cleaning Ceramic Tiled Shower Cubicle
The first step was to remove the wire accessory holder and then soak all the tile and grout in a strong solution of Tile Doctor Pro-Clean. I find decanting into a spray bottle works best as it mixes it with air which makes it easier to stick to the wall.
With the Pro-Clean in place it was then hand scrubbed to get the tile and especially the grout clean of all the mould and other stains. The shower walls were rinsed down and the process repeated where necessary.
Grout Colouring Shower Wall Tiles
With the tiles and grout now clean we could see that the grout was still discoloured in some areas where it had been badly stained. One option at this point would be rake out the grout and replace with new however overtime it would only discolour again, so in agreement with the customer we applied a grout colourant in a Limestone colour to better match the tile.
The Grout Colourant would ensure all the grout had a consistent appearance while also adding an impenetrable barrier that will keep its appearance for a long time. It takes a little time to do but is easily applied with a small brush and then you wipe off any excess that gets onto the tile.
The next step was to strip out the mastic silicone sealant strip from around the base of the shower cubicle and replace with new. I used high quality silicone sealant that left nice lines and fresh look, don’t use cheap sealant as it will soon discolour and some have been known to shrink.
Deep cleaning and re-colouring the grout made a huge difference; the shower cubicle has been transformed and now looks like a new installation.
Thomas Wilson
Edinburgh Tile Doctor
 Jarrett Design
This bathroom needed help as it was tired, dated and cramped! The vanity area was open to the master bedroom and sandwiched between a closet and existing bathroom wall. Behind the bathroom wall, was a second sink, a small walk-in shower and the commode. A poorly placed linen closet ate into the area and there was a soffit over the shower adding to the cramped feeling. The ceiling was cluttered with old-school heating lamps, flush-mount fixtures and ventilation grills. The “movie star” lighting meant to add some glamour only made the bathroom feel dated and sad. Our clients wanted to bring this bathroom to life.
We built a wall and added a door between the bedroom and bathroom to ensure more privacy and define the space. In addition, we removed the wall separating the actual bathroom and vanity area to make the master bathroom larger. The linen closet was also taken out so the shower could be expanded significantly. Our homeowner had recently suffered a knee injury so they were looking for future solutions that would work for them as they continued to age. We made the shower large enough to include a bench and installed a handheld sprayer located near the seat. Shower walls were reinforced so that when the day came that a grab bar was needed, they would be ready.
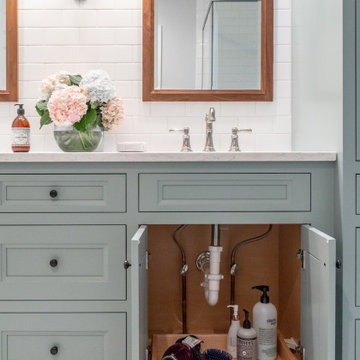
We added a tall cabinet that featured two, deep rollouts and interior shelving to keep linens and bathroom supplies organized. Beneath the sinks, we included rollout drawers so items would not get lost in those dark areas under the plumbing. Everything that had been cluttering the ceiling was removed including the shower soffit and heat lamp. With those gone, we added evenly-spaced, recessed ceiling lights to help brighten the space making it safer and more practical.
We chose a custom blue-green paint for the cabinets which was understated enough to provide a sense of serenity while still offering a splash of color to help liven up the room. Walnut-framed mirrors added a touch of warmth and the patterned floor tile made the whole room fun! An old bathroom came alive!

 Honey Bee Carpentry Inc.
The updated and restructured load bearing balcony that serves both as a solid support for the wide overhanging roof and as a safe space to enjoy year-round views over the lake. A natural armour stone retaining wall was added to strengthen the shoreline right away as well. Timber-framed braces support the roof where the unstable slope suffers from erosion. Railings are cedar posts with top cedar rails and high tension cable wires (which are difficult to see in the photos).
 All-Craft Decks & Sunrooms
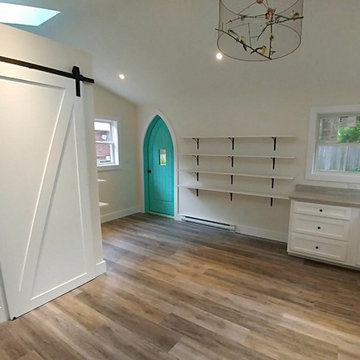
The she shed was intended for a combination art studio and a place to relax for the homeowner who was elderly and suffered with a severe medical condition. We needed to maximize the space to it’s potential, especially since it’s a small space. Included was higher-end pieces such as a stunning chandelier and a stunning Anderson door entrance system. For a more tranquil environment, we incorporated space for comfortable furniture and a propane fireplace. Space was used to the max with built in shelving and cabinetry for the art work and supplies
This 12x18 she-shed was customized with:
Tear-drop custom door by Anderson
Cathedral ceiling with skylights for abundance of natural light
Propane fireplace
Built in cabinets and shelving for art studio supplies
Barn door entrance to small garden tool storage area
 New Roots Landscaping
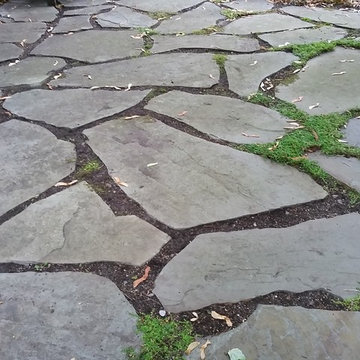
Natural bluestone patio replaces a lawn area that had suffered as the surrounding ornamental trees provided too much shade for the grass. Post intallation, ground cover just starting to fill in.
 Tile Doctor Ltd
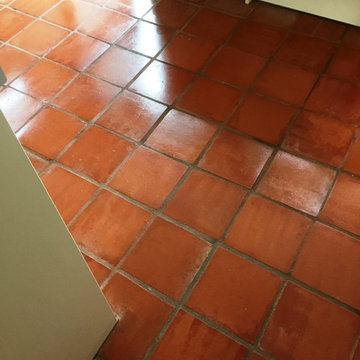
Newly built properties are not without their problems and often take a while to resolve all the snagging which occasionally extends to resolving problems with newly laid tiled floors. At this new property in the village of Malvern, and overlooked by the Malvern hills, the builders had left the Terracotta tiled kitchen floor covered in grout smears (also known as Grout Haze) following installation. They had also neglected to seal the tiles, which was actually quite fortunate in this case as they would have sealed in the grout haze, making it more difficult to remove.
Naturally, the property owner wanted the problem to be resolved as soon as possible, and for me to make the tiles easy to keep clean in future, which can be achieved by sealing the tile.
Before starting work, I made sure to fully protect any exposed woodwork with a plastic sheet covering to protect them from potential damage. I then proceeded to give the floor a thorough clean, using Tile Doctor Remove and Go to clean the floor and eradicate some stains that had been left behind as a result of the building work.
Next, I paid special attention to the grout, where the very visible problem of grout haze had arisen. To neutralise these smears I used Tile Doctor Grout Clean Up, a concentrated phosphoric acid cleaner that can also remove alkaline mineral deposits and efflorescence. Grout Clean Up is only to be used on acid resistant stone, as sensitive stone can suffer from irreparable etching if it comes into contact with the product.
Once completely clean and free of grout smears the floor was thoroughly rinsed with water to remove any trace of product and then dried as much as possible with a wet vacuum, afterwards an air mover was installed to speed up the drying process.
Later that afternoon the floor was dry and I was able to apply a sealer. To do this I opted to use several coats of Tile Doctor Seal and Go Extra, a topical, fully breathable sealer that works really well on Terracotta.
The sealer builds up a layer of protection on the surface of the tiles, protecting against ingrained dirt and stains. Seal and Go Extra also provides a high quality sheen finish which really did well to enhance the look of the Terracotta.
The property owner was exceptionally pleased with the results, and to have this problem dealt with quickly and efficiently, additionally the sealer will ensure the Kitchen floor is easy to keep clean in the future.
 Studio Roundtop LLC
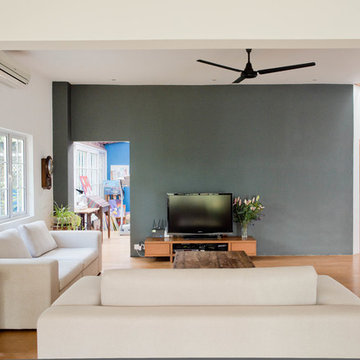
The owners of this house appreciate living in a home that is connected with its tropical context. Set in a dense residential neighborhood, the challenge was to create a home with a garden as an extension of its interior, whilst retaining a sense of privacy that the owners valued. Working within the existing shell of an old semi-detatched house, the interior layout was reconfigured to create a series spaces that open out to the lush tropical garden.
The existing kitchen was converted into an open kitchen, connecting the backyard to the dining and living room. Large sliding windows open the living/dining space to its patio and garden to offer an outdoor dining experience.
The existing hallway and common bathroom also suffered from daylight and natural ventilation. A skylight was inserted to brighten the otherwise existing dim hallway. The previously mechanically ventilated bathroom was also converted into a semi-outdoor bathroom with the introduction of an air-well and feature rock wall.
The guest bedroom, previously accessible through the kitchen, was turned into a home office now exclusive to the master bedroom. A private courtyard was introduced to connect the master bedroom and home office to create a private sanctuary for one residing in the the bedroom or working in the office.
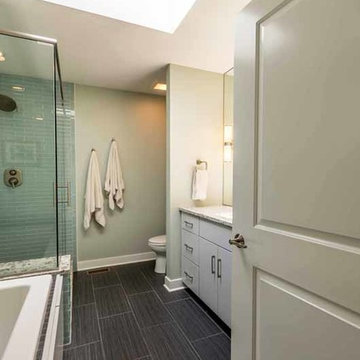
 12/12 Architects & Planners
This family of 5 was quickly out-growing their 1,220sf ranch home on a beautiful corner lot. Rather than adding a 2nd floor, the decision was made to extend the existing ranch plan into the back yard, adding a new 2-car garage below the new space - for a new total of 2,520sf. With a previous addition of a 1-car garage and a small kitchen removed, a large addition was added for Master Bedroom Suite, a 4th bedroom, hall bath, and a completely remodeled living, dining and new Kitchen, open to large new Family Room. The new lower level includes the new Garage and Mudroom. The existing fireplace and chimney remain - with beautifully exposed brick. The homeowners love contemporary design, and finished the home with a gorgeous mix of color, pattern and materials.
The project was completed in 2011. Unfortunately, 2 years later, they suffered a massive house fire. The house was then rebuilt again, using the same plans and finishes as the original build, adding only a secondary laundry closet on the main level.
 Ploughshare Design | Build
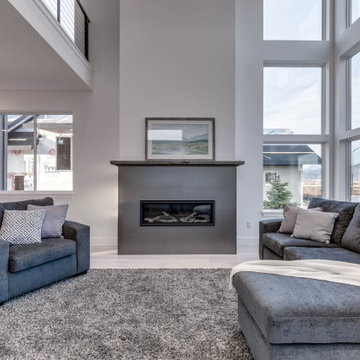
The living room in The Maslow House at Flanders Mill. Many Montanans suffer some degree of seasonal affective disorder during the long winter months. To help, generous windows and crisp white walls pipe daylight into every corner of the home's common spaces.
29