
Search results for "Typical challenges" in Home Design Ideas
 Amy Pearson Design
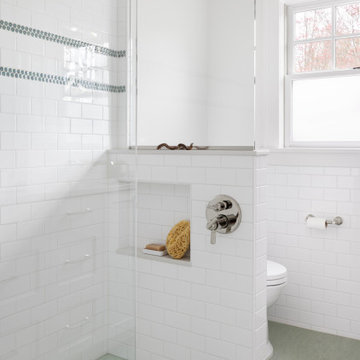
This classic Portland bungalow in the highly desirable Irvington neighborhood has been in the family for generations and lovingly cared for and updated throughout the years. It was now the main floor’s primary bathroom that needed to be addressed. A tight footprint made for some space planning challenges, but what we love so much about this project is that it demonstrates that so much can be done with a small space! Designing a shallower than typical vanity allowed us to extend the cabinetry and countertop as far as the door swing into the room would allow, adding much needed storage to the room. A narrow undermount sink combined with wall mount faucet ensures the vanity remains extremely functional. A tower cabinet at the end frames the sink and mirror, bringing an appreciated moment of symmetry while providing space for electric bathroom products and so much more. Where a two sided tub/shower once lived, now a walk in shower framed in glass makes the space feel, and live, significantly larger than its modest square footage. The use of glass on only the long side, and pony wall with glass above on the short end, visually expands the space allowing the eye to move freely around the room while still providing privacy at the toilet. Marmoleum flooring makes for easy cleaning while mosaic tile on the shower floor ensures traction in the wet environment. A classic penny tile accent around the shower walls, combined with the tile wainscot around the room speak to the classic architecture of the home. The bright and fresh palette is at once lively and calming, youthful and sophisticated, current and timeless!
 Drury Design
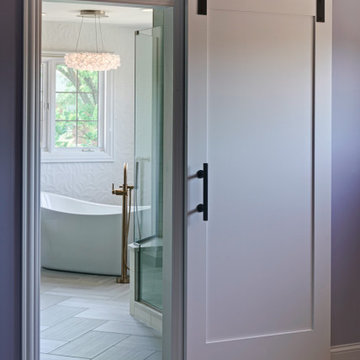
The original idea was to update the tile floor and the tub. That’s it.
A further discussion of wants and needs revealed intentions for an eventual larger shower and an improved vanity storage. It made sense to map out the possibilities and design our update with potential next steps in mind. The process was exciting, ultimately leading to the decision to do a full primary bath remodel.
Design Objectives:
-Maintain existing locations for all major bathroom functions
-Make the shower larger and more open
-Use luxurious materials throughout
-Improve vanity storage and define accessories for specific items
-Incorporate luxury shower fixtures
-Include the latest technology
Design Challenges
-Enlarging the shower in a typical rectangular shape would block the view and light from the alcove windows behind the tub
-Logical placement of the built-in shower caddy and all shower components in accordance with how and where they were to be used
-Keeping the long, back wall free from any shower modules to maintain the decorative tile design
-Combining the owner’s existing smart home system with a comprehensive shower system
-Planning cabinetry for hidden storage and use for various small appliances and make-up
-Integrating expensive shower wall tile with less expensive wall tile for aesthetic and budget purposes
-Incorporating special design features to balance the highly decorative shower tile
Design solutions:
-A clipped corner was planned for the shower bench seat – this allowed for a larger glass wall. The glass wall at the angled bench also brought more natural light into the shower
-Thoughtful shower space design prevented the crowding of features – the shower caddy and handheld shower head were placed on the full-height wall by the shower bench, the regular shower head and body sprays remained on the opposite wall, and the rain head was placed in the center of the shower
-A multi-port DTV system was installed, providing control of all shower components, including chromotherapy and music inside and outside the shower
-The lavish water-jet stone and glass decorative tile was paired with a less-expensive glass tile found in the mosaic
-Pull-out grooming organizers and electrical docking stations were incorporated into the cabinetry
Additional storage was created in the lower corner cabinet
The homeowners are thrilled with their new primary bathroom. Clear goals and carefully evaluated materials informed a fun and functional design that is both thoughtful and sumptuous!
 Dresner Design | Chicago Custom Kitchens Cabinets
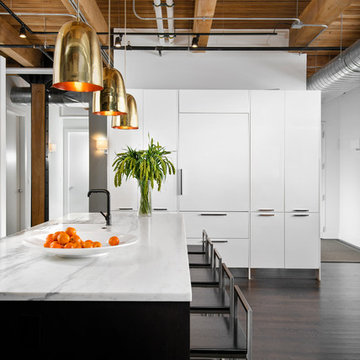
Dresner Design possesses the expertise to design cutting edge, cost-effective kitchens, baths and closets for developer’s multi-unit projects. They were recently part of the design team for The Ronsley, River North's best new luxury condominium development.
This former industrial timber loft building was transformed into an incredible 41-unit building, and Dresner Design was hired to design both the kitchens and baths using Italian cabinetry from Stosa Cucine.
Challenges:
All the units were the same but with varying configurations. The goal was to make all the units feel and look the same but each of the layouts was different- making 30 layouts in all.
Concept:
The kitchens and baths were designed to be sleek and modern, blending in with the loft style. The kitchen islands fabricated with wood compliments the wood ceilings and beams typical of loft living. White kitchens are always timeless and the Ronsley used the most beautiful and high-end cabinetry made of 100% lacquer.
Photography by Jim Tschetter
Find the right local pro for your project
 Alderwood Landscape Architecture and Construction
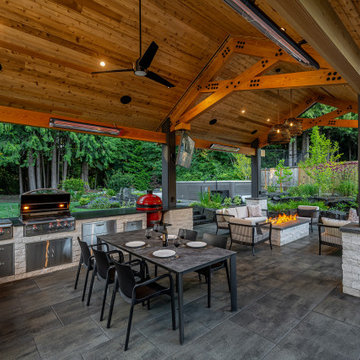
The homeowners wanted to better use their outdoor space to feel like an extension of their home with several separate lounge and entertaining spaces. While they desired to keep the lawn for their kids, they also wanted to ensure there were enough private areas for adults. While these factors are typical for an Alderwood project, the challenges of this landscape made the final design incredibly unique. Rather quickly, our design team learned that a large septic system ran right underneath most of the backyard. Coordinating with city workers, the building architect, and the clients, our landscape architect crafted a unique design that worked around the drain constraints and accomplished each desire on the clients' list.
 Drewett Works
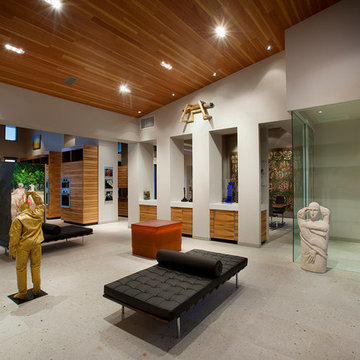
Believe it or not, this award-winning home began as a speculative project. Typically speculative projects involve a rather generic design that would appeal to many in a style that might be loved by the masses. But the project’s developer loved modern architecture and his personal residence was the first project designed by architect C.P. Drewett when Drewett Works launched in 2001. Together, the architect and developer envisioned a fictitious art collector who would one day purchase this stunning piece of desert modern architecture to showcase their magnificent collection.
The primary views from the site were southwest. Therefore, protecting the interior spaces from the southwest sun while making the primary views available was the greatest challenge. The views were very calculated and carefully managed. Every room needed to not only capture the vistas of the surrounding desert, but also provide viewing spaces for the potential collection to be housed within its walls.
The core of the material palette is utilitarian including exposed masonry and locally quarried cantera stone. An organic nature was added to the project through millwork selections including walnut and red gum veneers.
The eventual owners saw immediately that this could indeed become a home for them as well as their magnificent collection, of which pieces are loaned out to museums around the world. Their decision to purchase the home was based on the dimensions of one particular wall in the dining room which was EXACTLY large enough for one particular painting not yet displayed due to its size. The owners and this home were, as the saying goes, a perfect match!
Project Details | Desert Modern for the Magnificent Collection, Estancia, Scottsdale, AZ
Architecture: C.P. Drewett, Jr., AIA, NCARB | Drewett Works, Scottsdale, AZ
Builder: Shannon Construction | Phoenix, AZ
Interior Selections: Janet Bilotti, NCIDQ, ASID | Naples, FL
Custom Millwork: Linear Fine Woodworking | Scottsdale, AZ
Photography: Dino Tonn | Scottsdale, AZ
Awards: 2014 Gold Nugget Award of Merit
Feature Article: Luxe. Interiors and Design. Winter 2015, “Lofty Exposure”
 Kitchen Associates
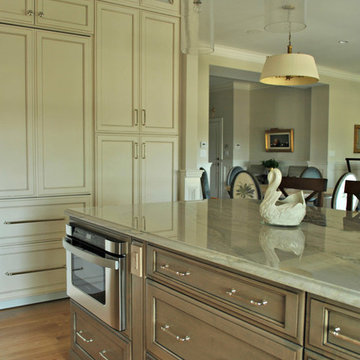
This old historic building in Belmont, MA was converted into beautiful luxury condos. While the high 10.5 foot ceilings are a great feature of the space, they also created a design challenge in the kitchen. We wanted to somehow fill the space between the reachable upper cabinets and the high ceiling avoiding an awkward "open" look in this area.
The homeowners wanted stacked cabinets, but rather than just doing typical glass doors, we installed cabinets with medallion mullion doors with antiqued mirror inserts. This not only gives the kitchen a classy look, but also creates some storage for those "once a year" items you can never find a place for.
Another exciting design element is the wood range hood with nautical trim molding. Come visit our showroom to see this same range hood in person!
Brand: Brookhaven
Door Style: Freemont Recessed
Finish: (main) Lace with Charcoal Glaze, (island) Harbor Mist with Pewter Glaze
Countertop: Marble
Hardware: Top Knobs - Polished Nickel (TK321PN & TK323PN)
 Bilotta Kitchen & Home
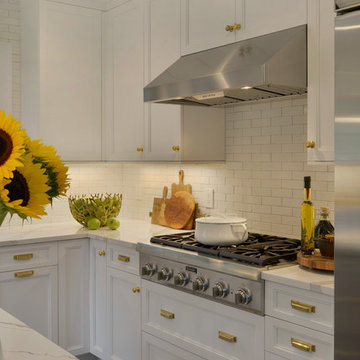
For this kitchen, designed by Peter Bittner, the client had a very clear idea of what she wanted right from the start. She did her research. The mother of a fast growing, young family, she wanted something as efficient as it was beautiful – on the simple, yet elegant side. Her requests were straightforward: white and light grey Bilotta cabinetry in a transitional style so as not to compete with the detailing inside her 1950s Tudor-style home; a heated tile floor (By Rye Ridge Tile); stainless appliances; white subway tile backsplash by Walker Zanger (again to keep it clean and not compete with its surroundings); and seating at the island for snacks and homework. The “pop” suggested by Peter was done through the satin brass hardware and lighting fixtures. The real challenge with this space was to fit as much as possible into the existing footprint which was overall on the smaller side. The solution was eliminating a doorway (with a swinging door that opened into the kitchen) and stairs from the kitchen to the basement. By moving the stairs and doorway, the usable space increased considerably. The typical working triangle became the focus for one side of the kitchen and the island overhang and seating became available on the other side. To make up for the limited amount of wall cabinets Peter designed shallow pantry-style cabinets along the back wall. Quartz Countertops by Rom Stone Fabrication. Designer: Peter Bittner Photographer: Peter Krupenye


 Crystorama Lighting
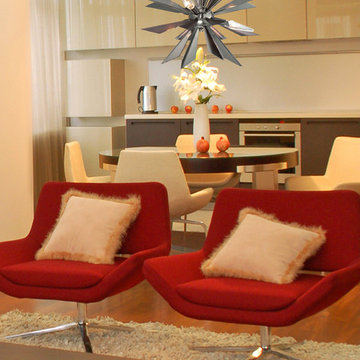
Like designer runway fashions, the Galaxy Collection is trendsetting, light-catching and beautifully inventive, challenging conventional notions of chandeliers. Sleek in design and contemporary in chrome accented with gunmetal is anything but typical. The orbital design is freely formed by rays of metal creating show-stopping chandeliers.
 Align Design LLC
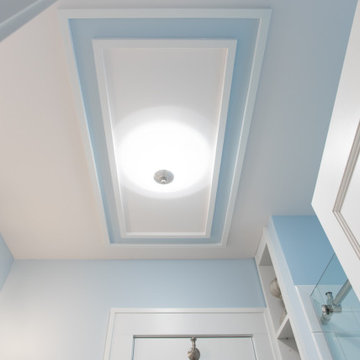
This project was focused on eeking out space for another bathroom for this growing family. The three bedroom, Craftsman bungalow was originally built with only one bathroom, which is typical for the era. The challenge was to find space without compromising the existing storage in the home. It was achieved by claiming the closet areas between two bedrooms, increasing the original 29" depth and expanding into the larger of the two bedrooms. The result was a compact, yet efficient bathroom. Classic finishes are respectful of the vernacular and time period of the home.
 Renovisions
This client requested that we design her new kitchen space to look and function with her and her family’s usage in mind. She was not happy with her existing kitchen due to builder-grade ceramic flooring, lack of countertop space, poor lighting, inadequate and unorganized storage and the closed off feel of the area. Renovisions resolved all of these issues by designing and building an impressive, transitional styled kitchen; delivering a beautifully well thought-out space that provides a multi-functional approach and meets the needs of this busy and dynamic household.
Typically, we encounter challenges in every project, and this was no different. The upstairs bathroom plumbing ran across the entire length of the kitchen sink wall and it was necessary to work with it by moving the plumbing as far up as possible and then building a soffit to hide it.
Creating a space that has a more open feel was top of mind for our client. Installing a new wood floor that matched the existing dining room floor helped with this and in addition, warmed up the room. By relocating the refrigerator to the opposite wall and adding a bar area at the end toward the family room, the flow of traffic for family members and guests became more managed.
The open floor plan allowed for additional island cabinets to accommodate smart storage and better functionality when prepping meals, sitting to eat or gathering with friends and family. We believe having ample countertop surface space is a critical improvement in any renovation and this particular project now boasts a large countertop area with a stunning wide vein pattern that accentuates the design instead of overpowering it. The soft look of the Blanco Arabescato quartz enhances the space and looks lovely with the white inset styled cabinetry.
Beauty and function go hand-in-hand in this kitchen with several exceptional elements such as under-cabinet lighting with dimmers to control the mood light. Glass doors were added to the wall cabinets which flank the wine rack for displaying their decorative glassware and a beverage cooler below provided added convenience and access to cold beverages. The GE Café line of appliances in ‘Slate’ and ‘Stainless Steel’ finishes are a stunning contrast here.
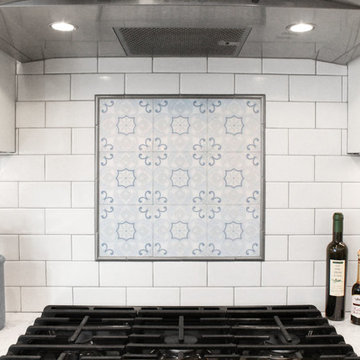
The sensational looking decorative marble 6”x6” backsplash tile over the gas range and in the bar area creates nice focal points by creating a unique look for her that family and guests love.
Convenient and functional elements were added such as a blind corner pull-out for easier pot/pan storage, a sweep-o-vac under cabinet vacuum system for those constant quick clean-ups, a pull-out caddy under the sink base for storage of cleaning products and a protective mat to collect potential spills.
Our client let us know it was time for a change and we listened. She shared a few pictures she loved from a home magazine, we shared our insight and then designed/built the kitchen of her dreams! … A fabulous and functional space.
 Living with Lolo
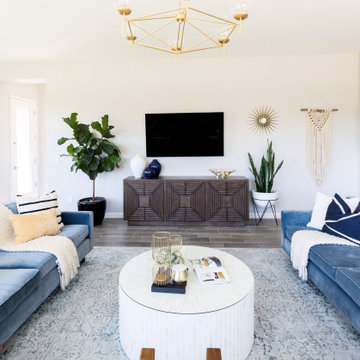
Living Room in Hodges Street | Room Type:
Whole Home Interior Design |
Project Name:
Hodges Street |
Key Feature:
A builder-grade tract home transformed with personality through a playful mid-century modern design influence.
Challenge:
The home originally lacked character and felt like a typical builder-grade tract house. The goal was to elevate the space and create a more distinctive interior.
Solution:
The design introduced bold styling and mid-century modern touches throughout the home, adding personality and visual interest while creating a more elevated and cohesive interior.
Timeline:
Completed in 2018.
 Align Design LLC
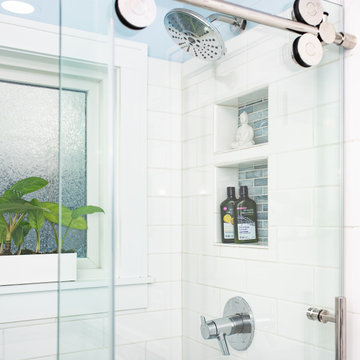
This project was focused on eeking out space for another bathroom for this growing family. The three bedroom, Craftsman bungalow was originally built with only one bathroom, which is typical for the era. The challenge was to find space without compromising the existing storage in the home. It was achieved by claiming the closet areas between two bedrooms, increasing the original 29" depth and expanding into the larger of the two bedrooms. The result was a compact, yet efficient bathroom. Classic finishes are respectful of the vernacular and time period of the home.
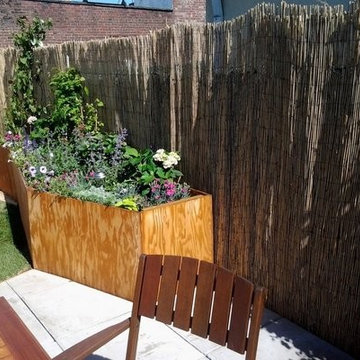
 NY Plantings Irrigation and Landscape Lighting
New york plantings green rooftop garden design nyc with custom built planters and landscape lights by newyorkplantings.
Greenroof is still in its infancy even though the concept has been around for a long time, even a hundred years or more.
NY plantings has the concept and business model to service the trade by providing expert contracting services, experienced professional staff and project management that effectively and efficiently gets the job done.
Who would be interested in working with nyp garden designers and landsp...nyc?
Landscape architects, designers, garden designers, landscape design professionals, general contractors, property owners, property management companies, project managers and anyone who requires a company that first is a master garden and NY landscaping company. Tree planting, garden installation and complete plantings installations including personalized design touches such as specimen shrubs, flowering trees, dwarf conifers and trees, landscape boulders and moss rock, flowers and climbers.
NY Plantings can work from a design concept only without requiring a detailed landscape drawing or garden plan. True enthusiasm and years of hands on experience mean that you don’t even need a detailed planting plan; in most cases lead designer, Todd Nappi makes suggestions or improvements to the typical NYC landscape Designer provided garden design plan that both achieve highly desirable results and can possibly even save money vs. the cost of the original rooftop garden design or traditional landscape.
A high technical aptitude with experience in building rooftop and terrace gardens from scratch, solving challenging issues onsite and the ability to make the right decisions prove that NY Plantings is a resource as a landscape or rooftop garden contractor to the Landscape Design trade.
Besides Gardening, Drip irrigation and landscape lighting NY Plantings has been also specializing in hard capes, outdoor construction such as decks, pergolas, custom built planter boxes, custom fence, lattice, trellis and living walls (vertical gardening)
Nyc terrace garden and custom built planter design by newyorkplantings. Greenroof design and construction is the new frontier for any urban epicenter and NY Plantings green roofing installers are up to the task.
As the green roof industry becomes more mature so will NY Plantings remain a resource as a contractor for providing and installing greenroof systems in Manhattan and the NY Metro areas.
#newyorkplantings
New York Plantings Garden Designers and Landscape contracting
432 E 14st
New York, NY 10009
Call: 347-558-7051
site url: http://www.newyorkplantings.com/
info@newyorkplantings.com
 Studio 1200
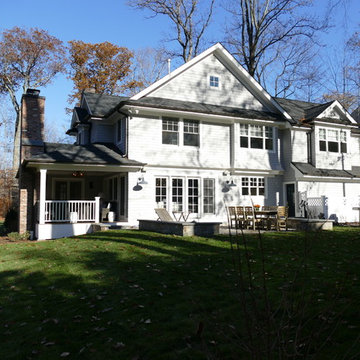
With a location right in the heart of vibrant Madison New Jersey, this house has a prime location in a charming and desirable neighborhood. The new owners’ dream for a Shingle Style house more typical of the size and style of other houses in the neighborhood was challenged by the fact that the building coverage was already maxed for the property. Any increases would have to be done within the existing footprint.
Studio 1200 was able to provide a more substantial and functional living experience for the family by adding one story and reconfiguring the first floor to create a better flow. A new kitchen and dining room were created and relocated to rear of the house, resulting in an easy egress to the private patio and backyard. A new mudroom, spare bedroom, powder room, office and covered porch completed the modern layout of the first floor, all within the same original footprint. The addition of a fireplace to the covered porch meant this space can be used practically year-round. The second floor also received an upgrade through redesign, introducing a special master suite with 2 separate walk-in closets as well as a bathroom with a dramatic soaking tub. Completing the second floor are three more bedrooms, two bathrooms, and a laundry room. Atop it all is an attic, providing storage space that was not in the original home’s design.
 Studio 1200
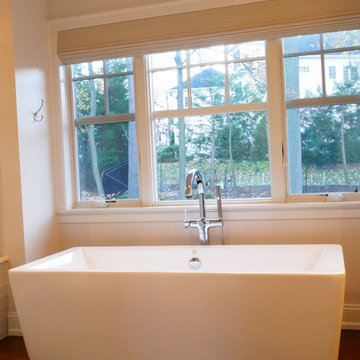
With a location right in the heart of vibrant Madison New Jersey, this house has a prime location in a charming and desirable neighborhood. The new owners’ dream for a Shingle Style house more typical of the size and style of other houses in the neighborhood was challenged by the fact that the building coverage was already maxed for the property. Any increases would have to be done within the existing footprint.
Studio 1200 was able to provide a more substantial and functional living experience for the family by adding one story and reconfiguring the first floor to create a better flow. A new kitchen and dining room were created and relocated to rear of the house, resulting in an easy egress to the private patio and backyard. A new mudroom, spare bedroom, powder room, office and covered porch completed the modern layout of the first floor, all within the same original footprint. The addition of a fireplace to the covered porch meant this space can be used practically year-round. The second floor also received an upgrade through redesign, introducing a special master suite with 2 separate walk-in closets as well as a bathroom with a dramatic soaking tub. Completing the second floor are three more bedrooms, two bathrooms, and a laundry room. Atop it all is an attic, providing storage space that was not in the original home’s design.
 Studio 1200
With a location right in the heart of vibrant Madison New Jersey, this house has a prime location in a charming and desirable neighborhood. The new owners’ dream for a Shingle Style house more typical of the size and style of other houses in the neighborhood was challenged by the fact that the building coverage was already maxed for the property. Any increases would have to be done within the existing footprint.
Studio 1200 was able to provide a more substantial and functional living experience for the family by adding one story and reconfiguring the first floor to create a better flow. A new kitchen and dining room were created and relocated to rear of the house, resulting in an easy egress to the private patio and backyard. A new mudroom, spare bedroom, powder room, office and covered porch completed the modern layout of the first floor, all within the same original footprint. The addition of a fireplace to the covered porch meant this space can be used practically year-round. The second floor also received an upgrade through redesign, introducing a special master suite with 2 separate walk-in closets as well as a bathroom with a dramatic soaking tub. Completing the second floor are three more bedrooms, two bathrooms, and a laundry room. Atop it all is an attic, providing storage space that was not in the original home’s design.
 Windy City Painters
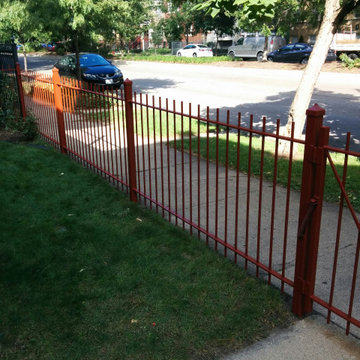
Ever notice how your iron fence looks worse every spring after another Chicago winter? That slow deterioration is not cosmetic - it is active metal failure that compounds every freeze-thaw cycle until replacement becomes the only option. Windy City Painters works with homeowners across the Chicago North Side and Near West Side to restore original iron fencing on greystones, two-flats, Victorian brownstones, and coach houses before that point is reached.
PROJECT OVERVIEW
This iron fence restoration involved a classic Chicago residential property with original wrought iron fencing showing surface rust across the majority of pickets, flaking previous paint coats, and localized deep pitting near the base rails. A structural check identified two loose pickets requiring welding before any surface preparation or coating began. Total linear footage fell in the mid-range for a standard Chicago residential lot.
MATERIALS AND PRODUCTS
Windy City Painters selected Ospho rust converter for chemically neutralizing active iron oxide before priming. Ospho reacts with rust to form a stable phosphate compound that stops corrosion progression rather than simply sealing over it. Sherwin-Williams DTM rust-inhibitive primer was applied to all bare and converted surfaces, followed by two finish coats of Rust-Oleum DTM in satin black. DTM - direct to metal - formulas provide corrosion inhibitors built into the coating matrix, which matters significantly in Chicago's climate.
THE PROCESS
Step 1 - Structural Assessment and Welding Coordination. Before any surface preparation begins, Windy City Painters inspects every picket and rail connection for structural integrity. Loose or cracked iron must be welded before coating. Paint applied over a compromised joint will fail within one season as movement continues to break the bond. On this project, two pickets were tack-welded by a coordinating welder before prep started.
Step 2 - Wire Wheel Grinding and Needle Gun Descaling. All rusted sections were ground to bare or near-bare metal using wire wheel attachments and needle gun descaling tools. This step removes loose scale, flaking previous coatings, and surface contamination that would prevent primer adhesion. Skipping mechanical prep is the single most common reason iron fence paint fails prematurely on Chicago properties.
Step 3 - Ospho Rust Converter Application. Ospho was brushed into all pitted and converted areas and allowed to cure fully. The phosphoric acid chemistry converts iron oxide into iron phosphate, arresting active rust and creating a surface that accepts primer more effectively than bare metal alone. Corroseal is an equivalent alternative used on projects with heavier pitting.
Step 4 - DTM Primer and Finish Coat Application. Sherwin-Williams DTM rust-inhibitive primer was applied across all prepared surfaces. Two topcoats of Rust-Oleum DTM in satin black followed after full primer cure. DTM finish coats add a second corrosion-inhibiting layer and provide the UV and weather resistance needed for Chicago exterior iron work.
CHICAGO-SPECIFIC CHALLENGES
Chicago iron fencing faces conditions that accelerate corrosion faster than most US markets. Lake humidity keeps metal surface moisture elevated through much of the year. Road salt splash from winter maintenance reaches fencing along parkways and sidewalk edges, introducing chlorides that aggressively attack iron. Freeze-thaw cycles expand any rust pocket that has formed under paint, lifting coatings from the inside and creating the classic bubbled-paint appearance homeowners notice every spring.
WHAT TO EXPECT LONG-TERM
With Ospho conversion, DTM primer, and two DTM finish coats properly applied over mechanically prepared surfaces, most Chicago residential iron fences hold 5-8 years before needing significant touch-up. Annual visual inspection for any chips or bare spots, with immediate touch-up using Rust-Oleum DTM, extends that window considerably.
PRO TIPS
Tip 1 - Address any bare metal spot the same season you notice it. A pinhole of exposed iron becomes a rust bubble within one Chicago winter and a flaking section by the following spring.
Tip 2 - Never paint over active rust without a converter step. Ospho or Corroseal is inexpensive insurance against a complete repaint two years early.
Tip 3 - Check picket bases at grade level every spring. Ground contact accelerates corrosion at the base faster than anywhere else on the fence. Catching it early keeps welding out of the equation.
Contact Windy City Painters at windypainters.com for a project estimate.
FAQ
Q: What does iron fence painting cost in Chicago? A: Residential iron fence painting with proper rust prep typically runs $300-$900 for standard lot footage. Windy City Painters provides itemized estimates based on linear footage, rust severity, and whether structural welding is required before surface preparation begins.
Q: Do you paint over rust or remove it first? A: Windy City Painters always addresses active rust before priming. Ospho or Corroseal rust converter chemically neutralizes iron oxide, and wire wheel grinding removes loose scale - coating over unaddressed rust guarantees early failure on Chicago iron fences.
Q: When does an iron fence need welding before painting? A: Loose pickets, cracked rails, or connections with visible movement require welding before any coating work begins. Paint cannot stabilize a structural joint - Windy City Painters coordinates with welders when this condition is identified during initial assessment.
Q: How long does iron fence paint last in Chicago? A: With mechanical prep, Ospho conversion, and Sherwin-Williams or Rust-Oleum DTM coatings, properly restored iron fencing holds 5-8 years in Chicago's freeze-thaw climate before needing significant maintenance.
Q: Is Ospho better than Corroseal for Chicago iron fences? A: Both are effective rust converters. Ospho is a liquid phosphoric acid treatment suited for moderate rust and pitting. Corroseal is a latex-based converter-primer hybrid better suited to heavier rust profiles. Windy City Painters selects based on site conditions.
Q: What finish sheen works best on iron fencing? A: Satin or semi-gloss black is the traditional and most durable choice for Chicago greystone and brownstone properties. Satin hides minor surface imperfections better than gloss while still providing adequate UV and moisture resistance.
Q: Can iron fence painting be done in spring or fall in Chicago? A: Yes. Windy City Painters schedules iron fence work in temperatures above 50 degrees Fahrenheit with low ambient humidity - spring and early fall are often ideal windows that avoid both winter cold and peak summer humidity.
 Wedum & Associates P.C.
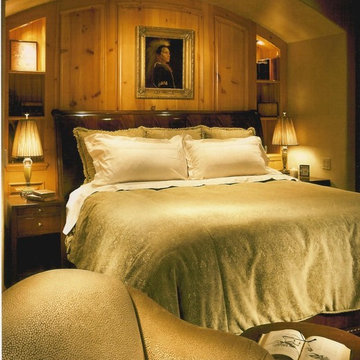
The existing home was a rustic log design with a typical Indian rug and horn interior. The challenge was to create a refined eclectic interior that keeps the classical western art in combination with fine furniture, fabrics and accessories for a more refined and warn interior.
 Crystorama Lighting
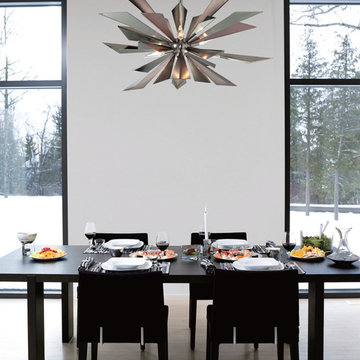
Like designer runway fashions, the Galaxy Collection is trendsetting, light-catching and beautifully inventive, challenging conventional notions of chandeliers. Sleek in design and contemporary in chrome accented with gunmetal is anything but typical. The orbital design is freely formed by rays of metal creating show-stopping chandeliers.
 Drury Design
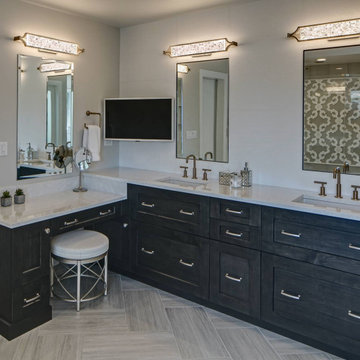
The original idea was to update the tile floor and the tub. That’s it.
A further discussion of wants and needs revealed intentions for an eventual larger shower and an improved vanity storage. It made sense to map out the possibilities and design our update with potential next steps in mind. The process was exciting, ultimately leading to the decision to do a full primary bath remodel.
Design Objectives:
-Maintain existing locations for all major bathroom functions
-Make the shower larger and more open
-Use luxurious materials throughout
-Improve vanity storage and define accessories for specific items
-Incorporate luxury shower fixtures
-Include the latest technology
Design Challenges
-Enlarging the shower in a typical rectangular shape would block the view and light from the alcove windows behind the tub
-Logical placement of the built-in shower caddy and all shower components in accordance with how and where they were to be used
-Keeping the long, back wall free from any shower modules to maintain the decorative tile design
-Combining the owner’s existing smart home system with a comprehensive shower system
-Planning cabinetry for hidden storage and use for various small appliances and make-up
-Integrating expensive shower wall tile with less expensive wall tile for aesthetic and budget purposes
-Incorporating special design features to balance the highly decorative shower tile
Design solutions:
-A clipped corner was planned for the shower bench seat – this allowed for a larger glass wall. The glass wall at the angled bench also brought more natural light into the shower
-Thoughtful shower space design prevented the crowding of features – the shower caddy and handheld shower head were placed on the full-height wall by the shower bench, the regular shower head and body sprays remained on the opposite wall, and the rain head was placed in the center of the shower
-A multi-port DTV system was installed, providing control of all shower components, including chromotherapy and music inside and outside the shower
-The lavish water-jet stone and glass decorative tile was paired with a less-expensive glass tile found in the mosaic
-Pull-out grooming organizers and electrical docking stations were incorporated into the cabinetry
Additional storage was created in the lower corner cabinet
The homeowners are thrilled with their new primary bathroom. Clear goals and carefully evaluated materials informed a fun and functional design that is both thoughtful and sumptuous!
22