
Search results for "Underlying issues" in Home Design Ideas
 Designs By Gia Interior Design and Renovation
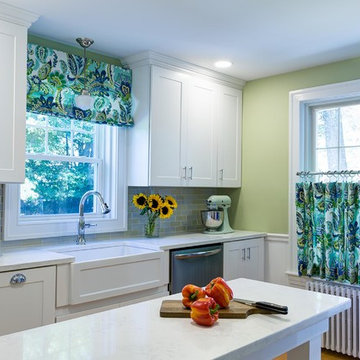
In this recent kitchen design and renovation project, these long time clients came to me originally, several years ago to start discussing the design of their kitchen. At that time, the kitchen in this 1800’s home included a kitchen that had been poorly remodeled in the 1980’s, so the kitchen had already lost most of it’s original charm. I created a design plan creating a beautiful large kitchen expanding the space into the adjacent rooms. My clients loved this design plan, but other home issues took precedence, so after a few additional years, my clients were now ready to start their kitchen project.
Their overall goals for the property did change since we first looked at this project, my clients decided that they did not want to enlarge or expand the small kitchen by opening it up to the adjacent rooms. So, I went back to the drawing board to create a kitchen in the existing kitchen space that fulfilled their new goals and created a beautiful functional space within the existing kitchen space. This new design, like my former design, honored this home’s traditional architecture, but added a light, fresh feel to the space using updated colors and material selections. This design consisted of additional storage and cabinetry, additional countertop space, and a small space to sit. We added new cabinetry, appliances, electrical, plumbing, beautiful quartz countertops, glass backsplash tile, traditional lighting fixtures, and finished everything off using beautiful classic hardware elements.
My clients are now in love with this new renovated kitchen space. It contains many of the elements of a much larger kitchen, and melds beautifully with the rest of the house which we have also designed renovated over the last few years. Finally my client’s get to enjoy their new kitchen space as much as they enjoy the rest of this beautiful home!
 Tile Doctor Ltd
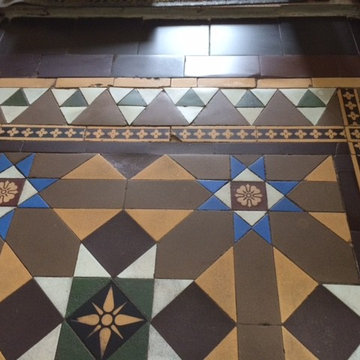
Recently Heidi and I worked on a Victorian tiled hallway floor at a house in Turton, Lancashire, an area which lies on the southern slopes of the West Pennine Moors. Victorian tile floors are commonly found in the reception area and hallways of older houses and public buildings, many of which date back to the reign of Queen Victoria (hence ‘Victorian’ tiles). It was during this time that the tile industry really started to boom.
Upon inspection it was evident that the floor in question had suffered from some settlement in the past resulting in a crack in the base under the tiles which had lifted one side and dropped the other; this is quite common in old houses resulting in some of the tiles becoming loose and would need to be fixed back in place before the floor could be given a good clean and re-seal.
Removing Lippage from Victorian Tiles
The concrete floor under the tile was patched as best as could be without pulling up more of the floor and the tiles were fixed in place, unfortunately however many of the triangular tiles in the adjacent border would not lay flat resulting in a lippage issue between them which naturally the customer was not very happy about.
Not wishing to cause the customer the extra expense of pulling up more tiles and relaying the concrete subfloor I left the tiles to fully set and then came back a few days later with a handheld Flex Machine fitted with a small 220 Grit Diamond pad to grind the tiles flat. As the pictures show, this made the difference and the diamond did not scratch the tiles despite the surface being dry.
Diamond pads are usually used on stone floors but after some investigation back at the Tile Doctor training centre we also realised they can be used on other types of tile including Victorian.
Once this was resolved the entire floor was given a thorough clean using a strong dilution of Tile Doctor Pro-Clean worked in with a scrubbing pad. As well as cleaning the tile and grout it also removed any remaining sealer which is important if you don’t know the history of the floor as the previous coating maybe incompatible with the new sealer. Once done the floor was given a thorough rinse with water which was then extracted from the floor with a wet vacuum.
Sealing Victorian Tiles
The floor was left to dry and I returned later to seal the tiles with a couple of coats of Tile Doctor Colour Grow which is an impregnating sealer that soaks into the pores of the tile and intensifies colour whilst also providing durable protection from within. Normally I use Seal and Go on Victorian Tiles however in this case the customer had specified a matt finish.
The results were fantastic and the client was very pleased with the now flat Victorian tiled floor which, thanks to the cleaning and sealing, was back to looking its best. Another happy customer for the Lancashire Tile Doctor!
 Castle Building & Remodeling
This modern home, near Cedar Lake, built in 1900, was originally a corner store. A massive conversion transformed the home into a spacious, multi-level residence in the 1990’s.
However, the home’s lot was unusually steep and overgrown with vegetation. In addition, there were concerns about soil erosion and water intrusion to the house. The homeowners wanted to resolve these issues and create a much more useable outdoor area for family and pets.
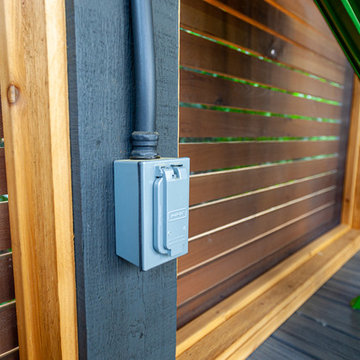
Castle, in conjunction with Field Outdoor Spaces, designed and built a large deck area in the back yard of the home, which includes a detached screen porch and a bar & grill area under a cedar pergola.
The previous, small deck was demolished and the sliding door replaced with a window. A new glass sliding door was inserted along a perpendicular wall to connect the home’s interior kitchen to the backyard oasis.
The screen house doors are made from six custom screen panels, attached to a top mount, soft-close track. Inside the screen porch, a patio heater allows the family to enjoy this space much of the year.
Concrete was the material chosen for the outdoor countertops, to ensure it lasts several years in Minnesota’s always-changing climate.
Trex decking was used throughout, along with red cedar porch, pergola and privacy lattice detailing.
The front entry of the home was also updated to include a large, open porch with access to the newly landscaped yard. Cable railings from Loftus Iron add to the contemporary style of the home, including a gate feature at the top of the front steps to contain the family pets when they’re let out into the yard.
Tour this project in person, September 28 – 29, during the 2019 Castle Home Tour!
Find the right local pro for your project
 AK Complete Home Renovations
ational Association of the Remodeling Industry Contractor of the Year (CoTY) Award Winning Design
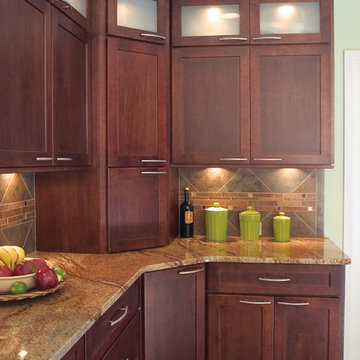
The new Marietta kitchen you see below is a far cry from the old, outdated and poorly designed kitchen that AK first saw. The homeowners complained that, among other issues, you could not open the oven and the refrigerator at the same time! The new kitchen boasts an incredible amount of customized storage, rich textures, colors a professional design plan that suited their unique lifestyle and acclaimed tile design.
 Designs By Gia Interior Design and Renovation
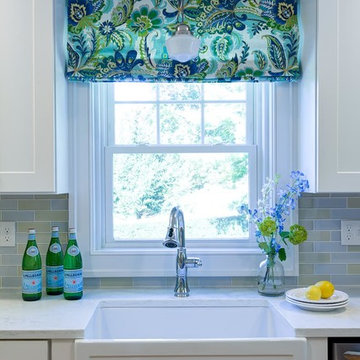
In this recent kitchen design and renovation project, these long time clients came to me originally, several years ago to start discussing the design of their kitchen. At that time, the kitchen in this 1800’s home included a kitchen that had been poorly remodeled in the 1980’s, so the kitchen had already lost most of it’s original charm. I created a design plan creating a beautiful large kitchen expanding the space into the adjacent rooms. My clients loved this design plan, but other home issues took precedence, so after a few additional years, my clients were now ready to start their kitchen project.
Their overall goals for the property did change since we first looked at this project, my clients decided that they did not want to enlarge or expand the small kitchen by opening it up to the adjacent rooms. So, I went back to the drawing board to create a kitchen in the existing kitchen space that fulfilled their new goals and created a beautiful functional space within the existing kitchen space. This new design, like my former design, honored this home’s traditional architecture, but added a light, fresh feel to the space using updated colors and material selections. This design consisted of additional storage and cabinetry, additional countertop space, and a small space to sit. We added new cabinetry, appliances, electrical, plumbing, beautiful quartz countertops, glass backsplash tile, traditional lighting fixtures, and finished everything off using beautiful classic hardware elements.
My clients are now in love with this new renovated kitchen space. It contains many of the elements of a much larger kitchen, and melds beautifully with the rest of the house which we have also designed renovated over the last few years. Finally my client’s get to enjoy their new kitchen space as much as they enjoy the rest of this beautiful home!
 Do Arch LLC
Our Process
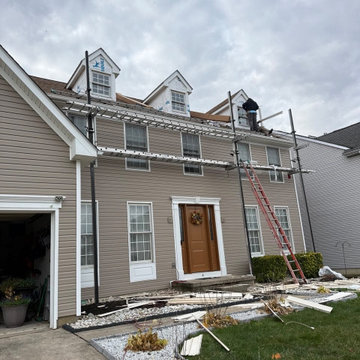
Every siding project we complete follows a structured, detail-focused approach to ensure long-term performance and a clean, high-end finish:
1. Preparation & Protection
We begin by protecting all surrounding areas, including landscaping, walkways, and entry points. This ensures a safe and clean job site from start to finish.
2. Removal of Existing Siding
The old siding is carefully removed and disposed of. During this stage, we inspect the underlying structure for any signs of damage or moisture issues.
3. Surface Inspection & Repairs
We address any compromised sheathing or framing as needed to create a solid, secure base for the new installation.
4. Weather Barrier Installation
A proper moisture barrier is installed to improve energy efficiency and protect the home from water intrusion.
5. Siding Installation
We install Double 4.5" Encore Dutch Lap siding in Natural Clay with precision, ensuring straight lines, tight seams, and consistent spacing throughout.
6. Trim, Shutters & Moldings
All shutters and exterior moldings are carefully reinstalled and aligned, maintaining the home’s original character while enhancing the updated look.
7. Final Detailing & Cleanup
We complete all finishing touches, conduct a full quality check, and leave the property clean and ready to enjoy.
 Do Arch LLC
Our Process
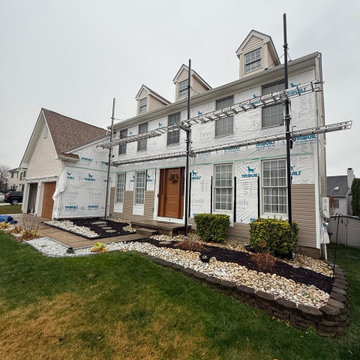
Every siding project we complete follows a structured, detail-focused approach to ensure long-term performance and a clean, high-end finish:
1. Preparation & Protection
We begin by protecting all surrounding areas, including landscaping, walkways, and entry points. This ensures a safe and clean job site from start to finish.
2. Removal of Existing Siding
The old siding is carefully removed and disposed of. During this stage, we inspect the underlying structure for any signs of damage or moisture issues.
3. Surface Inspection & Repairs
We address any compromised sheathing or framing as needed to create a solid, secure base for the new installation.
4. Weather Barrier Installation
A proper moisture barrier is installed to improve energy efficiency and protect the home from water intrusion.
5. Siding Installation
We install Double 4.5" Encore Dutch Lap siding in Natural Clay with precision, ensuring straight lines, tight seams, and consistent spacing throughout.
6. Trim, Shutters & Moldings
All shutters and exterior moldings are carefully reinstalled and aligned, maintaining the home’s original character while enhancing the updated look.
7. Final Detailing & Cleanup
We complete all finishing touches, conduct a full quality check, and leave the property clean and ready to enjoy.


 Greenhaven Landscapes Inc.
Hear what our clients, Karen & Robert, have to say about their project by clicking on the Facebook link and then the Videos tab.
Inspiration for a transitional full sun backyard stone landscaping in Chicago for fall.
Inspiration for a transitional full sun backyard stone landscaping in Chicago for fall.
 All for Surfaces
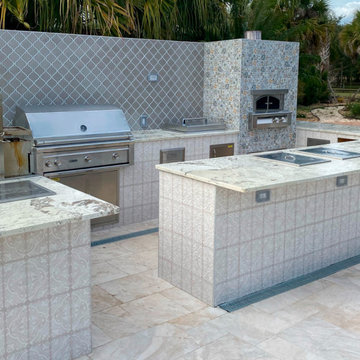
barbecue granite countertop. Why Granite for your BBQ? Granite is perhaps the best material for homeowners to use as an outdoor kitchen countertop. This stone’s durability can stand up against the harsh conditions on the South Florida with ease. Hot and sunny day? No problem! Granite can withstand the heat from the sun and hot pans without any issues. With a proper coat of sealant, granite is also resistant against stains, mold, and mildew so even the messiest gatherings or rainiest days won’t pose a threat. This natural stone is already very easy to maintain, but with a proper sealant, it will be even easier to take care of. No matter what style you choose, you wont need to worry about it fading under sun exposure. Sunlight can make darker colors hot to the touch, so you might want to purchase a lighter color if your outdoor kitchen doesn’t have shading. If you’re looking for to match the look of nature with your outdoor kitchen, consider going with a honed finish rather than a polished one. Overall, granite sets the bar high for materials to use in an outdoor kitchen countertop, but there are plenty of other great alternatives as well.
 Premier Design-Build-Remodel
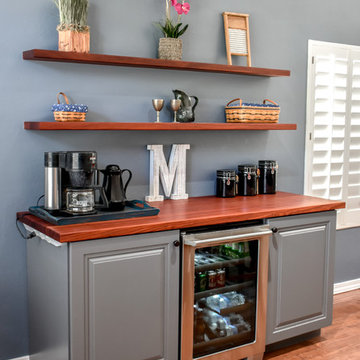
We are so blessed to have amazing customers! Thank you, Jay & Kelly, for letting us transform your kitchen! Luxury Open Concept Kitchen Design in Mesa. Knocked down multiple walls to create this Chef's Kitchen.
Photo Credit: Alicia Villarreal
 Iv Design
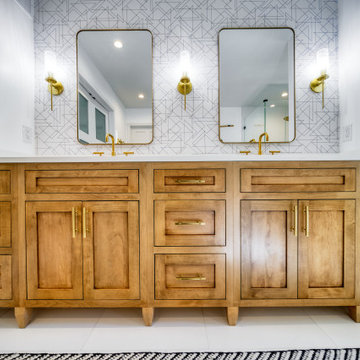
Freestanding bathtub - mid-sized modern master white tile and porcelain tile porcelain tile, white floor, double-sink and wallpaper freestanding bathtub idea in Chicago with recessed-panel cabinets, medium tone wood cabinets, a one-piece toilet, white walls, an undermount sink, quartzite countertops, a hinged shower door, white countertops, a niche and a built-in vanity
 Innovative Design Build
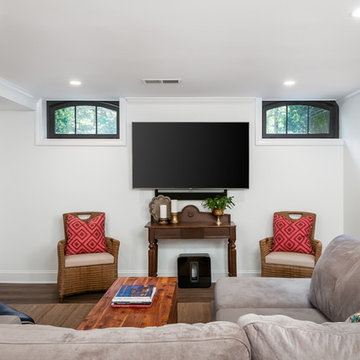
Our clients wanted a space to gather with friends and family for the children to play. There were 13 support posts that we had to work around. The awkward placement of the posts made the design a challenge. We created a floor plan to incorporate the 13 posts into special features including a built in wine fridge, custom shelving, and a playhouse. Now, some of the most challenging issues add character and a custom feel to the space. In addition to the large gathering areas, we finished out a charming powder room with a blue vanity, round mirror and brass fixtures.
 KitchenLab Interiors
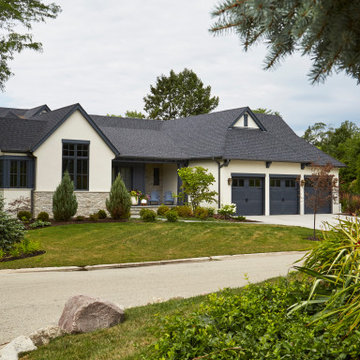
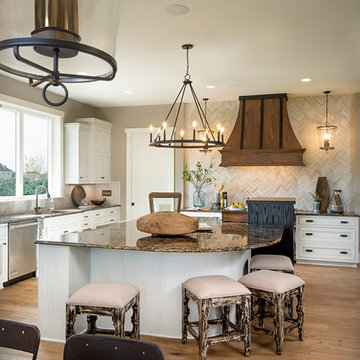
KitchenLab Interiors’ first, entirely new construction project in collaboration with GTH architects who designed the residence. KLI was responsible for all interior finishes, fixtures, furnishings, and design including the stairs, casework, interior doors, moldings and millwork. KLI also worked with the client on selecting the roof, exterior stucco and paint colors, stone, windows, and doors. The homeowners had purchased the existing home on a lakefront lot of the Valley Lo community in Glenview, thinking that it would be a gut renovation, but when they discovered a host of issues including mold, they decided to tear it down and start from scratch. The minute you look out the living room windows, you feel as though you're on a lakeside vacation in Wisconsin or Michigan. We wanted to help the homeowners achieve this feeling throughout the house - merging the causal vibe of a vacation home with the elegance desired for a primary residence. This project is unique and personal in many ways - Rebekah and the homeowner, Lorie, had grown up together in a small suburb of Columbus, Ohio. Lorie had been Rebekah's babysitter and was like an older sister growing up. They were both heavily influenced by the style of the late 70's and early 80's boho/hippy meets disco and 80's glam, and both credit their moms for an early interest in anything related to art, design, and style. One of the biggest challenges of doing a new construction project is that it takes so much longer to plan and execute and by the time tile and lighting is installed, you might be bored by the selections of feel like you've seen them everywhere already. “I really tried to pull myself, our team and the client away from the echo-chamber of Pinterest and Instagram. We fell in love with counter stools 3 years ago that I couldn't bring myself to pull the trigger on, thank god, because then they started showing up literally everywhere", Rebekah recalls. Lots of one of a kind vintage rugs and furnishings make the home feel less brand-spanking new. The best projects come from a team slightly outside their comfort zone. One of the funniest things Lorie says to Rebekah, "I gave you everything you wanted", which is pretty hilarious coming from a client to a designer.
 JuliaGarden Design Ltd.
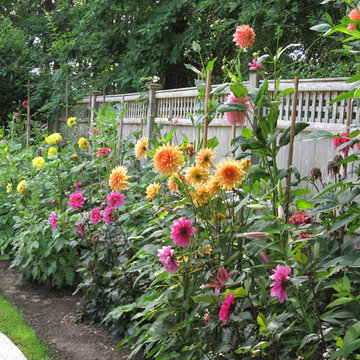
A private wooded pool garden in part shady area. The dahlia border manages to bloom with early morning sunlight. This is a border of bright colors using hot pinks, oranges, peach, purples and reds. The dahlias are most dinner plate varieties.
 Ashton Renovations
The original ensuite bathroom in this condominium required renovations to replace problematic Kitec plumbing. The layout in the space remained the same, but improvements were made to address certain design challenges with lighting, automation, and space. The aim was to create a modern bathroom design with textured wood features, and the feel of metallic black accents.
A number of prominent changes were made to improve the use of space. The original entry, a left-handed door swinging into the bathroom, was replaced. It interfered with the vanity clear floor space. It also made the use of the bathroom difficult when two users were present. It was changed to a soft closing pocket door. To avoid losing space it was installed by creating a wall cavity on the outside of the bathroom. This door also included frosted glass panels to allow natural light into the space. Double sliding glass shower doors were also installed to address access issues to the shower valve.
Storage improvements included the installation of dual inset medicine cabinets, and pull out drawers within the wall hung vanity. The depth of the medicine cabinets were extended outwards, and this nice detail was finished with a textured wood finish. The addition of the wall hung vanity also created the feeling of more space beneath the units and allowed for under cabinet lighting.
Lighting and automation improvements included the addition of HUE LED lighting. This was done by installing two shower pot lights, a 6” main potlight, and under cabinet lighting. These are all controlled by the Philips Hue App that programs routines, scenes, and other settings.
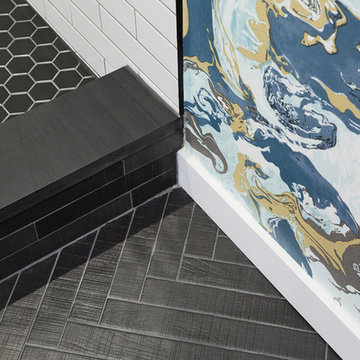
Some of the other highlights of this modern bathroom include dark grout, which contrasts nicely with the elongated white tile, a thermostatic shower system, herringbone textured porcelain floor tile, and a Schluter Kerdi waterproofing shower system. This bathroom is made most unique though with the choice of wallpaper, which can be described as modern luxury, a graphic take on agate stone patterns with metallic embellishments.
 Maughan Design & Remodel
Whitney Lyons
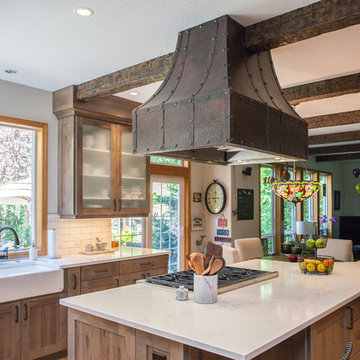
Large mountain style u-shaped light wood floor and beige floor eat-in kitchen photo in Portland with a farmhouse sink, shaker cabinets, medium tone wood cabinets, quartz countertops, white backsplash, ceramic backsplash, stainless steel appliances and an island
Large mountain style u-shaped light wood floor and beige floor eat-in kitchen photo in Portland with a farmhouse sink, shaker cabinets, medium tone wood cabinets, quartz countertops, white backsplash, ceramic backsplash, stainless steel appliances and an island

 Bakes & Kropp Fine Cabinetry
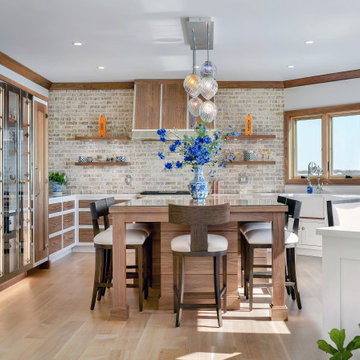
For this newly-built waterfront home on Long Island’s north shore, Bakes & Kropp designed a modern, transitional kitchen and complimentary bathroom spaces. Led by Senior Kitchen Designer Mary Dimichino, the design team drew inspiration from the peaceful water vista framed by the kitchen windows. The result is an open, airy space with clean lines and a soothing mixture of white and walnut finishes tempered by polished metal accents.
 INSPIRED KITCHEN DESIGN
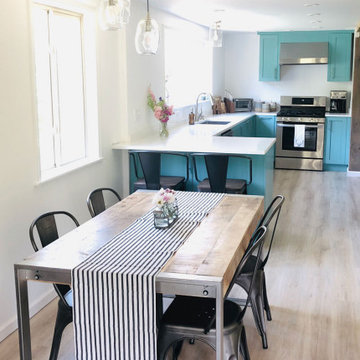
For Amanda, once the kitchen process started, her home posed a bit of a design obstacle course.
She explains: “A big obstacle we faced was when we started moving a wall. It turned out that everything needed to be rewired and new plumbing had to be installed.”
After that issue was addressed, she also had the range vent arrive damaged upon delivery and also encountered several weather-related delays, including leaks in her roof.
“I also had some issues with getting new inspiration on Pinterest every few days, and then trying to change the design while [the contractor] was in the middle of the remodel. He did not love that,” she adds.
And, of course, she wanted to bring in more light by expanding the window and to close the odd window to the laundry room. This was achieved by expanding the window as she wanted and placing open shelving on either side of the window, which cleverly insured that upper cabinets wouldn’t block out any light.
Amanda concludes with some useful advice for other IKEA remodelers who are just starting out with their IKEA kitchen project.
“If you feel [overwhelmed] when you see the price tag of cabinets at other stores, go to IKEA. My cabinets ended up costing me about 30% of what I would’ve spent at another store,” she says.
She concludes: “My other piece of advice for anybody who wants to do a kitchen remodel is to pick your design and stick with it.”
And if any obstacles present themselves – even things outside your control like weather or damaged items – definitely look on the bright side, you’ll have a new IKEA kitchen in no time!
 Reico Kitchen & Bath
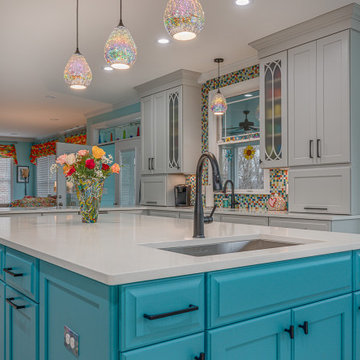
Designed by Darcie Duncan of Reico Kitchen & Bath in Salem, VA in collaboration with Kathryn Oddo of Interiors Unlimited and Roger White of White Builders, this eclectic style two-finish kitchen features a customer splash of color. The kitchen features Greenfield Cabinetry in the Carlton door style in two painted finishes. The perimeter cabinets are in the finish Repose and the kitchen island the Benjamin Moore color San Jose Blue. Kitchen countertops are MSI Q in the color Snow White. Custom glass mosaic tile was provided by others.
“Working with Kathryn Oddo of Interiors Unlimited and Roger White of White Builders, this kitchen was so much fun to work on,” said Darcie. “The customer loves bright colors and wanted to incorporate them into the design to transform a darker and less functional kitchen. It was a refreshing change from the white cabinets. Supply issues forced us to re-visit the island countertop selection. This was the biggest challenge for this project because the kitchen was designed around the original selection as a focal point. The client wanted something that was perfectly her, and through everyone’s team work it all came together on the island countertop and entire kitchen.”
“I love my kitchen remodel,” said the client. “Reico truly transformed the space, previously dark and less functional, into my dream kitchen!”
Photos courtesy of Sowder Group LLC.
52