
Search results for "Exhausts" in Home Design Ideas
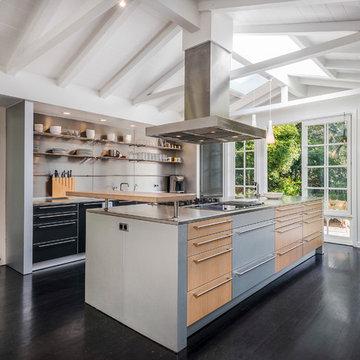
 Riskin Partners
Example of a trendy galley dark wood floor kitchen design in Santa Barbara with flat-panel cabinets, black cabinets, stainless steel appliances and an island
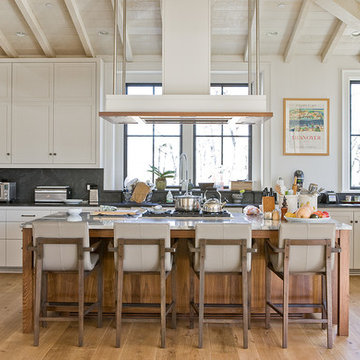
Transitional u-shaped light wood floor kitchen photo in Boston with recessed-panel cabinets, beige cabinets, gray backsplash, stainless steel appliances and an island
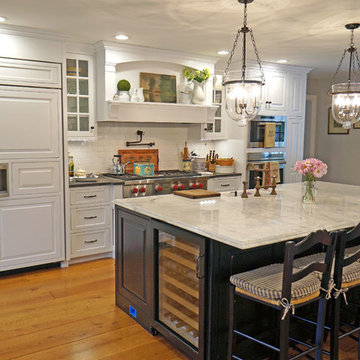
 Spotlight Design Center
Large cottage single-wall medium tone wood floor eat-in kitchen photo in Boston with a farmhouse sink, white cabinets, quartzite countertops, white backsplash, ceramic backsplash, paneled appliances, an island and raised-panel cabinets
Find the right local pro for your project
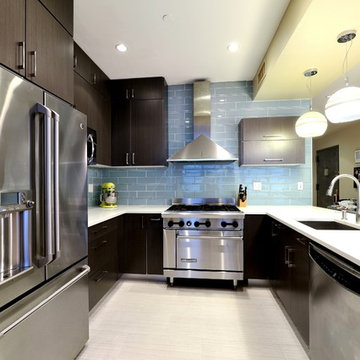
 KBR Design & Build
Kitchen remodel in West Village Manhattan.
Blue tile back-splash against sold white counter tops and stainless steel appliances. .
KBR Design & Build
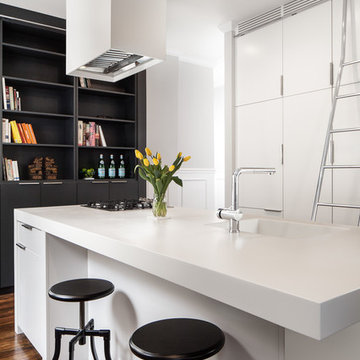
 Bunker Workshop
Matt Delphenich
Eat-in kitchen - small contemporary dark wood floor eat-in kitchen idea in Boston with an integrated sink, flat-panel cabinets, white cabinets, solid surface countertops, paneled appliances and an island
Eat-in kitchen - small contemporary dark wood floor eat-in kitchen idea in Boston with an integrated sink, flat-panel cabinets, white cabinets, solid surface countertops, paneled appliances and an island
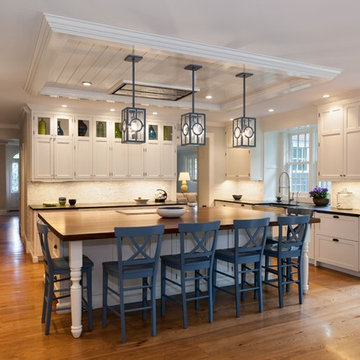
 The Remodeling Company
This gorgeous, spacious kitchen is the perfect place to
gather. The large black walnut island fits 6 seated guests alone!
Damianos Photography
Example of a small classic u-shaped brown floor and medium tone wood floor eat-in kitchen design in Boston with an undermount sink, wood countertops, stainless steel appliances, brown countertops, recessed-panel cabinets, white cabinets, white backsplash, marble backsplash and an island
Example of a small classic u-shaped brown floor and medium tone wood floor eat-in kitchen design in Boston with an undermount sink, wood countertops, stainless steel appliances, brown countertops, recessed-panel cabinets, white cabinets, white backsplash, marble backsplash and an island
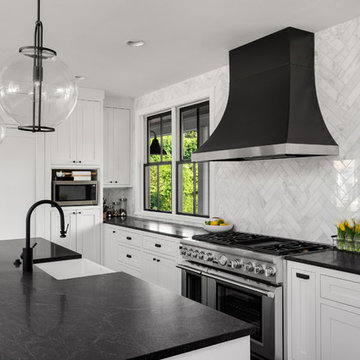
 Kitchen Master Design & Remodeling LLC
beautiful white kitchen in new luxury home with island, pendant lights, and hardwood floors. Island and Counters are Black, Hardwood Floors are Dark, and Cabinets, Backsplash, and Woodwork are White
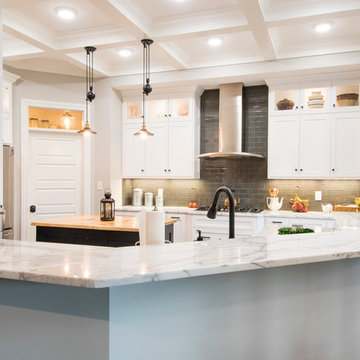

 South Coast Home Builders, Inc.
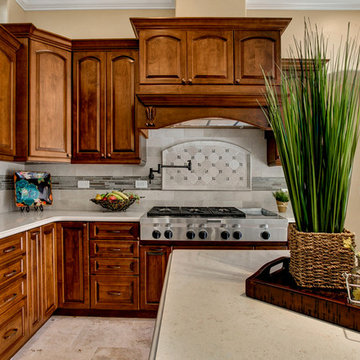
Kitchen with Commercial Grade Cooktop, Exhaust Hood, Pot Filler, & Double Oven.
Inspiration for a large mediterranean u-shaped travertine floor and beige floor kitchen remodel in San Diego with raised-panel cabinets, medium tone wood cabinets, quartzite countertops, beige backsplash, stone tile backsplash and stainless steel appliances
Inspiration for a large mediterranean u-shaped travertine floor and beige floor kitchen remodel in San Diego with raised-panel cabinets, medium tone wood cabinets, quartzite countertops, beige backsplash, stone tile backsplash and stainless steel appliances
 AOFOTOS.com
AOFOTOS.com © 2016 Houzz
Designer: Brooke Eversoll, Bee Studios Design Build Group
Contractor: Norm Walters Construction
 Tim Englert Construction, Inc.
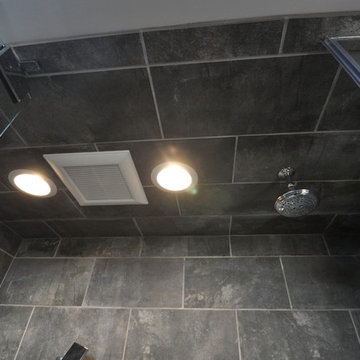
The tile extends all the way to the ceiling that has recessed lighting, bath exhaust fan and rain shower head
Example of a trendy ceramic tile ceramic tile double shower design in Cleveland with an undermount sink and quartz countertops
Example of a trendy ceramic tile ceramic tile double shower design in Cleveland with an undermount sink and quartz countertops
 South Coast Home Builders, Inc.
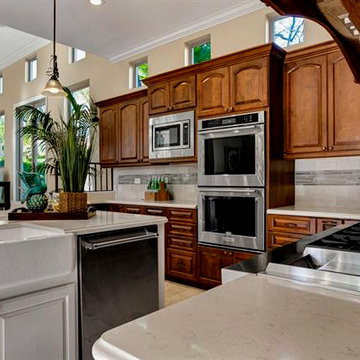
Kitchen with Commercial Grade S.S. Cooktop, Exhaust Hood, Pot Filler, Microwave, D/W, & Double Oven.
Kitchen - large mediterranean u-shaped travertine floor and beige floor kitchen idea in San Diego with a farmhouse sink, raised-panel cabinets, medium tone wood cabinets, quartzite countertops, beige backsplash, stone tile backsplash, stainless steel appliances and an island
Kitchen - large mediterranean u-shaped travertine floor and beige floor kitchen idea in San Diego with a farmhouse sink, raised-panel cabinets, medium tone wood cabinets, quartzite countertops, beige backsplash, stone tile backsplash, stainless steel appliances and an island
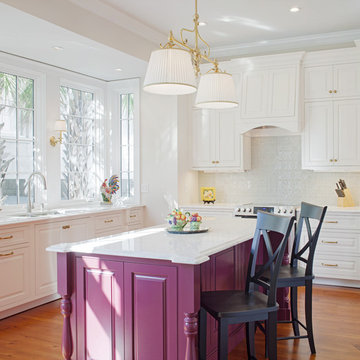
 Ellsworth Design Build
Traditional home in the heart of Savannah's Historic Landmark District that was built in 1999 had an 8' by 11' kitchen completely cut off from the rest of the house. We pushed out the back of the house three feet to create a bay to hold a sink, allowing us to completely open up the floorplan. The island color was based on the clients favorite shade of red (it also matches the front door). The rest of the palette is kept light and soft with a play of materials like the original pine floors, grass cloth wallpaper, Walker Zanger backsplash tile, and Viaterra Quartz 'marble' counters. The cabinets are all fully custom including an integrated dishwasher. It is a complete transformation from where we started!
Photos by Richard Leo Johnson of Atlantic Archives
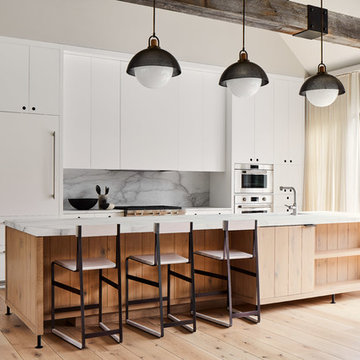
 Kevin O'Sullivan + Associates
Photo: Read McKendree
Inspiration for a coastal galley medium tone wood floor and brown floor kitchen remodel in New York with an undermount sink, flat-panel cabinets, white cabinets, gray backsplash, stone slab backsplash, paneled appliances, an island and white countertops
Inspiration for a coastal galley medium tone wood floor and brown floor kitchen remodel in New York with an undermount sink, flat-panel cabinets, white cabinets, gray backsplash, stone slab backsplash, paneled appliances, an island and white countertops
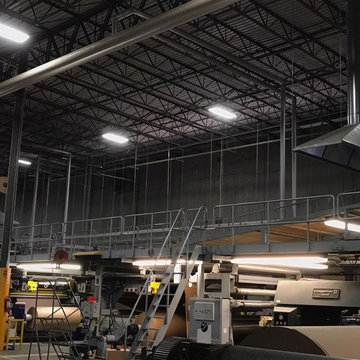


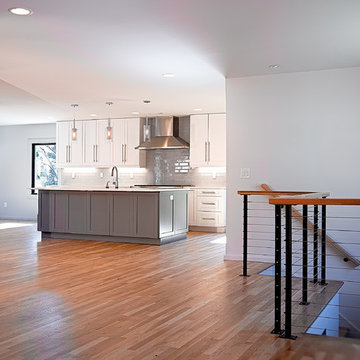
 Rossoto Art LLC
William Rossoto
Eat-in kitchen - mid-sized modern galley light wood floor and brown floor eat-in kitchen idea with an undermount sink, shaker cabinets, white cabinets, quartzite countertops, gray backsplash, subway tile backsplash, stainless steel appliances, an island and white countertops
Eat-in kitchen - mid-sized modern galley light wood floor and brown floor eat-in kitchen idea with an undermount sink, shaker cabinets, white cabinets, quartzite countertops, gray backsplash, subway tile backsplash, stainless steel appliances, an island and white countertops
 Dream Home Construction
Our client contacted us regarding their outdated bathroom. They could not handle
taking a shower in their “TOMB” shower anymore. They wanted to update their
bathroom giving it a streamlined look with a traditional touch.
Our client’s desires were:
• Wanted a large open shower
• Wanted a larger master closet
• Wanted a better way of excising the wall cabinet by the vanity
• They wanted to remove their Jacuzzi tub
After coming up with a design that satisfied the customer’s needs, we started the demo
process and ran into the first obstacle. Because of the construction of the original
closed shower, there was no moisture barrier used which caused the existing framing
and exterior sheathing to decay. We were also startled by what look like an expanding
black cloud of carpenter ants, when we opened up the wall.
After making the necessary repairs, we continued with the remodel which consisted of a
dramatic large shower, the large subway design, granite shelving along with the bronze
accent tile that enhances the over all look of the show er. It also gave it a larger
appearance with the custom glass enclose. Another concern we had after relocating the
shower to its new location, was that it was under an existing skylight. We felt that there
maybe a moisture concern especially during the winter months. To over come this
obstacle we installed an exhaust fan near the ceiling in the w all above the shower. We
painted the exhaust fan grill the same color of the walls, so the fan would not stand out.
To make sure that there would not be any problem with condensation around the
skylight , we trimmed the skylight with azek material.
We installed custom cabinets that reflected the look the client was trying to achieve.
During this process we over came our last obstacle by installing bi-fold style doors on
the wall cabinet next to the vanity, which would swing completely out of the way so the
customer could have full access to the slide drawers. The handles were placed on the
doors to make it look like a regular two door wall cabinet. The bi-fold action also
allowanced it to clear a wall sconce.

 TOC design & construction inc.
DESIGNED BY TOC design
CONSTRUCTION BY TOC design & Construction inc.
PHOTOS BY : Tania Scardellato
I was fortunate to have a young family approach me in desperate need to renovate there only 3 piece bathroom. This space was In dire need of a remodel, with old brown wall to wall tiles and a dated bulky yellow brown single sink vanity.
Storage was a must, lighting a necessity, and proper accessibility to the shower bath area.
We had a tight budget to respect, but a full gut of this bathroom was required. And a good thing too, once we started doing the demolition we noticed that mildew and rotting floors and walls had accumulated throughout the years. Doing it right the first time is no joke when dealing with water and electrical issues.
We discarded all reminisce of old and built from scratch, new walls, new plumbing, new electrical ,new insulation and a new window, a new fan that actually exhausted outside ( I say this laughing as you would be amazed at how many fans are installed but don’t exhaust outside, and you the client would never know unless you go inside the attic space.
Once all the hard stuff was done, the rest is just a matter of smart design. If you have a small bathroom here are some tips to guide you.
10 tips for making a small bathroom feel larger
Is your tiny bathroom cramping your functionality and style, leaving you longing for the enormous bathrooms gracing the pages of design magazines? Even if your bathroom is a fraction of the size, all it takes is some design savvy to make the most of the space you have. Consider these 10 smart tips that will help your bathroom look, feel and function like those larger contenders.
1-Get creative with corners
Space is at a premium in small bathrooms, so it's important to maximize every inch. Corners, for example, provide extra space for shelving, storage units and even hooks. Get creative and install unique design solutions that are not only functional, but also eye-catching. If you love the airiness of floating cabinets, add baskets or decorative boxes under for extra storage. If you are installing floating cabinets insure that they are installed securely to studs or plywood at wall.
2- Let solid colors shine
Busy patterns have a shrinking effect and make small bathrooms seem even smaller. Conversely, light natural hues make a space feel more open. If you're itching to get creative with design, experiment with textures but keep overpowering patterns to a minimum. Tone on tone is the best to achieve this.
3 - Maximize your bathtub
A bathtub takes up a significant portion of the room, but modern, compact options with curved basins, can make the tub feel larger when in use, all while conserving space.
4 - Select a smaller faucet
A faucet is jewelry for the bathroom. And just as accessories can overpower an outfit, a big bulky faucet isn't flattering in a small bath. Single-handle designs conserve counter space, while a wall-mount installation frees it up all together and can create quite the wow-factor, if the budget can accommodate the required changes to plumbing behind the wall.
5 - Make vanity storage simple
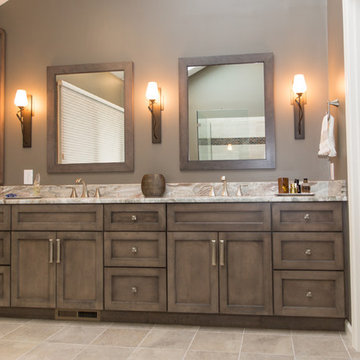
If you're in a storage war with your small bathroom, you're not alone in the battle. Toiletries and personal supplies without a place to call home only add clutter and chaos. Store smart with a space-saving vanity, the dual sink vanity shown here, looks quite simple, but in reality it has 4 sets of full extension drawers, and the vanity tower adds extra storage without overpowering the use of space.
6 - Show off the shower
Shower curtains may be pretty, but they interrupt the visual flow of a bathing space and make it feel significantly smaller. In bathrooms with small footprints, opt for a clear glass sliding shower door that doesn't require the clearance of one with a hinged design. Or as shown in this design and for fraction less expensive a half hinged panel installed on a fixed tempered glass panel. If you're embarking on a big remodel, create the illusion of more space by using same tile in the shower that's used throughout; instead of seeing them as two separate zones, the eye will read them as one.
7 - Discover the treasure of hidden storage
Work with a contractor, and you just might find some serious storage potential hidden behind your walls. Whether it's utilizing space between the studs for shallow shelving or a creating a small linen closet by annexing space from an adjacent room, even small additions can make a big difference.
8 - Focal Point
Tile is a beautiful, durable addition to any bathroom. For dainty spaces, consider installing tile at a diagonal to accentuate the focal point or as in this bathroom I used an oversized textured pattern to bring depth to the space at the window wall.
9 - Choose the right lights
Strategically install light to reflect and brighten a small bathroom to make it appear larger. Recessed lighting is an affordable solution for tiny rooms, offering ample light while taking up little space. Wall sconces alongside a mirror also reflect off the walls and make a room feel bright and airy. I always recommend going with LED lighting at 2800 to 3000K.
10 – Accessorize
This is your time to shine in your decorating skills, have fun with your towels, you can change the color scheme daily just by adding pops of color in your accessories, make sure to get items that serve a dual purpose, like baskets, boxes they can always be used as hampers, storing of towels and even a nice display for your guest.
 TOC design & construction inc.
DESIGNED BY TOC design
CONSTRUCTION BY TOC design & Construction inc.
PHOTOS BY : Tania Scardellato
I was fortunate to have a young family approach me in desperate need to renovate there only 3 piece bathroom. This space was In dire need of a remodel, with old brown wall to wall tiles and a dated bulky yellow brown single sink vanity.
Storage was a must, lighting a necessity, and proper accessibility to the shower bath area.
We had a tight budget to respect, but a full gut of this bathroom was required. And a good thing too, once we started doing the demolition we noticed that mildew and rotting floors and walls had accumulated throughout the years. Doing it right the first time is no joke when dealing with water and electrical issues.
We discarded all reminisce of old and built from scratch, new walls, new plumbing, new electrical ,new insulation and a new window, a new fan that actually exhausted outside ( I say this laughing as you would be amazed at how many fans are installed but don’t exhaust outside, and you the client would never know unless you go inside the attic space.
Once all the hard stuff was done, the rest is just a matter of smart design. If you have a small bathroom here are some tips to guide you.
10 tips for making a small bathroom feel larger
Is your tiny bathroom cramping your functionality and style, leaving you longing for the enormous bathrooms gracing the pages of design magazines? Even if your bathroom is a fraction of the size, all it takes is some design savvy to make the most of the space you have. Consider these 10 smart tips that will help your bathroom look, feel and function like those larger contenders.
1-Get creative with corners
Space is at a premium in small bathrooms, so it's important to maximize every inch. Corners, for example, provide extra space for shelving, storage units and even hooks. Get creative and install unique design solutions that are not only functional, but also eye-catching. If you love the airiness of floating cabinets, add baskets or decorative boxes under for extra storage. If you are installing floating cabinets insure that they are installed securely to studs or plywood at wall.
2- Let solid colors shine
Busy patterns have a shrinking effect and make small bathrooms seem even smaller. Conversely, light natural hues make a space feel more open. If you're itching to get creative with design, experiment with textures but keep overpowering patterns to a minimum. Tone on tone is the best to achieve this.
3 - Maximize your bathtub
A bathtub takes up a significant portion of the room, but modern, compact options with curved basins, can make the tub feel larger when in use, all while conserving space.
4 - Select a smaller faucet
A faucet is jewelry for the bathroom. And just as accessories can overpower an outfit, a big bulky faucet isn't flattering in a small bath. Single-handle designs conserve counter space, while a wall-mount installation frees it up all together and can create quite the wow-factor, if the budget can accommodate the required changes to plumbing behind the wall.
5 - Make vanity storage simple
If you're in a storage war with your small bathroom, you're not alone in the battle. Toiletries and personal supplies without a place to call home only add clutter and chaos. Store smart with a space-saving vanity, the dual sink vanity shown here, looks quite simple, but in reality it has 4 sets of full extension drawers, and the vanity tower adds extra storage without overpowering the use of space.
6 - Show off the shower
Shower curtains may be pretty, but they interrupt the visual flow of a bathing space and make it feel significantly smaller. In bathrooms with small footprints, opt for a clear glass sliding shower door that doesn't require the clearance of one with a hinged design. Or as shown in this design and for fraction less expensive a half hinged panel installed on a fixed tempered glass panel. If you're embarking on a big remodel, create the illusion of more space by using same tile in the shower that's used throughout; instead of seeing them as two separate zones, the eye will read them as one.
7 - Discover the treasure of hidden storage
Work with a contractor, and you just might find some serious storage potential hidden behind your walls. Whether it's utilizing space between the studs for shallow shelving or a creating a small linen closet by annexing space from an adjacent room, even small additions can make a big difference.
8 - Focal Point
Tile is a beautiful, durable addition to any bathroom. For dainty spaces, consider installing tile at a diagonal to accentuate the focal point or as in this bathroom I used an oversized textured pattern to bring depth to the space at the window wall.
9 - Choose the right lights
Strategically install light to reflect and brighten a small bathroom to make it appear larger. Recessed lighting is an affordable solution for tiny rooms, offering ample light while taking up little space. Wall sconces alongside a mirror also reflect off the walls and make a room feel bright and airy. I always recommend going with LED lighting at 2800 to 3000K.
10 – Accessorize
This is your time to shine in your decorating skills, have fun with your towels, you can change the color scheme daily just by adding pops of color in your accessories, make sure to get items that serve a dual purpose, like baskets, boxes they can always be used as hampers, storing of towels and even a nice display for your guest.
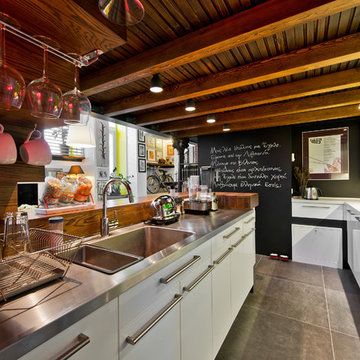
 Dalius & Greta Design
Architect Dalius Regelskis
DGD / Dalius & Greta Design
Vilnius, Lithuania
Kitchen - eclectic kitchen idea
Kitchen - eclectic kitchen idea
8