
Search results for "Entailed" in Home Design Ideas
 Laura Kaehler Architects
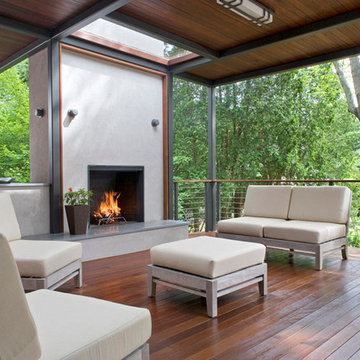
We designed a new first floor at this 1980's contemporary in Old Greenwich. This entailed designing a new angre wood kitchen with frosted glass and metal uppers, opening up the wall between the living and dining rooms and adding a large dual level porch and deck.
Richard Basic: Project Architect
 Kitchens of Diablo
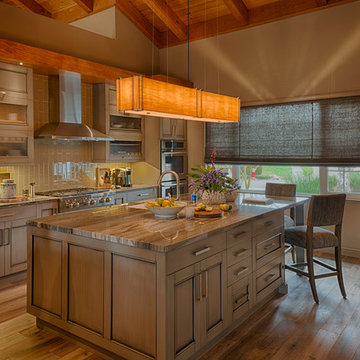
This whole house remodel is a transitional elegant piece of art work. The wall of refrigeration to the Quartzite counters and fireplace. The cabinetry is by Elmwood Cabinetry. The cabinets are all wood construction with a painted finish called Fossil Dusk. The door style is Munroe. The countertop is a natural Quartzite stone in Ocean Tide with a 1 1/2" Beveled Edge. The cooktop is a 36" Wolf gas cooktop. The refrigerator wall is made up of two 30" Subzero Integrated columns, one a full refrigerator, and the other side a full freezer. The outer ends of the wall are two wine fridges by Subzero both 24" and Integrated. The hood is a 42" Zephyr Venezia. The double ovens are 30" by Jenn-Air Dual Fan Convection Ovens. The sink is an integrated sink. The faucet, Air Gap, Air Switch are all Rohl in Satin Nickel. The instant hot dispenser is by brasstech and is in stainless steel. The pendant light is by Ultralights from there Genesis collection in a custom size. The tile is all from Siena Tile in San Ramon, CA. The backsplash is Tomei Lunada Bay Tile in Loft Natural 3" x 12". The fireplace tile is Quartzite rock by Norstone in Charcoal. The paint is by Kelly Moore. The walls are Creek Bay KM5784-3. The accent walls and trim are Country Club KM5785-3. All the cabinet hardware is by Top Knobs. The barn door and barn door hardware is all from Rustica Hardware.
 ORIJIN STONE, LLC
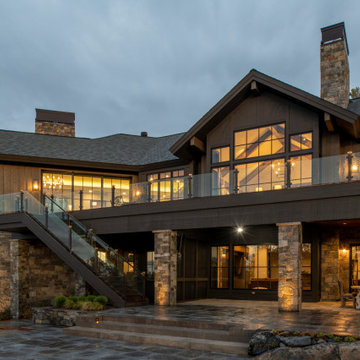
At the edge of the Minnesota/Canadian border sits this stunning private estate. Perched on a rocky ledge overlooking an adjoined private island, the landscape install entailed blasting into the rock to form a pool. The impressive exterior of the house is clad in ORIJIN STONE's beautiful Wolfeboro™ Granite veneer, and interior features include ORIJIN natural stone tile and custom stone work.
**Also featured here: ORIJIN STONE Connemara™ Sandstone pool paving. ORIJIN STONE custom Ferris™ Limestone Pool coping & steps.
Architecture: Eskuche Design Group
Builder: Wagner Construction, International Falls, MN
Landscape Design: Mom's Design Build
Interior Design: Studio M Interiors
Photography: Scott Amundson Photography
Find the right local pro for your project
 StoneUnlimited Kitchen and Bath Remodeling
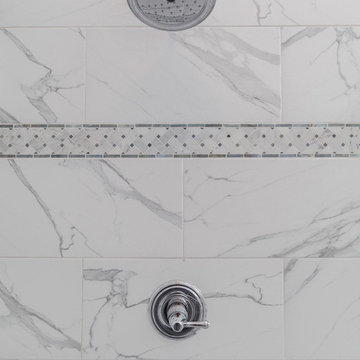
This exquisite bathroom remodel located in Alpharetta, Georgia is the perfect place for any homeowner to slip away into luxurious relaxation.
This bathroom transformation entailed removing two walls to reconfigure the vanity and maximize the square footage. A double vanity was placed to one wall to allow the placement of the beautiful Danae Free Standing Tub. The seamless Serenity Shower glass enclosure showcases detailed tile work and double Delta Cassidy shower rain cans and trim. An airy, spa-like feel was created by combining white marble style tile, Super White Dolomite vanity top and the Sea Salt Sherwin Williams paint on the walls. The dark grey shaker cabinets compliment the Bianco Gioia Marble Basket-weave accent tile and adds a touch of contrast and sophistication.
Vanity Top: 3CM Super White Dolomite with Standard Edge
Hardware: Ascendra Pulls in Polished Chrome
Tub: Danae Acrylic Freestanding Tub with Sidonie Free Standing Tub Faucet with Hand Shower in Chrome
Trims & Finishes: Delta Cassidy Series in Chrome
Tile : Kendal Bianco & Bianco Gioia Marble Basket-weave
 Neri Architects
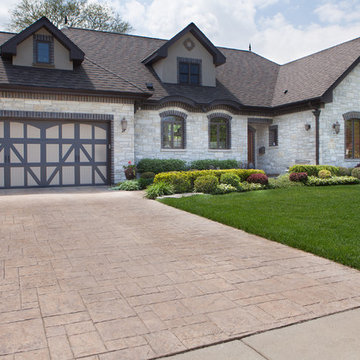
1,500 s.f. addition entails reconfiguring the first floor to accommodate a larger open kitchen plan, additional garage space, and an additional hall bath and changing the existing hall bath to additional space for the existing master bath. The northwest bedroom was converted to a walk in closet for the master suite. For the open plan to work the basement stair had to be relocated and an addition of a stair to the new second floor which accesses 2 additional bedrooms and a hall bath. The great room was upgraded with a vaulted ceiling and a masonry fireplace which contained an extra flue for an exterior fireplace from the rear patio.
 Alina Hallaq Design LLC
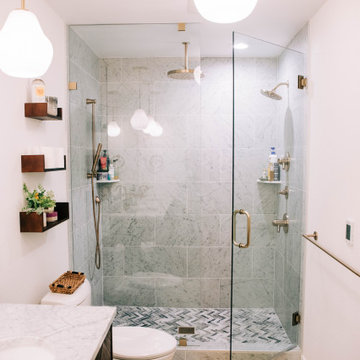
Nestled in the heart of Kirkland, this condominium underwent a breathtaking transformation. While most rooms had a good layout, with living and dining room windows offering a stunning view of Lake Washington against the backdrop of majestic mountains, I opted to give the kitchen and both bathrooms a complete layout makeover. This intricate project necessitated the expertise of structural and mechanical engineers.
Now, let's delve into the kitchen remodel—a true masterpiece. It entailed dramatic changes in layout, plumbing, and equipment placement. We closely collaborated with the client to craft a brand-new design. A primary goal was to create a spacious, functional kitchen space with ample storage, perfect for family gatherings. By removing two interior walls and retaining a structural column, we fashioned an inviting island with a cozy seating area.
 Advance Design Studio, Ltd.
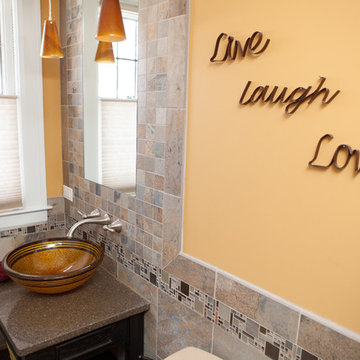
This well-loved home belonging to a family of seven was overdue for some more room. Renovations by the team at Advance Design Studio entailed both a lower and upper level addition to original home. Included in the project was a much larger kitchen, eating area, family room and mud room with a renovated powder room on the first floor. The new upper level included a new master suite with his and hers closets, a new master bath, outdoor balcony patio space, and a renovation to the only other full bath on in that part of the house.
Having five children formerly meant that when everyone was seated at the large kitchen table, they couldn’t open the refrigerator door! So naturally the main focus was on the kitchen, with a desire to create a gathering place where the whole family could hang out easily with room to spare. The homeowner had a love of all things Irish, and careful details in the crown molding, hardware and tile backsplash were a reflection. Rich cherry cabinetry and green granite counter tops complete a traditional look so as to fit right in with the elegant old molding and door profiles in this fine old home.
The second focus for these parents was a master suite and bathroom of their own! After years of sharing, this was an important feature in the new space. This simple yet efficient bath space needed to accommodate a long wall of windows to work with the exterior design. A generous shower enclosure with a comfortable bench seat is open visually to the his and hers vanity areas, and a spacious tub. The makeup table enjoys lots of natural light spilling through large windows and an exit door to the adult’s only exclusive coffee retreat on the rooftop adjacent.
Added square footage to the footprint of the house allowed for a spacious family room and much needed breakfast area. The dining room pass through was accentuated by a period appropriate transom detail encasing custom designed carved glass detailing that appears as if it’s been there all along. Reclaimed painted tin panels were added to the dining room ceiling amongst elegant crown molding for unique and dramatic dining room flair. An efficient dry bar area was tucked neatly between the great room spaces, offering an excellent entertainment area to circulating guests and family at any time.
This large family now enjoys regular Sunday breakfasts and dinners in a space that they all love to hang out in. The client reports that they spend more time as a family now than they did before because their house is more accommodating to them all. That’s quite a feat anyone with teenagers can relate to! Advance Design was thrilled to work on this project and bring this family the home they had been dreaming about for many, many years.
Photographer: Joe Nowak
 J & F Specialties, Inc.
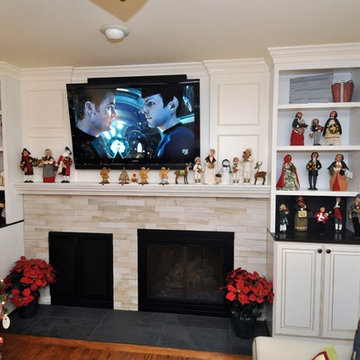
This project entailed the removal of the wood mantle and trim, removing some of the brick fireplace and hearth and prepping for the wall mounted TV. Bridgewood Advantage cabinetry in the Arlington Door style in Painted White with glaze finish were utilized for the built-ins on either side of the fireplace. A wood mantle was constructed and finished to match the new cabinets. A cabinet front with custom metal grill was installed in front of the old firewood storage area. Stacked stone type ceramic tile was installed on the face of the fireplace. The new flat screen was installed with all the wiring concealed. New slate tile was installed on the hearth. The project was finished just in time for Christmas decoration.
 Painting in Partnership, Inc.
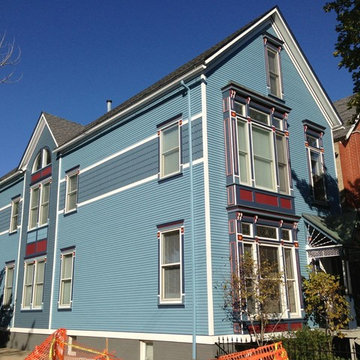
We just repainted a Victorian house, Circa 1885, for a new client in Chicago. When you see a house of this size and this level of detail, a question comes to mind: How often do you want to have to repaint a house like this? The answer is simple: The least often possible! The related question is: What can you do to extend the life of a paint job?
Depending on its size, its level of detail and the condition of its coatings and substrates, a Painted Lady’s paint job can cost between $20,000 and $50,000, sometimes even more. Because of its clapboard and extensive trim and millwork, a Victorian house is especially vulnerable to deterioration. Before having us start the painting project, the owners spent about $8,000 on carpentry repair work to the house. To minimize the future cost of carpentry repairs and prolong the longevity of the paint job, we recommend what we call “Maintenance Painting” to our clients. What does maintenance painting entail?
Maintenance painting consists of doing a close inspection of the coatings of a house, every couple of years. What do we look for: signs of failure in the caulking and coatings. When the coating or caulking starts to crack, it is an entry point to moisture, which gets trapped, rots the wood and causes paint failure. Once caulk starts to fail, the deterioration of the substrate and coatings accelerates rapidly. This is why early detection is critical to maintain the integrity of the paint job. We then do caulk and coating maintenance on those spots we detected. When we notice the beginning signs of wood rot, we also do epoxy restoration in those areas.
A homeowner needs the assistance of a dedicated painting and decorating contractor in order execute this periodic maintenance. The challenge is two-fold. One, owners are typically unaware of the importance of coating maintenance. Two, painting contractors do not seem to recognize the opportunity of offering this service to their clients. So, these expensive paint jobs are allowed to deteriorate, which adds to the future cost of the repaints.
The kind of coating maintenance we are talking about can cost between $500 and $1,500 every two years. The money saved in avoiding expensive carpentry repairs alone more than justifies coating maintenance. Our clients who own historic Victorian home or other “Period” homes in the Chicago area really appreciate this additional service we offer them.
 BUILD
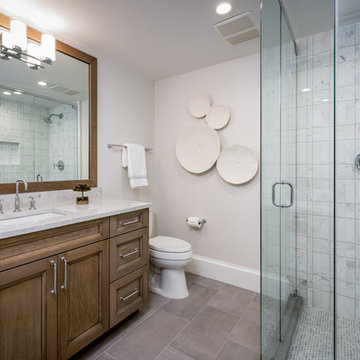
BUILDThis three-bedroom three bath residence underwent a comprehensive renovation that entailed a color palette of whites and grays with dark wood as designed by Interiors by Design West. The whole house was
updated with wood and tile flooring, new doors, trim and plumbing throughout. The laundry room and bathrooms were modernized with Woodmode cabinetry and quartz countertops. The kitchen was completely remodeled with Woodmode cabinetry, quartz countertops,
Thermador appliances and updated lighting. The transitional style offers a clean line, elegant look throughout this home.
Phillip Cates Photography
 Best Possible Removal Service In London
What You Should Know About Fuel Tanks
Home heating solutions can encompass electrical, gas, solar and oil based systems. When one talks about oil tanks that are used as home heating systems, there are a few important things to keep in mind.
Start with the installer
A high-quality, professional and expert installer of oil or fuel tanks can certainly help you make the decision on which type of tank is the best for your property. When you decide on underground fuel tanks, you should make sure that they are:
• Compliant with all statutory requirements.
• Made of steel and polyurethane.
• Covered by guarantee.
• Supported by backfill material, leak detection systems and tank supports.
Aboveground fuel tanks are easier to maintain simply because they are more accessible. Even the smallest of oil or fuel leaks can be detected almost immediately. But even here, an installer should give you premium quality tanks. These tanks:
• Should have secondary containment.
• Should be corrosion resistant.
• Should have proper support as well.
Installation
Installation for both – underground and above ground tanks is a technical and complex process. The installation process for both will start with a technician visiting your home and making an assessment of aspects such as:
• Measuring the space.
• Taking stock of the distance from your home to the tank, pipes and so on.
• The supports needed for the tank and so on.
If it is an above ground tank, then it may also need bollards to protect it from vehicles. An underground tank will need containment sumps and drop tubes and so on.
The combination of components will be decided by the installer and you can certainly ask for a complete breakup of the same and get the costs for the same as well.
Remediation
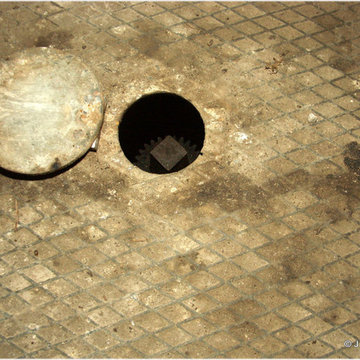
Repair and remediation of above and underground tanks is a critical task. In fact, many problems associated with underground fuel storage tanks can be eliminated if the home owner invests time and resources into periodic analysis and examination of the same.
A fuel tank that has been installed above the ground will be easier to access but repair and remediation of both types of tanks will entail:
• Soil sampling.
• Extent of oil contamination.
• Assessment of leaks and the extent and number of the same.
• Drawing up a plan for dealing with all problem areas.
Removal
Every fuel tank has a shelf life. At some point of time or the other, the fuel tank will need to be removed. When it comes to above ground installations, the removal company will need to assess the type of fuel and the knowhow on emptying the tank completely.
The tank will also need to be cleaned completely before being loaded on to a vehicle that can take it away to a recycling unit or disposal unit. Underground tanks can be removed or closed or treated as abandoned depending on the condition of the tank and official licenses. For instance, a tank can be treated as closure in place if the removal of the same is going to compromise the safety of structures above the ground.
 Gappsi
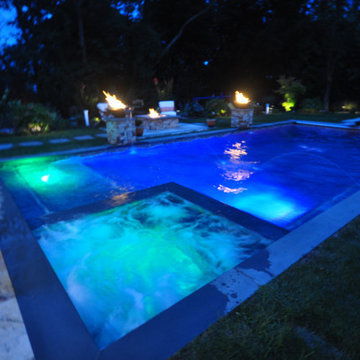
This project was designed by Giuseppe Abbrancati and installed by Gappsi at a fully custom built luxury home in the secluded area of Huntington Bay on Long Island. Simple, clean lines, and elegant design incorporates a 20×40 gunite swimming pool with many features. It includes a built-in spa, finished with waterline porcelain tiles and a blue diamond brite quartz finish made to last a long time. The spa, swimming pool, and all the other options are fully automated by a control accessible through a smartphone. The swimming pool is also equipped with a safety auto cover, that can open and close in one minute. The swimming pool equipment includes a gas heater, multiple VS pumps, an air blower for the spa, a salt-chlorine generator system, and an ozone system. The pool also includes 2 water spill over fire bowls with LED lighting, a full sized diving board, and a sundeck LED bubbler water jet.
This backyard setting includes a gas fire pit area with a masonry patio fire pit structure, and 36 inches columns built to hold the fire bowls next to the pool. There is also an outdoor kitchen built with Wolf outdoor cabinets and a Twin Eagles grill. All patios and walls were paved and veneered with Fiorito travertine, and the pool coping and stepping stone walkways are custom cut flamed Pennsylvania blue stone. A custom-built pavilion was incorporated in the layout to match the house’s architectural design, colors, and materials. This structure was built to cover the couch sitting area and protect it from the rain and sun. The landscaping entails many types of trees and flowers, natural rock walls, precast step risers built to lead to the lower backyard area, and all new sod with an irrigation system for the entire backyard.
Gappsi is a pool & masonry contractor that provides full services from design concepts to management and construction. Gappsi provides backyard and pool designer services in Huntington Bay NY 11743. Feel free to visit our website also at Gappsi.com.
 Western Outdoor Designs
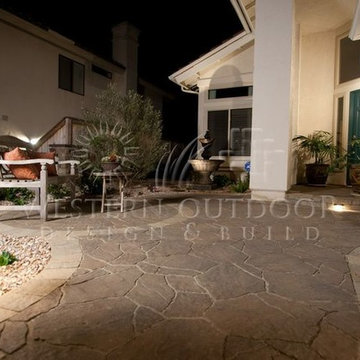
Xeriscaping is extremely popular, especially in Southern California. With rising water costs, many homeowners have turned to xeriscaping to lower their utility bills and reduce their carbon footprint. Xeriscaping entails the creative use of hardscape and native and succulant plants to create a beautiful, low-maintenance, drought-tolerant landscape design.
 Gramophone
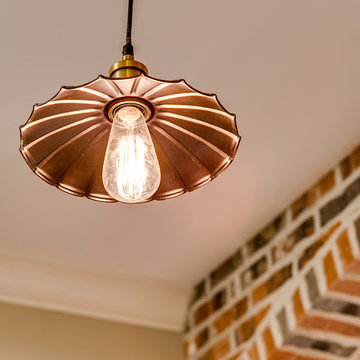
This project entailed updating a finished basement and boys' playroom that was underutilized and contained many design obstacles from lolly columns to mechanical equipment. The client wanted the space to blend with the eclectic old style of the rest of her home, and also wanted to incorporate a couple of existing custom millwork pieces. With three boys, all with varying interests from art to toy collections, the client needed this space to cater to their hobbies. Ultimately the clients received exactly what they wanted- a multifunctional space that all could enjoy that can only be defined as breathtaking.
Photography: Maryland Photography Inc.
 Adonis Kitchen & Bath
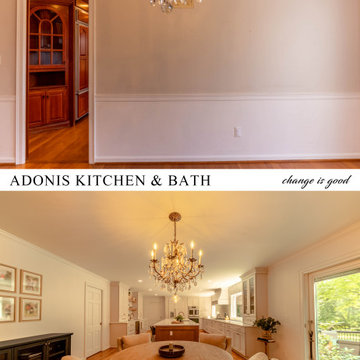
This major remodel in the Fairlawn Heights area of Akron, OH entailed wall removal, swapping the former rear entry door for a window, swapping a window for a new rear entry, masonry for the brick exterior as well as a beautiful high-end kitchen/dining remodel
This project included panel-ready appliances, a custom wooden range hood, and gorgeous KraftMaid cabinetry
 Design Exteriors
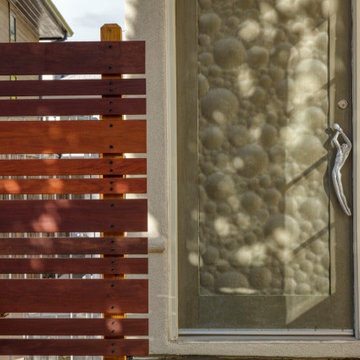
Our client commissioned us to redesign the entire front landscape of their beautiful contemporary home, built in 2004. As a starter, the project entailed demolishing and repouring their front steps and walkway. We chose sand-finish concrete as the replacement material for its beauty and slip resistance, and we laid the walkway out in a segmented, offset pattern to complement the contemporary nature of our client’s home. We chose solid-brass pathway lights from Brilliance Lighting to complement the beauty of their bronze front door.
To further accentuate the beauty of our client’s entrance, we tiled their front stoop with natural Rustica slate, built a decorative screen of South American Ipe wood on one side of their entrance, and installed a colorful ceramic flowerpot on the other. We installed an automatic watering system for the flowerpot, and directed their downspout effluence into an underground drainage system. Our planting choices for the project included a specimen multi-trunk Eastern Redbud tree, ‘Panchito’ Manzanita, Itoh Peony, ‘Kelseyi’ Dogwood, Blue Avena Grass, and Liriope Muscari.
 Ashton Renovations
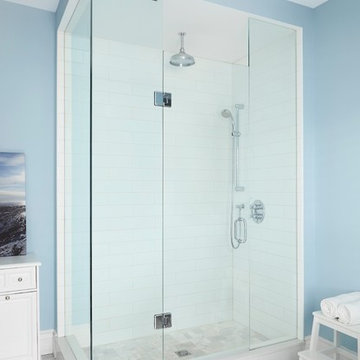
Renovations of this 100 year old home involved two stages: the first being the upstairs bathroom, followed by the kitchen and full scale update of the basement.
The original basement was used mainly for storage. The ceiling was low, with no light, and outdated electrical and plumbing. The new basement features a separate laundry, furnace, bathroom, living room and mud room. The most prominent feature of this newly renovated basement is the underpinning, which increased ceiling height. Further is the beautiful new side entrance with frosted glass doors.
Extensive repairs to the upstairs bathroom was much needed. It as well entailed converting the adjacent room into a full 4 pieces ensuite bathroom. The new spaces includes new floor joists and exterior framing along with insulation, HVAC, plumbing, and electrical. The bathrooms are a traditional design with subway tiles and mosaic marble tiles. The cast iron tub is an excellent focal feature of the bathroom that sets it back in time.
The original kitchen was cut off from the rest of the house. It also faced structural issues with the flooring and required extensive framing. The kitchen as well required extensive electrical, plumbing, and HVAC modifications. The new space is open, warm, bright and inviting. Our clients are most exited about now being able to enjoy the entire floor as one. We hope Stephan, Johanna, and Liam enjoy the home for many years to come along with the other improvements to the house.Aristea Rizakos
 TOC design & construction inc.
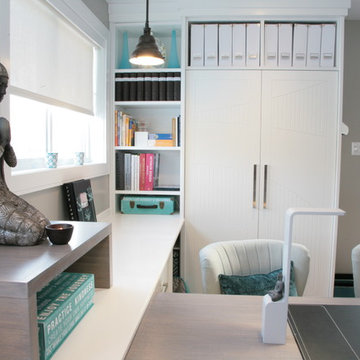
The importance of a properly designed home office ( especially when the space is also used as a meeting-place/showroom ) entails the comfort & positive experience of your customer in the following manner:
1. Exclusive office space with its own entrance separate from rest of home.
2. Ergonomic customer seating and ample presentation surfaces.
3. Dedicated customer computer screen(s) detailing CAD drawings & presentation in a show and tell manner.
4. Proper lighting ( LED lighting has come a long way )
5. Practical design touches ( hooks for purses, coats, umbrella stand, refreshments area, guest WIFI, etc...)
One of the greatest benefits of a home office is the freedom to design it with a distinct identity. In other words, we shouldn’t blend the workplace with the rest of our personal space, aka home.
 Kariouk Associates
m.o.r.e. Cabin
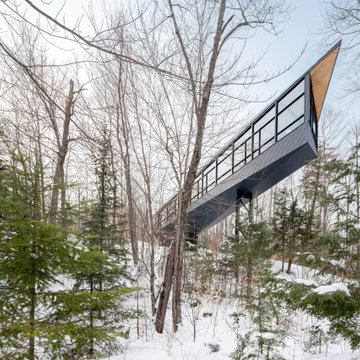
The paradigmatic North American cottage is romanticized as a wilderness log cabin. Nonetheless, typical cottages are “woodsy” versions of suburban homes with every modern convenience. These buildings sustain the myth that appearing to be one with the land equates to a reduced impact on the environment.
The m.o.r.e. Cabin inverts this idea through a separation from the landscape that is more sustainably constructed than other cottages. This unravelling of eco-fictions is not cynical, but optimistic: while organic environments are being degraded, what remains can be engaged more responsibly.
To this end, m.o.r.e. Cabin touches the land lightly through:
- Interpreting the law creatively to uphold its principles.
- Reducing foundation size through a steel mast.
- Low-waste cross-laminated timber (CLT) structure.
- Achieving greater tensile strength through a “folded” structure.
- Off-grid power and high-efficiency heating.
- Creating a home for endangered bats.
Interpreting the Law with Finesse
Zoning rules required a 100-foot (30-metre) setback from the lake. A cliff face at that 100-foot mark was incorporated into the design, whereas conventional construction approaches would entail blasting.
To minimize harm to the hillside and forest, a zoning variance was obtained to allow the front of m.o.r.e. Cabin to hover above, rather than sit on, the 100-foot (30-metre) mark.
The Mast
The technical solution to the environmental issue involved a single concrete footing and a steel “mast” placed within the required setback.
Avoiding a conventional large foundation preserved the watershed and prevented erosion, as did elevating the construction zone. Use of carbon-intensive concrete was also reduced for a lower carbon footprint.
m.o.r.e. Than One Way to Skin a Home
m.o.r.e. Cabin is built with suitably-sourced CLT panels and glulam beams.
The CLT was milled offsite then hoisted into place, avoiding damage to the landscape by the maneuvering of construction machinery.
Cabin-as-Beam
m.o.r.e. Cabin’s environmental considerations yielded structural innovation. Our challenge became to develop a structural strategy using cantilevered CLT panels as a response to the zoning variance that we obtained; CLT is fundamentally deployed in vertical/compressive sections, not horizontally in tension.
Conventional 5-ply CLT is too heavy to support itself over longer spans. The solution used thinner 3-ply CLT, with structural capacity ensured through “folding” (just like paper gains strength when folded).
Off-Grid
The home is solar-powered.
The elevated cottage catches more breezes and has excellent cross-ventilation. Heat is provided by a high-efficiency “green carbon” wood stove. Good R-value and thermal comfort are provided by CLT’s mass, and precise joinery provides air-tightness.
Inviting Over the Neighbours
One goal of the home was to create extensive lodging for endangered brown bats. Bat pods were integrated into the mast to provide safety from climbing predators and a clear flight path to the lake.
*“m.o.r.e.” stands for the clients’ grandmothers’ names; all of whom did more with less — and gracefully so.
 Tile Doctor Ltd
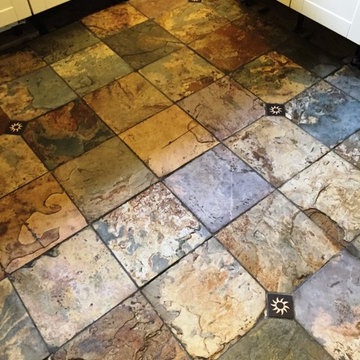
I recently visited a client living in the market town of Woodstock in Oxfordshire to rejuvenate a fantastic multi-coloured Slate floor that had been hidden under several years’ worth of dirt in their kitchen. Slate is a typically hard-wearing tile used for flooring high traffic areas of houses and public buildings but does need sealing to bring out its best features and in this case the sealer had long since worn off and dirt had become ingrained in the stone.
My first task in the cleaning process was to mix a strong solution of Tile Doctor Pro-Clean, which is a strong alkaline cleaner safe to use on Tile and Stone, and NanoTech HBU (Heavy Build-up Remover), which is a particularly powerful product that uses nano-sized particles to tackle muck in areas of the stone where typical cleaners simply can’t reach. I spread this solution across the floor and left it to seep into the stone, to get underneath and lift out the ingrained dirt.
After allowing the solution adequate time to dwell, I scrubbed the floor with a carbon brush to gradually reveal the fantastic natural colours of the Slate hidden beneath. Following this, I rinsed the entire floor several times with clean water, before soaking up the resulting soiled residue with a wet vacuum.
The next part of the cleaning process entailed paying particular attention to the grout lines. I used Tile Doctor Grout Clean-Up to scrub the grout lines and also to treat a small amount of efflorescence. The resulting residue was promptly extracted with the wet vacuum and I finished by giving the whole floor a rinse with Tile Doctor pH Neutral Tile Cleaner. This is a day to day tile cleaning product which is recommended for stone floors, many supermarket tile cleaning products are only suitable for ceramic tiles due to their acidic formula and can damage a floor over years of use so you should always read the label. I then left the floor to dry completely overnight.
On day two, the Slate tiled floor was dry and ready to seal. The floor had to be completely dry, as any excess moisture has the potential to the damage the performance of the sealer. Since my client had specifically requested a matte finish, I opted to use Tile Doctor Colour Grow. Colour Grow is an impregnating sealer that provides durable surface protection from within while also enhancing all of the natural mineral shades.
My client was very pleased with the results, particularly as they hadn’t realised they had such a great looking floor in their house when they had first purchased it!
Barry Woodward
Oxfordshire Tile Doctor
27