
Search results for "Excessive" in Home Design Ideas
 Century Stair Company
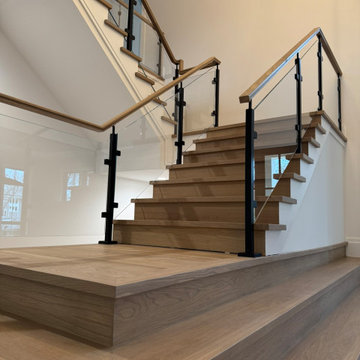
Warm wood and cold glass don't always work well together, but here they do. This white oak staircase pairs naturally grained treads with a sleek glass balustrade anchored by bold black metal posts, a combination that feels considered rather than contrived. The wrap-around starting steps ease the entry, softening what could have been a hard geometric statement into something more welcoming. Overhead, a statement lighting installation pulls the eye upward, casting a warm glow that works with the oak rather than against it. Clean lines throughout, nothing excessive.
1976-2026 © Century Stair Company
 Virtuoso Builders
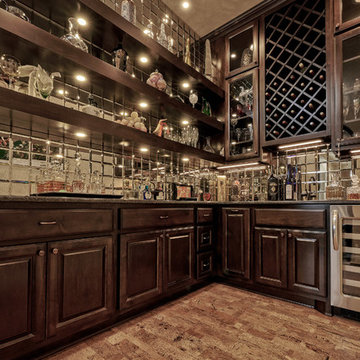
The homeowner's margarita machine was the catalyst for this home addition. What was an unused Atrium was enclosed to create this one-of-a-kind room for their wine, beverages, and collectibles.
 Century Stair Company
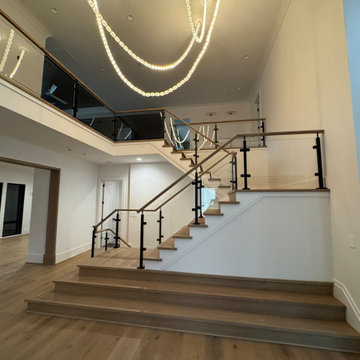
Warm wood and cold glass don't always work well together, but here they do. This white oak staircase pairs naturally grained treads with a sleek glass balustrade anchored by bold black metal posts, a combination that feels considered rather than contrived. The wrap-around starting steps ease the entry, softening what could have been a hard geometric statement into something more welcoming. Overhead, a statement lighting installation pulls the eye upward, casting a warm glow that works with the oak rather than against it. Clean lines throughout, nothing excessive.
1976-2026 © Century Stair Company
Find the right local pro for your project
 Mom's Design Build
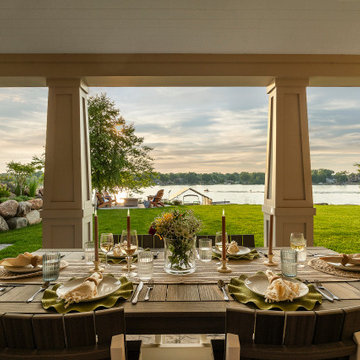
The #LakesideLeisure Project was a comprehensive redesign of a lakefront property that transformed various challenges into stunning solutions. Initially, the property featured a small, high-maintenance cedar deck with minimal lake views, poorly placed stairs, limited flat yard space due to extensive tiered landscaping and excessive plantings, obstructed lake views, and privacy concerns from a neighboring home.
The client’s vision was clear: they wanted a large, flat yard for family activities and hosting, enhanced outdoor living spaces for dining and lounging, increased privacy from neighbors, more shaded hangout areas, improved “curb appeal” from the lake, and reduced maintenance.
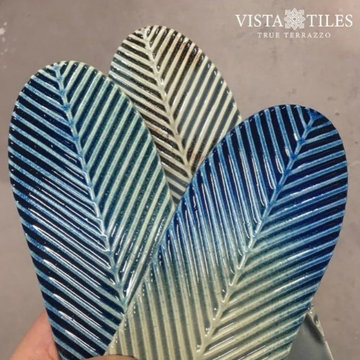
 VISTA TILES
There are 97 leaf tile tiles in 1 m2.
The product size is 9cmx15 cmx 1cm. The back side is matt-based and serrated, the front side is glazed and glossy polished.
Leaf Çini ceramic tile features are a dimension that expresses the structure as a multi-colored color with the tile tiles decorations.
- Material made of ceramic material. Tiles are converted into water and cleaning materials.
- Decorating the leaf tile tile for many years. Color and pattern do not exist.
- Water and moisture clean thanks to the glossy glazed polished.
- It does not form mold.
- In places where Leaf Tile tiles are used, we breathe cool and warm in summer.
- Figure the days of sound waves taking advantage of the reflective feature of the days in the regions caused by Leafy Tiles.
- Kütahya tiles are against the sun, wind and exterior.
- Leaf Tiles and easy to use.
- Kütahya and Iznik patterned shaped tile tile models and prices are the most suitable examples.
It is used between countertops in kitchens.
Ceramic-based hexagons are suitable for use as wall tiles in bathrooms.
Production is made in pools, flooring, pool interior flooring, design design and design.
For floor tiles, it can be designed to be comprehensive in detail to floor tiles.
Leaf Tile Tile Application
First of all, the area to be applied should be flat, if not, it should be corrected. Thin plaster should be applied to the area. Cement-based adhesive mortar should be used as adhesive mortar. The adhesive mortar is applied to the surface to be applied regularly and evenly with a fine notched trowel. Kütahya and İznik patterned tile tiles are placed on the surface to be laid. For non-slip and a flat application, you can press on it using a spirit level or wedge. It is an important issue that the Kütahya and Iznik tiles with Ottoman and Seljuk motifs complement each other.
After bonding the tile tiles to the surface, the grouting is ready for application. Normally, tiles are laid without joints. After the grouting material is prepared in accordance with the instructions, it is applied on the tile tiles. We recommend that you prefer antibacterial grouts, especially for patterned tile ceramic tiles that you will apply in your kitchens and bathrooms. After the joint application, the excess joints remaining on the tiles whose flooring has been completed are removed by wiping them with a wet sponge.
Please note that international buyers are responsible for any duties/customs charges and import taxes associated with shipping to their respective countries. These fees are calculated and imposed by your country when the item arrives in the country.
 Cool River Construction LLC
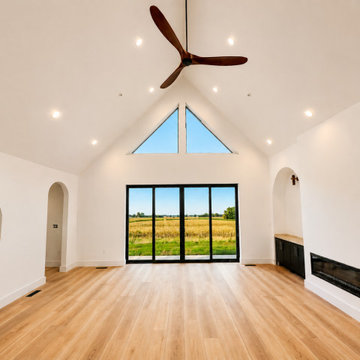
Modern Transitional with European farmhouse influences — airy, architectural, and intentionally restrained. The power of the space comes from its volume, symmetry, and connection to the landscape rather than decorative excess. This great room embraces a minimal, high-volume architectural aesthetic, where clean lines and natural light become the primary design features. The dramatic vaulted ceiling instantly creates grandeur while maintaining warmth through proportion and material balance.
 HomeClick
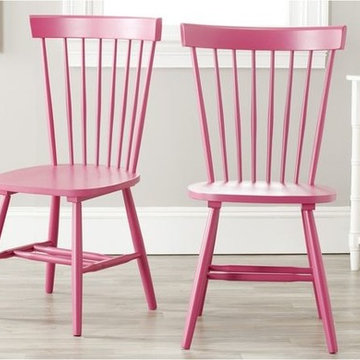
Safavieh Set of 2 Parker Side Chairs
The Parker chair takes its cues from the classic American country home style but strips away any excess ornamentation Clean lines, simple lines and fresh colors update this airy addition to casual dining rooms. Sure to be the perfect addition to any decor.
 Gappsi
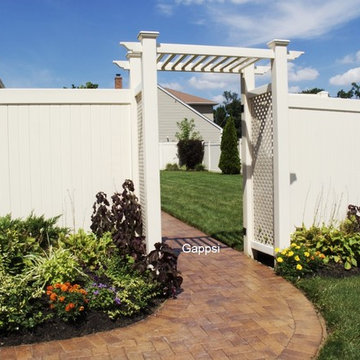
Patio, walkway, and front steps were built by Gappsi in Wyandanch Long Island, NY in Suffolk County. The stone used is over-sized ridge brick and ridge circle pavers in a golden brown blend. The pavers are mixed randomly in square and rectangular sizes. This stone has a textured riven surface and slightly chamfered edges. The sealing process begins with pressure washing the entire patio, removing all dirt and debris from the stone surface and in between the joints. Next, Nexgel Techniseal synthetic sand is applied in between the pavers joints and vibrated with a mechanical plate compactor. The plate compactor has rubber rollers to prevent the stones from cracking or scratching. This vibrating process allows the sand to fall in between the joints to densify. Then, we clean the pavers with brooms and landscape blowers, to clean the excess sand from the pavers surface and to evenly spread the sand in between the pavers joints. The next step is to wash the pavers by misting water to penetrate the synthetic sand into the paver joints all the way down below the pavers. The sand and water activate a chemical reaction of the pollen that's in the sand to cause the sand to harden. Finally, the application of the sealer. A two parts components urethane dealer, specially formulated for Gappsi, is applied to the pavers surface and the sand joints to prevent stones from staining, extend their life cycle and further enhance their texture, color, and surface.
https://www.youtube.com/watch?v=Z2t3swbuYXo
 MARGARITA BRAVO
Our clients wanted a modern mountain getaway that would combine their gorgeous mountain surroundings with contemporary finishes. To highlight the stunning cathedral ceilings, we decided to take the natural stone on the fireplace from floor to ceiling. The dark wood mantle adds a break for the eye, and ties in the views of surrounding trees. Our clients wanted a complete facelift for their kitchen, and this started with removing the excess of dark wood on the ceiling, walls, and cabinets. Opening a larger picture window helps in bringing the outdoors in, and contrasting white and black cabinets create a fresh and modern feel.
---
Project designed by Miami interior designer Margarita Bravo. She serves Miami as well as surrounding areas such as Coconut Grove, Key Biscayne, Miami Beach, North Miami Beach, and Hallandale Beach.
For more about MARGARITA BRAVO, click here: https://www.margaritabravo.com/
To learn more about this project, click here: https://www.margaritabravo.com/portfolio/colorado-nature-inspired-getaway/
 The Painted Door
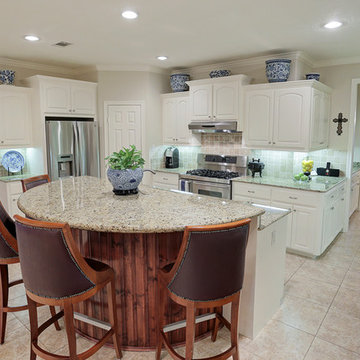
The open kitchen is the heart of this home. By removing some unused and excess décor, the remaining urns really allow the bright kitchen to re-take center stage
 3D Design Edge
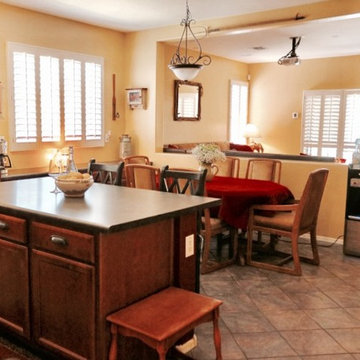
This transitional staging project was so much fun. For starters we generated a workable plan to get the client top dollar for their listing. Our clients decided to trust the process and moved forward with all of our staging suggestions per the written plan we generated for them. The successful Staging Resulted in a first showing offer, above asking! To get started we removed excess furniture and any items that might detract from the desired staging direction. The clients received full asking with a standard close date and all parties involved were very pleased with the outcome.
 CertaPro Painters of KC Northland
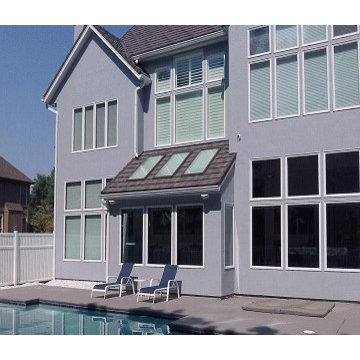
At the rear of the home, we did additional work, including wood rot repair and stucco scar repair, removal of dirt and excessive mildew. One coat of Sherwin Williams Duration to entire body of house.
 Laidlaw Schultz architects
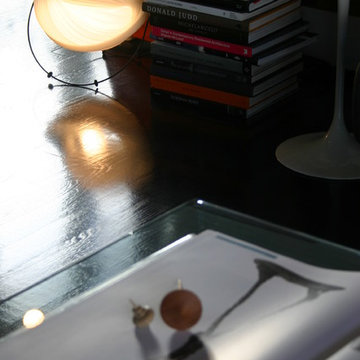
The project’s starting point was to understand the building’s original post and beam structure and to use that internal logic to formulate a sympathetic remodel. With an emphasis on the upper back unit, the owner’s private residence within this recently purchased Edward Killingsworth triplex, the first order of business was to strip the excess out and to return the complex to something that resembled the original. With a limited budget, the tact was to restore where possible, and to insert where needed, but always with a sympathetic eye. The kitchen quickly became the primary focus and it was soon realized that by removing the division between the existing galley and family room that the essence of the structural system could be revealed. Once opened the datum of the layered beams was adhered to with the kitchen reinforcing this overhead water line. The primary internal wall was then highlighted with a new wood veneer with the refrigerator recessed (borrowing a bit of space from the master closet) and the existing heater chromed.
 Hawthorne Garden Design
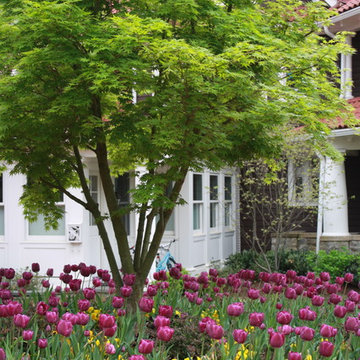
Color, structure and movement create a fluid, rhythmic garden. A keyhole driveway is anchored by a majestic Japanese maple and seasonal under plantings. The curved retaining wall is highlighted by masses of purple tulips that complement the allee of saucer magnolias and gently direct one up the hill to a ‘hidden children’s garden. Below, mature cherries and dogwoods frame a garden bed of moisture-loving dawn redwoods, twiggy dogwoods and iteas. A dry river-bed absorbs excess water.
 Forward Design Build Remodel
Our clients came to us wanting to create a kitchen that better served their day-to-day, to add a powder room so that guests were not using their primary bathroom, and to give a refresh to their primary bathroom.
Our design plan consisted of reimagining the kitchen space, adding a powder room and creating a primary bathroom that delighted our clients.
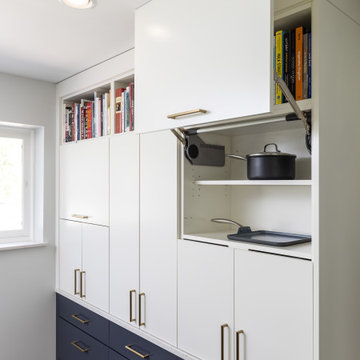
In the kitchen we created more integrated pantry space. We added a large island which allowed the homeowners to maintain seating within the kitchen and utilized the excess circulation space that was there previously. We created more space on either side of the kitchen range for easy back and forth from the sink to the range.
To add in the powder room we took space from a third bedroom and tied into the existing plumbing and electrical from the basement.
Lastly, we added unique square shaped skylights into the hallway. This completely brightened the hallway and changed the space.

 Deck and Patio Company "Outdoor Living Experts"
This pond has been cleared of excessive plant material and ice does not cover over the pond so that the fish are happily hibernating. www.deckandpatio.com
 Century Stair Company
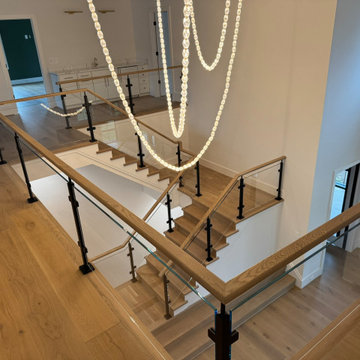
Warm wood and cold glass don't always work well together, but here they do. This white oak staircase pairs naturally grained treads with a sleek glass balustrade anchored by bold black metal posts, a combination that feels considered rather than contrived. The wrap-around starting steps ease the entry, softening what could have been a hard geometric statement into something more welcoming. Overhead, a statement lighting installation pulls the eye upward, casting a warm glow that works with the oak rather than against it. Clean lines throughout, nothing excessive.
1976-2026 © Century Stair Company
 Architectural Resource LLC
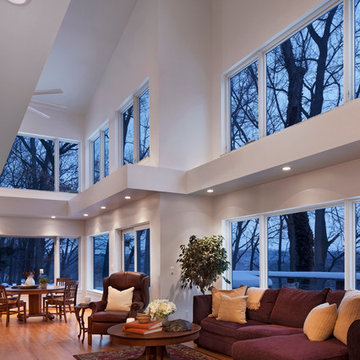
Architectural Resource is extremely excited to share with you the 'River View' house. This very special remodeling project was the first remodeling project in S.E. Michigan to achieve Emerald Certification (the highest level possible) in the National Association of Home Builder’s (NAHB) National Green Building Certification Program. This home combines smart, sustainable design; advanced construction techniques; and integrated solar panels for renewable energy capture. The result… our clients received a Credit for net excess electrical production in July of 2014, the hottest July on record to date! This state of the art remodel and addition project includes a new two-story addition, master suite and kitchen remodel, and a view of the Huron River valley that one reporter exclaimed was "the most beautiful view in Ann Arbor!"
-Beth Singer Photography
 Reflections Water Gardens
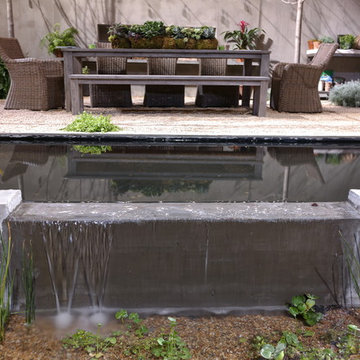
Creating environments that encourage our families to spend more time outdoors is important in today’s hi-tech world. Designed for the 2014 Chicago Flower and Garden show, this display garden captures a playful sensibility well-suited for any family to enjoy. The clean, modern lines and carefully planned spaces of this 50’ by 50’ garden form an enticing setting to simply unplug. Working within a very limited area, the design organizes a bio pool with sundeck, a spillover water feature and lounge area, and a gravel dining terrace with a built-in fireplace and shade tree canopy.
Unlike traditional pools, our bio pool utilizes aquatic plants, beneficial bacteria, and microbes, rather than harsh chemicals, to filter the water. Impurities and excess nutrients are drawn out of the water naturally, creating a much healthier swimming environment. A native plant palette is incorporated throughout the garden with shade trees, ornamentals, native forbs, and perennials in an emergent spring landscape. We hope this exciting design will encourage green inspiration for visitors, whether they have a tight city lot or a larger suburban property.
 Petit Construction, Inc.
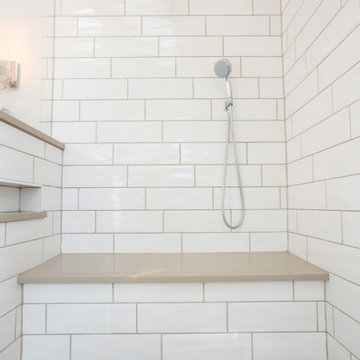
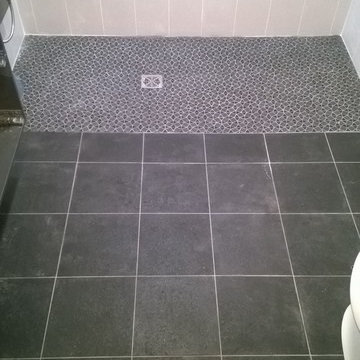
This Master Bath was remodeled after the new owner discovered excessive termite damage that required the entire bathroom, including the sub-framing and exterior walls, to be demolished. The bathroom was re-arranged to not include a tub/shower. This photo shows the completed work just before the glass partition for the walk-in shower was installed.
50