
Search results for "Construction zone" in Home Design Ideas
 Thomas Roszak Architecture, LLC
Photo credit: Scott McDonald @ Hedrich Blessing
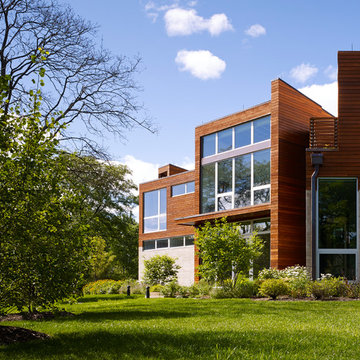
7RR-Ecohome:
The design objective was to build a house for a couple recently married who both had kids from previous marriages. How to bridge two families together?
The design looks forward in terms of how people live today. The home is an experiment in transparency and solid form; removing borders and edges from outside to inside the house, and to really depict “flowing and endless space”. The house floor plan is derived by pushing and pulling the house’s form to maximize the backyard and minimize the public front yard while welcoming the sun in key rooms by rotating the house 45-degrees to true north. The angular form of the house is a result of the family’s program, the zoning rules, the lot’s attributes, and the sun’s path. We wanted to construct a house that is smart and efficient in terms of construction and energy, both in terms of the building and the user. We could tell a story of how the house is built in terms of the constructability, structure and enclosure, with a nod to Japanese wood construction in the method in which the siding is installed and the exposed interior beams are placed in the double height space. We engineered the house to be smart which not only looks modern but acts modern; every aspect of user control is simplified to a digital touch button, whether lights, shades, blinds, HVAC, communication, audio, video, or security. We developed a planning module based on a 6-foot square room size and a 6-foot wide connector called an interstitial space for hallways, bathrooms, stairs and mechanical, which keeps the rooms pure and uncluttered. The house is 6,200 SF of livable space, plus garage and basement gallery for a total of 9,200 SF. A large formal foyer celebrates the entry and opens up to the living, dining, kitchen and family rooms all focused on the rear garden. The east side of the second floor is the Master wing and a center bridge connects it to the kid’s wing on the west. Second floor terraces and sunscreens provide views and shade in this suburban setting. The playful mathematical grid of the house in the x, y and z axis also extends into the layout of the trees and hard-scapes, all centered on a suburban one-acre lot.
Many green attributes were designed into the home; Ipe wood sunscreens and window shades block out unwanted solar gain in summer, but allow winter sun in. Patio door and operable windows provide ample opportunity for natural ventilation throughout the open floor plan. Minimal windows on east and west sides to reduce heat loss in winter and unwanted gains in summer. Open floor plan and large window expanse reduces lighting demands and maximizes available daylight. Skylights provide natural light to the basement rooms. Durable, low-maintenance exterior materials include stone, ipe wood siding and decking, and concrete roof pavers. Design is based on a 2' planning grid to minimize construction waste. Basement foundation walls and slab are highly insulated. FSC-certified walnut wood flooring was used. Light colored concrete roof pavers to reduce cooling loads by as much as 15%. 2x6 framing allows for more insulation and energy savings. Super efficient windows have low-E argon gas filled units, and thermally insulated aluminum frames. Permeable brick and stone pavers reduce the site’s storm-water runoff. Countertops use recycled composite materials. Energy-Star rated furnaces and smart thermostats are located throughout the house to minimize duct runs and avoid energy loss. Energy-Star rated boiler that heats up both radiant floors and domestic hot water. Low-flow toilets and plumbing fixtures are used to conserve water usage. No VOC finish options and direct venting fireplaces maintain a high interior air quality. Smart home system controls lighting, HVAC, and shades to better manage energy use. Plumbing runs through interior walls reducing possibilities of heat loss and freezing problems. A large food pantry was placed next to kitchen to reduce trips to the grocery store. Home office reduces need for automobile transit and associated CO2 footprint. Plan allows for aging in place, with guest suite than can become the master suite, with no need to move as family members mature.
 The Cousins
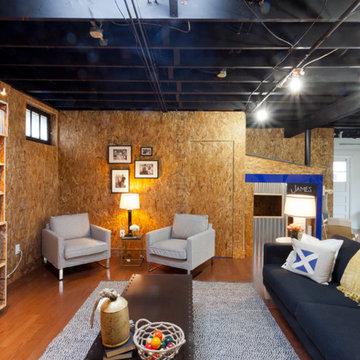
The new basement is the ultimate multi-functional space. A bar, foosball table, dartboard, and glass garage door with direct access to the back provide endless entertainment for guests; a cozy seating area with a whiteboard and pop-up television is perfect for Mike's work training sessions (or relaxing!); and a small playhouse and fun zone offer endless possibilities for the family's son, James.
 Mãkena Interiors
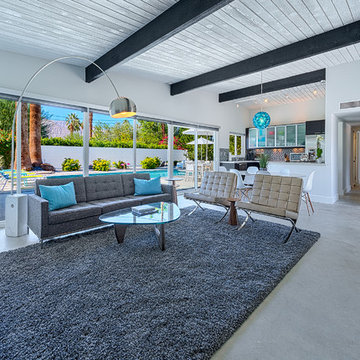
Original Mid-Century Home in Sunmor Palm Springs, built by the Alexander Construction Co in 1958
available for vacation rentals
Living room - 1960s open concept living room idea in Other with white walls
Living room - 1960s open concept living room idea in Other with white walls
Find the right local pro for your project
 Jennifer Messina Interiors
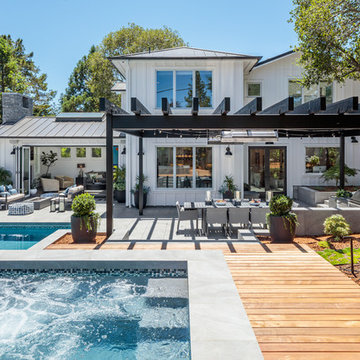
Inspiration for a transitional white two-story wood house exterior remodel in San Francisco with a metal roof
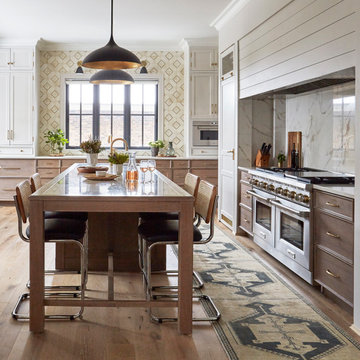
 KitchenLab Interiors
KitchenLab Interiors’ first, entirely new construction project in collaboration with GTH architects who designed the residence. KLI was responsible for all interior finishes, fixtures, furnishings, and design including the stairs, casework, interior doors, moldings and millwork. KLI also worked with the client on selecting the roof, exterior stucco and paint colors, stone, windows, and doors. The homeowners had purchased the existing home on a lakefront lot of the Valley Lo community in Glenview, thinking that it would be a gut renovation, but when they discovered a host of issues including mold, they decided to tear it down and start from scratch. The minute you look out the living room windows, you feel as though you're on a lakeside vacation in Wisconsin or Michigan. We wanted to help the homeowners achieve this feeling throughout the house - merging the causal vibe of a vacation home with the elegance desired for a primary residence. This project is unique and personal in many ways - Rebekah and the homeowner, Lorie, had grown up together in a small suburb of Columbus, Ohio. Lorie had been Rebekah's babysitter and was like an older sister growing up. They were both heavily influenced by the style of the late 70's and early 80's boho/hippy meets disco and 80's glam, and both credit their moms for an early interest in anything related to art, design, and style. One of the biggest challenges of doing a new construction project is that it takes so much longer to plan and execute and by the time tile and lighting is installed, you might be bored by the selections of feel like you've seen them everywhere already. “I really tried to pull myself, our team and the client away from the echo-chamber of Pinterest and Instagram. We fell in love with counter stools 3 years ago that I couldn't bring myself to pull the trigger on, thank god, because then they started showing up literally everywhere", Rebekah recalls. Lots of one of a kind vintage rugs and furnishings make the home feel less brand-spanking new. The best projects come from a team slightly outside their comfort zone. One of the funniest things Lorie says to Rebekah, "I gave you everything you wanted", which is pretty hilarious coming from a client to a designer.
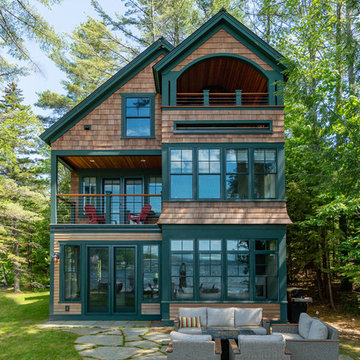
 Cummings Architecture + Interiors
Situated on the edge of New Hampshire’s beautiful Lake Sunapee, this Craftsman-style shingle lake house peeks out from the towering pine trees that surround it. When the clients approached Cummings Architects, the lot consisted of 3 run-down buildings. The challenge was to create something that enhanced the property without overshadowing the landscape, while adhering to the strict zoning regulations that come with waterfront construction. The result is a design that encompassed all of the clients’ dreams and blends seamlessly into the gorgeous, forested lake-shore, as if the property was meant to have this house all along.
The ground floor of the main house is a spacious open concept that flows out to the stone patio area with fire pit. Wood flooring and natural fir bead-board ceilings pay homage to the trees and rugged landscape that surround the home. The gorgeous views are also captured in the upstairs living areas and third floor tower deck. The carriage house structure holds a cozy guest space with additional lake views, so that extended family and friends can all enjoy this vacation retreat together. Photo by Eric Roth
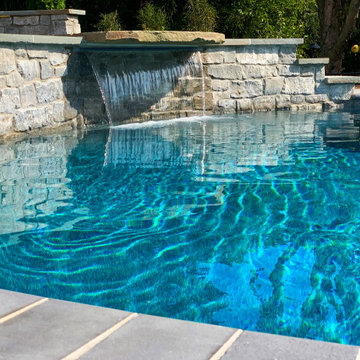
 C.E. Pontz Sons
The fall has snuck up on us rather quick but not before we had a final summer day to show off this amazing outdoor living project we just recently completed. This outdoor living project included pricing to excavation and installation of a ledge rock retaining wall around the perimeter of the property. The wall included the step area, large retaining walls, proper drainage behind the wall, and wall caps. After the wall was installed we constructed the sitting wall and natural stone ‘dive rock’. the sitting wall was constructed on concrete footings, with concrete block core, faced with natural stone veneer matching stone used on pool, and capped with 2″ natural flagstone. The dive rock was set on existing pool beam and concrete slab poured behind pool beam. Installation of the landscape, grading, seeding, sodding, and landscape lighting was completed around the pool area. All plants and trees were installed in new landscape beds with mulch, decorative river stone was installed between the fence and wall across back of pool area, and all disturbed areas outside of fence were graded and seeded. All lawn areas inside of the fence were sodded. A broken flagstone path was installed from concrete patio to steps in wall, and a low natural limestone boulder wall for raised planter at egress window was also installed. A low voltage LED lighting system (FX Luxor Zoning/Dimming/Color) was installed with under cap lights installed in sitting wall (Zoning/Dimming/Color) and in existing stair treads (Zoning/Dimming) to screen porch, up lights/wash lights installed on select trees (Zoning/Dimming/Color), and path lights (Zoning) installed at concrete steps, along back of patio, and wall steps. Additional drainage including adding a drain box for the Sump pump outlet pipe and adding an underground pipe to the downspout near the pool equipment and fence gate was also installed.
Sponsored
Columbus, OH

Snider & Metcalf Interior Design, LTD
Leading Interior Designers in Columbus, Ohio & Ponte Vedra, Florida
 C.E. Pontz Sons
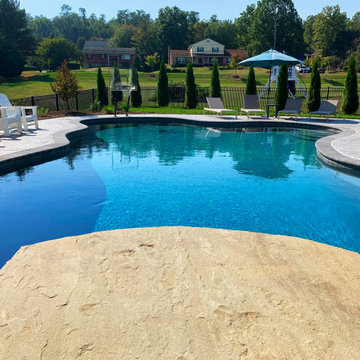
The fall has snuck up on us rather quick but not before we had a final summer day to show off this amazing outdoor living project we just recently completed. This outdoor living project included pricing to excavation and installation of a ledge rock retaining wall around the perimeter of the property. The wall included the step area, large retaining walls, proper drainage behind the wall, and wall caps. After the wall was installed we constructed the sitting wall and natural stone ‘dive rock’. the sitting wall was constructed on concrete footings, with concrete block core, faced with natural stone veneer matching stone used on pool, and capped with 2″ natural flagstone. The dive rock was set on existing pool beam and concrete slab poured behind pool beam. Installation of the landscape, grading, seeding, sodding, and landscape lighting was completed around the pool area. All plants and trees were installed in new landscape beds with mulch, decorative river stone was installed between the fence and wall across back of pool area, and all disturbed areas outside of fence were graded and seeded. All lawn areas inside of the fence were sodded. A broken flagstone path was installed from concrete patio to steps in wall, and a low natural limestone boulder wall for raised planter at egress window was also installed. A low voltage LED lighting system (FX Luxor Zoning/Dimming/Color) was installed with under cap lights installed in sitting wall (Zoning/Dimming/Color) and in existing stair treads (Zoning/Dimming) to screen porch, up lights/wash lights installed on select trees (Zoning/Dimming/Color), and path lights (Zoning) installed at concrete steps, along back of patio, and wall steps. Additional drainage including adding a drain box for the Sump pump outlet pipe and adding an underground pipe to the downspout near the pool equipment and fence gate was also installed.
 C.E. Pontz Sons
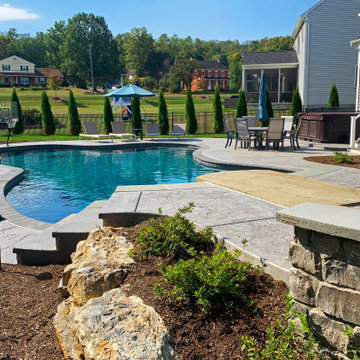
The fall has snuck up on us rather quick but not before we had a final summer day to show off this amazing outdoor living project we just recently completed. This outdoor living project included pricing to excavation and installation of a ledge rock retaining wall around the perimeter of the property. The wall included the step area, large retaining walls, proper drainage behind the wall, and wall caps. After the wall was installed we constructed the sitting wall and natural stone ‘dive rock’. the sitting wall was constructed on concrete footings, with concrete block core, faced with natural stone veneer matching stone used on pool, and capped with 2″ natural flagstone. The dive rock was set on existing pool beam and concrete slab poured behind pool beam. Installation of the landscape, grading, seeding, sodding, and landscape lighting was completed around the pool area. All plants and trees were installed in new landscape beds with mulch, decorative river stone was installed between the fence and wall across back of pool area, and all disturbed areas outside of fence were graded and seeded. All lawn areas inside of the fence were sodded. A broken flagstone path was installed from concrete patio to steps in wall, and a low natural limestone boulder wall for raised planter at egress window was also installed. A low voltage LED lighting system (FX Luxor Zoning/Dimming/Color) was installed with under cap lights installed in sitting wall (Zoning/Dimming/Color) and in existing stair treads (Zoning/Dimming) to screen porch, up lights/wash lights installed on select trees (Zoning/Dimming/Color), and path lights (Zoning) installed at concrete steps, along back of patio, and wall steps. Additional drainage including adding a drain box for the Sump pump outlet pipe and adding an underground pipe to the downspout near the pool equipment and fence gate was also installed.
 C.E. Pontz Sons
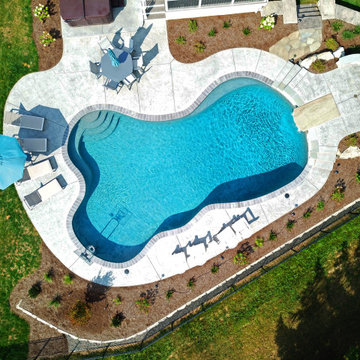
The fall has snuck up on us rather quick but not before we had a final summer day to show off this amazing outdoor living project we just recently completed. This outdoor living project included pricing to excavation and installation of a ledge rock retaining wall around the perimeter of the property. The wall included the step area, large retaining walls, proper drainage behind the wall, and wall caps. After the wall was installed we constructed the sitting wall and natural stone ‘dive rock’. the sitting wall was constructed on concrete footings, with concrete block core, faced with natural stone veneer matching stone used on pool, and capped with 2″ natural flagstone. The dive rock was set on existing pool beam and concrete slab poured behind pool beam. Installation of the landscape, grading, seeding, sodding, and landscape lighting was completed around the pool area. All plants and trees were installed in new landscape beds with mulch, decorative river stone was installed between the fence and wall across back of pool area, and all disturbed areas outside of fence were graded and seeded. All lawn areas inside of the fence were sodded. A broken flagstone path was installed from concrete patio to steps in wall, and a low natural limestone boulder wall for raised planter at egress window was also installed. A low voltage LED lighting system (FX Luxor Zoning/Dimming/Color) was installed with under cap lights installed in sitting wall (Zoning/Dimming/Color) and in existing stair treads (Zoning/Dimming) to screen porch, up lights/wash lights installed on select trees (Zoning/Dimming/Color), and path lights (Zoning) installed at concrete steps, along back of patio, and wall steps. Additional drainage including adding a drain box for the Sump pump outlet pipe and adding an underground pipe to the downspout near the pool equipment and fence gate was also installed.
 C.E. Pontz Sons
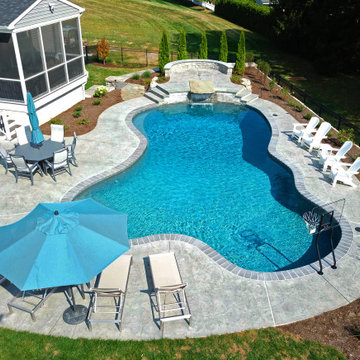
The fall has snuck up on us rather quick but not before we had a final summer day to show off this amazing outdoor living project we just recently completed. This outdoor living project included pricing to excavation and installation of a ledge rock retaining wall around the perimeter of the property. The wall included the step area, large retaining walls, proper drainage behind the wall, and wall caps. After the wall was installed we constructed the sitting wall and natural stone ‘dive rock’. the sitting wall was constructed on concrete footings, with concrete block core, faced with natural stone veneer matching stone used on pool, and capped with 2″ natural flagstone. The dive rock was set on existing pool beam and concrete slab poured behind pool beam. Installation of the landscape, grading, seeding, sodding, and landscape lighting was completed around the pool area. All plants and trees were installed in new landscape beds with mulch, decorative river stone was installed between the fence and wall across back of pool area, and all disturbed areas outside of fence were graded and seeded. All lawn areas inside of the fence were sodded. A broken flagstone path was installed from concrete patio to steps in wall, and a low natural limestone boulder wall for raised planter at egress window was also installed. A low voltage LED lighting system (FX Luxor Zoning/Dimming/Color) was installed with under cap lights installed in sitting wall (Zoning/Dimming/Color) and in existing stair treads (Zoning/Dimming) to screen porch, up lights/wash lights installed on select trees (Zoning/Dimming/Color), and path lights (Zoning) installed at concrete steps, along back of patio, and wall steps. Additional drainage including adding a drain box for the Sump pump outlet pipe and adding an underground pipe to the downspout near the pool equipment and fence gate was also installed.
 C.E. Pontz Sons
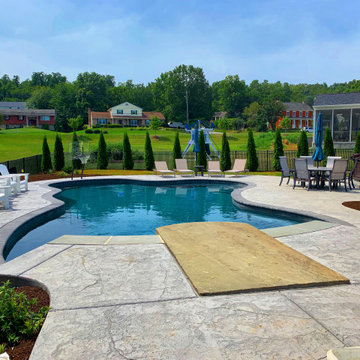
The fall has snuck up on us rather quick but not before we had a final summer day to show off this amazing outdoor living project we just recently completed. This outdoor living project included pricing to excavation and installation of a ledge rock retaining wall around the perimeter of the property. The wall included the step area, large retaining walls, proper drainage behind the wall, and wall caps. After the wall was installed we constructed the sitting wall and natural stone ‘dive rock’. the sitting wall was constructed on concrete footings, with concrete block core, faced with natural stone veneer matching stone used on pool, and capped with 2″ natural flagstone. The dive rock was set on existing pool beam and concrete slab poured behind pool beam. Installation of the landscape, grading, seeding, sodding, and landscape lighting was completed around the pool area. All plants and trees were installed in new landscape beds with mulch, decorative river stone was installed between the fence and wall across back of pool area, and all disturbed areas outside of fence were graded and seeded. All lawn areas inside of the fence were sodded. A broken flagstone path was installed from concrete patio to steps in wall, and a low natural limestone boulder wall for raised planter at egress window was also installed. A low voltage LED lighting system (FX Luxor Zoning/Dimming/Color) was installed with under cap lights installed in sitting wall (Zoning/Dimming/Color) and in existing stair treads (Zoning/Dimming) to screen porch, up lights/wash lights installed on select trees (Zoning/Dimming/Color), and path lights (Zoning) installed at concrete steps, along back of patio, and wall steps. Additional drainage including adding a drain box for the Sump pump outlet pipe and adding an underground pipe to the downspout near the pool equipment and fence gate was also installed.
 Encore Construction
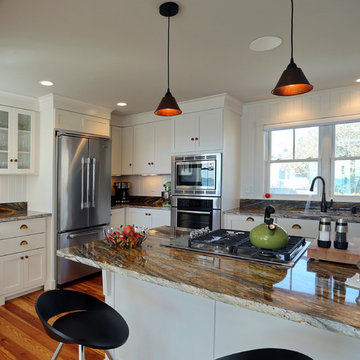
This family loves to entertain at their beach house. Despite a small footprint, they splurged on a kitchen that features plenty of storage, European appliances, an island with a gas stove, Hurricane Granite countertops and even a small pantry. OnSite Studios

 Two Hands Interiors
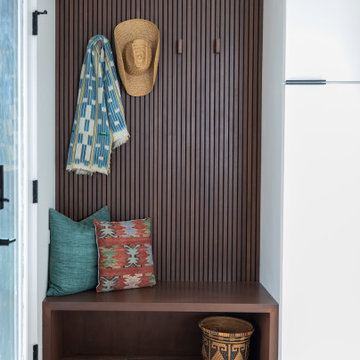
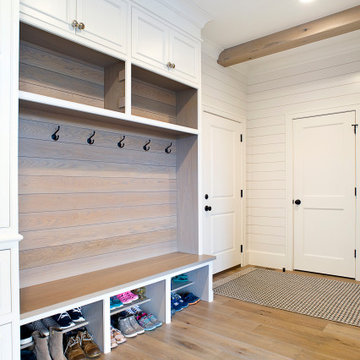
A custom walnut slat wall feature elevates this mudroom wall while providing easily accessible hooks.
Small trendy light wood floor, brown floor and wood wall mudroom photo in Chicago with white walls
Small trendy light wood floor, brown floor and wood wall mudroom photo in Chicago with white walls


 TOC design & construction inc.
DESIGNED BY TOC design
CONSTRUCTION BY TOC design & Construction inc.
PHOTOS BY : Tania Scardellato
I was fortunate to have a young family approach me in desperate need to renovate there only 3 piece bathroom. This space was In dire need of a remodel, with old brown wall to wall tiles and a dated bulky yellow brown single sink vanity.
Storage was a must, lighting a necessity, and proper accessibility to the shower bath area.
We had a tight budget to respect, but a full gut of this bathroom was required. And a good thing too, once we started doing the demolition we noticed that mildew and rotting floors and walls had accumulated throughout the years. Doing it right the first time is no joke when dealing with water and electrical issues.
We discarded all reminisce of old and built from scratch, new walls, new plumbing, new electrical ,new insulation and a new window, a new fan that actually exhausted outside ( I say this laughing as you would be amazed at how many fans are installed but don’t exhaust outside, and you the client would never know unless you go inside the attic space.
Once all the hard stuff was done, the rest is just a matter of smart design. If you have a small bathroom here are some tips to guide you.
10 tips for making a small bathroom feel larger
Is your tiny bathroom cramping your functionality and style, leaving you longing for the enormous bathrooms gracing the pages of design magazines? Even if your bathroom is a fraction of the size, all it takes is some design savvy to make the most of the space you have. Consider these 10 smart tips that will help your bathroom look, feel and function like those larger contenders.
1-Get creative with corners
Space is at a premium in small bathrooms, so it's important to maximize every inch. Corners, for example, provide extra space for shelving, storage units and even hooks. Get creative and install unique design solutions that are not only functional, but also eye-catching. If you love the airiness of floating cabinets, add baskets or decorative boxes under for extra storage. If you are installing floating cabinets insure that they are installed securely to studs or plywood at wall.
2- Let solid colors shine
Busy patterns have a shrinking effect and make small bathrooms seem even smaller. Conversely, light natural hues make a space feel more open. If you're itching to get creative with design, experiment with textures but keep overpowering patterns to a minimum. Tone on tone is the best to achieve this.
3 - Maximize your bathtub
A bathtub takes up a significant portion of the room, but modern, compact options with curved basins, can make the tub feel larger when in use, all while conserving space.
4 - Select a smaller faucet
A faucet is jewelry for the bathroom. And just as accessories can overpower an outfit, a big bulky faucet isn't flattering in a small bath. Single-handle designs conserve counter space, while a wall-mount installation frees it up all together and can create quite the wow-factor, if the budget can accommodate the required changes to plumbing behind the wall.
5 - Make vanity storage simple
If you're in a storage war with your small bathroom, you're not alone in the battle. Toiletries and personal supplies without a place to call home only add clutter and chaos. Store smart with a space-saving vanity, the dual sink vanity shown here, looks quite simple, but in reality it has 4 sets of full extension drawers, and the vanity tower adds extra storage without overpowering the use of space.
6 - Show off the shower
Shower curtains may be pretty, but they interrupt the visual flow of a bathing space and make it feel significantly smaller. In bathrooms with small footprints, opt for a clear glass sliding shower door that doesn't require the clearance of one with a hinged design. Or as shown in this design and for fraction less expensive a half hinged panel installed on a fixed tempered glass panel. If you're embarking on a big remodel, create the illusion of more space by using same tile in the shower that's used throughout; instead of seeing them as two separate zones, the eye will read them as one.
7 - Discover the treasure of hidden storage
Work with a contractor, and you just might find some serious storage potential hidden behind your walls. Whether it's utilizing space between the studs for shallow shelving or a creating a small linen closet by annexing space from an adjacent room, even small additions can make a big difference.
8 - Focal Point
Tile is a beautiful, durable addition to any bathroom. For dainty spaces, consider installing tile at a diagonal to accentuate the focal point or as in this bathroom I used an oversized textured pattern to bring depth to the space at the window wall.
9 - Choose the right lights
Strategically install light to reflect and brighten a small bathroom to make it appear larger. Recessed lighting is an affordable solution for tiny rooms, offering ample light while taking up little space. Wall sconces alongside a mirror also reflect off the walls and make a room feel bright and airy. I always recommend going with LED lighting at 2800 to 3000K.
10 – Accessorize
This is your time to shine in your decorating skills, have fun with your towels, you can change the color scheme daily just by adding pops of color in your accessories, make sure to get items that serve a dual purpose, like baskets, boxes they can always be used as hampers, storing of towels and even a nice display for your guest.
 Suma Design and Construction
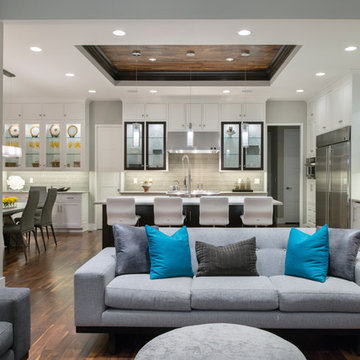
Large trendy medium tone wood floor living room photo in Kansas City with gray walls and a tile fireplace
 Interiors by Allegra
Mary Thames Louis Real Estate Photography
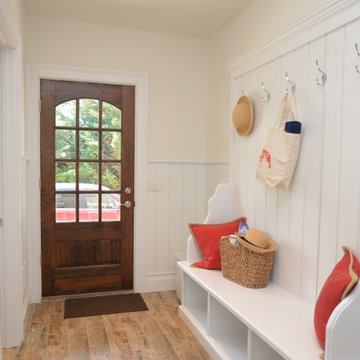
Entryway - coastal entryway idea in New York with a dark wood front door
Entryway - coastal entryway idea in New York with a dark wood front door
 JPM Construction
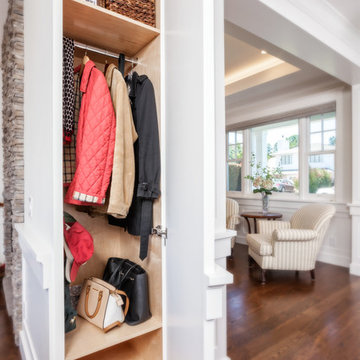
JPM Construction offers complete support for designing, building, and renovating homes in Atherton, Menlo Park, Portola Valley, and surrounding mid-peninsula areas. With a focus on high-quality craftsmanship and professionalism, our clients can expect premium end-to-end service.
The promise of JPM is unparalleled quality both on-site and off, where we value communication and attention to detail at every step. Onsite, we work closely with our own tradesmen, subcontractors, and other vendors to bring the highest standards to construction quality and job site safety. Off site, our management team is always ready to communicate with you about your project. The result is a beautiful, lasting home and seamless experience for you.
 Clearcut & Co
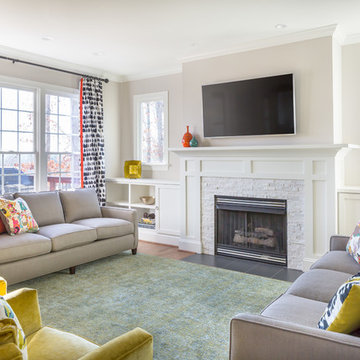
This project consisted of stripping everything to the studs and removing walls on half of the first floor and replacing with custom finishes creating an open concept with zoned living areas.
34