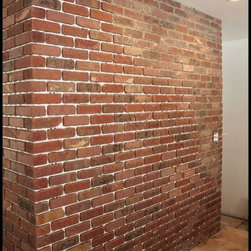


What Should You Know About Installing Veneer Bricks on Large-Scale Projects?
Large projects like apartments, hospitals, schools, and airports demand more from brick veneer than a single house. The walls are bigger, and small mistakes can repeat everywhere. Treat the veneer as a system: choose the right method for the building and timeline, plan clear paths for movement and water, set the look early with a mockup, and keep the team working the same way so every section matches that mockup.
Start with the system—and commit to it
Match the veneer system to the building’s structure, weight limits, site access, and schedule. Full-bed veneer offers reliability but is heavier and slower; adhered thin brick reduces weight but requires proper backing and moisture control; panelized thin brick speeds up installation and reduces schedule risk if planned properly. For large projects, avoid mixing systems on one façade to prevent awkward transitions.
When you’re shortlisting units, accessories, and sample sets at scale, materials like I-XL Build's veneer bricks for commercial projects are handy for benchmarking formats, corner pieces, and typical lead times. They often include spec sheets and CAD details that help align tie spacing, flashing compatibility, and corner strategies across elevations. Cross-check regional availability and stated lead times against your construction calendar so mockups and long-lead colors land on site before relief steel is set.
Let the building move without fighting the skin
Big structures move.
Slabs bend, frames sway, and daily temperature changes make things shift. The veneer has to “float” with that movement. Use shelf/relief angles at planned heights to split the wall’s weight into smaller sections. Lay out ties and anchors to handle wind and earthquakes, keeping embedment, edge distances, and corrosion protection within spec. Add vertical movement joints at regular spacing and where heights or planes change; continue these joints behind nearby finishes so the veneer and backup move together. At windows and slab edges, leave gaps for deflection and use proper backer rod and sealant so the brick never presses hard on the frame. These choices seem small on paper, but on a tower or stadium they prevent cracks and keep the wall calm.
Water always wins—unless you give it a path
Moisture is the top failure point on big jobs. A great-looking wall will stain or fail if the cavity is blocked or flashings stop short. Keep a clear, continuous air space behind the brick, and clean out mortar droppings as you go; use brushes/nets and do quick checks before closing each lift. Install through-wall flashings at window heads and sills, shelf angles, and roof-to-wall joints—add end-dams on every piece so water exits. The WRB/air barrier must be continuous: treat corners, transitions, and penetrations early, not as last-minute tape fixes. Kick-out flashings at roof/wall joints are small details with big impact—don’t skip them.
Set the grid before the first brick
On large façades, small bumps become big issues. Verify the backup wall is plumb and flat with real measurements. Establish a project datum (e.g., 100.00) and line up coursing so sills, heads, and relief angles land on full courses—no thin “slivers.” Keep head heights consistent on each elevation; if you must adjust, move sills, not heads, to keep sightlines clean. At corners and returns, use corner units or formed returns so edges look solid, not paper-thin. When these basics are set early and followed, the wall reads as one tidy surface.
Control color, joints, and texture with a real mockup
On big jobs, “close enough” turns into a patchwork. Blend pallets across the work area to avoid color blocks. Treat mortar color like brick color—one shade can change the whole feel. Pick a joint profile and stick with it: raked/shallow recessed for crisp shadows on smooth brick; light overgrout if you want a softer edge without going rustic. Most important, build a full mockup early with the actual crew and the exact WRB, flashings, ties, and accessories you’ll use. Approve color, joint width/profile, tooling, flashing laps, and sealant transitions. Photograph it and use it as the standard. The mockup is your quality agreement.
Coordinate openings, penetrations, and “visual noise”
Problems show up when other trades add penetrations late or scatter devices randomly. Group outlets, cameras, vents, and boxes in low-visibility spots, align them to the coursing, and pre-flash before brickwork starts. For windows and curtain wall, decide sealant joint sizes and backer rod early; don’t let brick crowd frames or force thin, weak sealant lines. Try to place balcony brackets, canopy anchors, and sign supports in mortar joints; if they must cut units, detail clean sleeves and trims instead of improvising. A bit of shop-drawing coordination prevents a lot of messy fixes.
Logistics and weather are design decisions in disguise
Access and weather control speed. For tall/wide façades, plan mast climbers or swings with pick points and travel paths. Keep brick, mortar, ties, flashings, and corners within easy reach so crews aren’t walking for materials. Follow temperature and moisture limits for mortar and adhesives. When weather turns, switch tasks (flashings, air-barrier, layout) instead of forcing wet work. At day’s end, cap open cavities and protect fresh lifts—water punishes sloppy close-outs.
Test as you go and keep a record
Testing costs less than rework. For adhered thin brick, schedule adhesion/pull tests as the spec requires. Do air/water tests at typical windows and tricky spots like balcony edges. Check ties for counts, embedment, and torque when needed. Keep photo logs of WRB seams, flashing laps, and end-dams before covering; these records save time during inspections and warranty talks.
Understand what really drives cost and schedule
In the field, certain choices matter. Stack bond or very tight joints look sleek but slow crews—budget time for layout and QA. Many relief angles add steel, flashing, and labor; if possible, reduce breaks. Corners, curves, and custom shapes add lead time and handling—order early and protect carefully. Panelized systems may cost more in materials but reduce site labor and steady the schedule—useful for hospitals, schools with fixed openings, or phased multifamily.
Avoid the predictable pitfalls
The usual problems: missing end-dams on flashings, clogged cavities, color blocks from poor pallet blending, long runs without movement joints, and late penetrations without proper flashing. Another trap: a mockup built by a different crew than production. Keep the same team, tools, and details from mockup into the main work, and refer back the moment things drift.
Closeout without drama—and leave a care plan
Before turnover, check for efflorescence and choose cleaners that suit the brick finish; harsh acids can damage faces or colors. Inspect interface sealants for proper joint size, backer rod, and adhesion to both sides. Store spare stock by color and batch, dry and labeled, for future fixes. Provide simple O&M notes: how to clean, what to avoid, sealant life, and where hidden movement joints/flashings are so future work doesn’t harm the system.
Conclusion
Large-scale veneer is about discipline, not tricks. Pick the right system, let the building move, give water a clear path, lock the look with a real mockup, coordinate penetrations, plan for weather and access, and test along the way. Do that, and the wall will look calm and perform well for years.
Start with the system—and commit to it
Match the veneer system to the building’s structure, weight limits, site access, and schedule. Full-bed veneer offers reliability but is heavier and slower; adhered thin brick reduces weight but requires proper backing and moisture control; panelized thin brick speeds up installation and reduces schedule risk if planned properly. For large projects, avoid mixing systems on one façade to prevent awkward transitions.
When you’re shortlisting units, accessories, and sample sets at scale, materials like I-XL Build's veneer bricks for commercial projects are handy for benchmarking formats, corner pieces, and typical lead times. They often include spec sheets and CAD details that help align tie spacing, flashing compatibility, and corner strategies across elevations. Cross-check regional availability and stated lead times against your construction calendar so mockups and long-lead colors land on site before relief steel is set.
Let the building move without fighting the skin
Big structures move.
Slabs bend, frames sway, and daily temperature changes make things shift. The veneer has to “float” with that movement. Use shelf/relief angles at planned heights to split the wall’s weight into smaller sections. Lay out ties and anchors to handle wind and earthquakes, keeping embedment, edge distances, and corrosion protection within spec. Add vertical movement joints at regular spacing and where heights or planes change; continue these joints behind nearby finishes so the veneer and backup move together. At windows and slab edges, leave gaps for deflection and use proper backer rod and sealant so the brick never presses hard on the frame. These choices seem small on paper, but on a tower or stadium they prevent cracks and keep the wall calm.
Water always wins—unless you give it a path
Moisture is the top failure point on big jobs. A great-looking wall will stain or fail if the cavity is blocked or flashings stop short. Keep a clear, continuous air space behind the brick, and clean out mortar droppings as you go; use brushes/nets and do quick checks before closing each lift. Install through-wall flashings at window heads and sills, shelf angles, and roof-to-wall joints—add end-dams on every piece so water exits. The WRB/air barrier must be continuous: treat corners, transitions, and penetrations early, not as last-minute tape fixes. Kick-out flashings at roof/wall joints are small details with big impact—don’t skip them.
Set the grid before the first brick
On large façades, small bumps become big issues. Verify the backup wall is plumb and flat with real measurements. Establish a project datum (e.g., 100.00) and line up coursing so sills, heads, and relief angles land on full courses—no thin “slivers.” Keep head heights consistent on each elevation; if you must adjust, move sills, not heads, to keep sightlines clean. At corners and returns, use corner units or formed returns so edges look solid, not paper-thin. When these basics are set early and followed, the wall reads as one tidy surface.
Control color, joints, and texture with a real mockup
On big jobs, “close enough” turns into a patchwork. Blend pallets across the work area to avoid color blocks. Treat mortar color like brick color—one shade can change the whole feel. Pick a joint profile and stick with it: raked/shallow recessed for crisp shadows on smooth brick; light overgrout if you want a softer edge without going rustic. Most important, build a full mockup early with the actual crew and the exact WRB, flashings, ties, and accessories you’ll use. Approve color, joint width/profile, tooling, flashing laps, and sealant transitions. Photograph it and use it as the standard. The mockup is your quality agreement.
Coordinate openings, penetrations, and “visual noise”
Problems show up when other trades add penetrations late or scatter devices randomly. Group outlets, cameras, vents, and boxes in low-visibility spots, align them to the coursing, and pre-flash before brickwork starts. For windows and curtain wall, decide sealant joint sizes and backer rod early; don’t let brick crowd frames or force thin, weak sealant lines. Try to place balcony brackets, canopy anchors, and sign supports in mortar joints; if they must cut units, detail clean sleeves and trims instead of improvising. A bit of shop-drawing coordination prevents a lot of messy fixes.
Logistics and weather are design decisions in disguise
Access and weather control speed. For tall/wide façades, plan mast climbers or swings with pick points and travel paths. Keep brick, mortar, ties, flashings, and corners within easy reach so crews aren’t walking for materials. Follow temperature and moisture limits for mortar and adhesives. When weather turns, switch tasks (flashings, air-barrier, layout) instead of forcing wet work. At day’s end, cap open cavities and protect fresh lifts—water punishes sloppy close-outs.
Test as you go and keep a record
Testing costs less than rework. For adhered thin brick, schedule adhesion/pull tests as the spec requires. Do air/water tests at typical windows and tricky spots like balcony edges. Check ties for counts, embedment, and torque when needed. Keep photo logs of WRB seams, flashing laps, and end-dams before covering; these records save time during inspections and warranty talks.
Understand what really drives cost and schedule
In the field, certain choices matter. Stack bond or very tight joints look sleek but slow crews—budget time for layout and QA. Many relief angles add steel, flashing, and labor; if possible, reduce breaks. Corners, curves, and custom shapes add lead time and handling—order early and protect carefully. Panelized systems may cost more in materials but reduce site labor and steady the schedule—useful for hospitals, schools with fixed openings, or phased multifamily.
Avoid the predictable pitfalls
The usual problems: missing end-dams on flashings, clogged cavities, color blocks from poor pallet blending, long runs without movement joints, and late penetrations without proper flashing. Another trap: a mockup built by a different crew than production. Keep the same team, tools, and details from mockup into the main work, and refer back the moment things drift.
Closeout without drama—and leave a care plan
Before turnover, check for efflorescence and choose cleaners that suit the brick finish; harsh acids can damage faces or colors. Inspect interface sealants for proper joint size, backer rod, and adhesion to both sides. Store spare stock by color and batch, dry and labeled, for future fixes. Provide simple O&M notes: how to clean, what to avoid, sealant life, and where hidden movement joints/flashings are so future work doesn’t harm the system.
Conclusion
Large-scale veneer is about discipline, not tricks. Pick the right system, let the building move, give water a clear path, lock the look with a real mockup, coordinate penetrations, plan for weather and access, and test along the way. Do that, and the wall will look calm and perform well for years.