

Hide All Those Wires in a DIY Charging Station
Keep your gadgets handy and charged with a flexible storage board you can design yourself

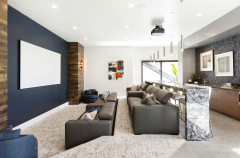
Most people designate a place in their home for charging electronic devices like phones and tablets. And most people deal with the disaster zone of knotted-up cables that ensues. In my home it’s a fire hazard and a far cry from being child safe.
So I decided to do something about it. I created a charging board that leans against a wall to save space and is also intriguing enough to display on a mantel. Here’s how you can do it yourself.
So I decided to do something about it. I created a charging board that leans against a wall to save space and is also intriguing enough to display on a mantel. Here’s how you can do it yourself.
I wasn’t exaggerating about our charging area, was I?
Materials and tools:
- 1-inch by 8-inch pine plank cut to desired height (mine came out to approximately ¾ inch by 7¼ inches)
- 2 pine strips, 1 inch by 2 inches, cut to desired height (actual dimensions are approximately ¾ inch by 1½ inches)
- 3 yards of elastic band (¾ inch to 1 inch in width; can be found online or at a fabric shop)
- Thumbtacks
- Handsaw
- Electric drill
- Sandpaper
- Clamps
- 4 screws, 1¼ inch to 1½ inches long (No. 6 size is preferred)
- Finish of choice (optional)
- Safety goggles
- Dust mask
I chose pine because it is readily available and the easiest wood to saw by hand due to its softness. Note, though, that its softness leaves it susceptible to dents and dings. You might consider experimenting with other soft woods that are slightly harder than pine, like redwood or Douglas fir.
Select planks that are straight and free from blemishes. Knots are acceptable but try to avoid them in the four corners where you plan to place screws. Use the wood-cutting service at a big-box hardware store to saw the three pieces you’ll need.
Select planks that are straight and free from blemishes. Knots are acceptable but try to avoid them in the four corners where you plan to place screws. Use the wood-cutting service at a big-box hardware store to saw the three pieces you’ll need.
Mark the angled ends of the narrow side pieces based on the diagram dimensions shown in photo 1 (about ⅜ inch from the edge).
Clamp one of the narrow side pieces firmly against your workstation.
Then use a second clamp to clamp a scrap piece of wood at the angle you intend to saw. The scrap wood will serve as a miter box. Keep your saw as straight as possible and use many quick, light strokes. Saw the same angle on the other end of the narrow side piece. Repeat this for the second narrow side piece.
Use coarse sandpaper to correct any asymmetry in the two narrow side pieces. Then sand all three pieces with a medium-grit sandpaper. Continue to the next step if you prefer an unfinished look. Otherwise, finish with a stain or paint now.
Use coarse sandpaper to correct any asymmetry in the two narrow side pieces. Then sand all three pieces with a medium-grit sandpaper. Continue to the next step if you prefer an unfinished look. Otherwise, finish with a stain or paint now.
Use tacks to hold the elastic band in place at a corner while you wrap the larger plank in your desired pattern.
Assemble the three pieces and clamp everything together for screwing. Remember to predrill holes so that you don’t crack the wood while screwing.
Assemble the three pieces and clamp everything together for screwing. Remember to predrill holes so that you don’t crack the wood while screwing.
Decide whether or not you want to reveal the screws. Depending on how you wrap the pattern, you can hide them behind the elastic.
Finally, strap a multiport USB charger into the back of the finished charging board and organize your cables using the elastic band.
A fire inspector at the Los Angeles Fire Department confirmed the safety of this design.
A fire inspector at the Los Angeles Fire Department confirmed the safety of this design.
The mess of cables and chargers is hidden behind the board. Tablets and electronic books can also be stowed behind the board, thanks to the gap created by the angle at the base. The front can hold electronics and other items.
Go neutral, as in this example, or go wild with your favorite colors.
Show us: How do you keep your electronics organized?
Go neutral, as in this example, or go wild with your favorite colors.
Show us: How do you keep your electronics organized?
Use any sort of finish for the wood and wrap the elastic bands in whatever patterns you want. Pictured here is a crisscrossed natural band over unfinished pine, black and fluorescent orange bands over unfinished pine, and a black band over ebonized pine. To maximize functionality, I recommend wrapping at least one long elastic band over the entire length of the wood several times.