

Lace Goes Modern in an Upholsterer's DIY Pendant Lights
Bring romance to a room with delicate pendant lights you can make yourself

These delicate DIY pendants fulfill the functionality of providing the right illumination for the front of my studio, and they also reflect the exact nature of my work: fabric, texture, DIY-ibility, shape and form. These beauties take a little forethought to create but will make a stunning, high-impact lighting statement for your home.
After more than a few tries at mastering these lacy light globes, I now understand what designers are up against on the road to product development. You don’t need all the gory details — the finely tuned how-to steps here alone can help you get the job done right. Here are all my mistakes in one sentence: Don't be fooled into thinking that soaking the lace pieces in Mod Podge will make them hard enough to retain their shape once the inflatable ball inside is deflated.
Curious about how to get these stunning fixtures? I'll show you how.
Materials and tools:
- Plastic play balls, approximately 18 inches in diameter and with air valves
- Plastic wrap
- Stiffy Fabric Stiffener, liquid and spray
- Lace fabric (old tablecloth or another substantial lace or crocheted fabric)
- 3-inch, 5-inch and 8-inch circle templates
- Pencil
- Plastic container or bowl
- Big bowl or stand for drying the globes
- Fan
- Pendant light fixture or another type of hanging outdoor lighting, like twinkle lights
- Two-part clear resin
- Paintbrush
- Small sharp scissors or X-Acto knife, plus regular scissors
- Handheld air pump and pump needle
Use the plastic wrap to cover your inflatable toy balls. The plastic wrap will allow the ball to easily pull away from the sides of the eventual lace globe.
Use an 8-inch circle stencil to cut out lace rounds.
You'll need about 25 lace circles to overlap one another and cover each plastic play ball.
Place the lace in a plastic container and pour in plenty of Stiffy Fabric Stiffener to soak the lace thoroughly.
Work the stiffener into all of the lace pieces. Wring out the pieces carefully before placing them on the inflatable balls.
Place the lace circles on each ball, overlapping the edges by about 1 inch. Add a second layer of lace on the top third of the ball to make it extra rigid. This part of the fixture will need strength when you hang the globe onto a pendant fixture.
Let the stiffener dry completely. This took about three or four days for me.
Let the stiffener dry completely. This took about three or four days for me.
Once the lace has dried on the balls, spray Stiffy Fabric Stiffener over the entire surface for added crispness. Let it dry for about a day and a half.
Here's where I got ahead of myself and had to repeat this step before I removed the inflated ball — just imagine that the ball is still inside the lace globe. Use a template to draw a 3-inch circle to fit the light socket inside the pendant.
Cut out the hole with small scissors.
Mix the two-part clear resin.
Brush the resin on the top third of the ball and let it dry for 30 minutes. This is important so that the globe will hang on the pendant without drooping.
After tracing a 5-inch circle directly opposite the small 3-inch hole, cut out the lace, deflate the ball and quickly remove it from inside the lace globe.
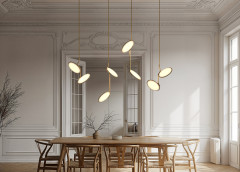
You're now ready to hang three feminine, lacy globes on three multilength pendant fixtures. Check out a nearby hardware store for some options.
If you have a covered outdoor space, you could fill the finished globes with twinkly, battery operated lights and hang them in clusters.
If you have a covered outdoor space, you could fill the finished globes with twinkly, battery operated lights and hang them in clusters.
In my busy shop, the front lounge is a favorite sitting area where people read design books, look through magazines or enjoy a cup of tea.
The warm light makes the front of my studio cozy and inviting.
The globes add interest to an empty space even when the lights aren't on.