


- Product Description
- Product Specifications
- Shipping and Returns
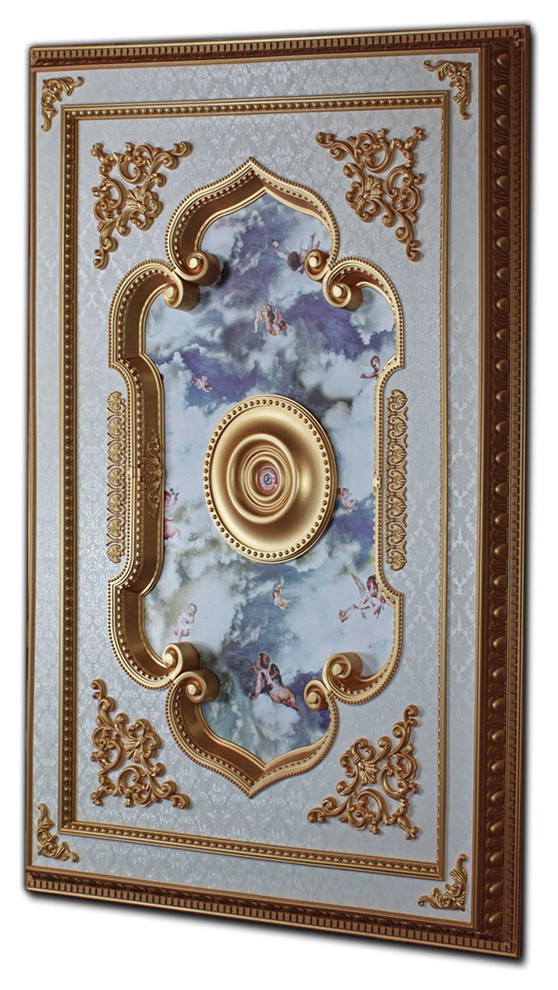
Michelangelo Ornate Medallions
Our Michelangelo Series of medallions come completely finished and ready to install on your ceiling. The medallions project 3-4" out from the ceiling so they provide another element of depth to the room. They are built from fiberglass, pvc, and other high-impact materials and come ready with a hole in the center for your lighting fixture. If you are not installing a lighting fixture with the medallion then you can still use these by ordering a small rosette to cover the medallion's center hole.
The ceiling medallions are flat on the back so they can be installed on any flat ceiling or wall. They are delivered fully assembled so they are easy to install. Since these are large medallions be sure to have at least 2 people involved with the installation.
Installation Instructions
Materials & Tools
Screw Gun / 2" Sheet Rock Screws
Adhesive / Caulking Gun
Tape Measure / Pencil
Caulking (prepasted latex)
Utility Knife
Step 1 - Getting Started If you are installing the medallion with a ceiling fan, chandelier or light, make sure the power is shut off at the breaker before attempting installation. Turning off the light switch WILL NOT prevent you from being shocked. If you have any doubts call an electrician.
Medallions are for decorative purposes only and cannot support the weight of a fan or light fixture. Your fixture must be supported by a support or junction box in the ceiling.
Step 2 - Aligning the Medallion Using your center point or fixture as a reference, lightly mark the ceiling with pencil where the perimeter of the medallion will be.
Step 3 - Adhesive Adhesive should be applied liberally to the backside of the medallion where it touches the ceiling. Sheet rock screws will secure the medallion while the adhesive sets. You can use any adhesive that is rated for use with wood (check the back of the label) -- we have found that using Liquid Nails??_ works well and is available at most home improvement stores.
Step 4 - Installation Consult your fixture??_s instructions. You may need to purchase additional hardware to make your fixture compatible with the offset of the medallion.
Before beginning, be sure to have several people available to lift and hold the medallion in place while you secure the medallion to the ceiling. With the medallion on the ground, apply adhesive liberally to the backside where it will touch the ceiling. Lift the medallion up near the ceiling and feed the electrical wires through the center of the medallion. Once the wiring is through, press the medallion against the ceiling and make sure it is properly aligned.
While your helpers continue to hold the medallion in place, use 2" sheet rock screws around the perimeter to secure it to the ceiling. On round models there will usually be exposed holes for you to screw through.
On rectangular models screw in between the teeth on the dentil section that borders the medallion. You can later cover the screws with the supplied caps for round medallions, or touch up the screw heads with the gold paint provided for rectangular medallions.
- Product ID
- 12532403
- Manufactured By
- Udecor
- Sold By
- Designers Wallpaper
- Size
- W 59" / D 3.5" / H 83"
- Color
- Faux Stone
- Materials
- Polyurethane
- Category
- Molding And Millwork
- Style
- Victorian
- Collection
- Medallions
- Product Description
- Product Specifications
- Shipping and Returns
Michelangelo Ornate Medallions
Our Michelangelo Series of medallions come completely finished and ready to install on your ceiling. The medallions project 3-4" out from the ceiling so they provide another element of depth to the room. They are built from fiberglass, pvc, and other high-impact materials and come ready with a hole in the center for your lighting fixture. If you are not installing a lighting fixture with the medallion then you can still use these by ordering a small rosette to cover the medallion's center hole.
The ceiling medallions are flat on the back so they can be installed on any flat ceiling or wall. They are delivered fully assembled so they are easy to install. Since these are large medallions be sure to have at least 2 people involved with the installation.
Installation Instructions
Materials & Tools
Screw Gun / 2" Sheet Rock Screws
Adhesive / Caulking Gun
Tape Measure / Pencil
Caulking (prepasted latex)
Utility Knife
Step 1 - Getting Started If you are installing the medallion with a ceiling fan, chandelier or light, make sure the power is shut off at the breaker before attempting installation. Turning off the light switch WILL NOT prevent you from being shocked. If you have any doubts call an electrician.
Medallions are for decorative purposes only and cannot support the weight of a fan or light fixture. Your fixture must be supported by a support or junction box in the ceiling.
Step 2 - Aligning the Medallion Using your center point or fixture as a reference, lightly mark the ceiling with pencil where the perimeter of the medallion will be.
Step 3 - Adhesive Adhesive should be applied liberally to the backside of the medallion where it touches the ceiling. Sheet rock screws will secure the medallion while the adhesive sets. You can use any adhesive that is rated for use with wood (check the back of the label) -- we have found that using Liquid Nails??_ works well and is available at most home improvement stores.
Step 4 - Installation Consult your fixture??_s instructions. You may need to purchase additional hardware to make your fixture compatible with the offset of the medallion.
Before beginning, be sure to have several people available to lift and hold the medallion in place while you secure the medallion to the ceiling. With the medallion on the ground, apply adhesive liberally to the backside where it will touch the ceiling. Lift the medallion up near the ceiling and feed the electrical wires through the center of the medallion. Once the wiring is through, press the medallion against the ceiling and make sure it is properly aligned.
While your helpers continue to hold the medallion in place, use 2" sheet rock screws around the perimeter to secure it to the ceiling. On round models there will usually be exposed holes for you to screw through.
On rectangular models screw in between the teeth on the dentil section that borders the medallion. You can later cover the screws with the supplied caps for round medallions, or touch up the screw heads with the gold paint provided for rectangular medallions.
Our Michelangelo Series of medallions come completely finished and ready to install on your ceiling. The medallions project 3-4" out from the ceiling so they provide another element of depth to the room. They are built from fiberglass, pvc, and other high-impact materials and come ready with a hole in the center for your lighting fixture. If you are not installing a lighting fixture with the medallion then you can still use these by ordering a small rosette to cover the medallion's center hole.
The ceiling medallions are flat on the back so they can be installed on any flat ceiling or wall. They are delivered fully assembled so they are easy to install. Since these are large medallions be sure to have at least 2 people involved with the installation.
Installation Instructions
Materials & Tools
Screw Gun / 2" Sheet Rock Screws
Adhesive / Caulking Gun
Tape Measure / Pencil
Caulking (prepasted latex)
Utility Knife
Step 1 - Getting Started If you are installing the medallion with a ceiling fan, chandelier or light, make sure the power is shut off at the breaker before attempting installation. Turning off the light switch WILL NOT prevent you from being shocked. If you have any doubts call an electrician.
Medallions are for decorative purposes only and cannot support the weight of a fan or light fixture. Your fixture must be supported by a support or junction box in the ceiling.
Step 2 - Aligning the Medallion Using your center point or fixture as a reference, lightly mark the ceiling with pencil where the perimeter of the medallion will be.
Step 3 - Adhesive Adhesive should be applied liberally to the backside of the medallion where it touches the ceiling. Sheet rock screws will secure the medallion while the adhesive sets. You can use any adhesive that is rated for use with wood (check the back of the label) -- we have found that using Liquid Nails??_ works well and is available at most home improvement stores.
Step 4 - Installation Consult your fixture??_s instructions. You may need to purchase additional hardware to make your fixture compatible with the offset of the medallion.
Before beginning, be sure to have several people available to lift and hold the medallion in place while you secure the medallion to the ceiling. With the medallion on the ground, apply adhesive liberally to the backside where it will touch the ceiling. Lift the medallion up near the ceiling and feed the electrical wires through the center of the medallion. Once the wiring is through, press the medallion against the ceiling and make sure it is properly aligned.
While your helpers continue to hold the medallion in place, use 2" sheet rock screws around the perimeter to secure it to the ceiling. On round models there will usually be exposed holes for you to screw through.
On rectangular models screw in between the teeth on the dentil section that borders the medallion. You can later cover the screws with the supplied caps for round medallions, or touch up the screw heads with the gold paint provided for rectangular medallions.


At Houzz we want you to shop for Udecor BRD-1521-S029 Michelangelo Medallion, Piece with confidence. You can read real customer reviews for this or any other product and even ask questions and get answers from us or straight from the brand. When you buy Udecor BRD-1521-S029 Michelangelo Medallion, Piece or any product product online from us, you become part of the Houzz family and can expect exceptional customer service every step of the way. If you have questions about Udecor or any other product for sale, our customer service team is eager to help.
Browse over 25 million home design photos on Houzz