


more fake rock; be careful what you ask for
straw_dog
17 years ago
Sort by:Oldest
Comments (20)
Related Stories
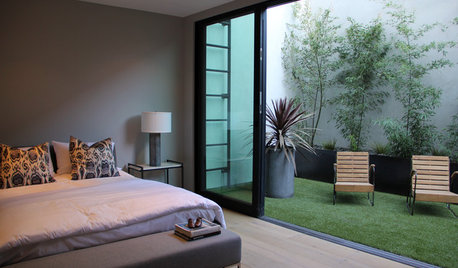
LANDSCAPE DESIGNIs It Time to Consider Fake Grass?
With more realistic-looking options than ever, synthetic turf can be a boon. Find the benefits and an installation how-to here
Full Story
SMALL HOMESAsk an Expert: What Is Your Ultimate Space-Saving Trick?
Houzz professionals share their secrets for getting more from any space, small or large
Full Story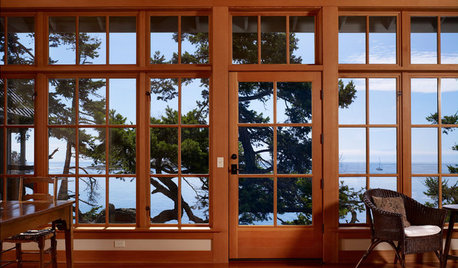
LIGHTINGHouse Hunting? Look Carefully at the Light
Consider windows, skylights and the sun in any potential home, lest you end up facing down the dark
Full Story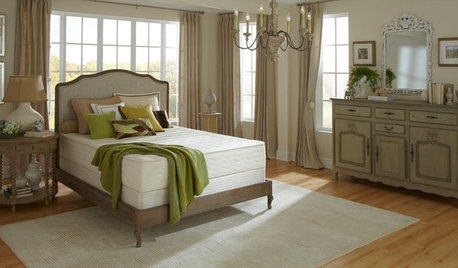
HOUSEKEEPINGHow to Clean and Care for Your Mattress
See what the experts recommend to protect your mattress from dust, moisture and stains
Full Story
CHRISTMASReal vs. Fake: How to Choose the Right Christmas Tree
Pitting flexibility and ease against cost and the environment can leave anyone flummoxed. This Christmas tree breakdown can help
Full Story
COFFEE WITH AN ARCHITECTA Few Things I Would Like to Ask Frank Lloyd Wright
It could take a lifetime to understand Frank Lloyd Wright's work — less if we had answers to a few simple questions
Full Story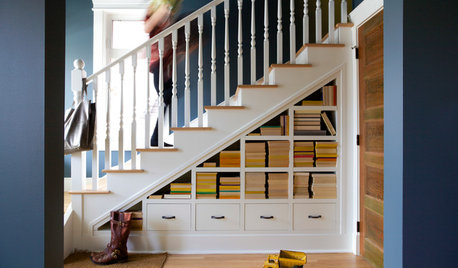
ORGANIZINGPre-Storage Checklist: 10 Questions to Ask Yourself Before You Store
Wait, stop. Do you really need to keep that item you’re about to put into storage?
Full StoryREMODELING GUIDESConsidering a Fixer-Upper? 15 Questions to Ask First
Learn about the hidden costs and treasures of older homes to avoid budget surprises and accidentally tossing valuable features
Full Story
MOST POPULAR10 Things to Ask Your Contractor Before You Start Your Project
Ask these questions before signing with a contractor for better communication and fewer surprises along the way
Full Story
DOORS5 Questions to Ask Before Installing a Barn Door
Find out whether that barn door you love is the right solution for your space
Full Story
lorinico
linnea2
Related Professionals
Canton Landscape Architects & Landscape Designers · Carlisle Landscape Architects & Landscape Designers · New Bedford Landscape Architects & Landscape Designers · 70037 Landscape Architects & Landscape Designers · Cary Landscape Architects & Landscape Designers · Cottonwood Landscape Architects & Landscape Designers · Fillmore Landscape Architects & Landscape Designers · Piqua Landscape Architects & Landscape Designers · Cliffside Park Landscape Contractors · Golden Landscape Contractors · Hicksville Landscape Contractors · Lynchburg Landscape Contractors · Pacifica Landscape Contractors · Porterville Landscape Contractors · Royal Oak Landscape Contractorsstraw_dogOriginal Author
Dena6355
straw_dogOriginal Author
ltd123
Dena6355
straw_dogOriginal Author
slate1
straw_dogOriginal Author
tango88
straw_dogOriginal Author
myback_garden
rustinj
tango88
slate1
straw_dogOriginal Author
slate1
jazzbone
mollymaples