


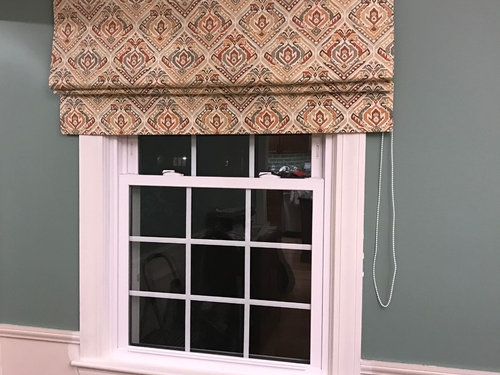
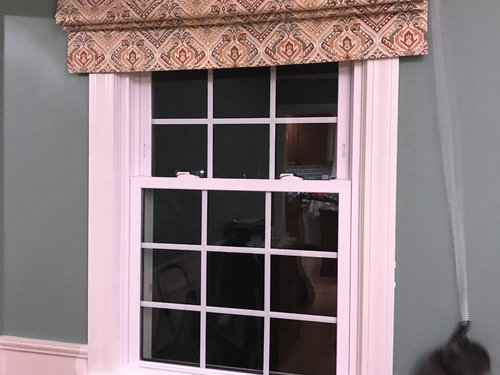
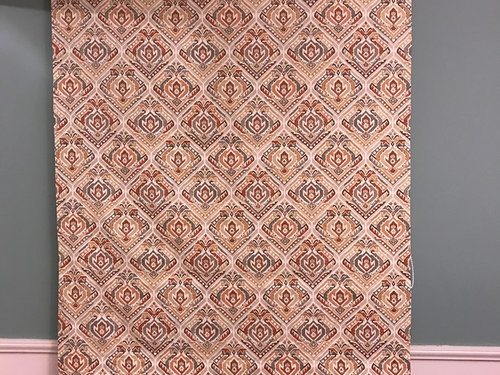
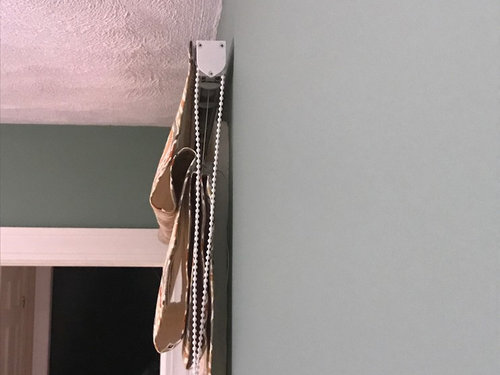
Latest DIY roman shade with continuous loop
pippiep
7 years ago
Featured Answer
Sort by:Oldest
Comments (25)
Related Professionals
Atlanta Furniture & Accessories · Charleston Furniture & Accessories · Chicago Furniture & Accessories · Nashville Furniture & Accessories · Highland Park Furniture & Accessories · Decatur Custom Artists · West University Place Lighting · San Francisco Lighting · Warwick Lighting · Whittier Lighting · Creve Coeur Window Treatments · Fraser Window Treatments · Ridgewood Window Treatments · San Jose Window Treatments · Bell Window Treatments
pippiep
7 years agopippiep
7 years agopippiep
7 years agopippiep
7 years ago
Laurie
7 years agopippiep
7 years agopippiep
7 years ago
lizzierobin
7 years agoLaurie
7 years agopippiep
7 years agopippiep
7 years agoLaurie
7 years agopippiep
7 years agoLaurie
7 years agopippiep
7 years agopippiep
7 years agoLaurie
7 years agopippiep
7 years ago

Related Stories
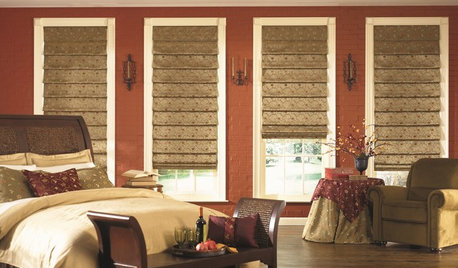
WINDOW TREATMENTSHow to Choose the Right Window Shades
Should you roll with rollers or do as the Romans do? This mini guide to choosing window shades can help
Full Story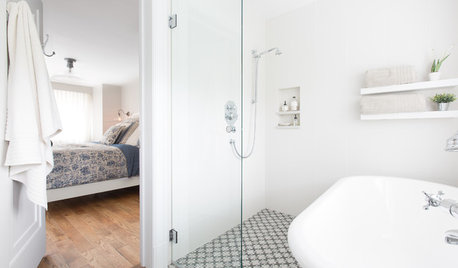
BATHROOM DESIGNSweet Retreats: The Latest Looks for the Bath
You asked for it; you got it: Here’s how designers are incorporating the latest looks into smaller master-bath designs
Full Story
SELLING YOUR HOUSEHome Staging to Sell: The Latest Techniques That Really Work
Get up to speed on the best ways to appeal to potential buyers through accessories, furniture, colors and more
Full Story
KITCHEN DESIGNHouzz Call: Pros, Show Us Your Latest Kitchen!
Tiny, spacious, modern, vintage ... whatever kitchen designs you've worked on lately, we'd like to see
Full Story
DOORSLet's Walk Through the Latest Door Trends
The functional feature has been getting a dose of flexibility, creativity and glamorous detail
Full Story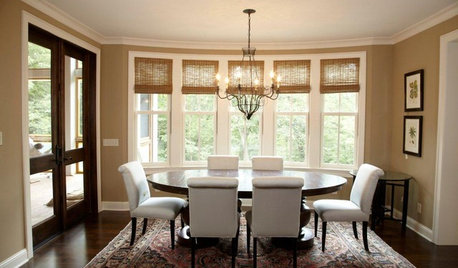
Woven Wood Shades Tie Rooms Together
Contrasting sharp modern edges or complementing a contemporary look, these window shades are a lovely finishing touch for any room
Full Story
DECORATING GUIDES8 Reasons to Jump Off the DIY Bandwagon
You heard right. Stop beating yourself up for not making stuff yourself, and start seeing the bright side of buying from others
Full Story
HOUZZ TOURSMy Houzz: Creative DIY Personalizes a 2-Bedroom Bungalow
Stenciling, custom finishes and furniture, and Scottish-inspired style give a 1920s home personality and warmth
Full Story
SALVAGEDIY: Secrets of Successful Upcycling
Learn how to find and customize salvaged pieces and materials to create one-of-a-kind furniture and accessories you love
Full Story
Call for DIY Projects: Show Us What You've Got!
Share a Pic of Your Handiwork with the Houzz Community
Full Story


msmeow