


The Basics: seams, pressing, etc.
K8Orlando
13 years ago
Sort by:Oldest
Comments (22)
Related Stories
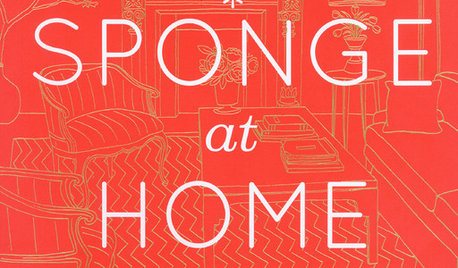
DECORATING GUIDESHot Off the Press: Design Sponge At Home
Grace Bonney's blog-gone-book is as practical as it is inspirational
Full Story0

MATERIALSRaw Materials Revealed: Drywall Basics
Learn about the different sizes and types of this construction material for walls, plus which kinds work best for which rooms
Full Story
ARCHITECTUREDesign Practice: The Basics of Marketing Your Business
Pro to pro: Attract clients and get paying work by drawing attention to your brand in the right places
Full Story
GREEN BUILDINGInsulation Basics: Heat, R-Value and the Building Envelope
Learn how heat moves through a home and the materials that can stop it, to make sure your insulation is as effective as you think
Full Story
KITCHEN ISLANDSWhat to Consider With an Extra-Long Kitchen Island
More prep, seating and storage space? Check. But you’ll need to factor in traffic flow, seams and more when designing a long island
Full Story
CONTRACTOR TIPSWhat to Look for in a Contractor's Contract
10 basic ingredients for a contract will help pave the way to remodel happiness
Full Story
GREEN BUILDINGLet’s Clear Up Some Confusion About Solar Panels
Different panel types do different things. If you want solar energy for your home, get the basics here first
Full Story
DECORATING GUIDESHow to Get Your Furniture Arrangement Right
Follow these 10 basic layout rules for a polished, pulled-together look in any room
Full Story
GREEN BUILDINGWhy You Might Want to Build a House of Straw
Straw bales are cheap, easy to find and DIY-friendly. Get the basics on building with this renewable, ecofriendly material
Full Story
LIFE10 Smart Organizing Ideas That Make Life Easier
Rethink where and how you store household basics, from bills to baking supplies, to buy some time and save some headaches
Full StorySponsored
Your Custom Bath Designers & Remodelers in Columbus I 10X Best Houzz
More Discussions
geezerfolks_SharonG_FL
User
Related Professionals
Austin Furniture & Accessories · Midland Furniture & Accessories · Savannah Furniture & Accessories · Aliso Viejo Furniture & Accessories · Culver City Furniture & Accessories · Port Chester Furniture & Accessories · Carpinteria Furniture & Accessories · Ashwaubenon Interior Designers & Decorators · Ogden Interior Designers & Decorators · Damascus Flooring Contractors · Oshkosh Flooring Contractors · Sun City Flooring Contractors · Uxbridge Flooring Contractors · West Chester Flooring Contractors · San Elizario Furniture & Accessoriesteresa_nc7
nanajayne
barbara_l
teresa_nc7
wendyfaye
cindykg23
day2day
chickie1
K8OrlandoOriginal Author
sandlapper_rose
wendyfaye
magothyrivergirl
toolgranny
magothyrivergirl
nanajayne
rosajoe_gw
buteau3rd
murphy_zone7
User
wendyfaye